
Disasters are an unavoidable reality in life. Bad things eventually will happen. Unfortunately, it is human nature to defer thinking about the worst case. When disaster strikes, we are often unprepared. This is true in life, and it is perhaps doubly true in IT. Now there is a good argument to be made here in favor of disaster avoidance given this fundamental quirk in human nature, and “design for failure” is certainly a core tenet of next generation cloud design, but for today we’re going to keep the focus on how things are today. The bulk of the applications that keep enterprises up and running today are not particularly resilient inherently. They are often monolithic, or have complex interdependencies on other systems and on persistent state. The best way to keep these applications alive is to build out the most highly available, and fault tolerant, infrastructure foundation possible below them. But once again, eventually even the strongest house can collapse. When the worst happens, are you prepared?
For most IT shops, the honest answer to this question is “probably not”. Or maybe the slightly better “it depends”. The fact is, IT budgets are tight in terms of both time and capital, and a thorough disaster recovery plan is expensive. And even where a plan is in place, it isn’t much good unless it is regularly tested to ensure it works. Unfortunately if it doesn’t work, this can lead to more cost and downtime which are two things IT must avoid like the plague. As a result, it isn’t a surprise that disaster runbooks often collect dust on a shelf, and cold sites stay cold, until lightning strikes and, once that happens, it is too late. Over the generations this sordid mess has left many IT pros wondering “why can’t there be an easy button?!” Well the good news is we are entering an era when “a DR easy button” is no longer a flight of fancy.
So what is the magic that has brought us to this point? How is it possible that such a difficult challenge can suddenly have become easier? It probably comes as know surprise that the key lies in the convergence of both virtualization and the cloud. Software Defined Everything means that all infrastructure can now be defined by code and code, by its nature, is flexible. On the other side of the equation, Infrastructure as a Service means that a secure, highly scalable, and physically remote site, billed by the hour and programmatically provisioned, is standing by ready for duty. Bridging these two worlds, however, and developing a true disaster recovery architecture and process, is still a challenge. Most IT shops don’t have the level of on premise maturity, or devops core competency, to build something like this out. That’s where VMware vCloud Air comes into play.
From day 1 VMwares pitch has been that their differentiated value lies in enabling a “true hybrid cloud” whereby on premise technology seamlessly extends into a public cloud service. It stands to reason then, that a disaster recovery service for VMware environments would be a no brainer and, sure enough, one of the first value added services released by VMware for vCloud Air is the vCloud Air Disaster Recovery as a Service offering. I recently had the chance to give the service a whirl and thought it would be interesting to document the process and provide some insight on how it went.
The first step of course is to subscribe to the service. I won’t go into detail on that process here, but the first step would be to contact one of the great VMware resellers, or contact VMware directly, and ask for info on the Disaster Recovery Service. More info on the service itself, and getting started, can be found on its landing page. Once you’ve subscribed, you’ll get a welcome aboard email with your credentials, and can sign in and start using the service. In addition, you will be provided a link to the vSphere Replication Appliance, to deploy on premise, which is the core engine of the service offering:

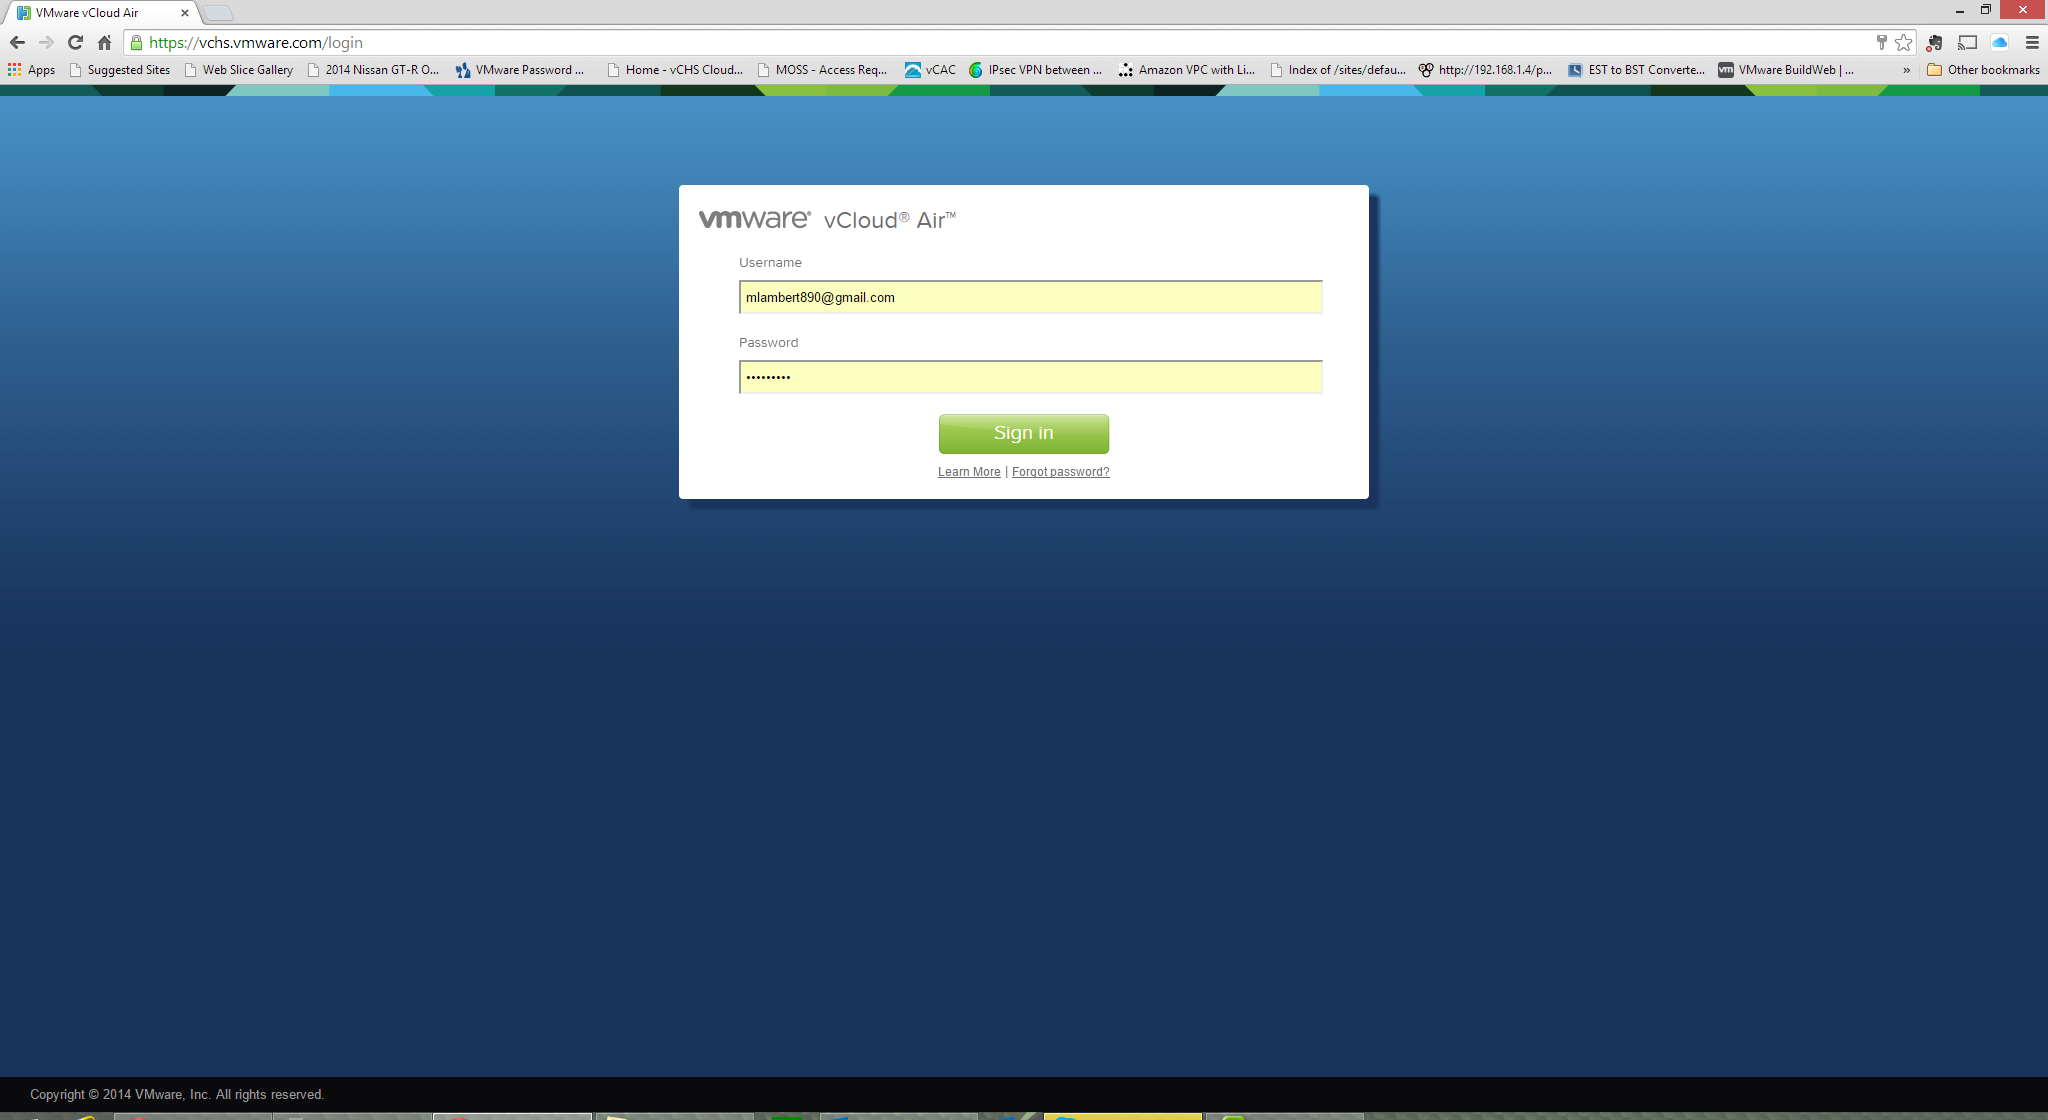
Once up and running, logging into the core vCloud Air service is easy. Just head over to the service URL from any web browser. The initial login prompt requires the credentials provided in the welcome aboard email:
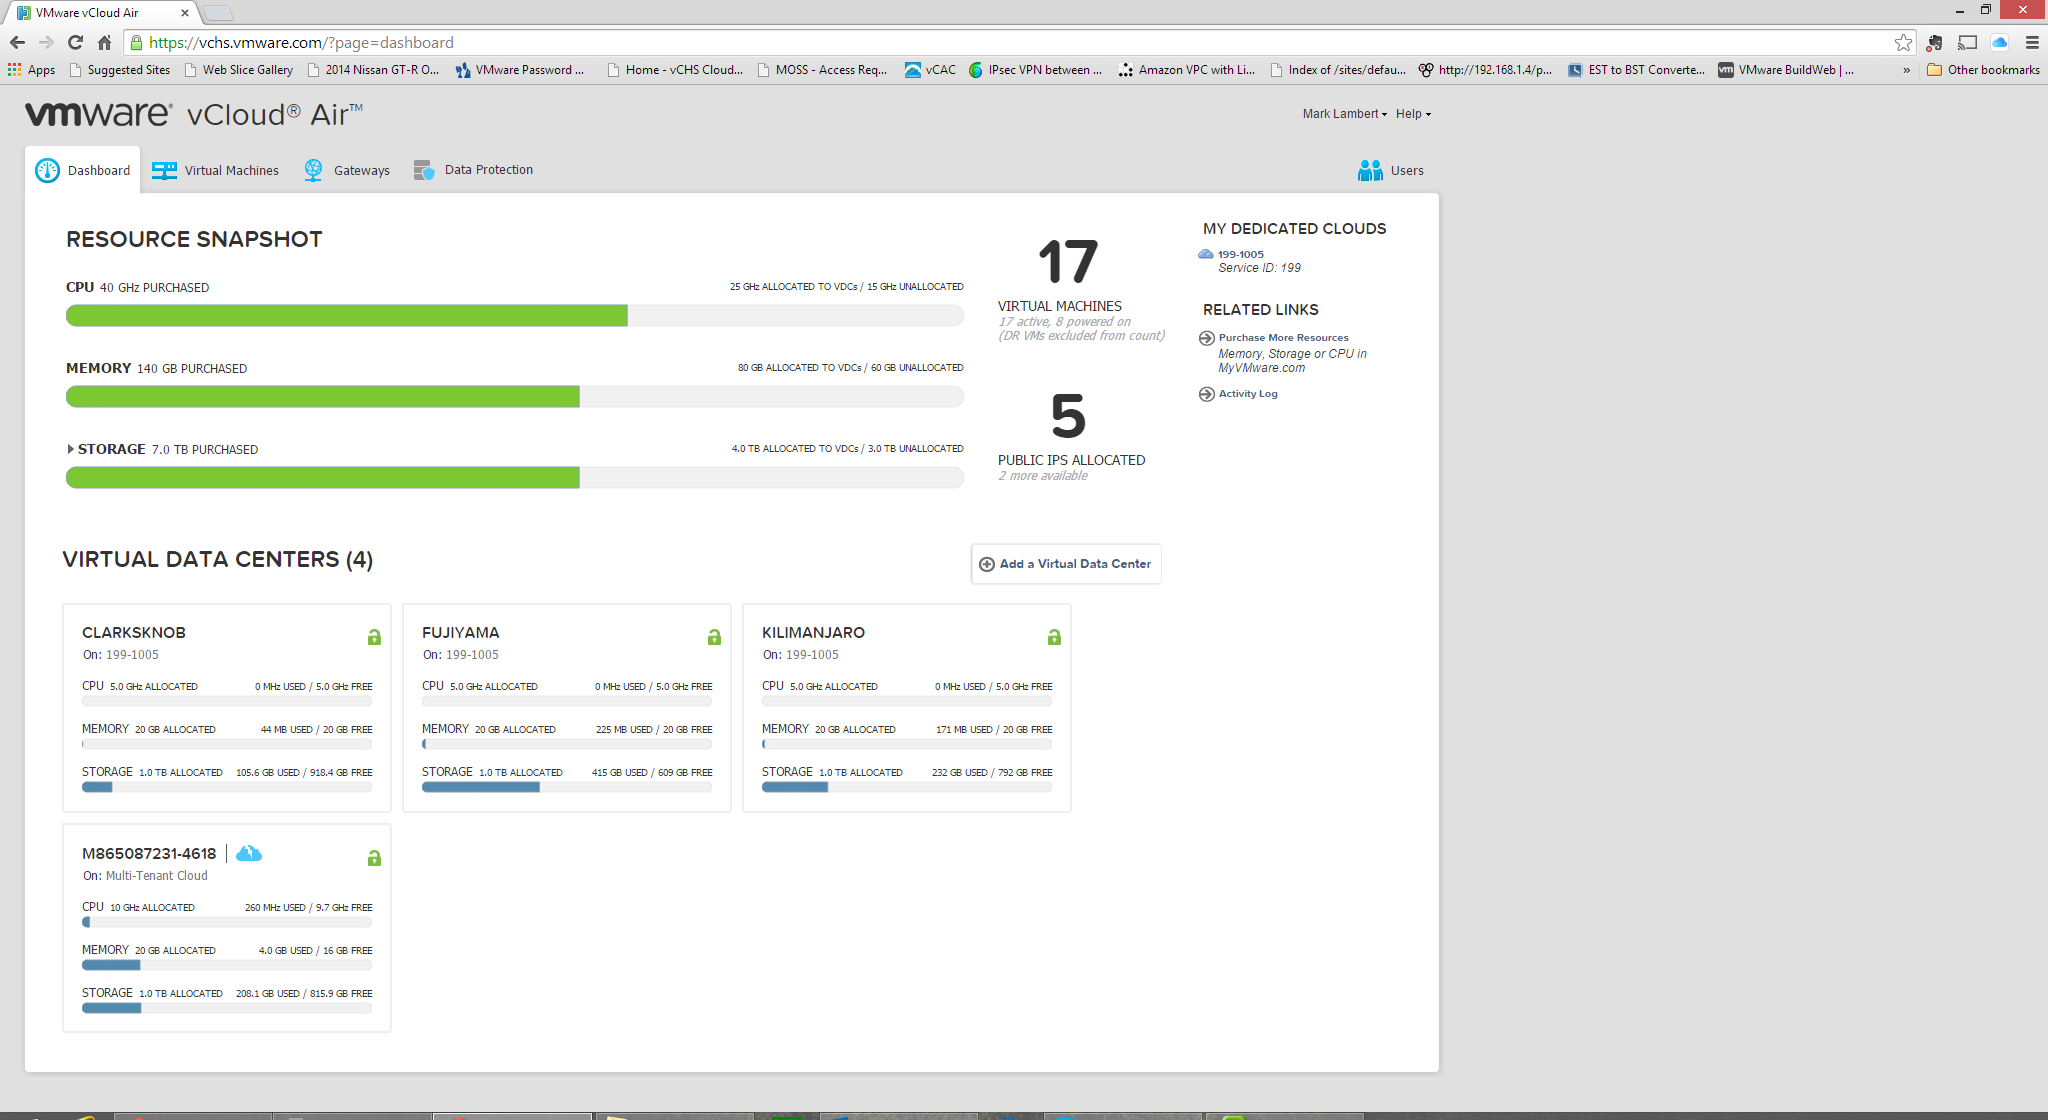
The initial landing page provides a great, and simple, over view of all cloud resources organized by “Virtual Datacenter”. In my case I have access to multiple environments including a “Dedicated Cloud” which has been partitioned into multiple vDCs. Disaster Recovery capacity is denoted by the blue lightning bolt cloud:
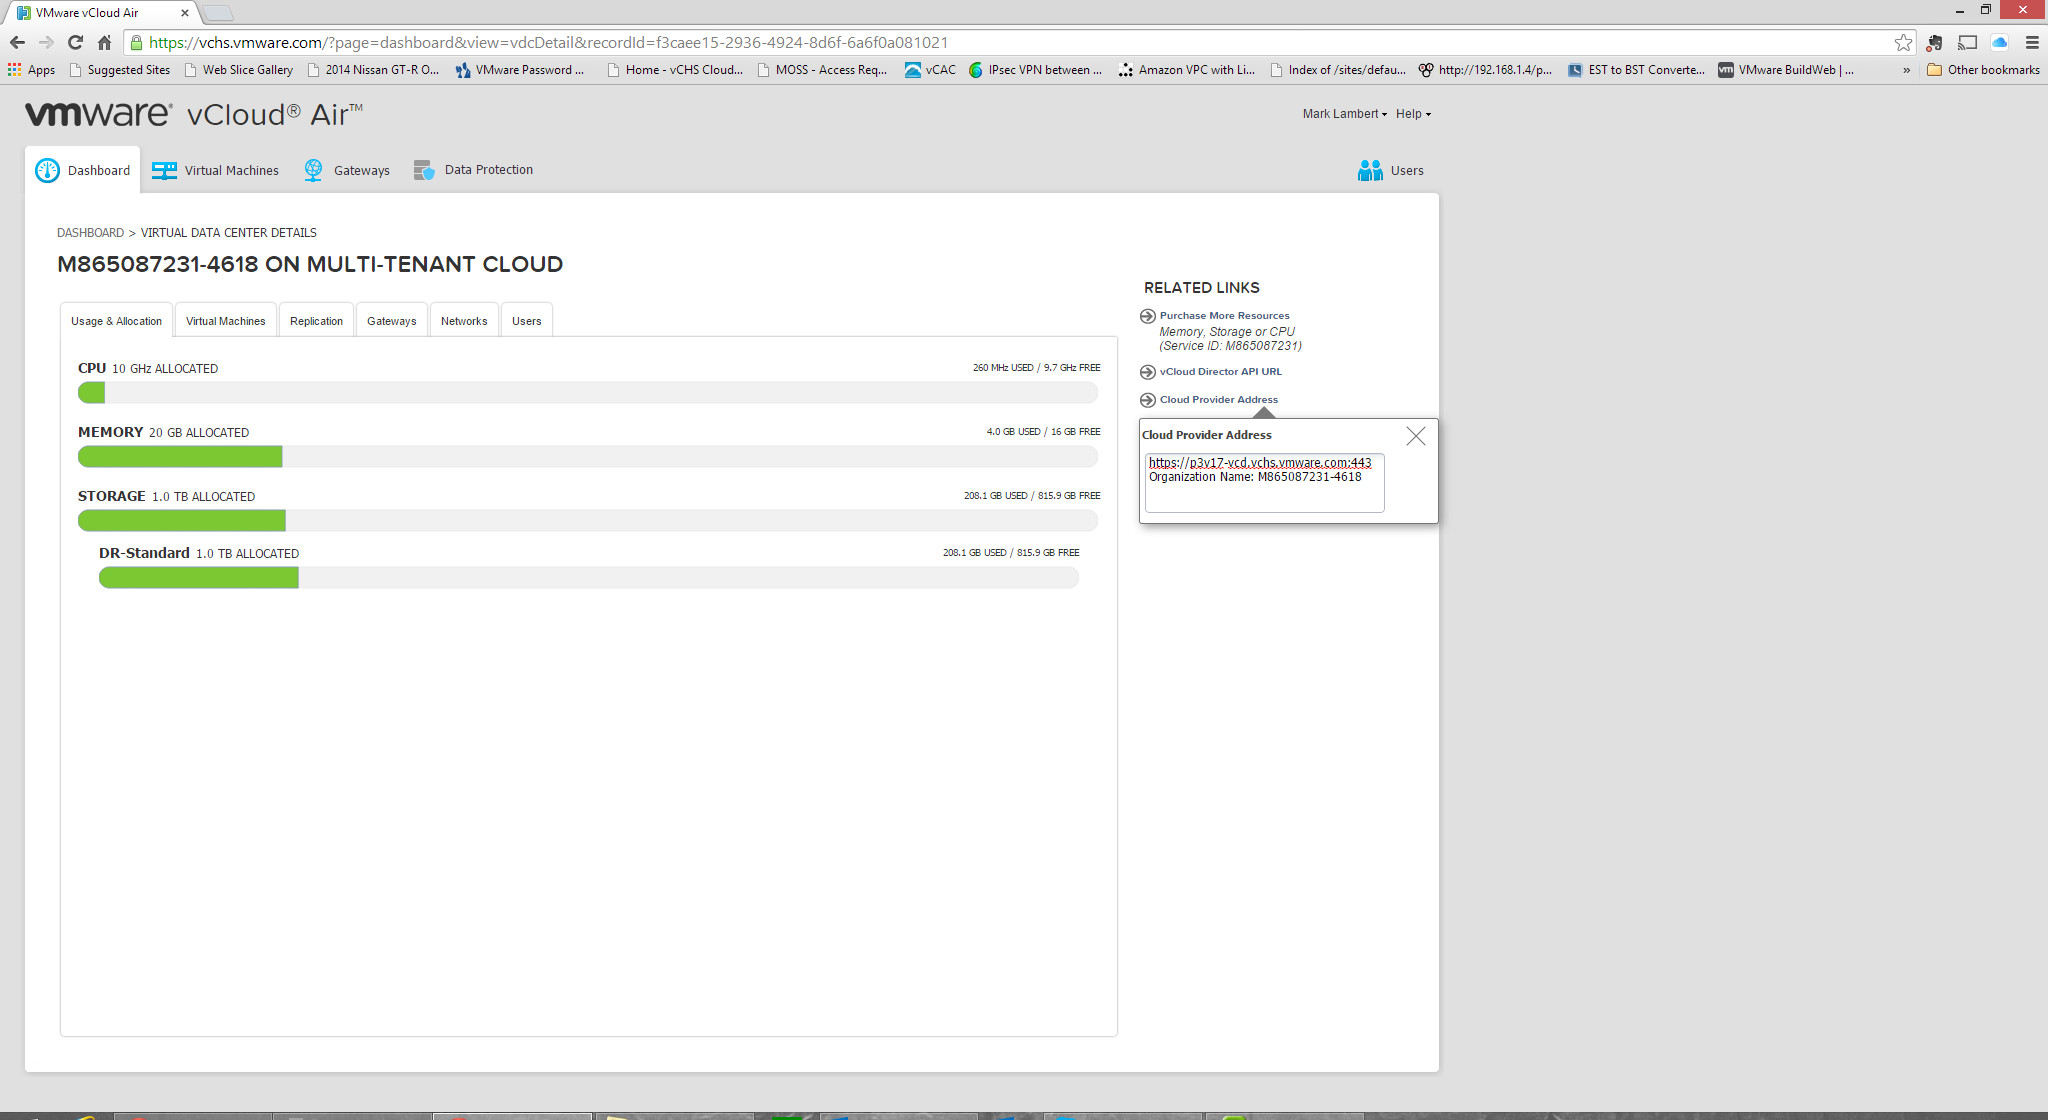
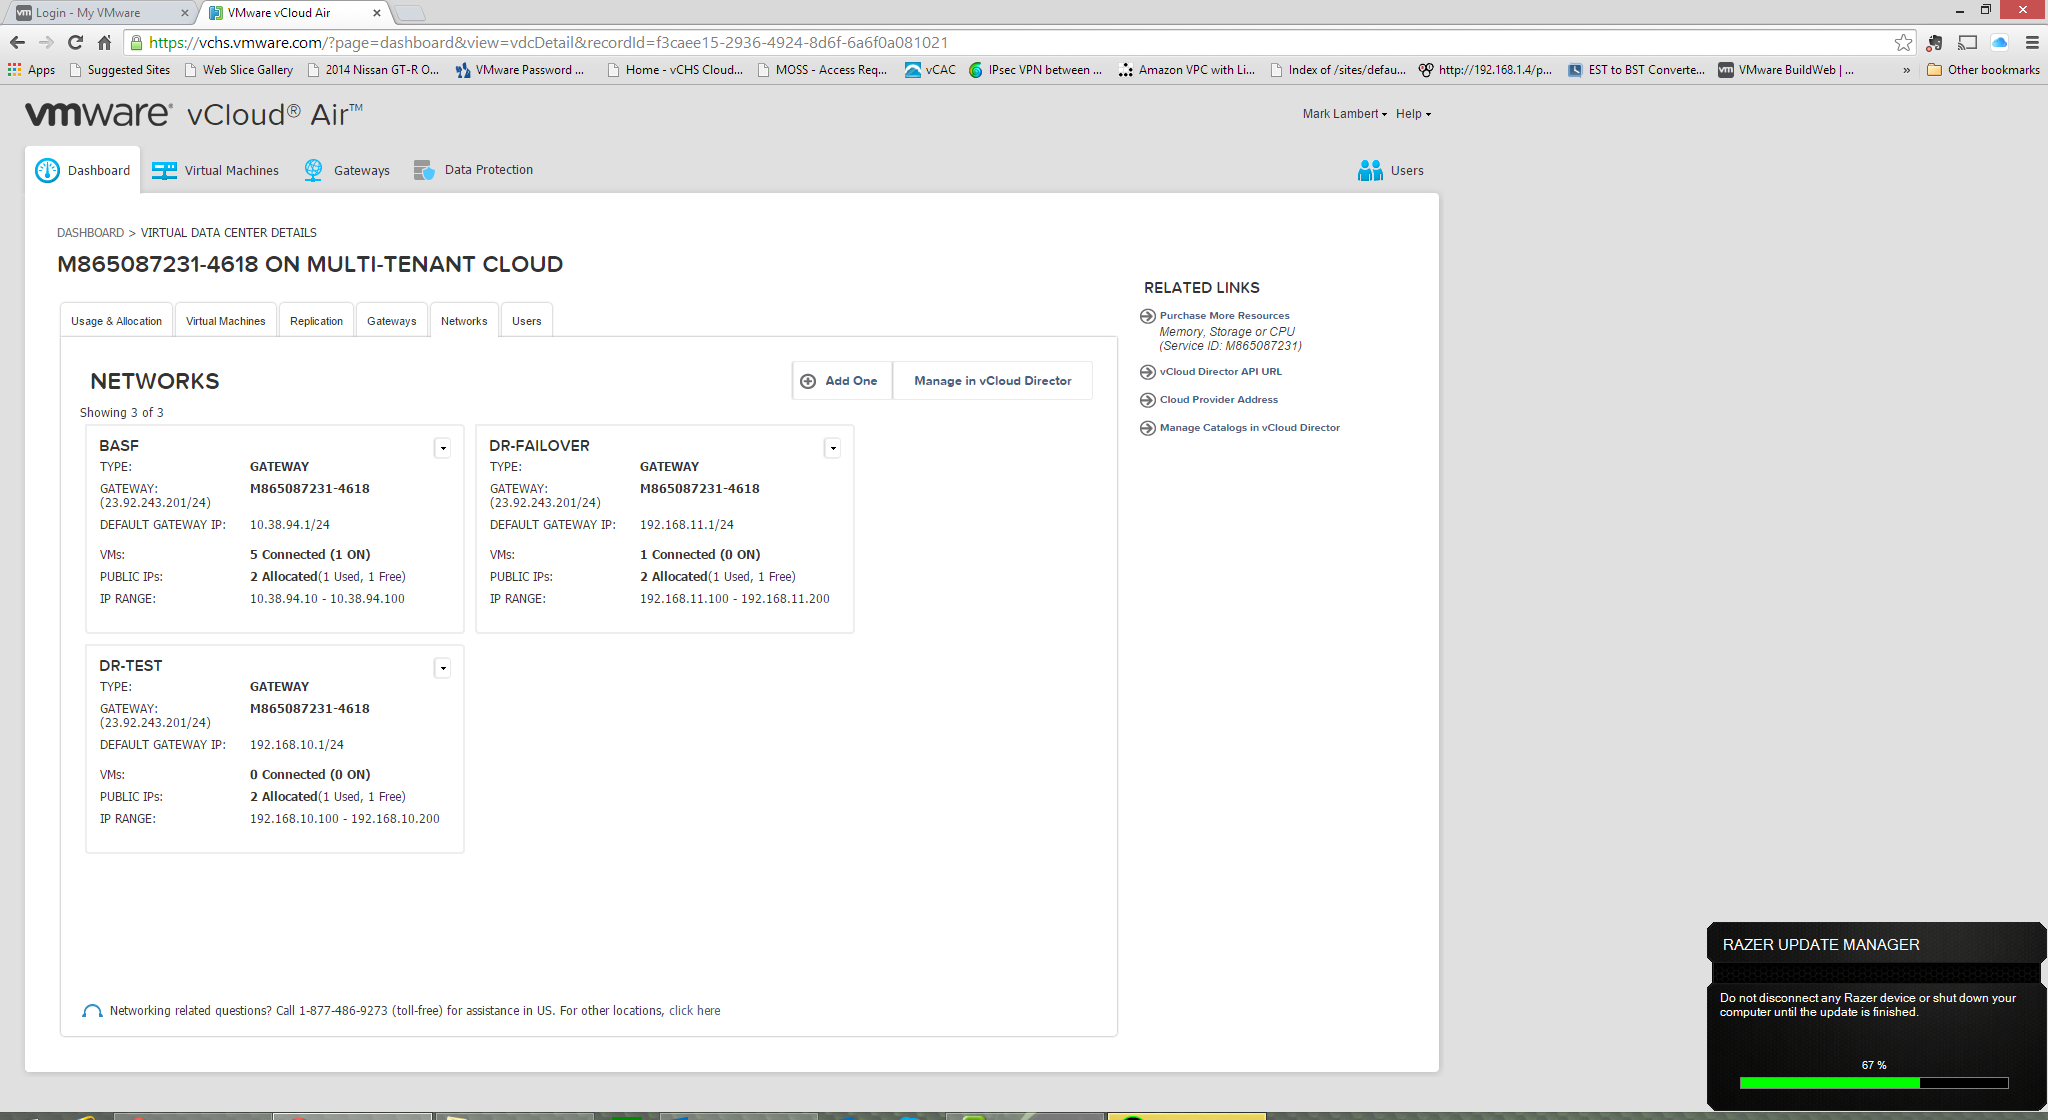
To get started, we need to configure our on-premises vCenter installation to prepare it for integrating with the service, but as a pre-requisite we should collect some info that we will need later. We are after two things, our Cloud Provider Address, and our Organization Name. These two items can be found by clicking into the Disaster Recovery virtual datacenter, and then clicking on the “Cloud Provider Address” link on the right:
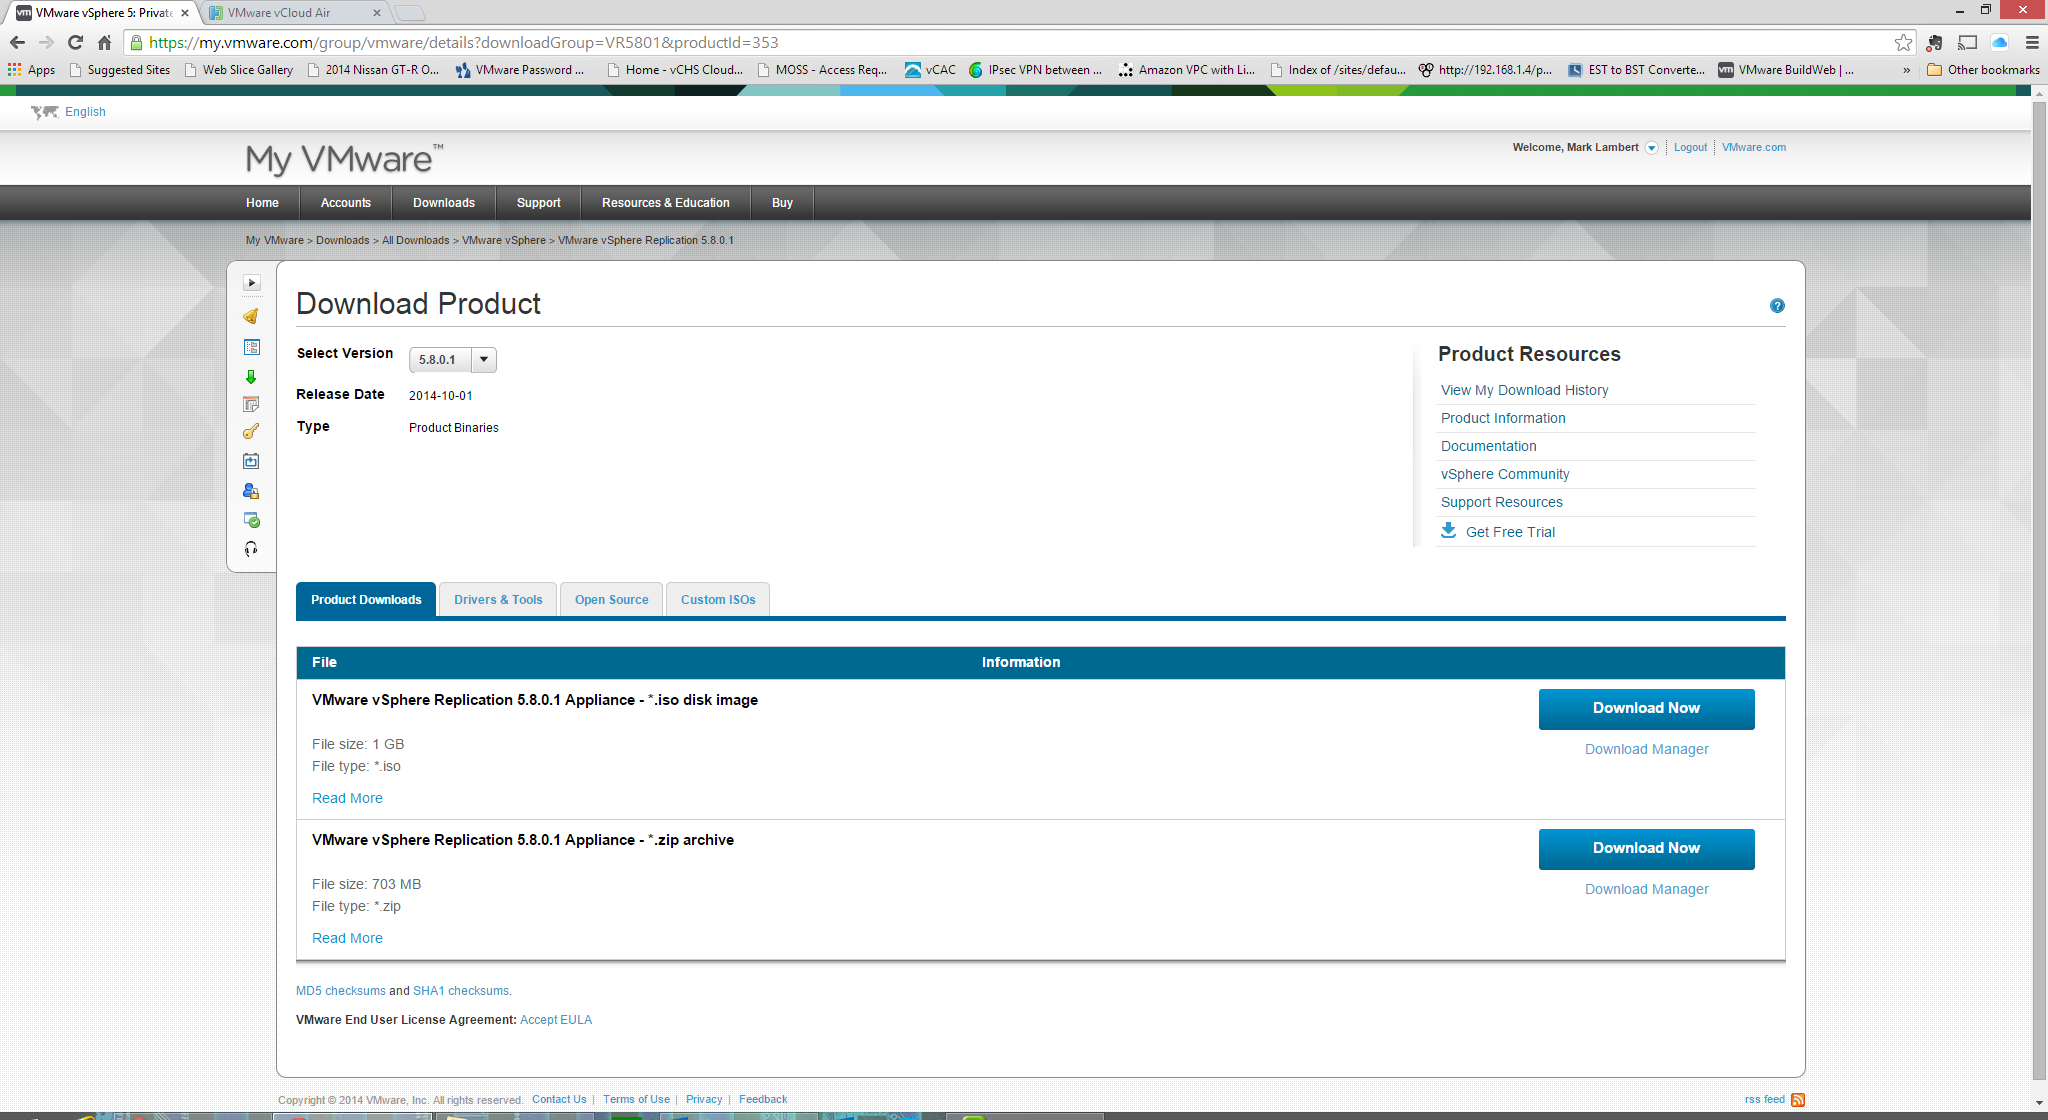
The next step is to get a hold of the appliance itself. It can be found inside of My VMware. After logging in, click on “My Downloads” and then “All Downloads”. Next search for “vSphere Replication Appliance”. The current version as of this entry is 5.8 and the link to the OVA should be at the top. If you select the right entry, you will see this download page from which you can download either an ISO or ZIP container:
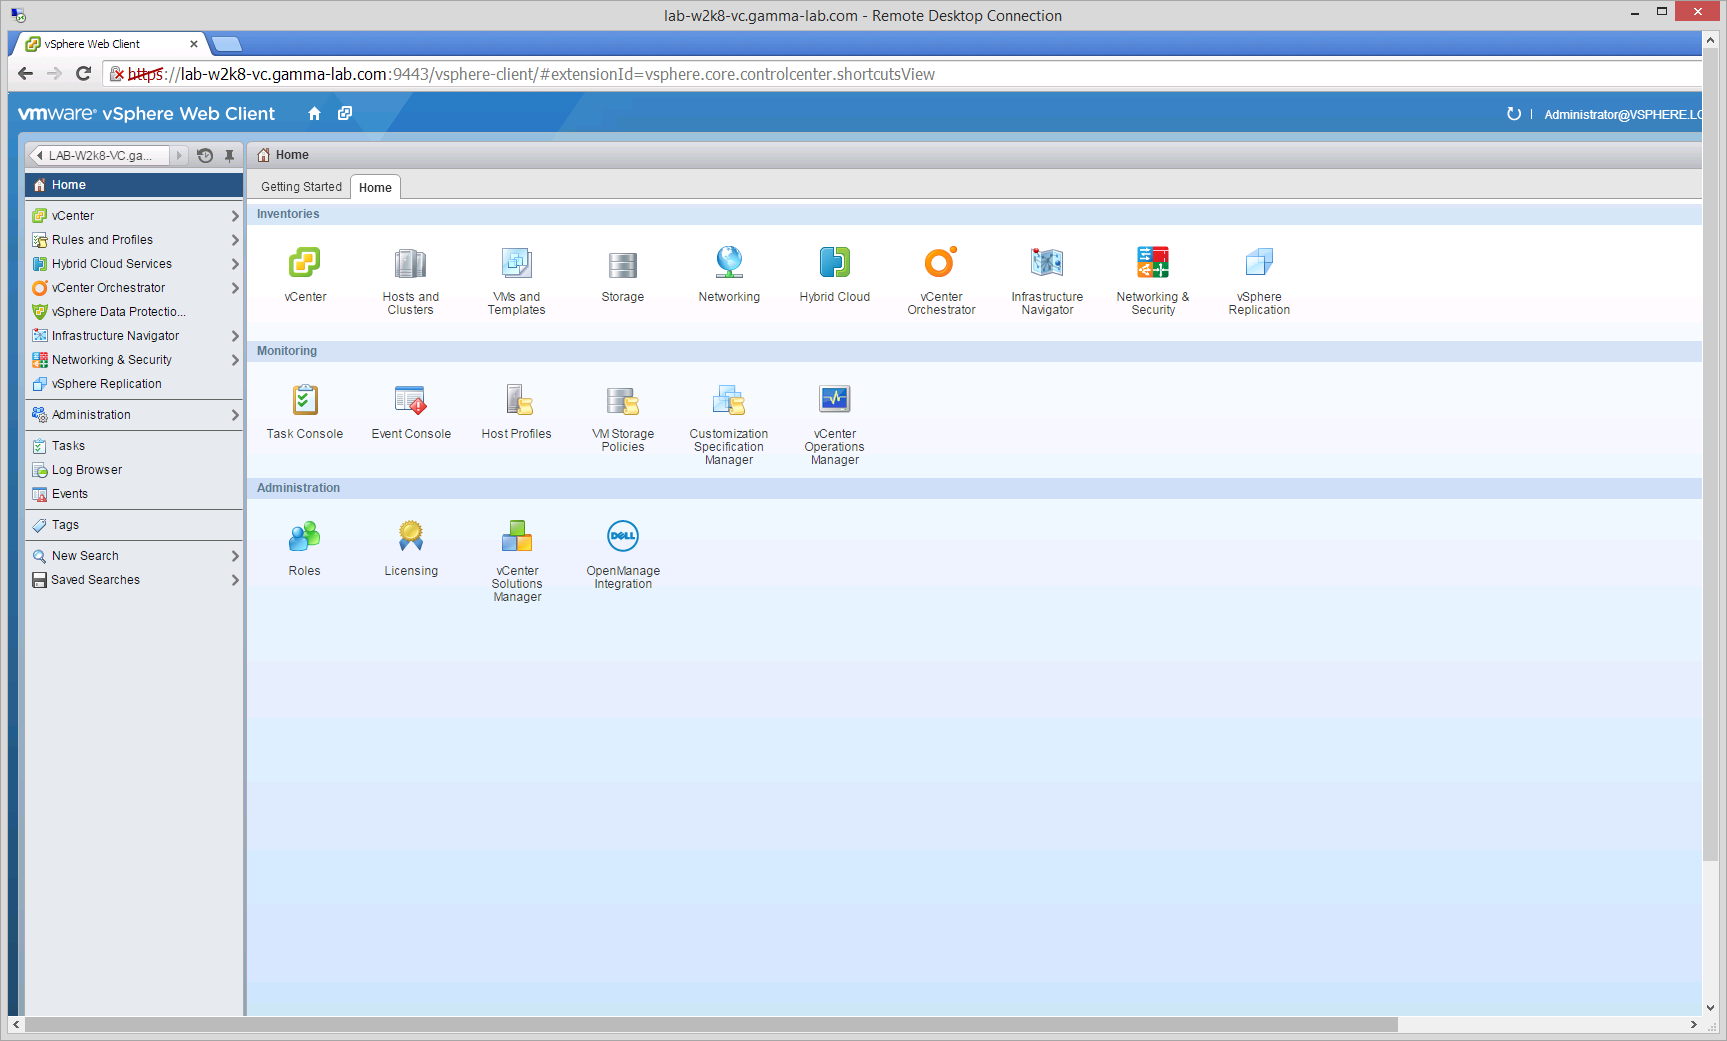
Once downloaded, either mount the ISO or extract the ZIP to a local folder, and launch the vSphere Web Client from your vCenter server. The replication appliance is a standard OVF install and detailed instructions step by step are provided by VMware here. Once the OVF has been deployed and configured, log out of the Web Client, close the browser tab, and launch a new session. If the installation went well, a new add-on icon for vSphere Replication will be found on the Home tab:
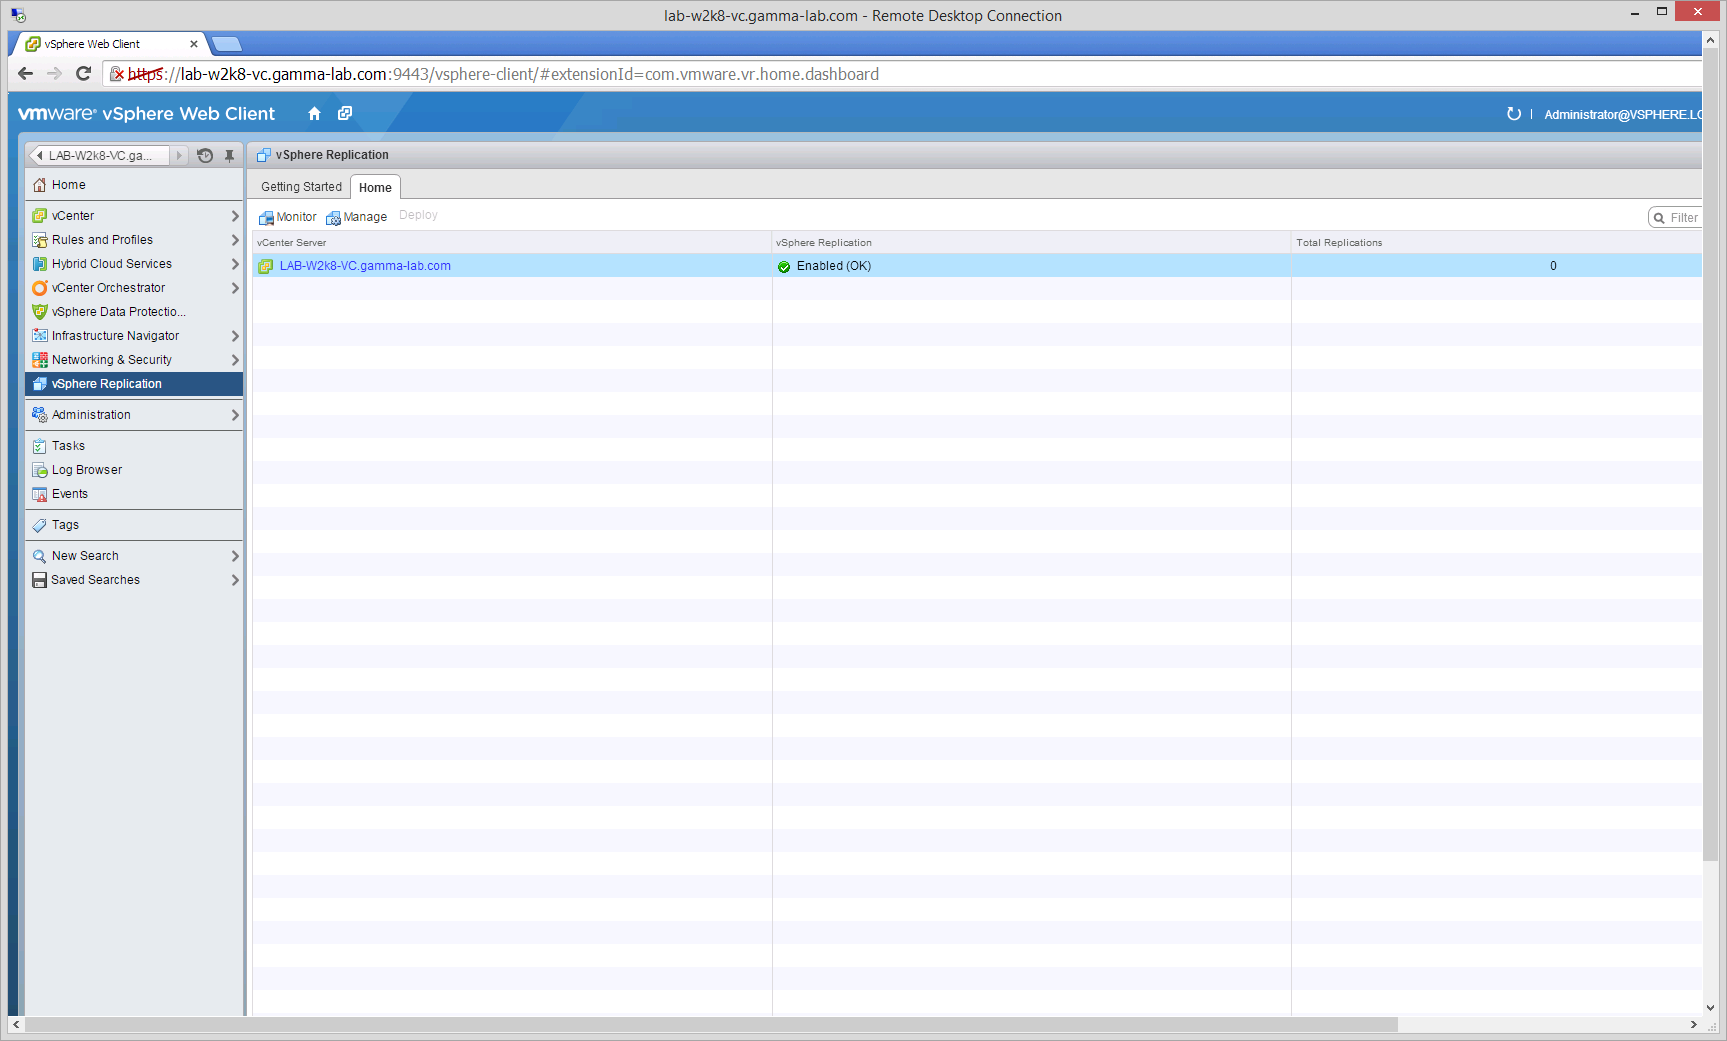
Click into the vSphere Replication add-on and select the Home tab. Highlight the vCenter entry and click the “Manage” icon:
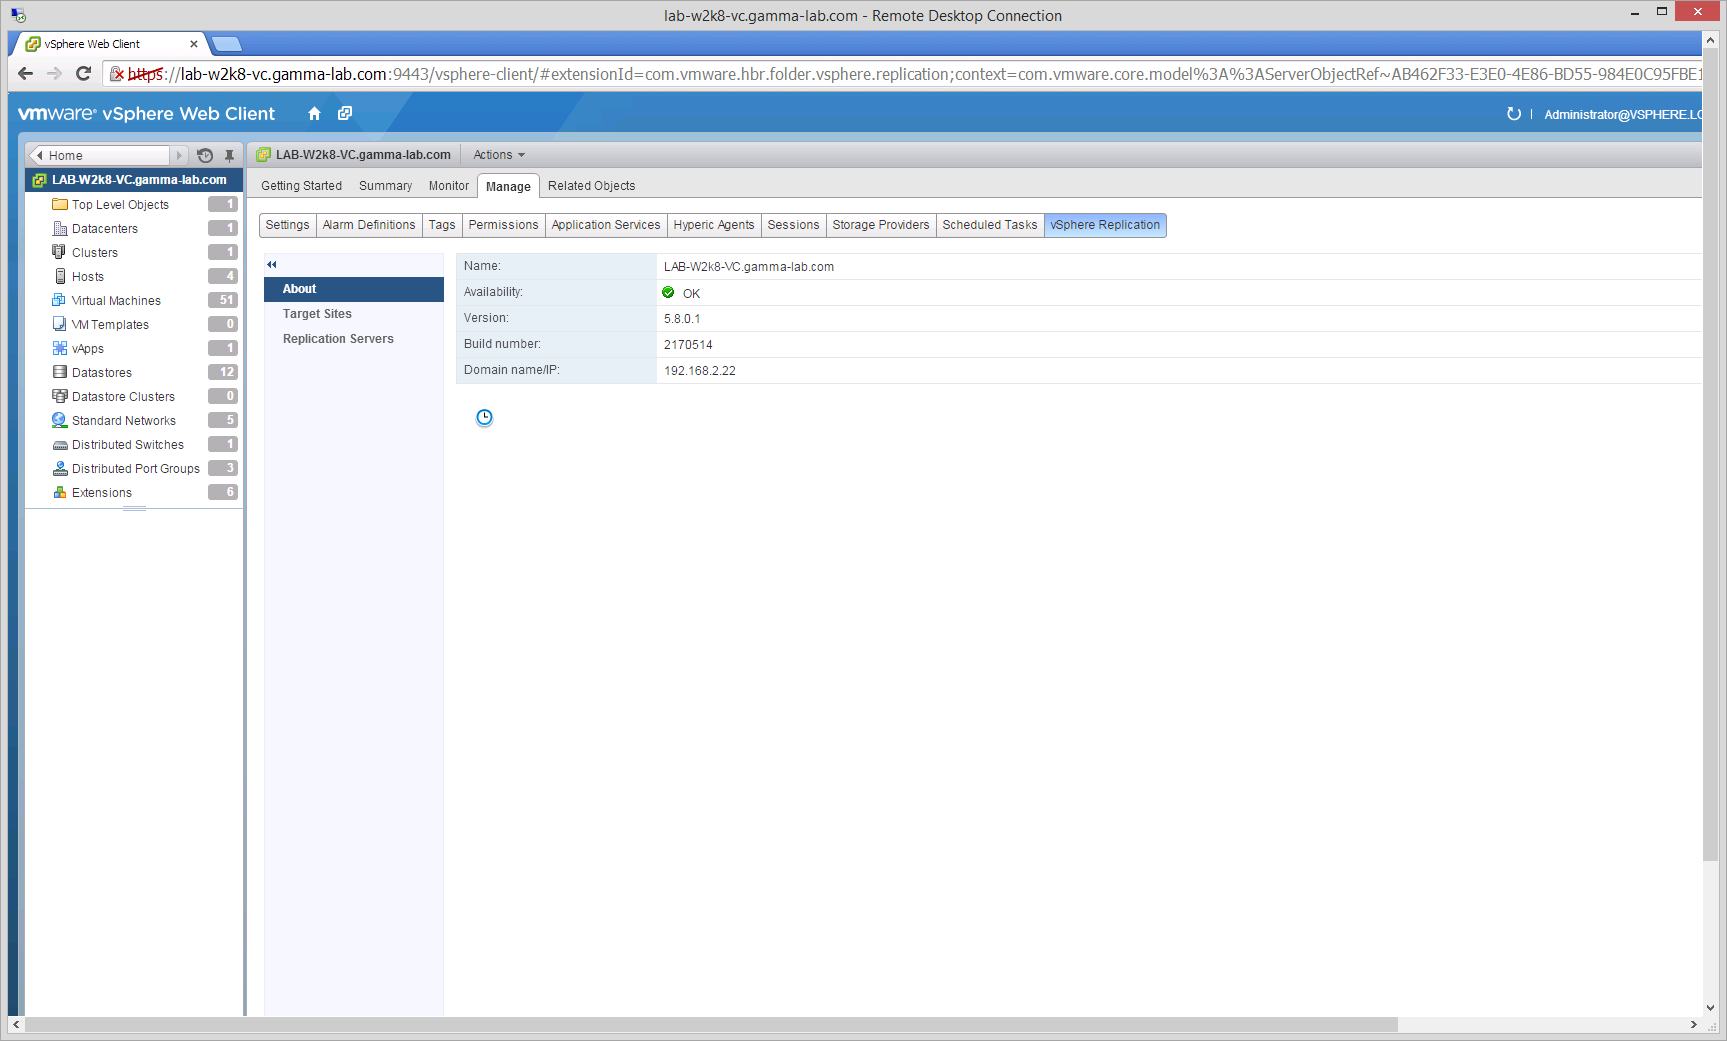
From the Management interface, select the vSphere Replication tab. This is where the foundation setup is configured for replication:
Select Target Sites to start the process of adding the vCloud Air service as replication target:

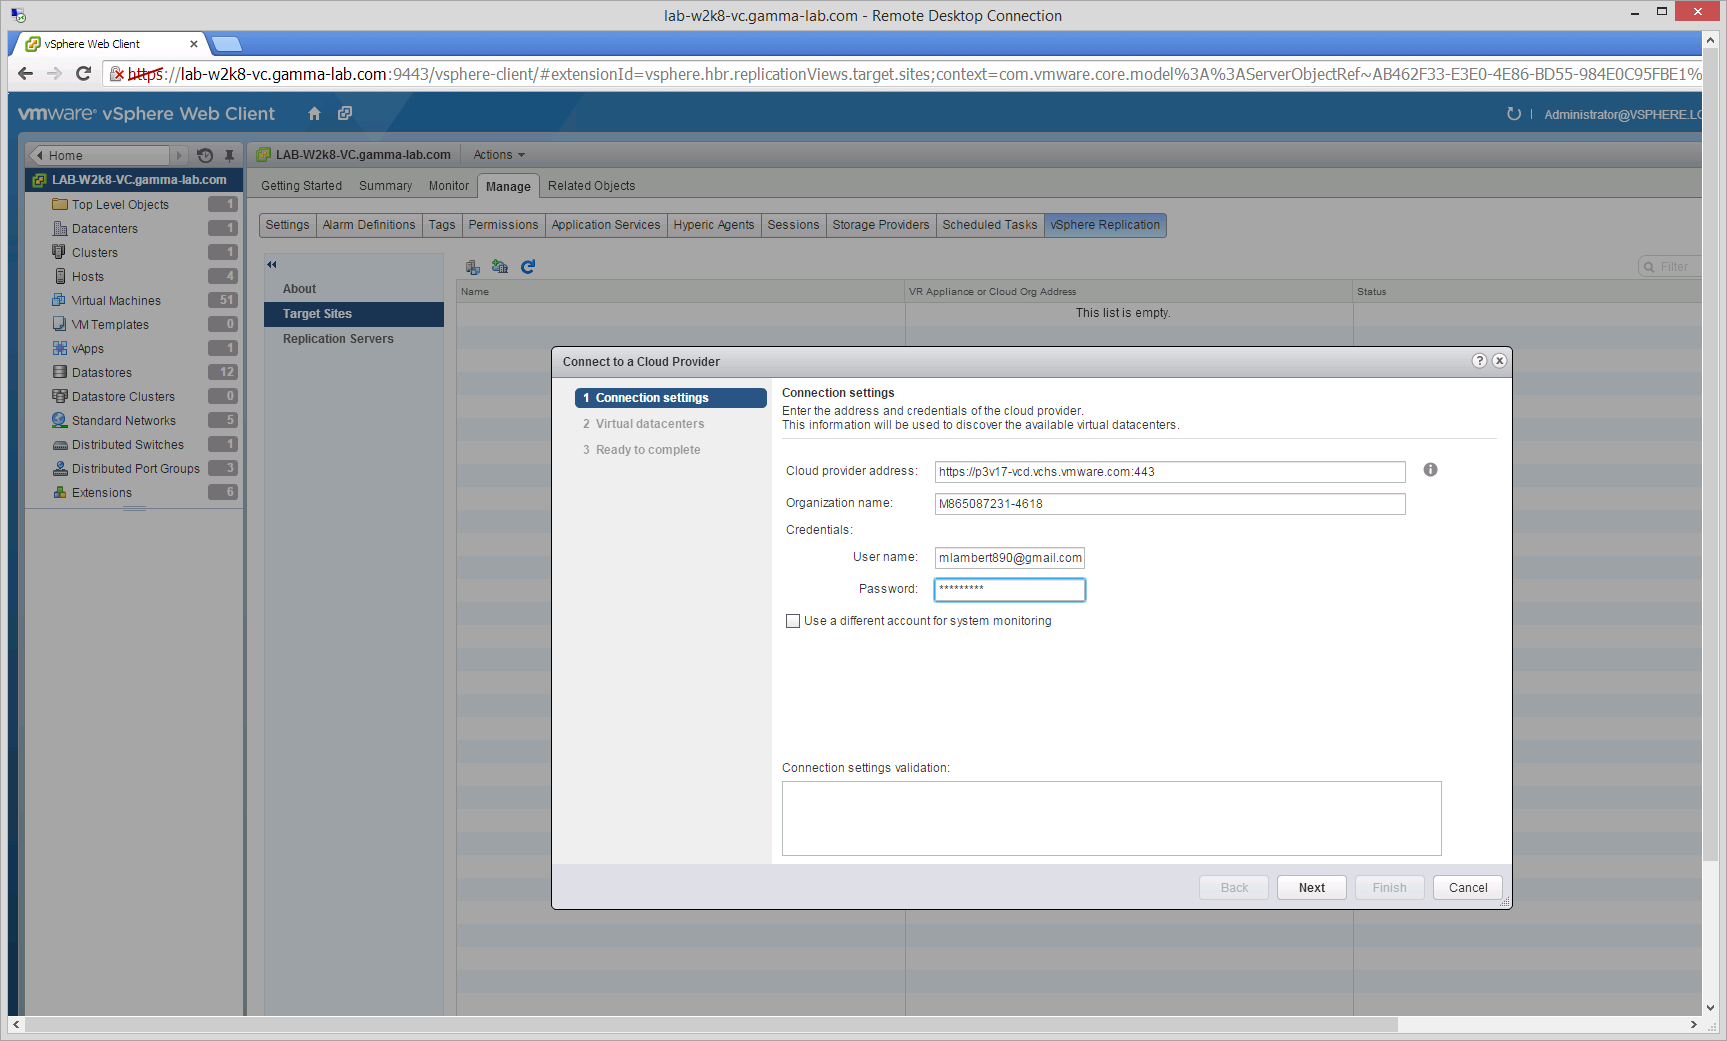
To kick off the workflow, click the “Add a Provider Target” icon. This is the icon to the immediate left of the refresh arrow. The “Connect to a Cloud Provider” wizard will start:
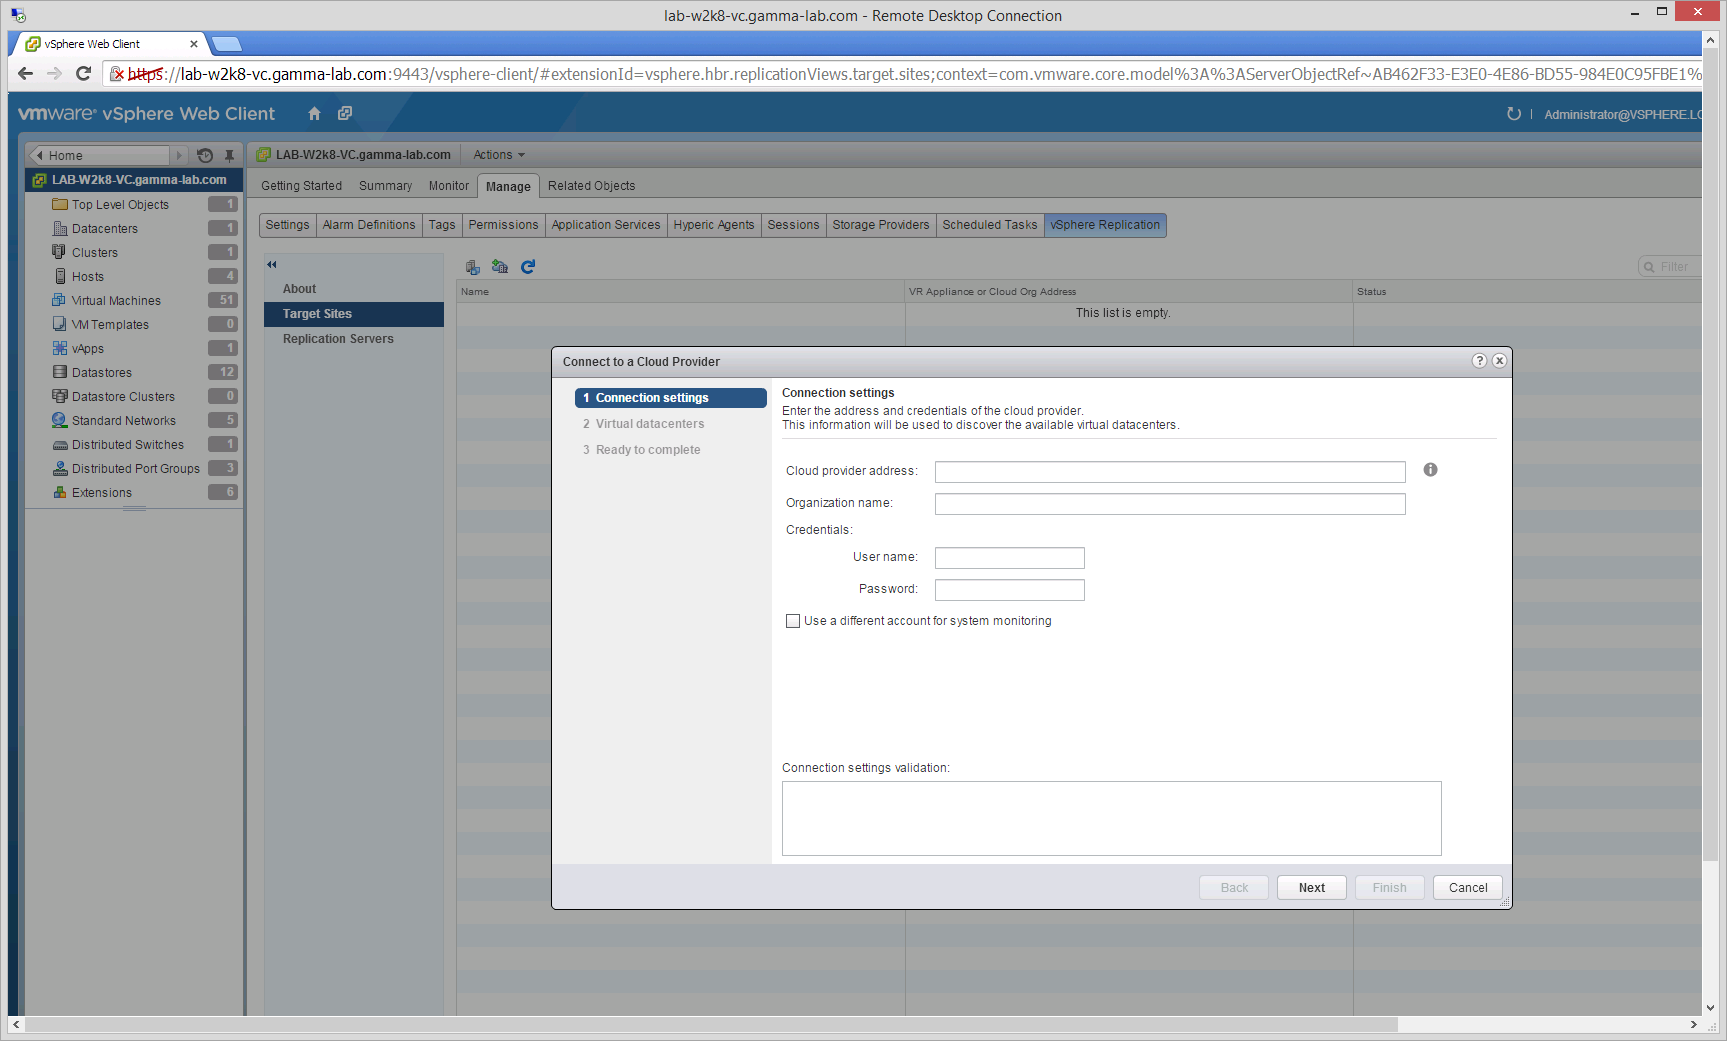
At this point we need the two critical pieces of information we gathered earlier. For “Cloud Provider Address”, enter the provider address we retrieved from the vCloud Air service. For “Organization Name”, enter the Organization Name retrieved in that same step. For User Name and Password enter the vCloud Air credentials and click next:
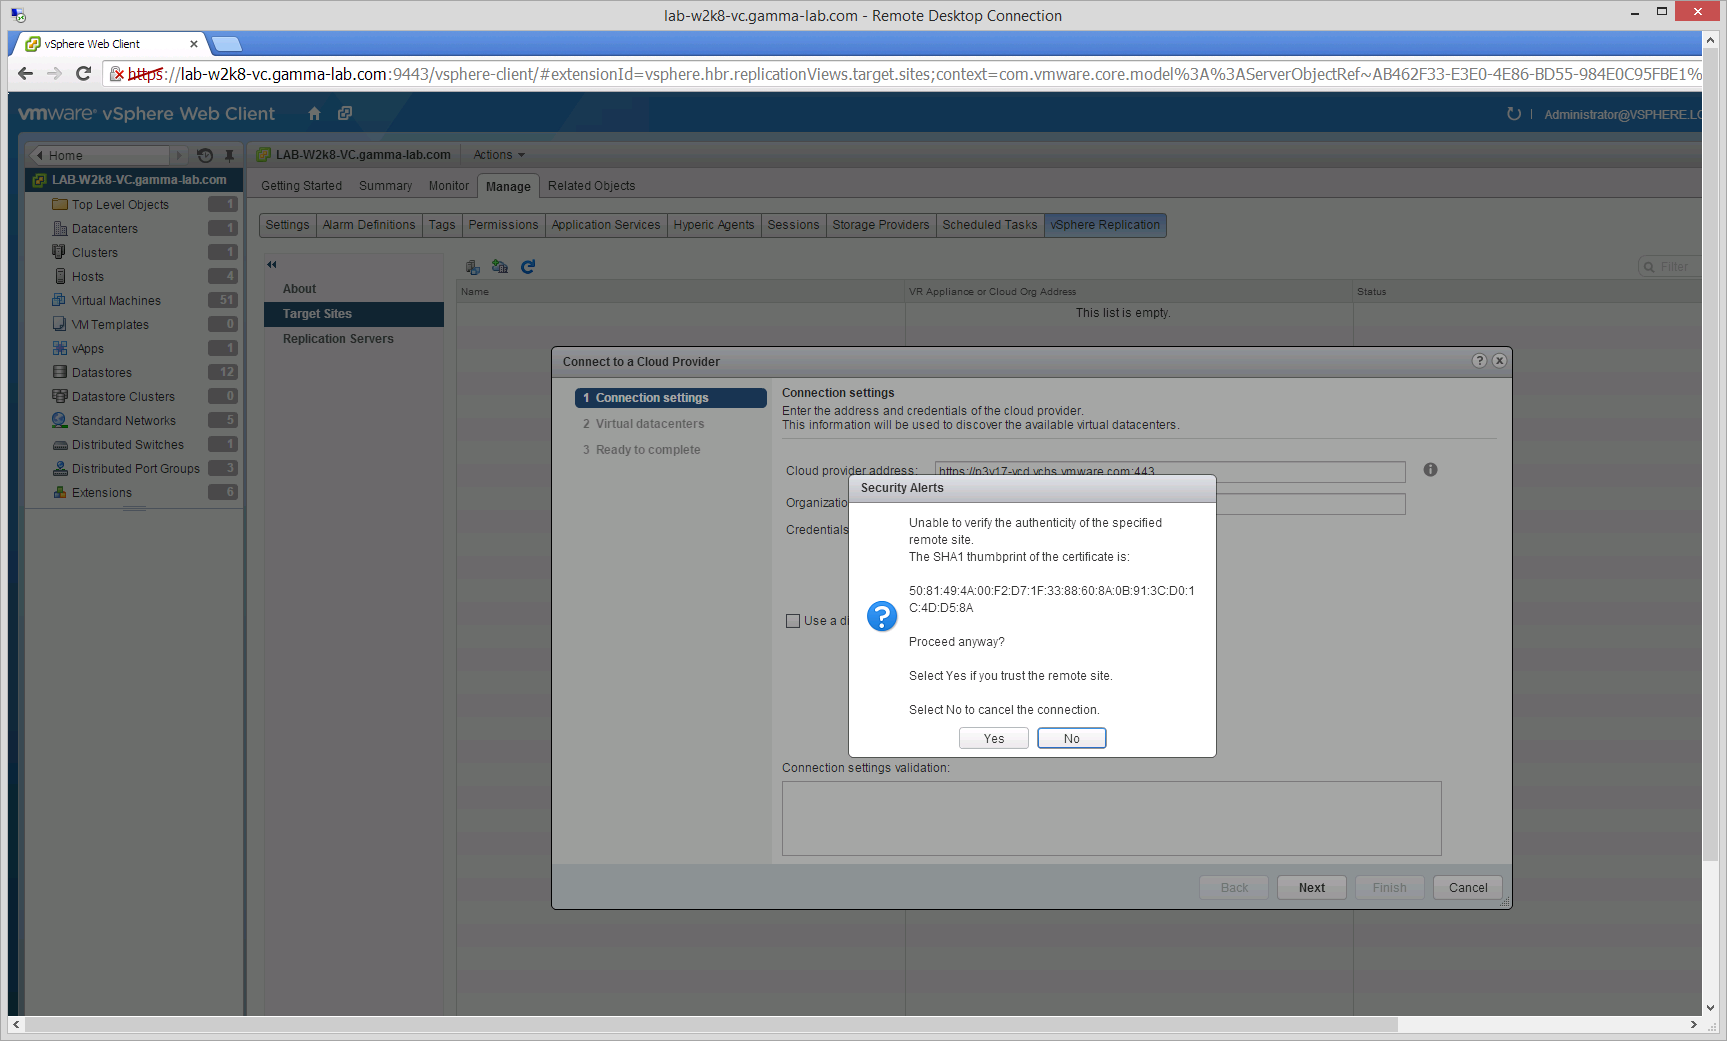
Connecting to the vCloud Air API endpoint will trigger a certificate warning. It can either be accepted here, or the certificate can be downloaded and installed on the vCenter server proactively to prevent the warning. Either approach will work:
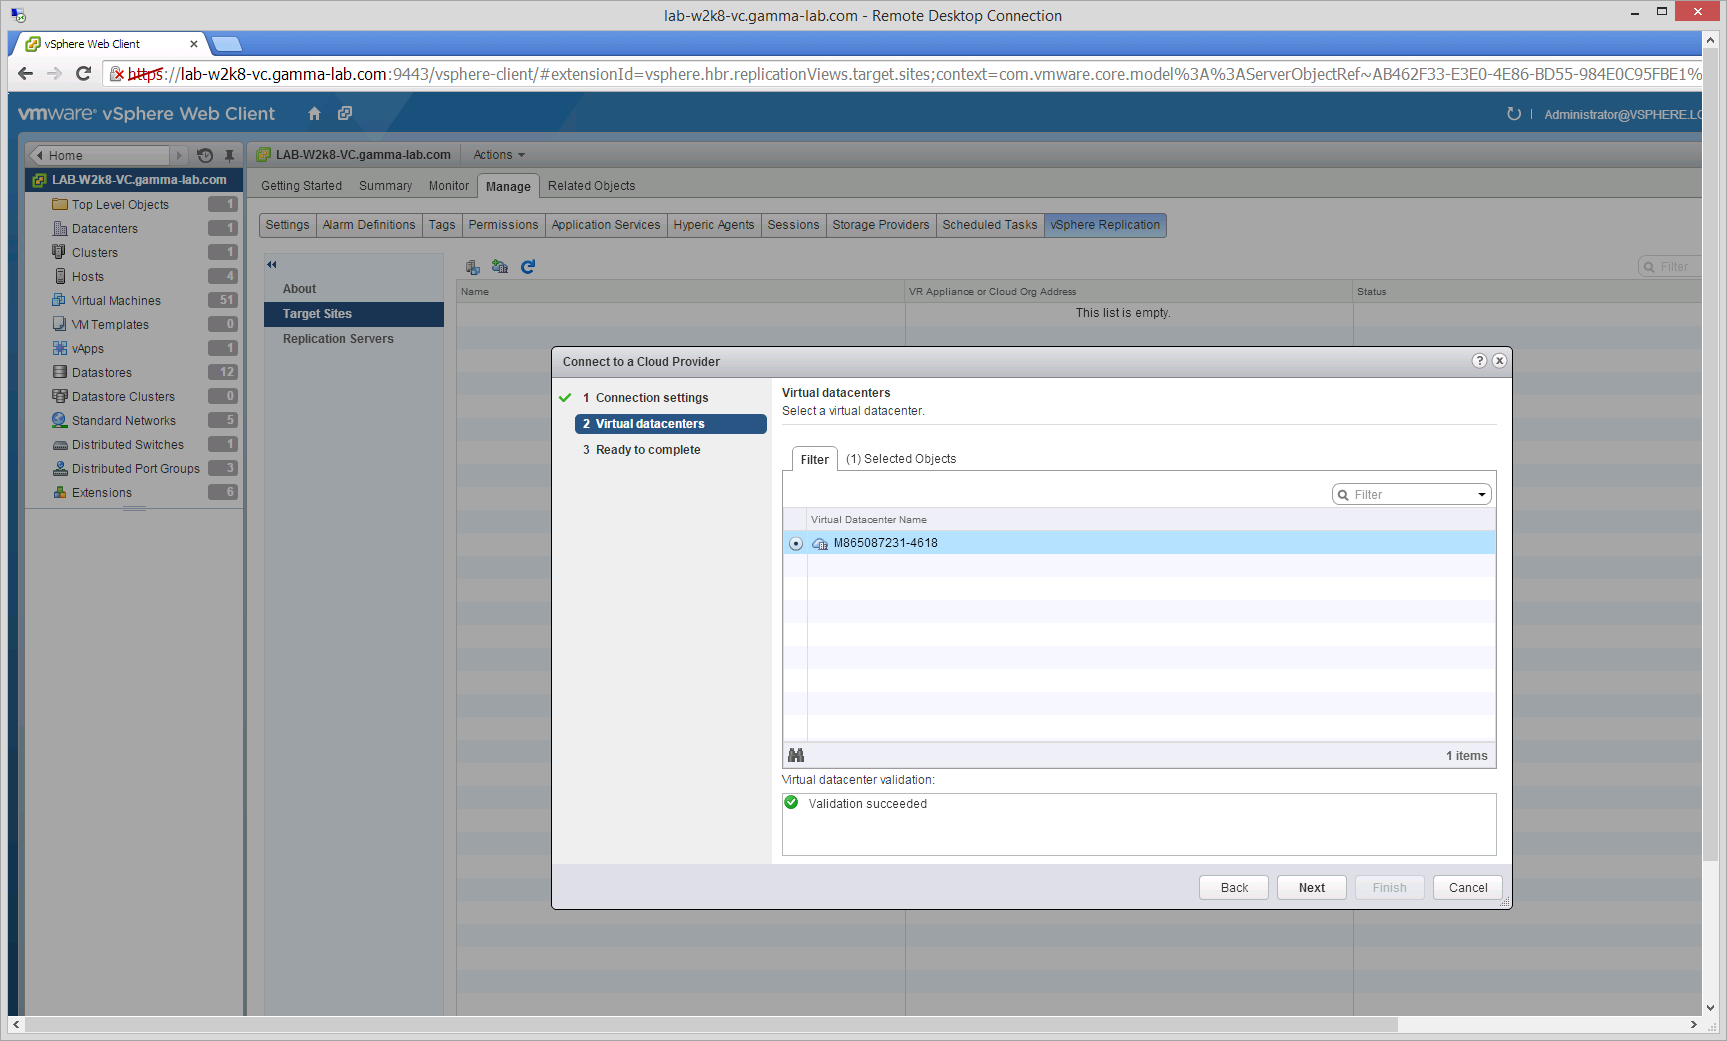
Next we select our Virtual Datacenter. Any vCloud Air DRaaS subscriptions will be available for selection here. In our case there is only the one subscription. Select the Virtual Datacenter being setup and click next:
Before we commit the configuration, we have one final opportunity to verify the settings:

At this point we have our replication target configured, but looking closely we can see there appears to be an issue. Under status we see an icon that appears to be a broken network connection and, luckily, some explanatory text indicating that we are missing our network settings:

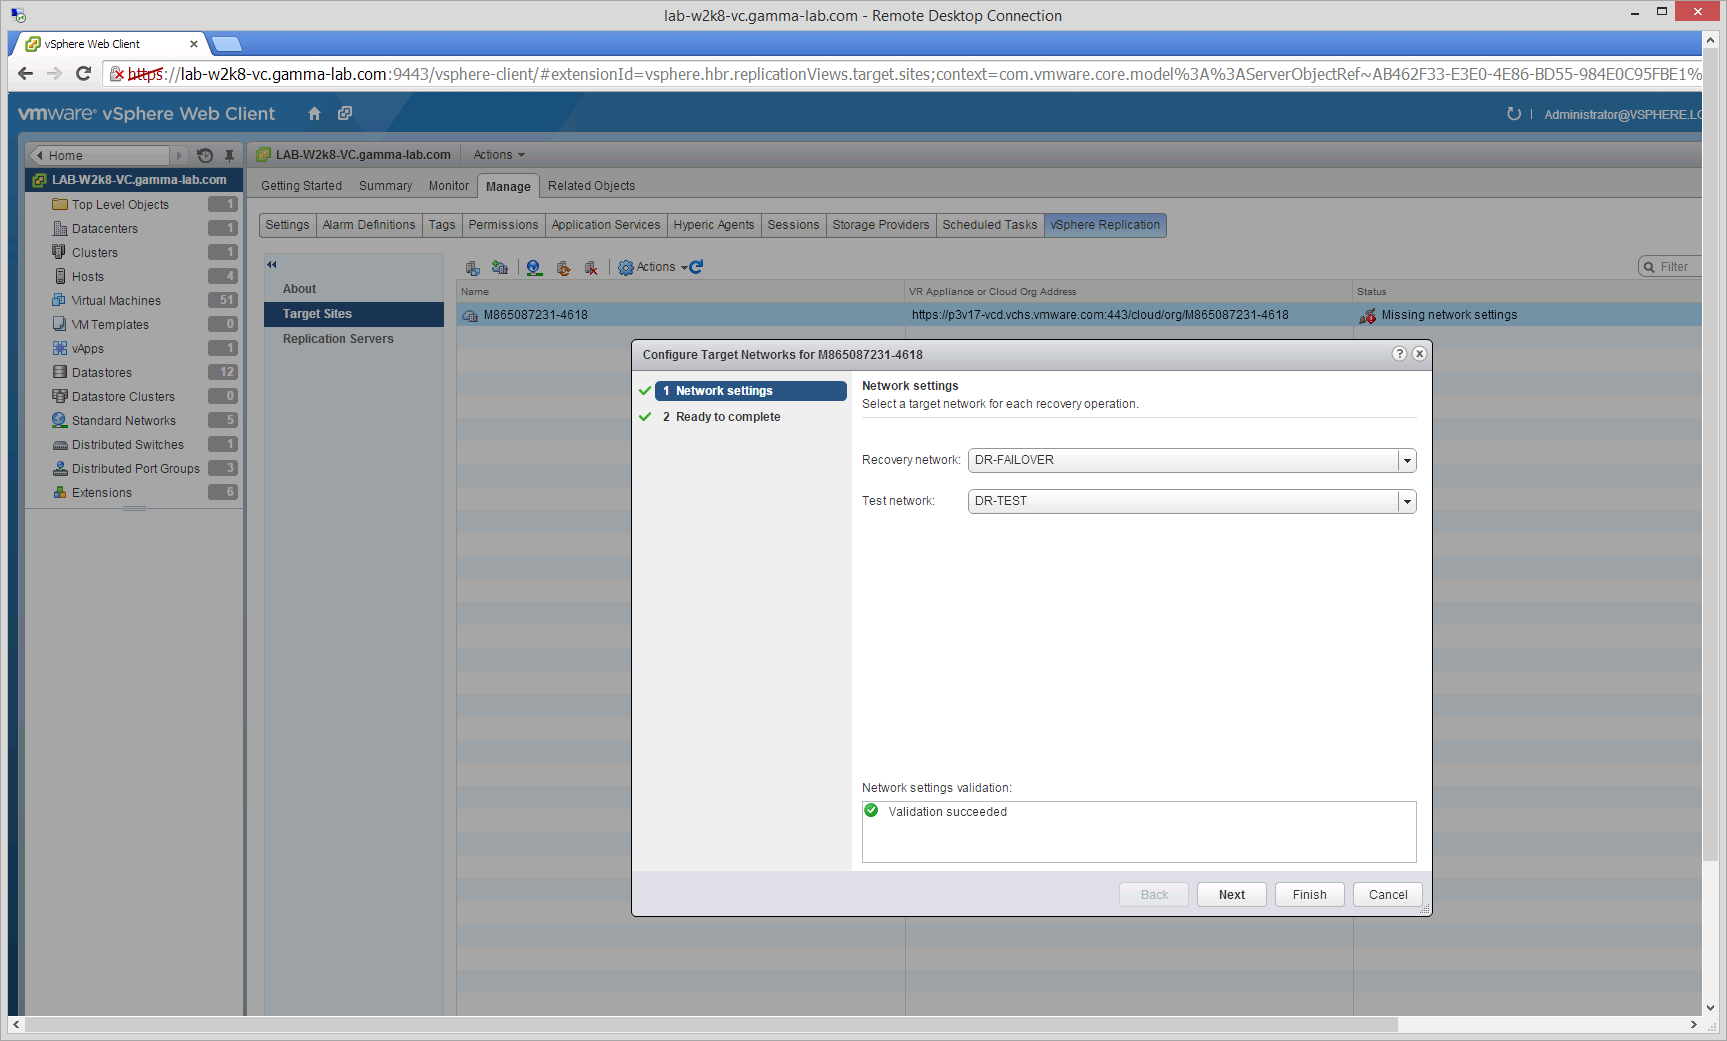
Very handily, this is a clickable icon. Clicking the network settings error will invoke the “Configure Target Networks” dialogue box. It’s worth taking a moment to explain what this setting means. In a disaster recovery scenario in general, a source server (the production state) is paired with a target server (the disaster recovery state) and the two servers are kept synchronized via replication. The two servers share a configuration by definition, but obviously live on two physically discrete networks. This is true regardless of whether the servers are physical or virtual (and whether the underlying network is physical, or virtual). The network configurations may also be duplicated (same IP space on both sides), but this isn’t mandatory. Obviously if the network configurations differ, then the server will need reconfiguration before it can function if it has a statically assigned IP. What we’re configuring in this step of the setup is the definitions for both the Test and Recovery networks in a DR event. These are network definitions that have already been setup in vCloud Air.
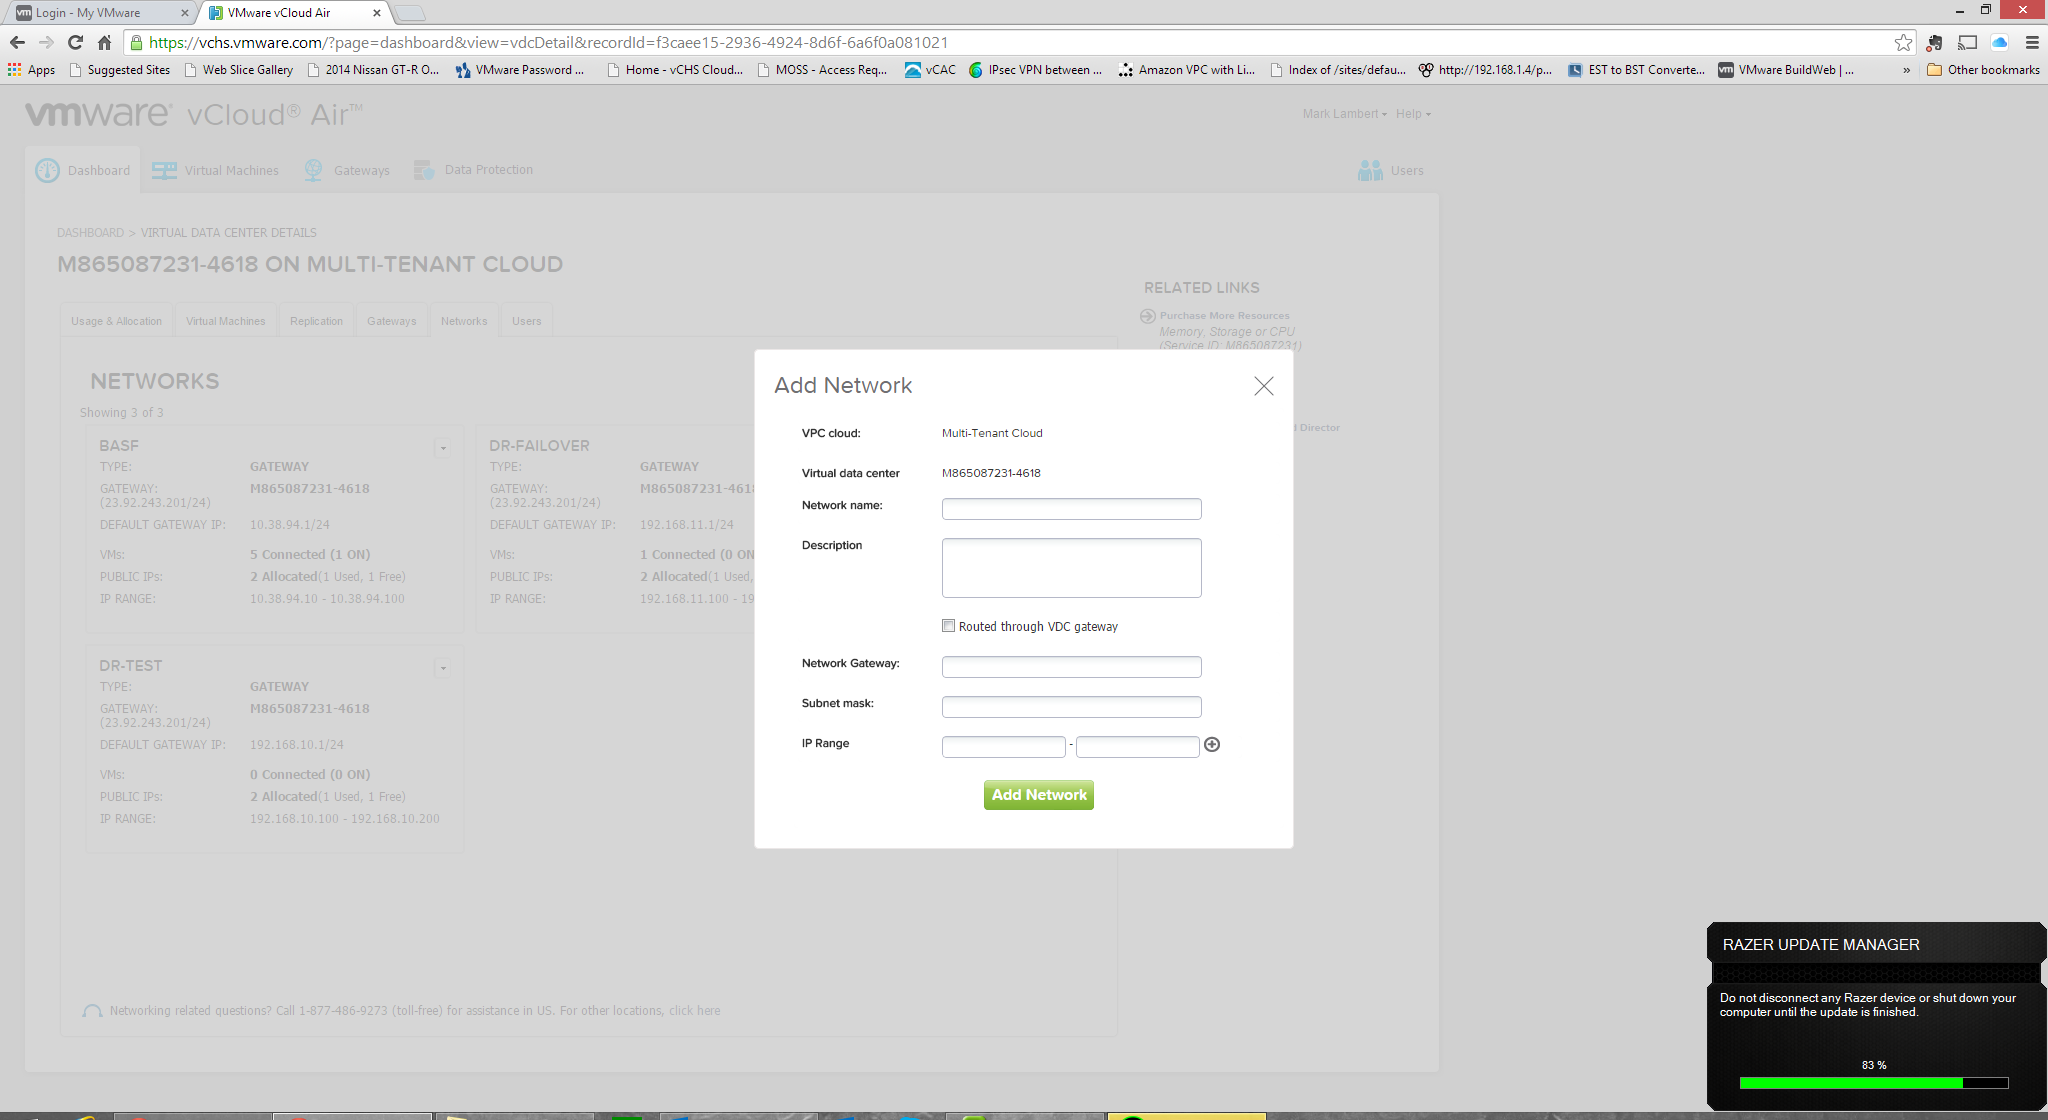
To setup our DR networks, we need to return to the vCloud Air UI. Clicking in to the DR Virtual Datacenter we can configure our virtual resources. Click on the Networks tab to show the networks that have been defined for DR. As you can see we have a few already defined in our case, but adding a new one is very easy. Click “Add One” to get started:
To create a new network definition we just have to provide some basic parameters. First we provide a name and description to identify the network entry. Next we enter the IP details – gateway, subnet mask and IP range. This configuration can match the vCenter port group at the source, or differ. Remember if it differs the VM will need to be reconfigured after a failure event. The service does not provide guest configuration capabilities (unlike SRM for example). Multiple networks can be created and any network definition can be selected for use as either the “Test” or “failover” network in the vSphere Replication configuration:
Returning to vCenter, we can now apply one of the defined network entries for each replication configuration category. The “Test” network refers to which network the VM will be attached to during one of the formal “DR Test” events (the DRaaS defines formal test cycles that are support facilitated in keeping with good DR best practice) and the “Recovery Network” refers to the network the VM will be attached to during an actual failure event. After the selections have been made, click next to validate
the configuration:
Finally clicking Finish will commit the configuration:

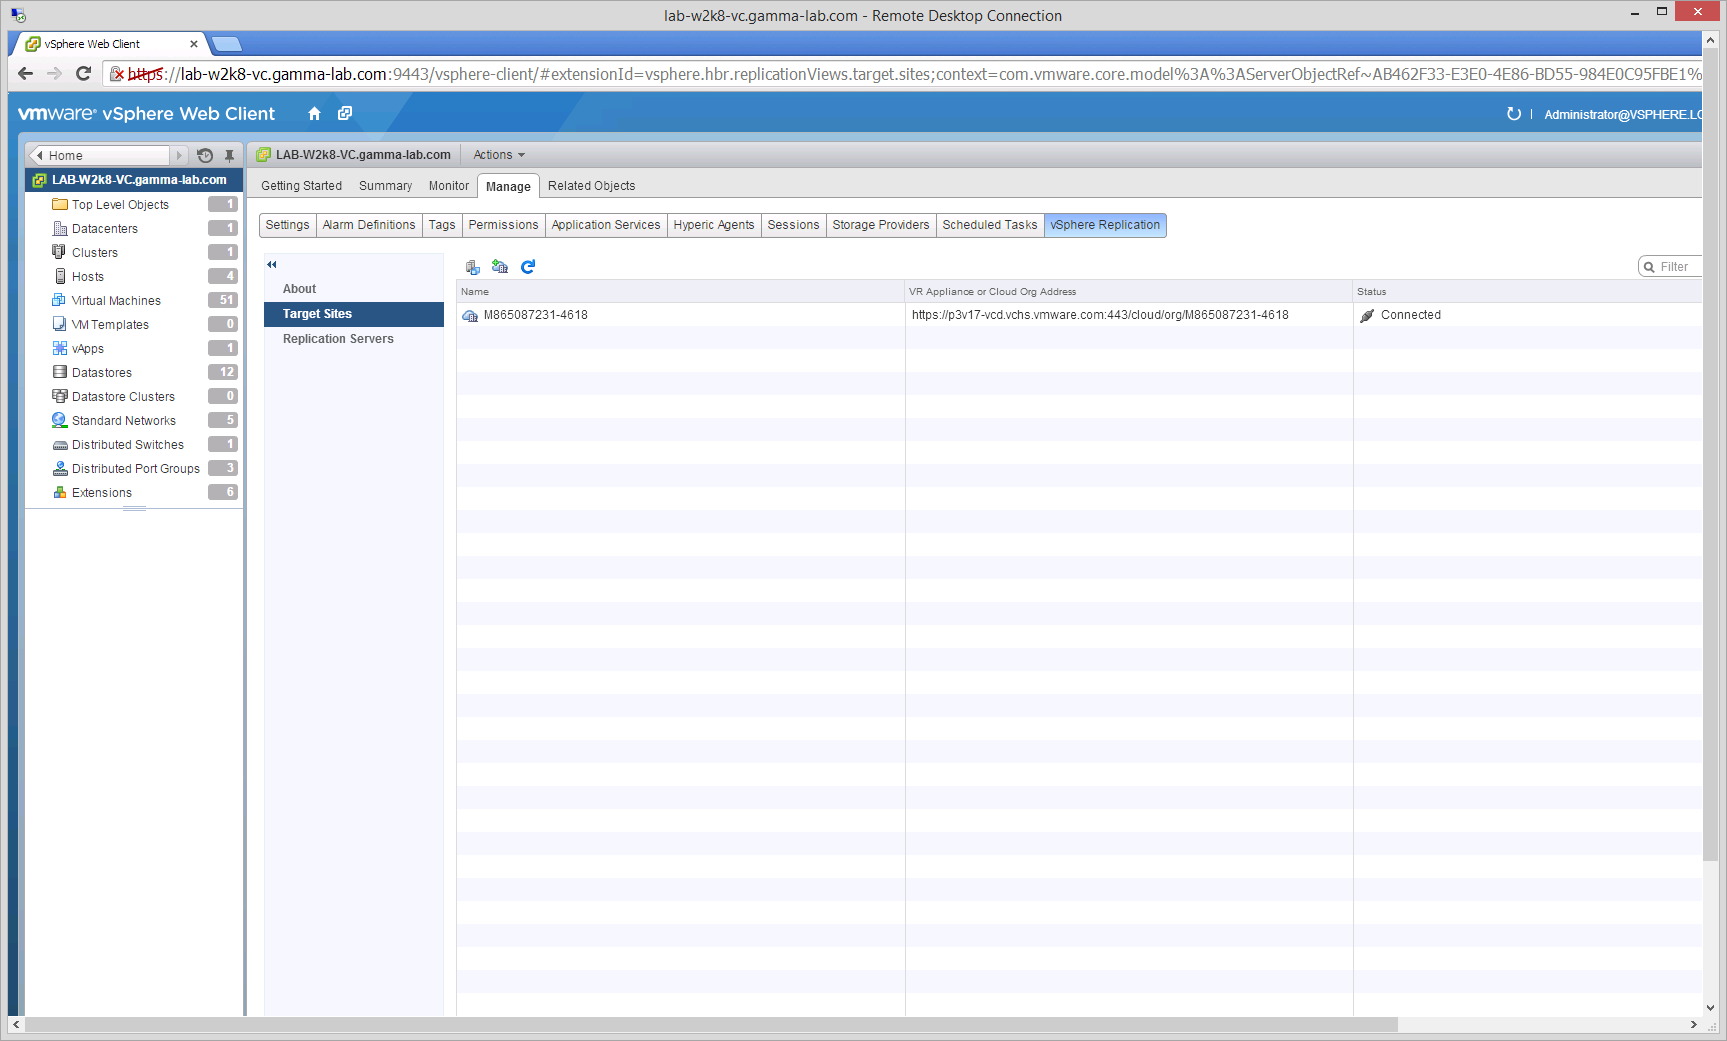
Returning to the Manage tab we can now see that the network settings error has been cleared and we are all green:
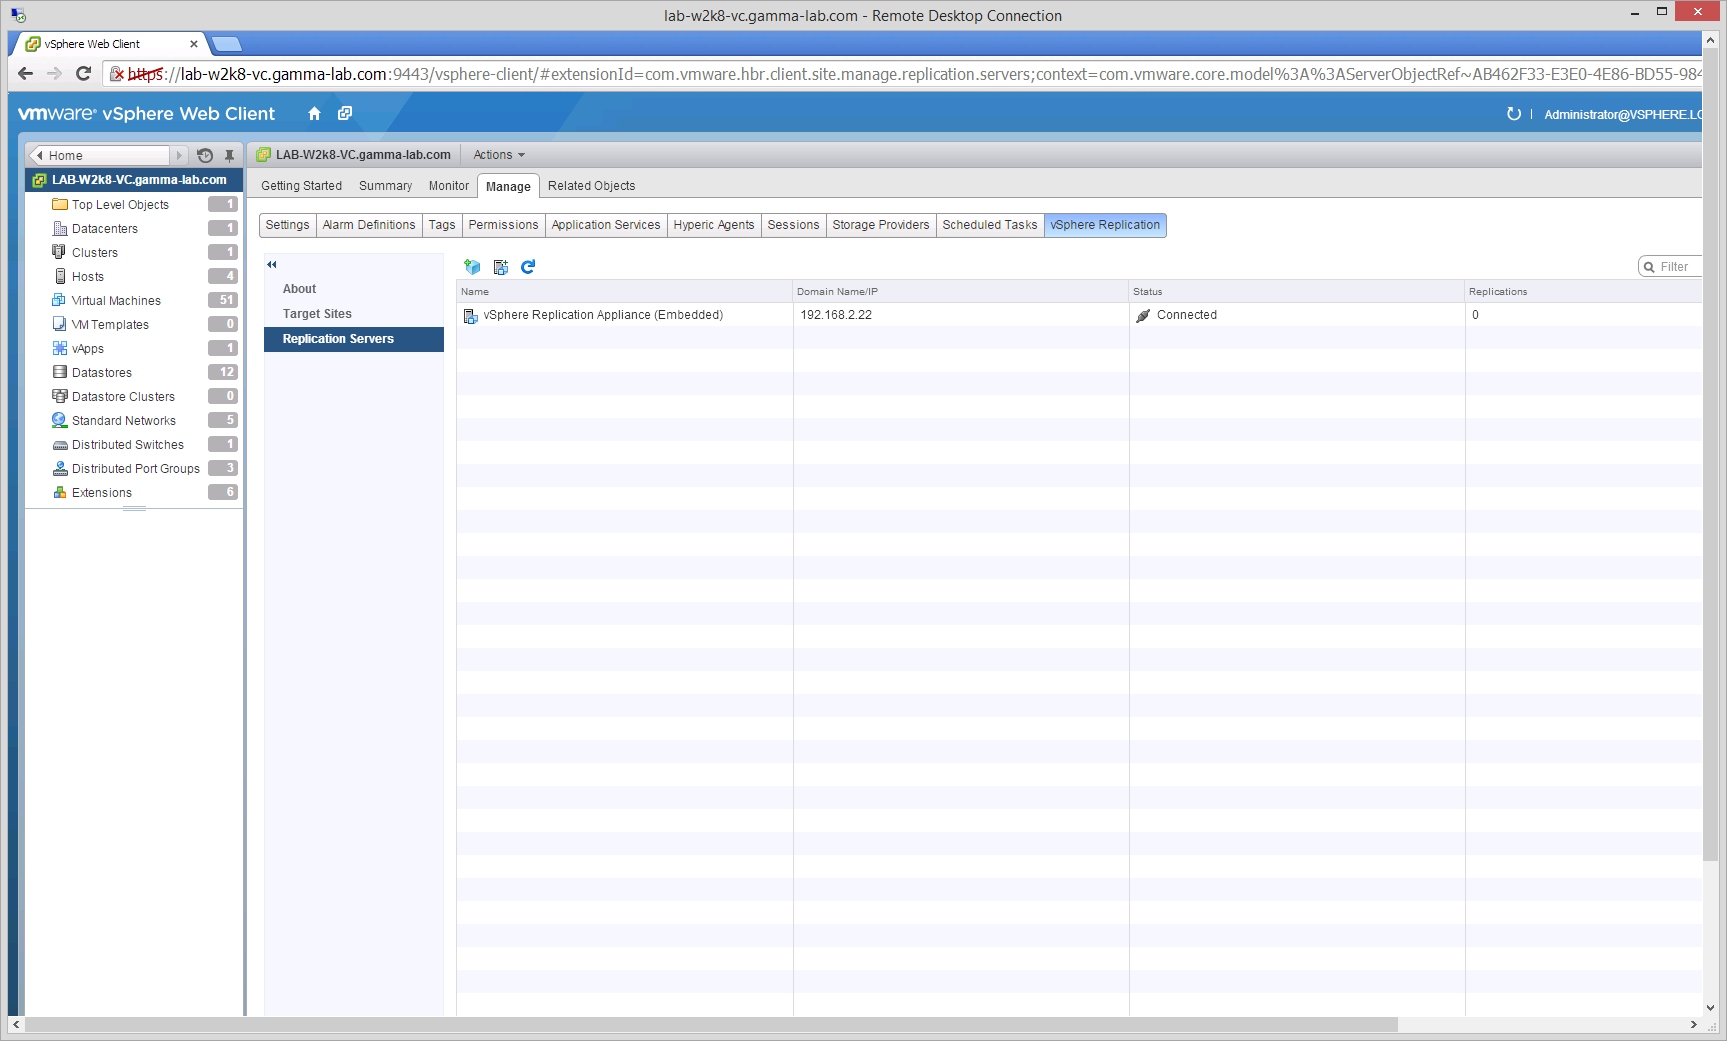
Next we can check on the status of our Replication setup by clicking Replication Servers:
And that’s all there is to configure! Before we can call this an “Easy Button” for real we need to make sure it actually works. Heading back over to our Virtual Machine list in the Web Client, we can now select any VM and pull up the Actions menu. Notice that we now have new option for vSphere Replication:
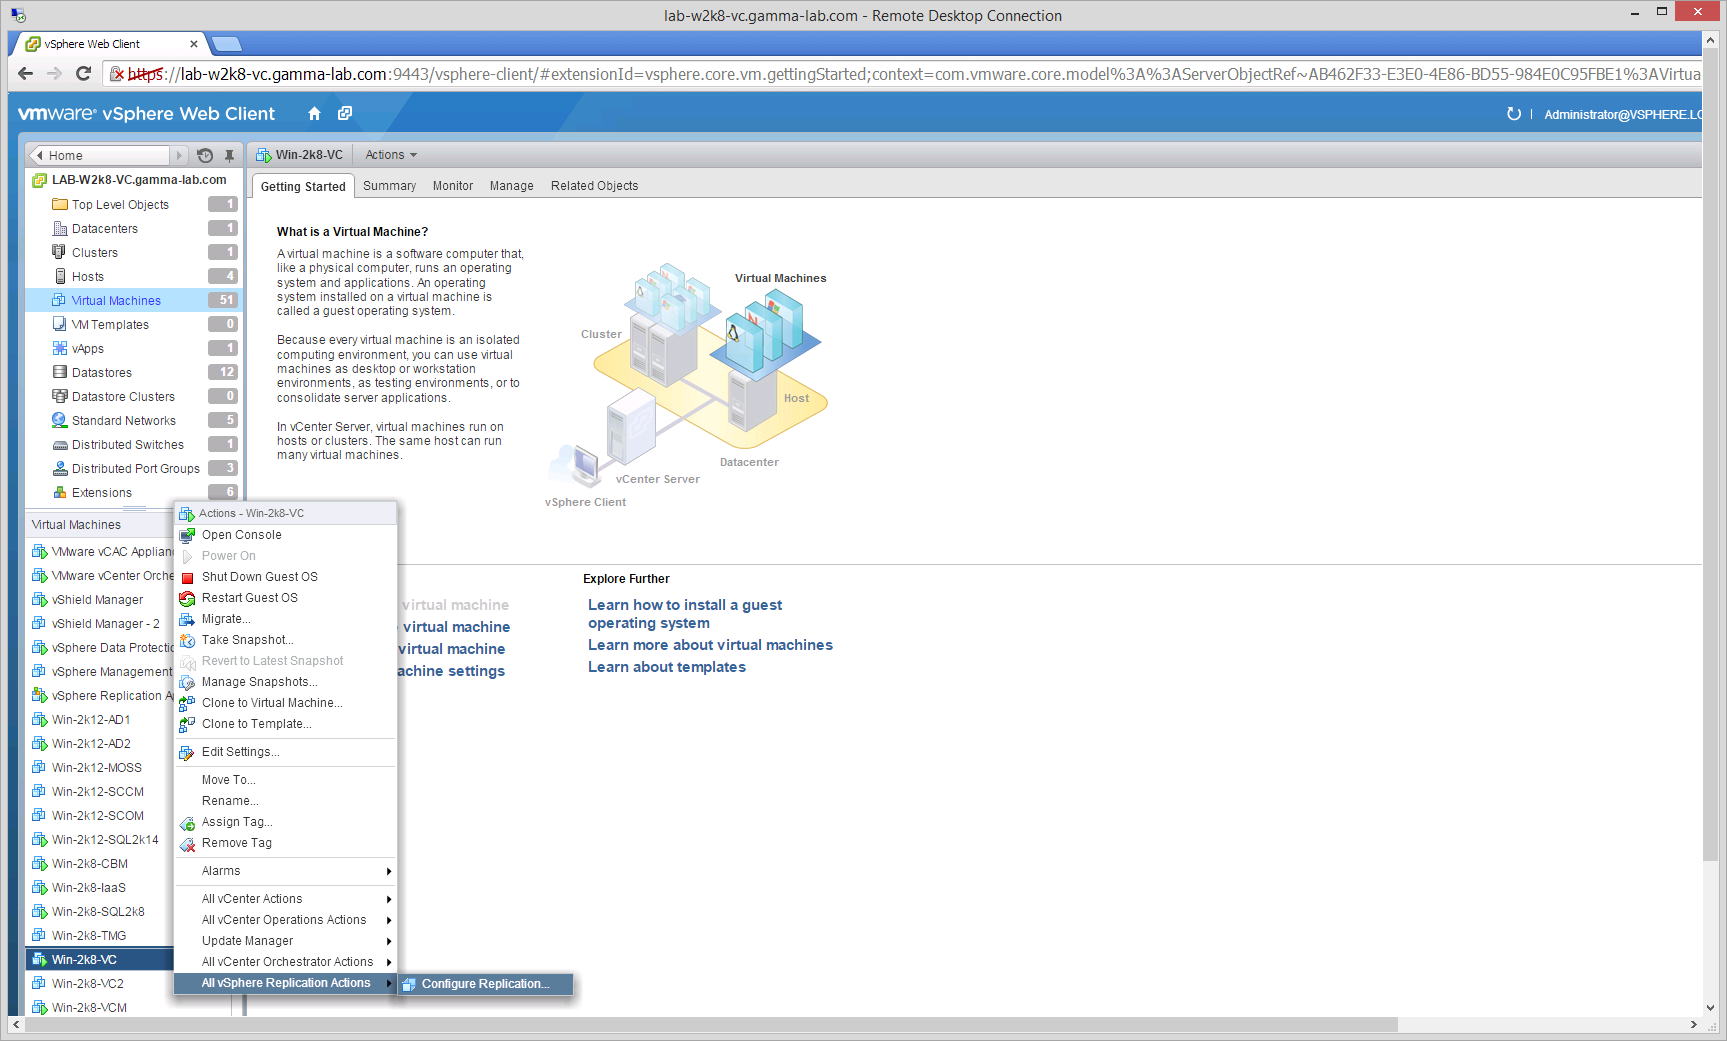
Selecting this option will trigger the Replication Configuration Wizard. First step is to choose a target. For vCloud Air we select “Replicate to a Cloud Provider” and click Next:

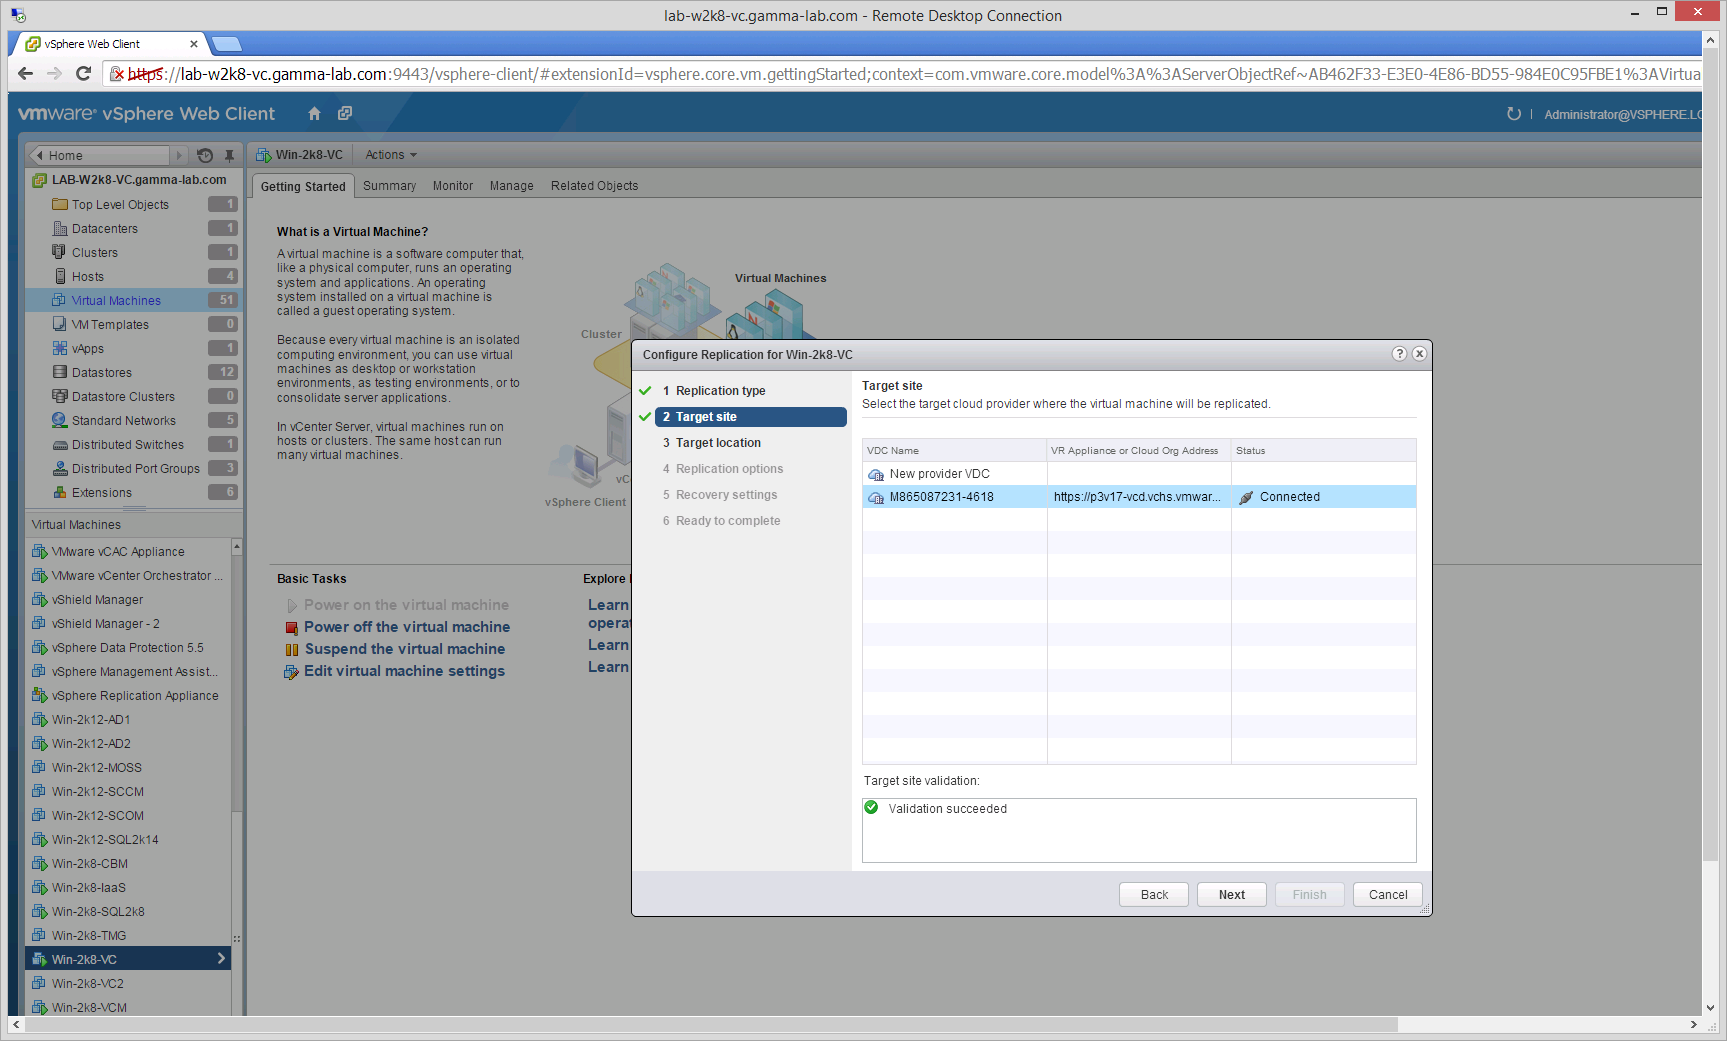
Next we can select the Target Site that we created in the previous steps:
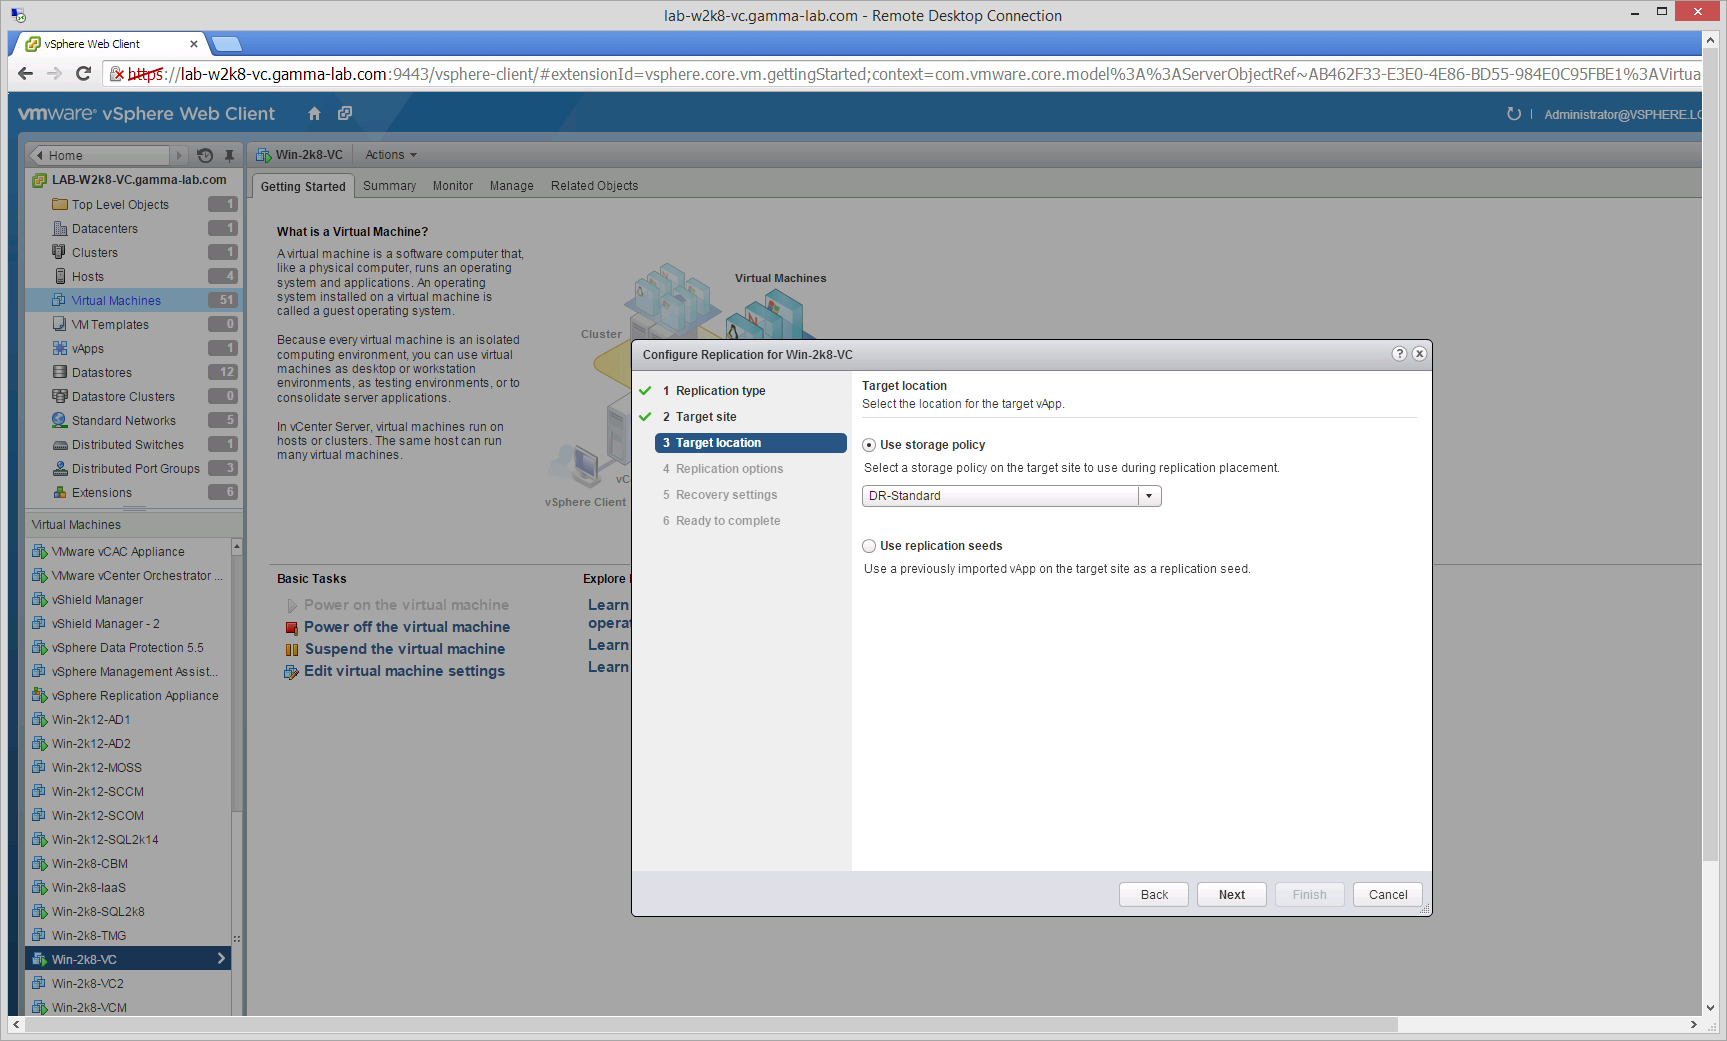
We can now select an available storage tier into which to hydrate the VM. This is a fantastic option as it allows us some interesting flexibility. For example, the choice can be made to run in a reduced performance mode during a disaster by selecting a lower performing, lower cost, tier of storage to fail over to. In our case we are selecting our standard storage tier:
Next we can set a policy for quiescence. This is another fantastic option. For background, quiescing means temporarily stopping the source OS in order to bring state in sync with the target. This option gives us the opportunity to choose a method by which the vSphere Replication server will quiesce the source. In our case we’ve selected a Wiindows based VM, so we will use Microsoft Volume Shadow Copy Services to control OS state:

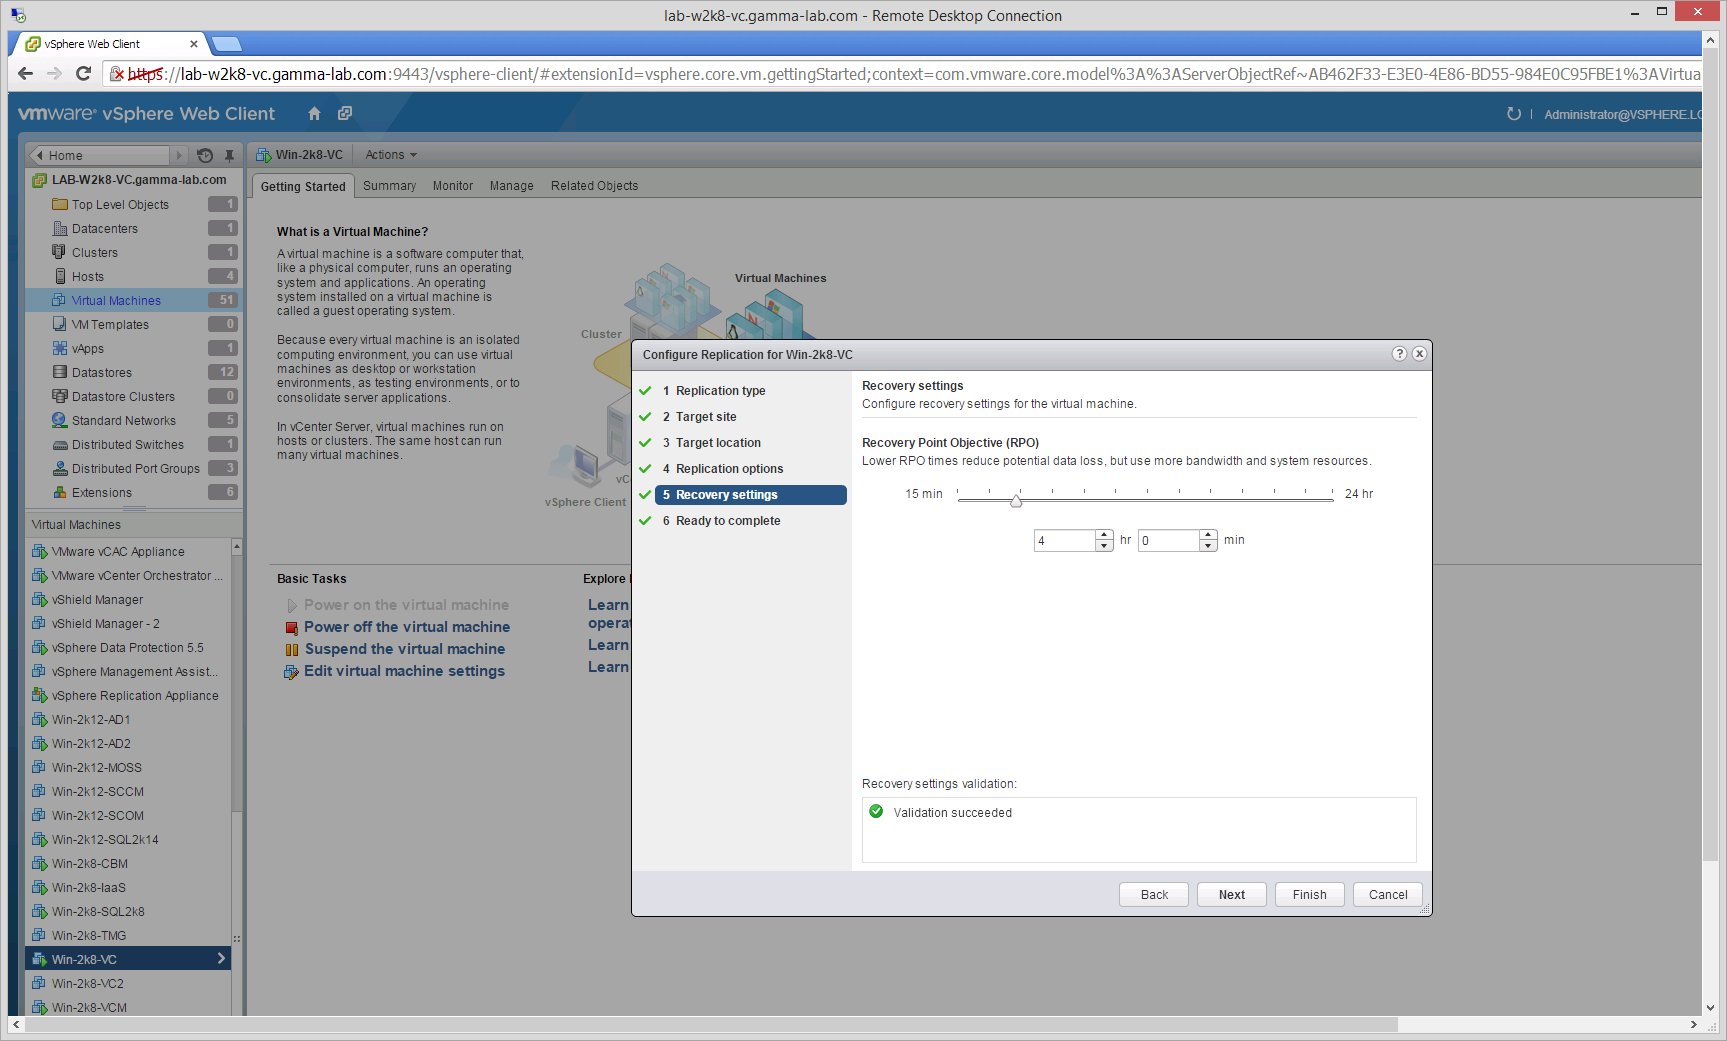
The last step is to set our Recovery Point Objective. RPO refers to the minimum amount of data loss we are willing to tolerate and directly sets the synchronization interval. For vCloud Air RPO can be set from 15 minutes to 24 hours. What this means is that every 15 minutes to 24 hours the source and target will be synchronized. This means in the event of a disaster the worst case will be that we lose 15 minutes of data (disaster occurs a moment before the next sync cycle would have triggered):
We can now validate the settings and commit the configuration:

And with that we have pushed the “Easy Button” for DR on this VM! Rinse repeat to cover as many VMs as you have subscribed capacity to support. So what are my thoughts on the service? Well I think it’s absolute fantastic. It brings you very painlessly from “nothing” to “something” without any investment in additional infrastructure construction. One thing we didn’t show here is that Offline Data Transfer can be used to seed the initial replication as well which is very handy in events where a large number of VMs are being protected and upload bandwidth is becoming a bottleneck.
Are there any caveats? There are, but luckily they are all covered by the roadmap so things will continue to improve. Some noteworthy gaps today are:
- Not completely self service disaster coverage – The Customer Success Team support folks do need to be called in a disaster. This will be changing down the line
- No “fail back” support – this one is tricky. Once up and running on the DR site, there is a 30 day window (extendable by calling support) after which point the DR site needs to be returned to cold and production shifted back on-prem. Unfortunately there is currently no tooling, other online or offline, for data transfer back. The replication is not bi-directional, so a manual copy event, using vCloud Connector, will have to be scheduled and performed to return to on-prem production. This is the biggest show stopper, but is definitely on the roadmap
- No guest customization support – as indicated in the entry, today there is no way to perform complex configuration of the target automatically, post disaster, the way you can with SRM. This is less impactful than the failback since there are lots of ways to mitigate it (keeping like for like network configuration, writing custom scripts, etc), but does appear to be in the future plans which is a good thing.
Not too bad! Just 3 caveats for a version 1 service in a space as complex as Disaster Recovery is a great start. I really look forward to tracking this service as it evolves and updating this entry with new info. Stay tuned!
