
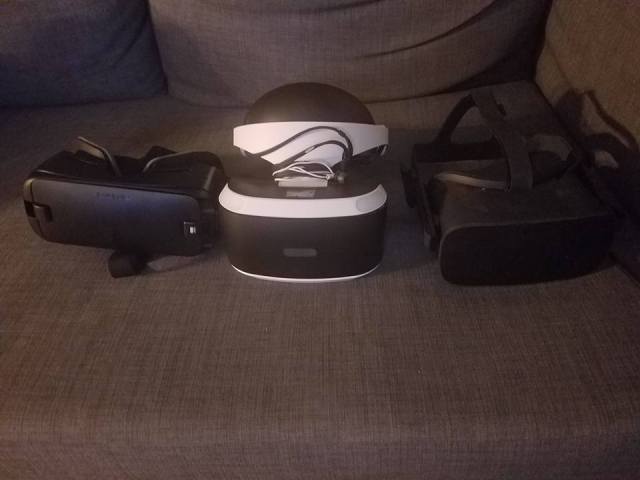
Setup
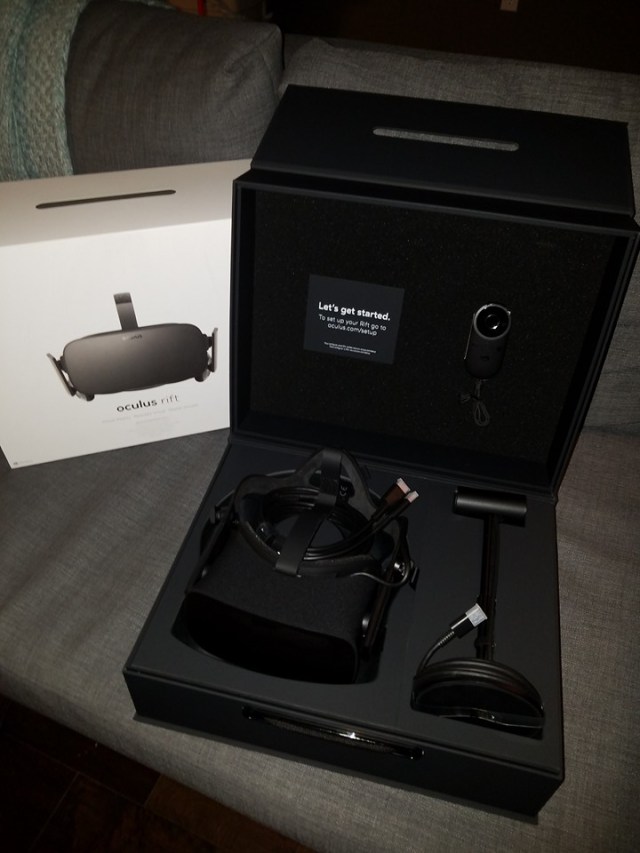
Oculus Rift
PlayStation VR

Like the Oculus, there is a lot to unpack here (literally). At first glance, it’s clear there are even more bits in the console pack than the PC. This comes actually as a bit of a shock. The PS VR needs its own power supply, as well as the obligatory USB and HDMI hookups. The headset has a dual proprietary data/power+ standard HDMI cable with an inline remote (2.5mm headphone jack for the included “3D audio” ear buds, volume, power, focus controls) that lead to a breakout box. The breakout box is pretty sizeable, but can sit on top of the PS4 (occupying most of the left side) and is an HDMI passthrough.
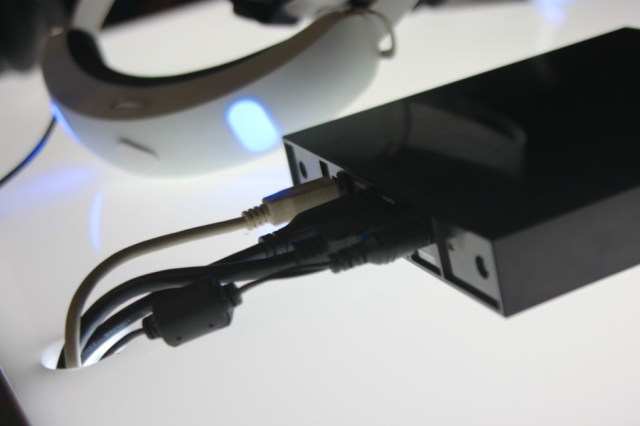
The HDMI connection heading from the PS4 to the TV shifts over to the breakout box TV out, and the HDMI “to PS4” port on the breakout box, shockingly, goes to the PS4. The next bit is the micro-USB connection which goes from the back of the breakout box to the front of the PS4. The final connection is the power brick which also connects to the back of the breakout box. All in all, it’s pretty straightforward and intuitive to hook up, but definitely something of a birds nest and more cumbersome than the PC. Moving on to the sensor, things don’t really improve much. The sensor is the old PS4 camera which, while easy enough to setup, is less flexible in terms of placement strategy than the Rift sensor. The last bit is the movement controllers which are literally the old PS3 mov hand helds. These are probably the weakest link. Setup is as easy as adding a new device and calibrating them with the camera, but again, this makes the whole thing more placement constrained. Not as bad as the Vive mind you, but much less flexible than the Rift. Once everything is physically connected, and the PS4 is powered on, the headset gets powered on and immediately needs an update. When it comes to system, game, and peripheral updates consoles are definitely nearly caught up with the PC. The overall software installation between the two was pretty much a wash in terms of time required for both the install itself and calibration. The calibration of the headset and controllers with the PS4 camera is less confidence inspiring than the Rift sensor, but it remains to be seen if this will impact gaming (hint – it does).
GearVR
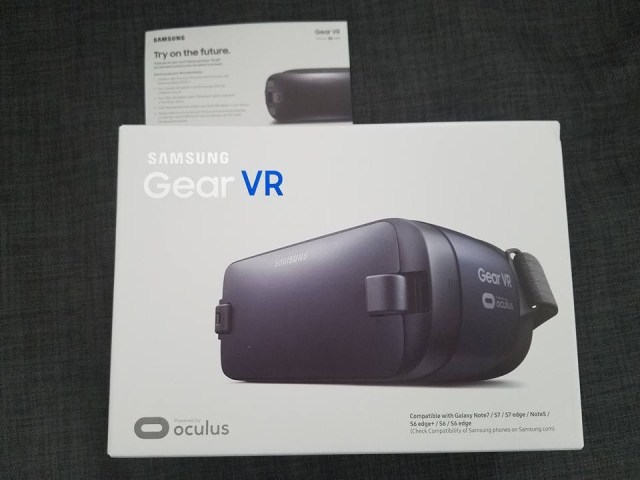
Right from the moment of unboxing, it’s clear that this rig is a much simpler proposition. The baby Oculus is not only physically smaller, but it is a much less complicated package with no sensors to be found, and no wires or cabling. Maybe even too simple in that it doesn’t even provide an in headset (like it’s big brother) or even in box (like the PS VR) audio solution. That said, every phone has a 2.5mm headphone jack and everyone has headphones, so it isn’t a huge issue. Given that the headset has no built in screen, and there is no HDMI in this install process. Instead, the phone itself becomes the screen. This is a bit odd, but it works. Since the phone is the screen, the software for VR needs to be installed before fitting it into the headset. This is a typical Android app install and is quick. The lens cover that protects the visor snaps off by pulling the clamp to the right, and then the phone slots in, docking with the micro-USB port (adapters for USB-C are included) and then snapping in, held in place by sliding the clamp back. Once the phone is in place, the visor can be worn and the software will auto launch. Calibration is extremely easy since the entire thing is self contained and movement is tracked by the phones gyroscopic sensor. Of the 3 units, the installation here is definitely the easiest by far, despite the somewhat strange move of having to dock the phone into it. The fact that there is no real calibration only adds to this.
WINNER: I’m going to call this one a victory for the GearVR. Remember, we’re just talking setup and OOBE here. The Rift takes second and, in a major upset, pushes the PS4 VR to last! Next up… Gaming!
