
So it was a good run. I had made a resolution that my last big gaming build (circa 12/10… documented here and on YouTube), was to be my last. I had become desk space bound, resolution bound, time bound and frankly wasn’t gaming much any more. Most of my time was spent on phones and tablets or on corporate laptops connected to giant clouds of converged infrastructure or white box servers (see various employer focused postings). Well no one believed me (least of all the better half) and it seems everyone was awaiting my inevitable (from their cynical perspective), fall from the wagon. I claimed they would be proven wrong and I would persevere! And for exactly 1 year, 9 months and 14 days persevere I did!.
Today, 9/24/12, marks the day I chose a warm plate of crow over staying strong. What finally did it? Which technological breakthrough lured me back to irresponsible spending? Quantum state computing? Holographic memory? Ivy Bridge? NO! No… in the end it was the humble GTX680. So with no further ado… GTX680 adventure!
First, out with the old:

Ah… GTX580s… It seems like just yesterday when you were newly arrived! You gave me heat. You gave me noise. You gave me power bills. And you gave me insufficient framerates in Metro 2033 5040×1050 3D surround! You will be missed my friends! This is also a good time to just show some Lian-Li PC-A77F love; a case that is such a joy to work in it almost makes upgrades worth it just for the opportunity to open it up… Almost. So anyhow, now you see them!

With the 580s stripped out in record time thanks to the mighty Lian-Li, it was off to eBay for those suckers! Next up… In with the new!!! But first… A tangent. Because one tackle one complex, expensive and potentially annoying project, when you can tackle two! Onward to project “monitor arm”!
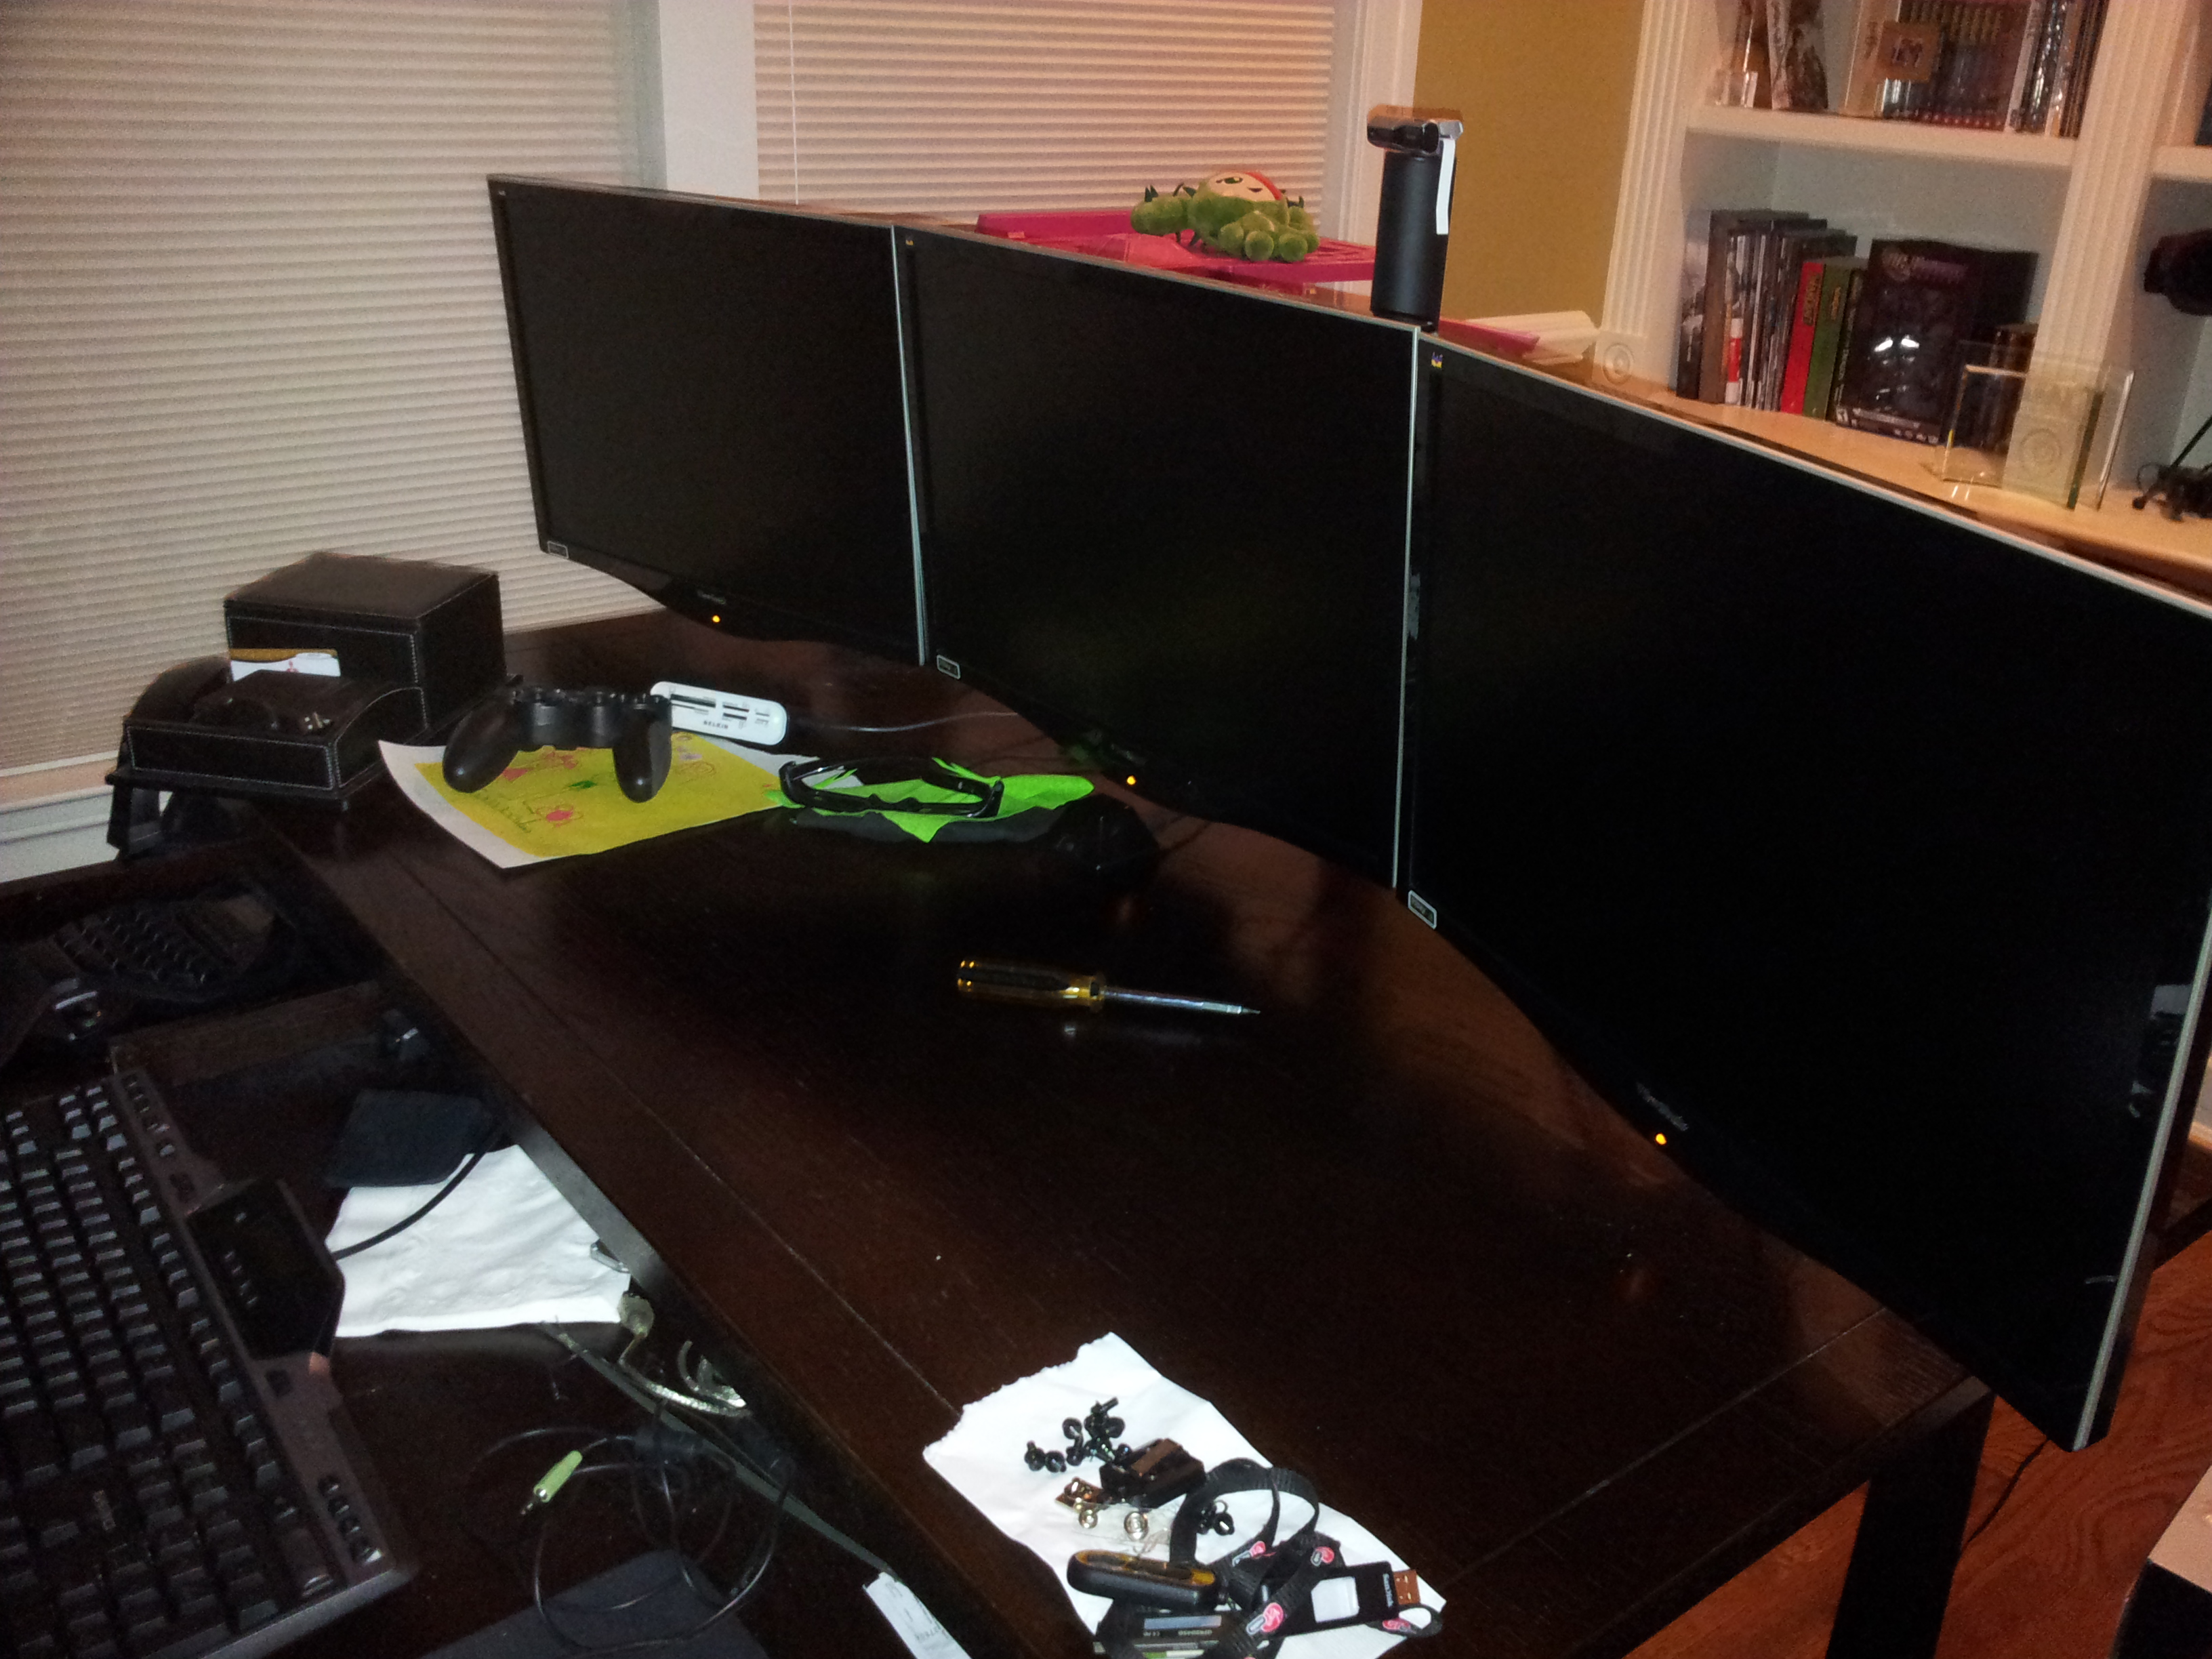
I know that this Siig triple monitor mount isn’t the best. I also know that better rigs can be found online. I am ashamed, but not too proud, to admit that three overriding urges guide most of my purchases; impulsiveness, laziness and impatience. It’s an odd cocktail of dysfunction that ultimately manifests itself in me buying lots of stuff from Micro Center. Basically, if its in stock at Micro Center in PA, thats probably the part I’m buying (occasional flirtations with Newegg and Amazon notwithstanding). I pretend that I’m helping the local economy in a meaningful way to assuage my guilty conscience over not being purely “over” brick and mortar.
So the Siig (on sale for $159), it is! It’s not going to win any packaging awards, but then again, it’s a monitor arm!

Step one in project monitor arm… Remove the base stands from the trusty trio of Viewsonic VX2268WM’s (PC parts have the best names!). This part was a slight pain, but I manged to get the plastic screw covers off without breaking a tab, so was very happy!

With the stands cleanly off, it was time to build the old Siig. This was pretty straightforward as the part comes largely assembled. You basically attach the clamp to the vertical pole, the horizontal bar to the vertical pole, and then the monitors to the horizontal bar. To keep things tight, Siig included the mother of all allen wrenches. I call it “ole torquey”

I was a bit worried about the main clamp because the shape of the desk prevented me from either making it super tight (the clips would bump the table), or pushing it all the way in (in order to tighten). I erred on having it as far in as possible and tightening it as much as I could given the inability to “turn the screws” fully. End result seems stale. If they come crashing down Ill update the blog with a sad tale…

The finished product ended up being pretty stable, looking decent enough, and like most PC projects turning out maybe just a bit underwhelming. Such is the hobby!

With the shiny new tri-arm setup squared away it was time to roll out the red carpet and introduce the new guest(s) of honor!

Gigabyte has been my “go to” ODM lately. I’ve decided that I do like their stuff. Their english translation is abysmal, which adds charm, and their parts work well and are solid. Their packaging? Not so much:
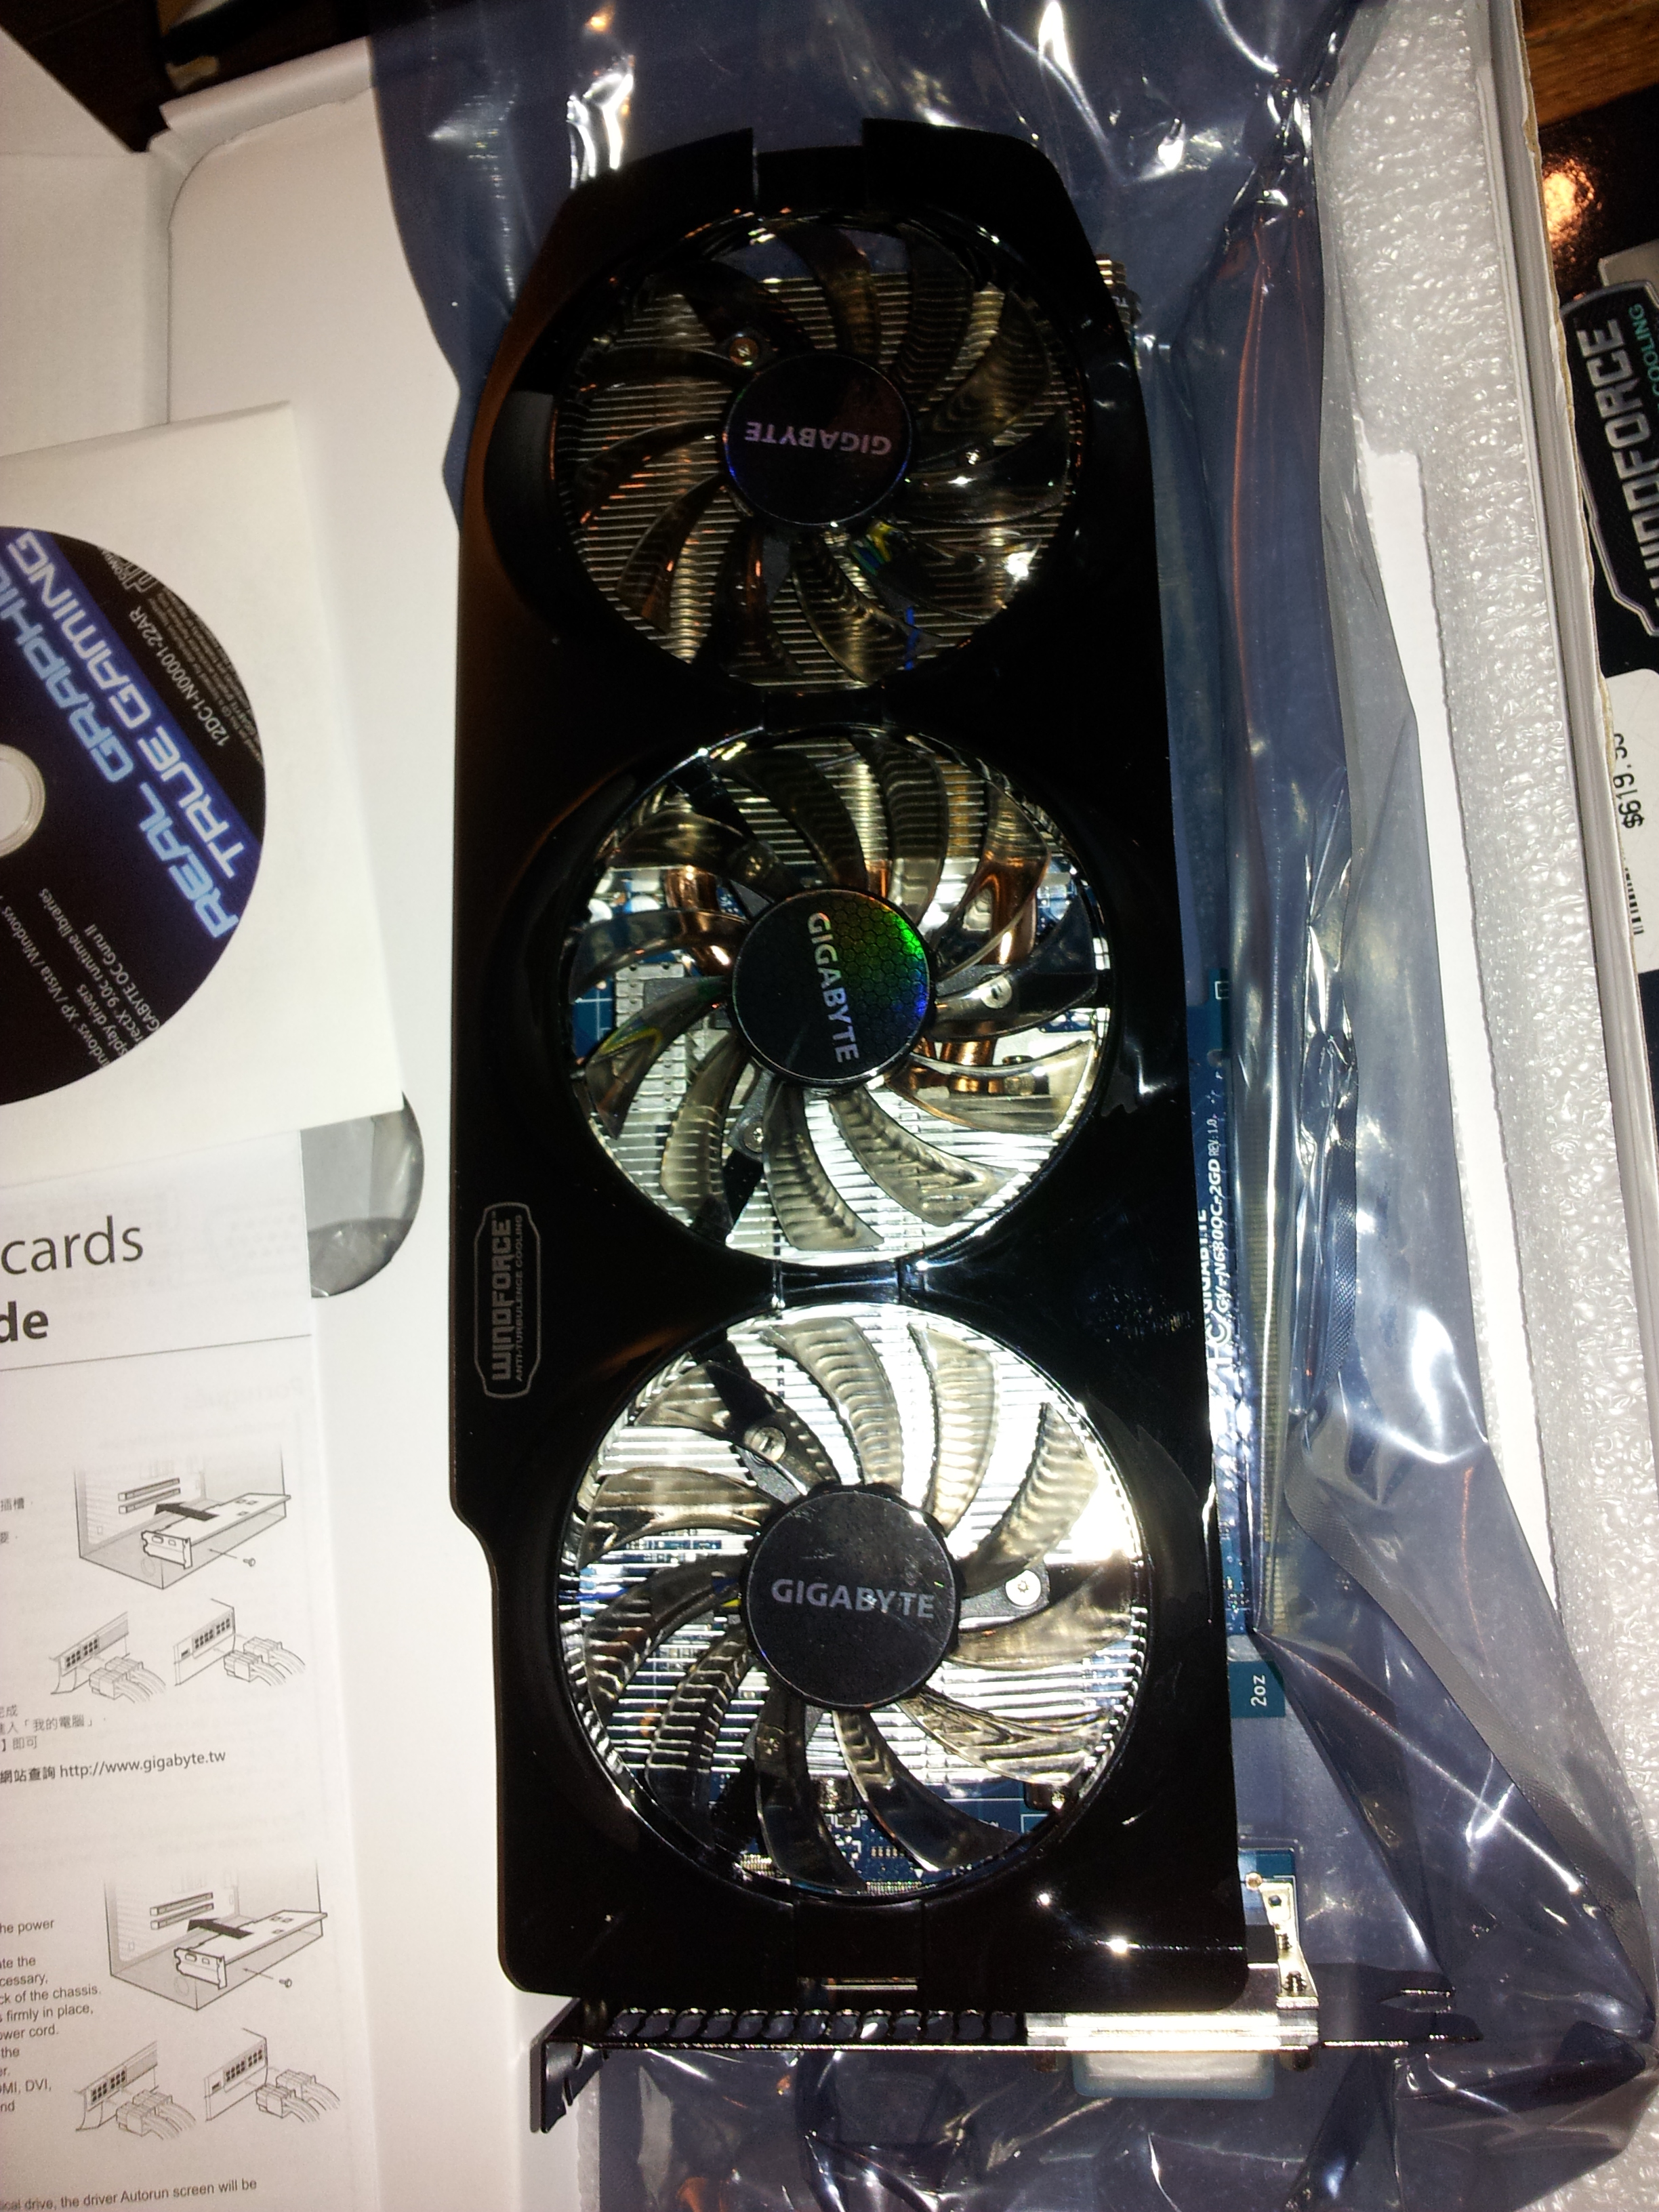
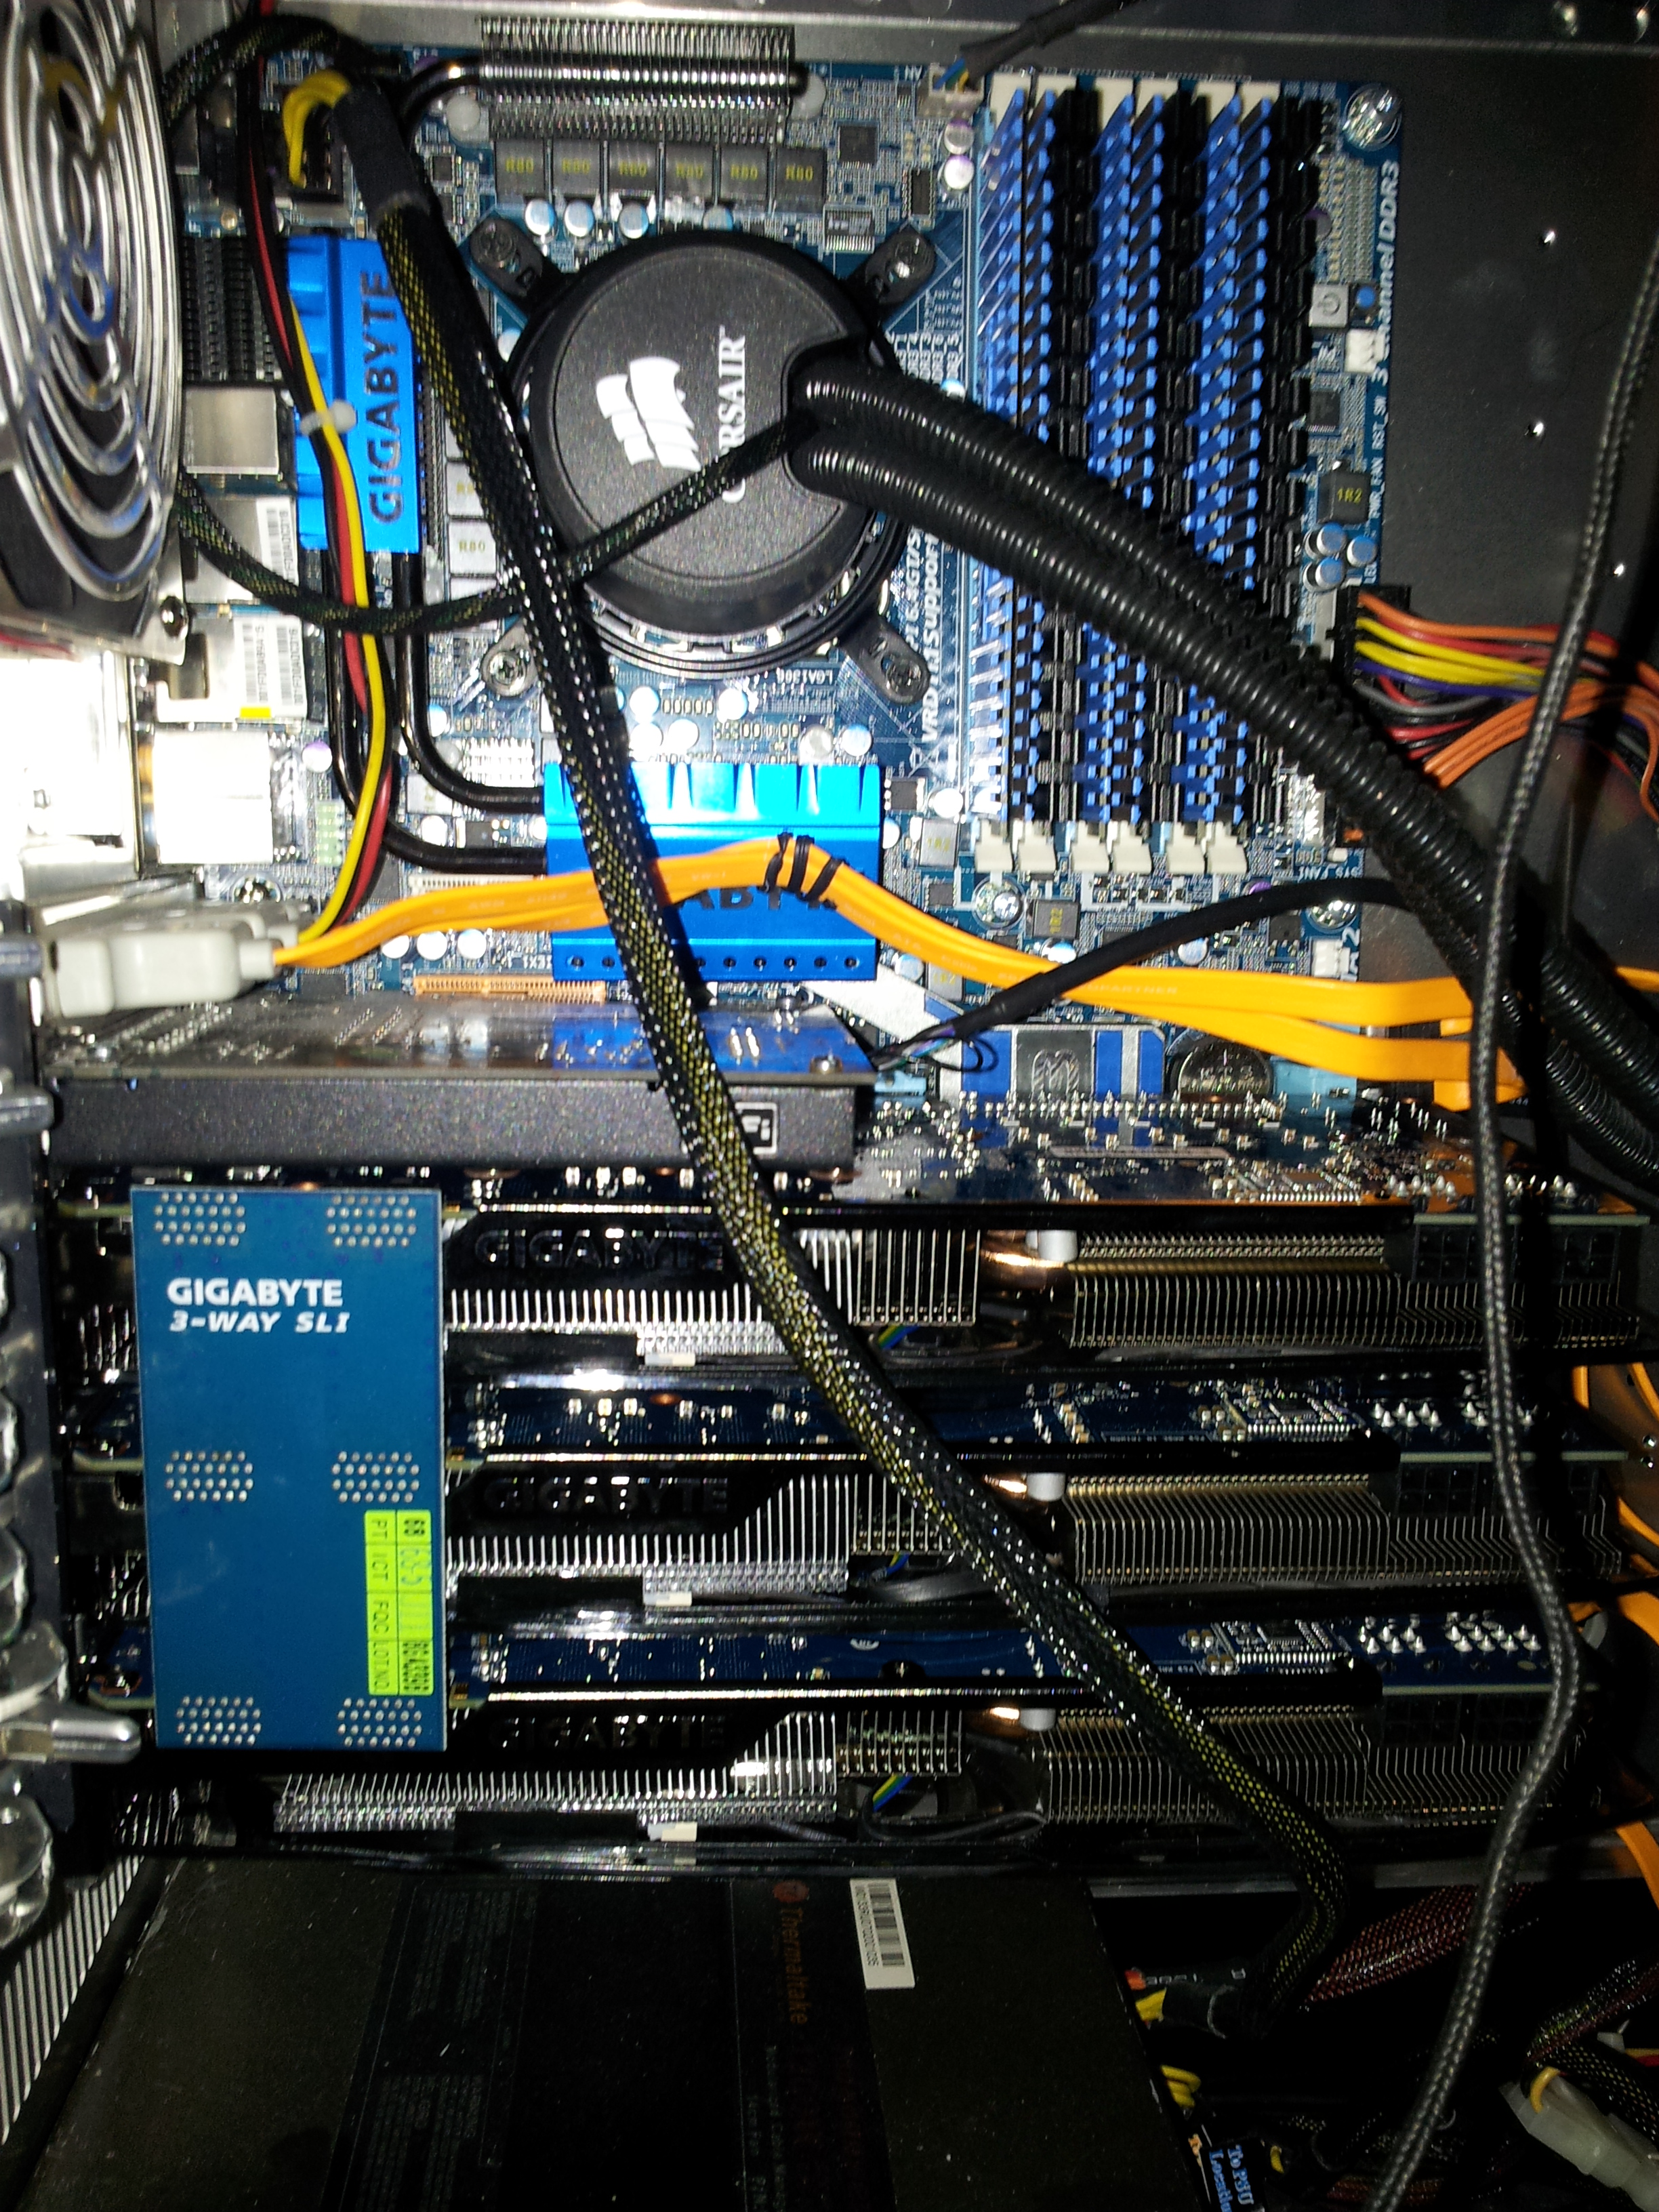
The physical install was painless and brainless. These are a direct part for part swap with the 580s. Same power connectors, slot requirements and basic size. See?
So that about does it for part I. Part II will be some notes on the software install and then onward to… Benchmark testing! Because what is a gaming PC good for, really, other than running benches! 😉 Until next time!
