
Last entry we got to the point where we had swapped out one of the 1TB Toshiba 7.2k SATA 2 drives for a Western Digital Red 2TB SATA3 drive and were ready to power on the server to see what would happen. My assumption based on past experience was that the PERC H710 would complain (a lot) at best, or outright block the disk at worst. Here is how things turned out:
Initial boot actually seemed to go well with no complaints evident at all! Front lights were all green and nothing was showing in the PERC logs, nor were there any warning comments being thrown. Inspired, I went ahead and replaced the other 5 drives, then prepared to do a real configuration of the RAID card and see if the behavior stayed consistent. This was my first time configuring a PERC and I was pleasantly surprised by how intuitive the config went. I captured it on video rather then taking screen shots:
Really a great outcome! 9.2TB RAID 5 volume online in no time at all with no warnings and solid green lights. The addition of the T620 into the home office necessitated a full redesign of equipment placement due to space returns. I initially considered keeping my 4 slimline white box hosts, but after seeing how cool and quiet the T620 was at first boot, I made the decision to stick with a nested ESX/one-box configuration. This decision went a long way towards reducing the clutter and made for a pretty decent final layout. Here is a shot of the full set of lab kit tidily stacked together awaiting installation:
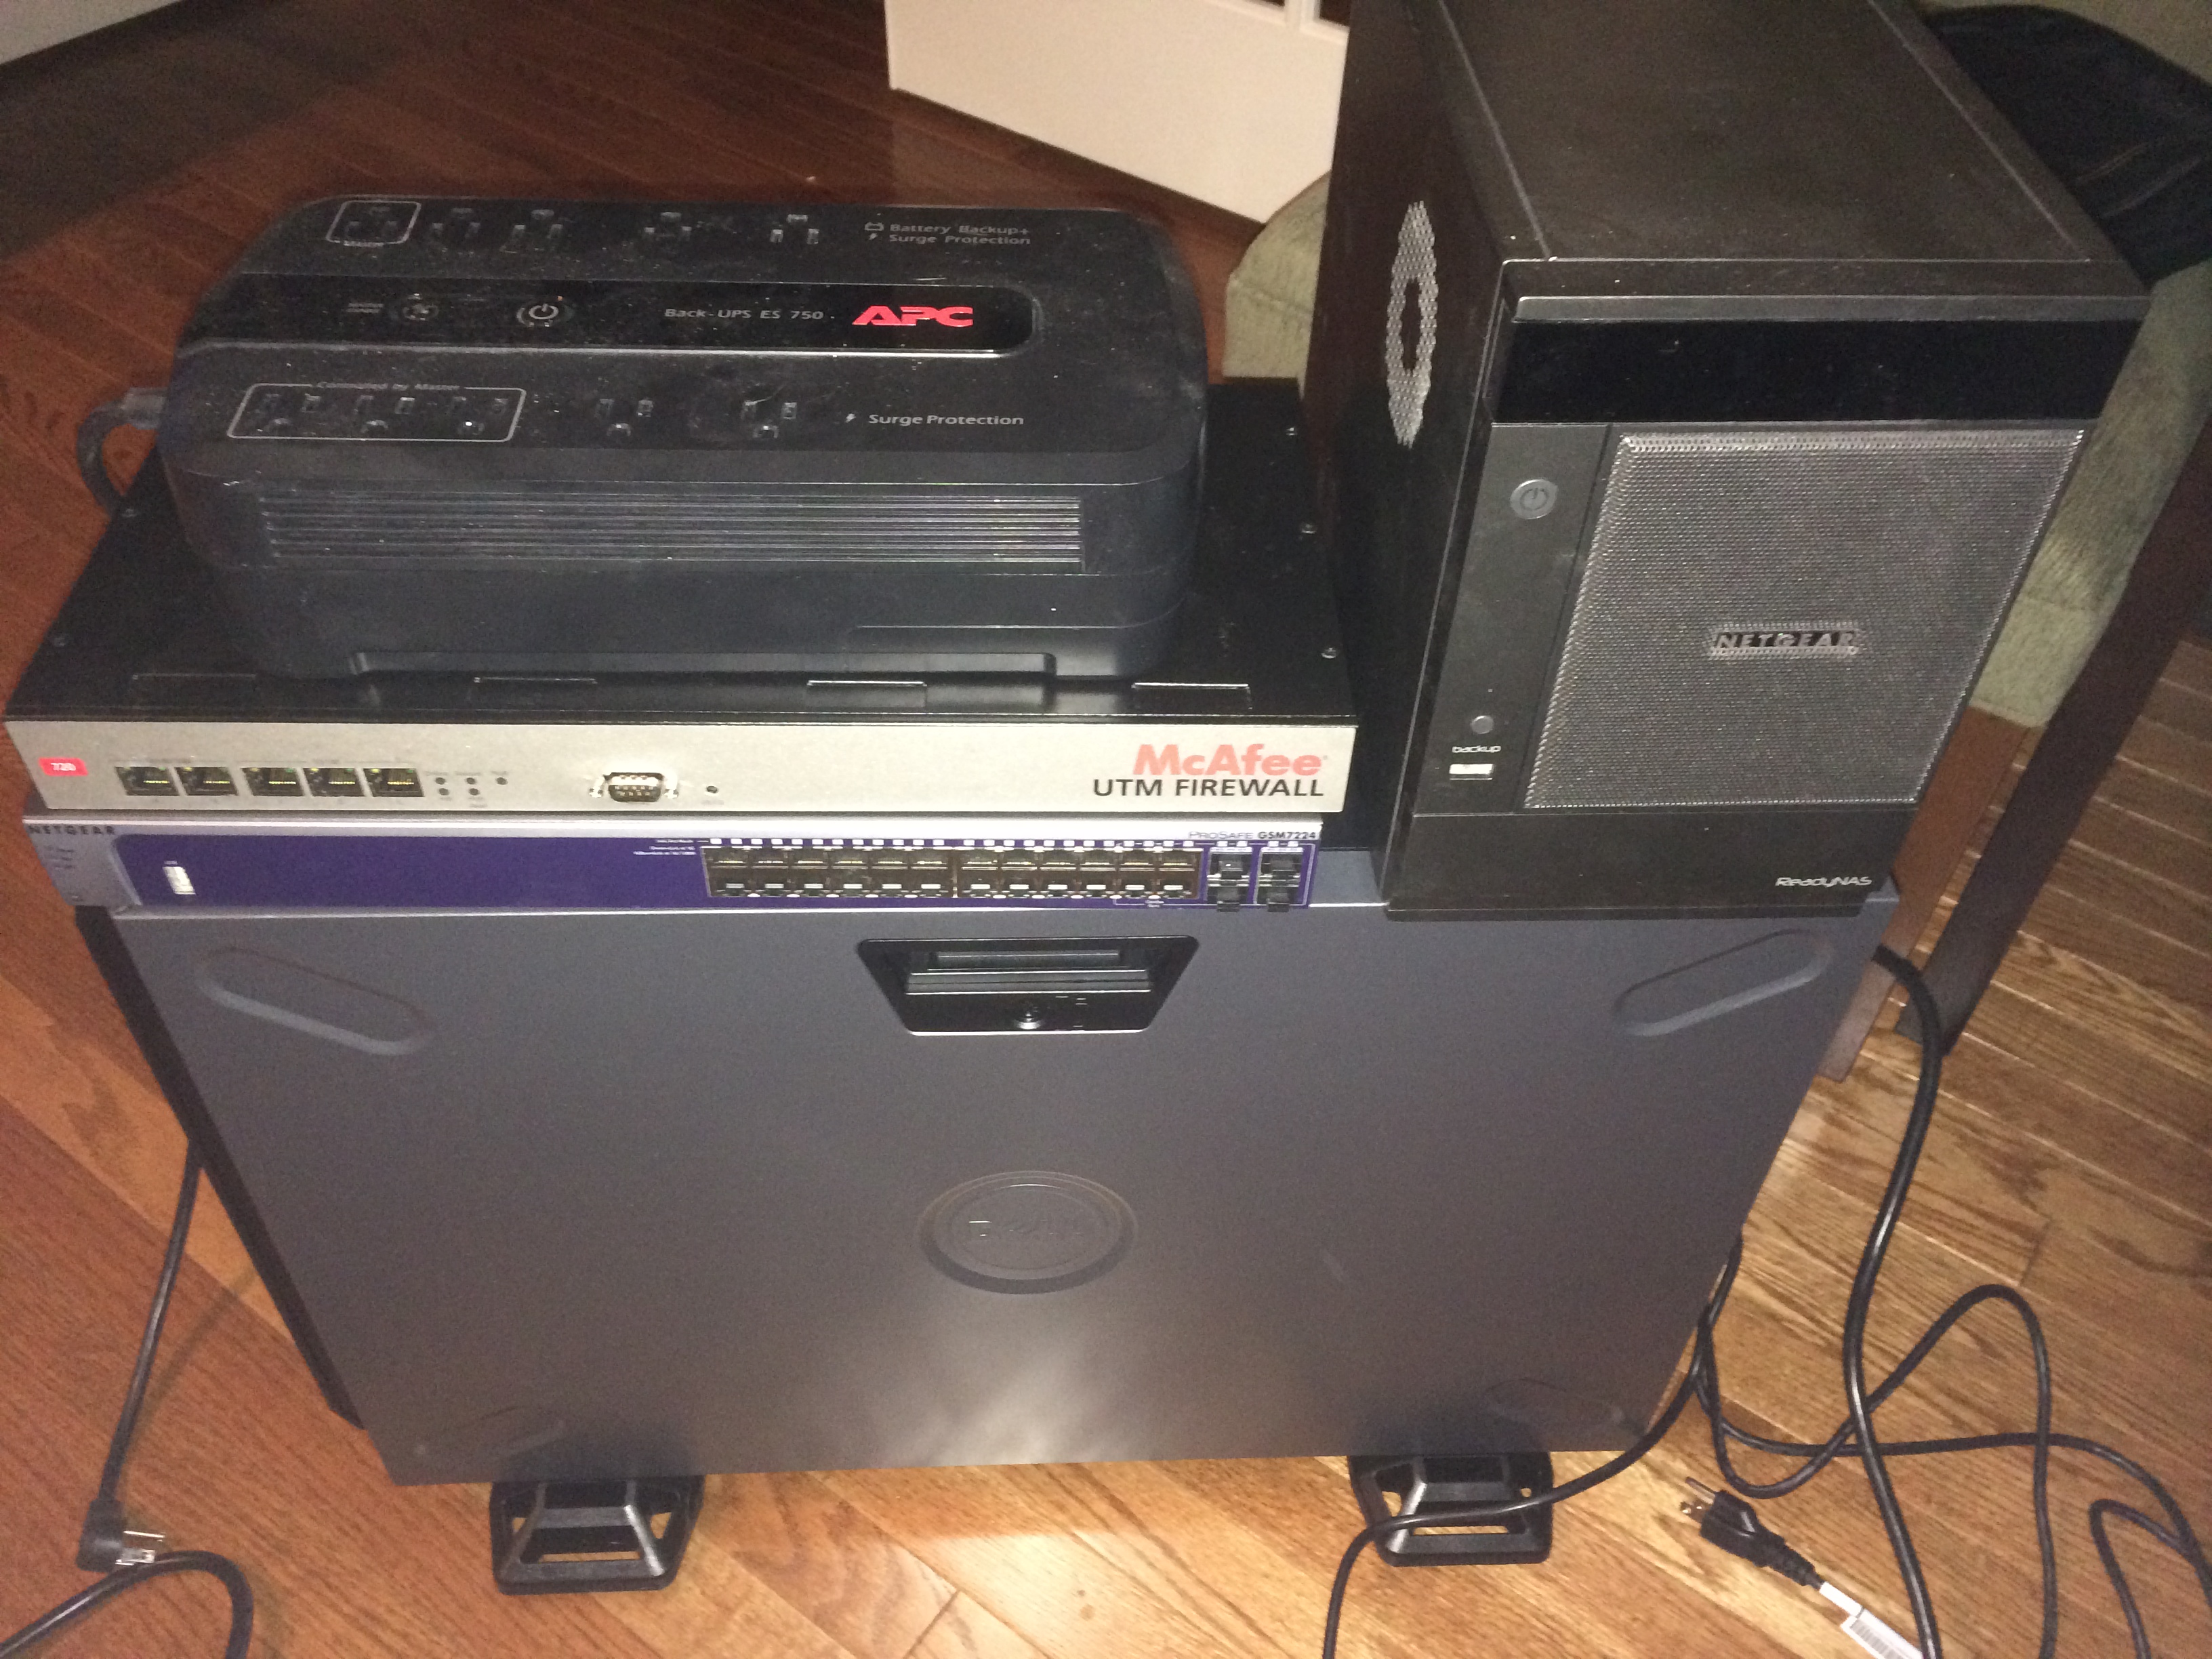
And here is a shot of the server nestled under the wife’s desk along with the fully cabled switch, firewall, NAS and UPS:
At this point, with all of the equipment fully installed and in-place, I was satisfied with the room layout and so I decided to go ahead and explore the T620 BIOS as well as setup the iDRAC 7 in preparation for the OS install. Rather than do a video, I took screenshots for these so I could more easily insert some written commentary. First up lets have a look at the initial power on screens. On power-up we are greeted with an update letting us know that the server is “Configuring Memory”. I assume that this is just the usual memory count, quick parity check and initialization as even with 192GB of ECC RAM it passes fairly quickly (10 seconds or so):

With the memory subsystem initialized, next up is the iDRAC board. Extremely cool that the iDRAC is initialized as early as possible during POST (very useful for an out-of-band management lights out board!):

Next up a nicely comprehensive report on CPU and memory configuration. I really like how verbose this is including a voltage report for the RAM. In addition here you can see your pre-OS options – F2 for System Setup, F10 to invoke the enormously cool LifeCycle Controller capabilities which are a part of the iDRAC 7 and allow you to do full bare metal setup (including BIOS settings) remotely via the iDRAC, F11 to bring up the BIOS boot menu and prompt for boot device selection and finally F12 to invoke PXE Boot via the NIC ROM. Speaking of which the last bit of info we can see here is the PXE boot agents header as well as the SATA AHCI BIOS header:

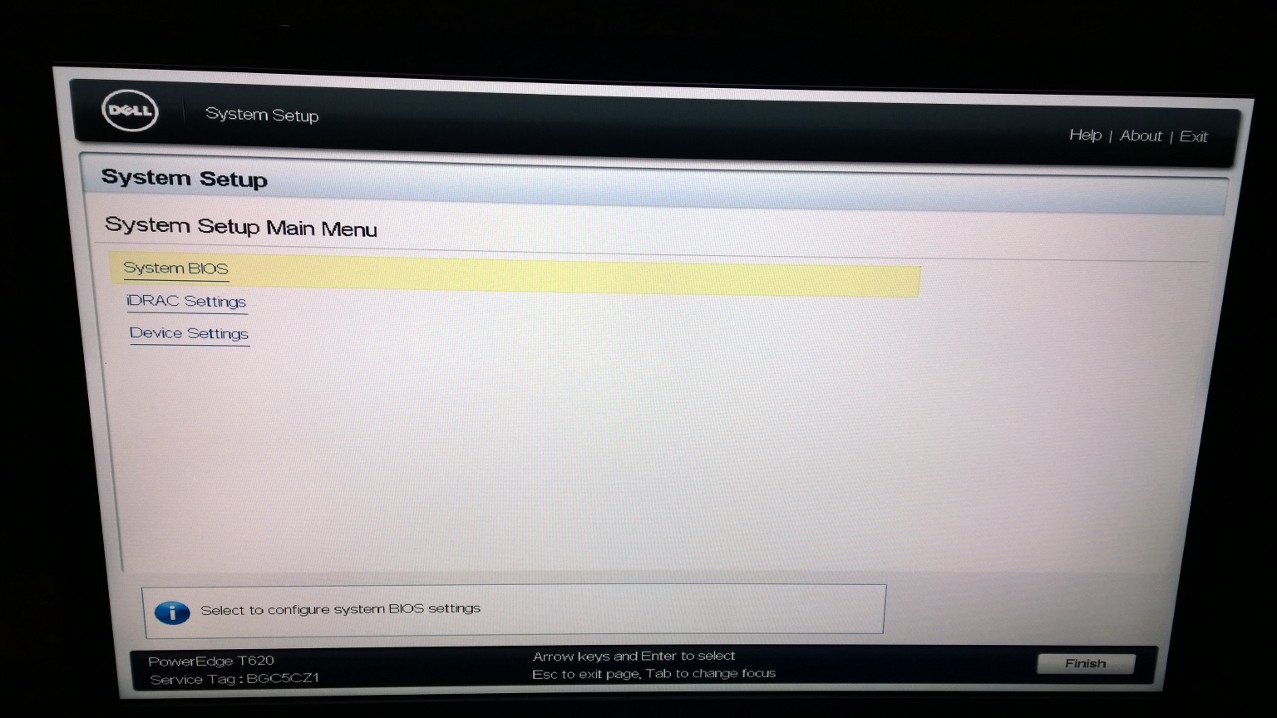
For this boot I selected “System Setup” which, after about 15 seconds thinking or so, launches the GUI based (with mouse support) main setup menu from which BIOS, iDRAC and Device settings can be reviewed and configured:

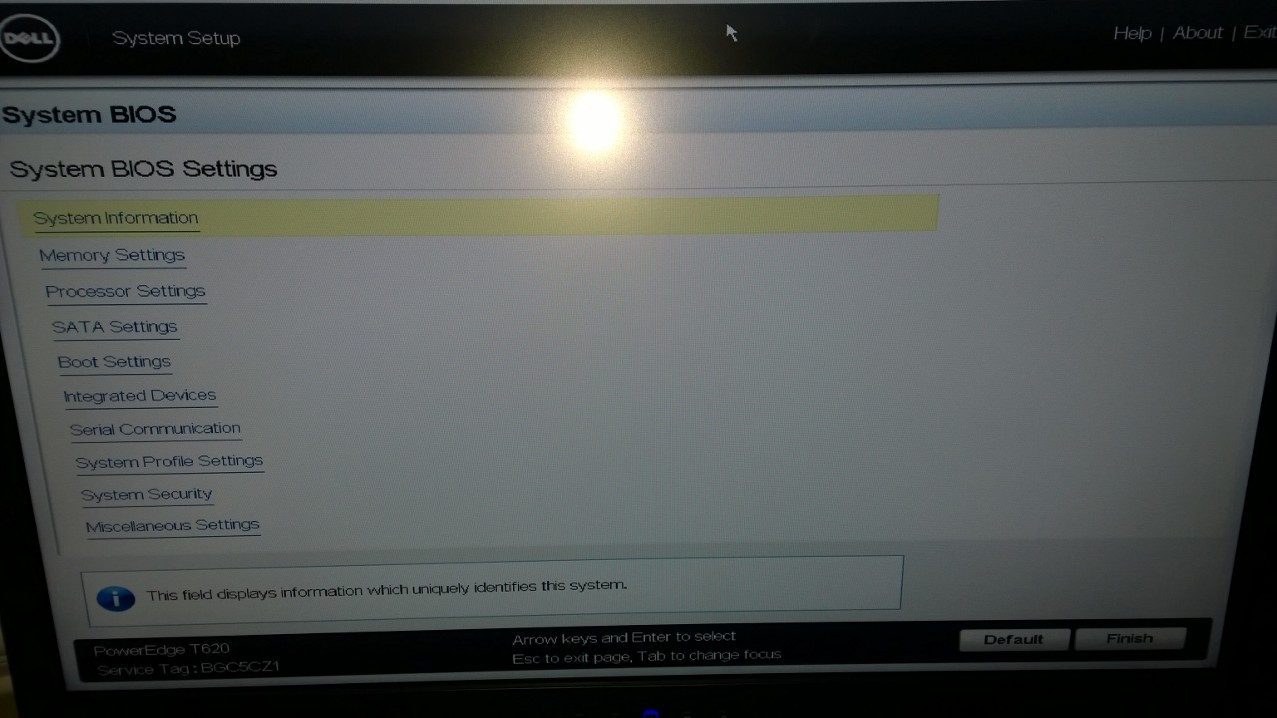
Starting off with the System BIOS we can see a fairly intuitive list of settings groups – System Information, Memory and Processor, SATA, Boot and Integrated Devices, Serial, System Profile, Security and last but not least Miscellaneous:

Let’s take a deeper look at a few of these starting with the Integrated Devices Settings… Most of these are self-explanatory (USB, NIC, etc), but a few are worth some additional discussion. I/OAT DMA Engine is an Intel I/O Acceleration Technology which is part of the Intel Virtualization Enablement technologies and provides increased network interface throughput and efficiency by allowing direct chipset control of the NIC. The I/OAT DMA setting enables this capability allowing direct memory access from the NIC via the chipset. Of course in order for this to work, the host OS has to be aware of it. The default setting is disabled and, considering the current VMware support statement for this capability, I opted to leave it that way. SR IOV or, “Single Root IO Virtualization” is another peripheral virtualization technology, this time controlled by the PCI SIG, which allows a single PCI device to appear as multiple devices. Examples of where this technology has been commonly implemented is in advanced 10Gb/s adapters allowing them to virtualize themselves and present multiple discrete interfaces from a single physical to the host OS. Once again the default here is disabled and I opted to leave it that way. Last but not least, Memory Mapped I/O Above 4GB is pretty standard stuff for 64 bit PCI systems and allows, as it implies, 64 bit PCI devices to map IO to 64 bit memory ranges (above 4GB):

The next interesting grouping is the System Profile Settings. Lot’s of great goodies in here including some of the usual suspects like memory voltage, frequency and turbo boost tuning. The most interesting aspect, however, is that the top line allows for quick profile setting via template using some pre-defined defaults. In my case I am most concerned with power and thermal efficiency so I set my configuration to “Performance Per Watt”. It’s great how much granularity is provided for control of CPU and memory power efficiency:

Next up are the Security Settings. Here we can set the basic system access and configuration passwords as well as control the Trusted Platform Module (TPM) state and settings:

Leaving most settings at either their default or “power efficient” values I left the System BIOS Settings behind and moved on to the iDRAC configuration. Up top you get a summary of both the settings and firmware versions as well as the option to dive deeper on the Summary, Event Log, Network settings, Alert status, Front Panel Security settings, VirtualMedia settings, vFlash Mode, LifeCycle Controller, System Location, User Accounts, Power and Thermal settings:

The System Summary section gives you an opportunity to set some basic asset information including Data Center location Name, rack position, etc. Super handy if you are centrally managing hundreds (or thousands) of iDRACs across a global footprint (cue salivating Dell reps!). For a single server home lab setup it isn’t super relevant, but I set some info down just for fun and testing:

We also have an opportunity to create iDRAC users and assign roles. This is critical as these will be the credentials you will use to access the iDRAC remotely via its web portal or other remote interfaces. Privilege levels are Administrator (full control), Operator (limited task management) and User (restricted access):

The System Event Log menu, as expected, provides visibility into the iDRACs log:

As we can see here on a new install the log is pretty sparsely populated!

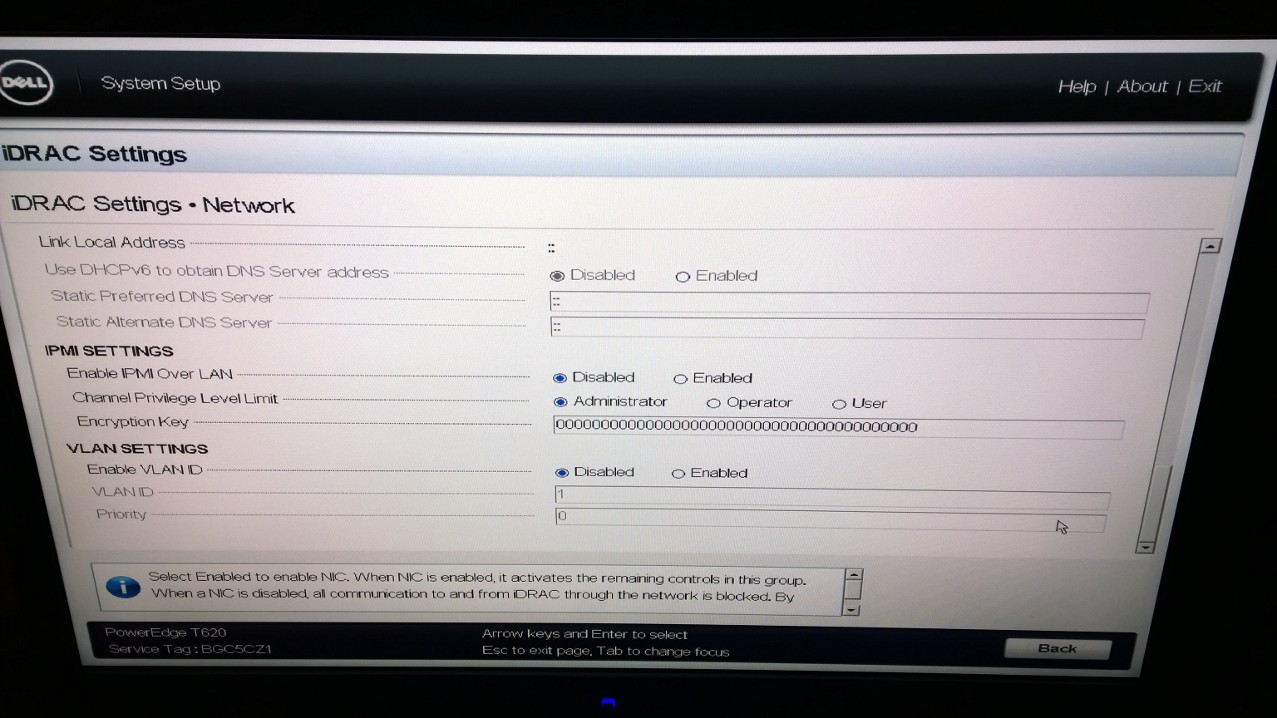
The Network Settings menu is the diametrical opposite of the System Event Log; lots and lots of fun levels to pull here. Up top you can enable network access for the iDRAC and, if you have an Enterprise class board, configure it to use the onboard NIC for access. In addition one of the onboard Ethernet ports can be used as well. The usual Ethernet settings are here along with the option to register the iDRAC board with a DNS:

Of course it is helpful to be able to set a name for something configured to register in DNS and we are able to do that here as well. In addition we can provide a static domain name or allow auto configuration as part of the DNS registration process. We can also do all of the expected IPV4 and IPV6 configuration:
Last up we have two really cool options: IPMI over LAN and VLAN configuration. VLAN configuration of course allows us to configure 802.1Q tagging which is super important for any management device (which in production will almost certainly sit on a management VLAN). IPMI over LAN allows the iDRAC to participate in an Intelligent Platform Management Interface based console implementation:
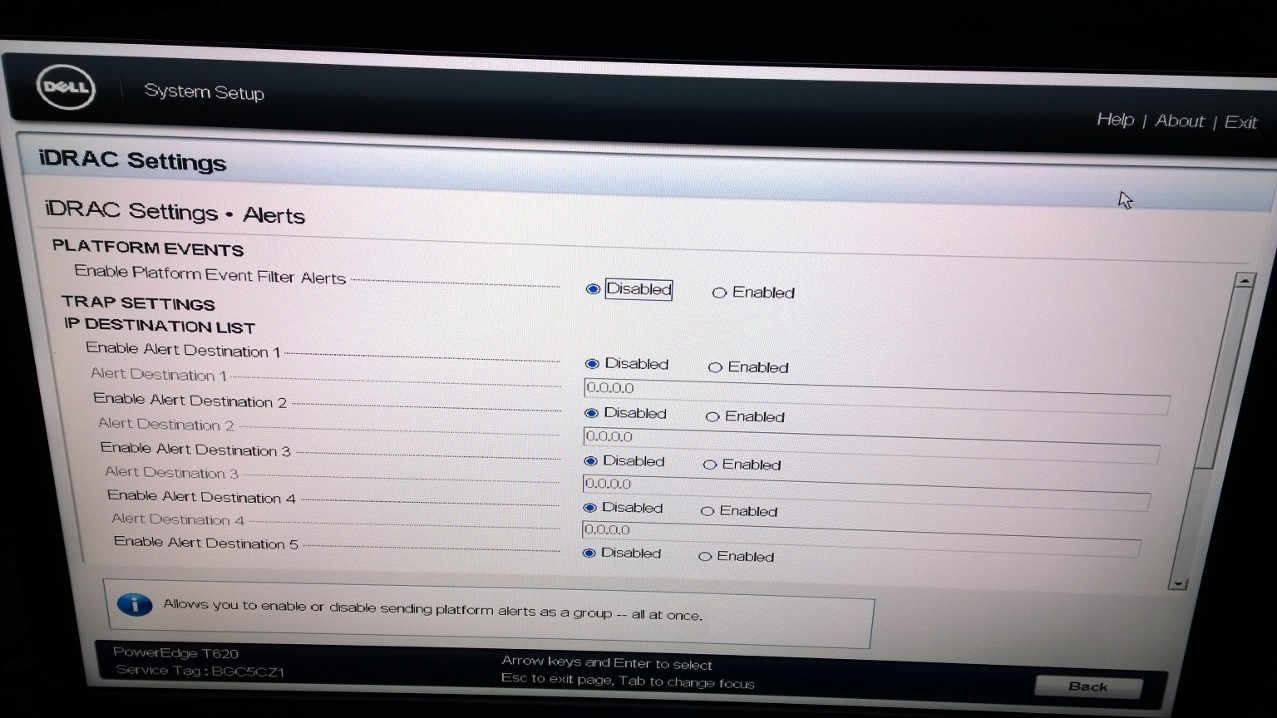
Under Alerts we are able to set SNMP trap destinations for platform events generated by the iDRAC:
Thermal settings allow us to set a thermal profile for the board or control the fan independently if we prefer:

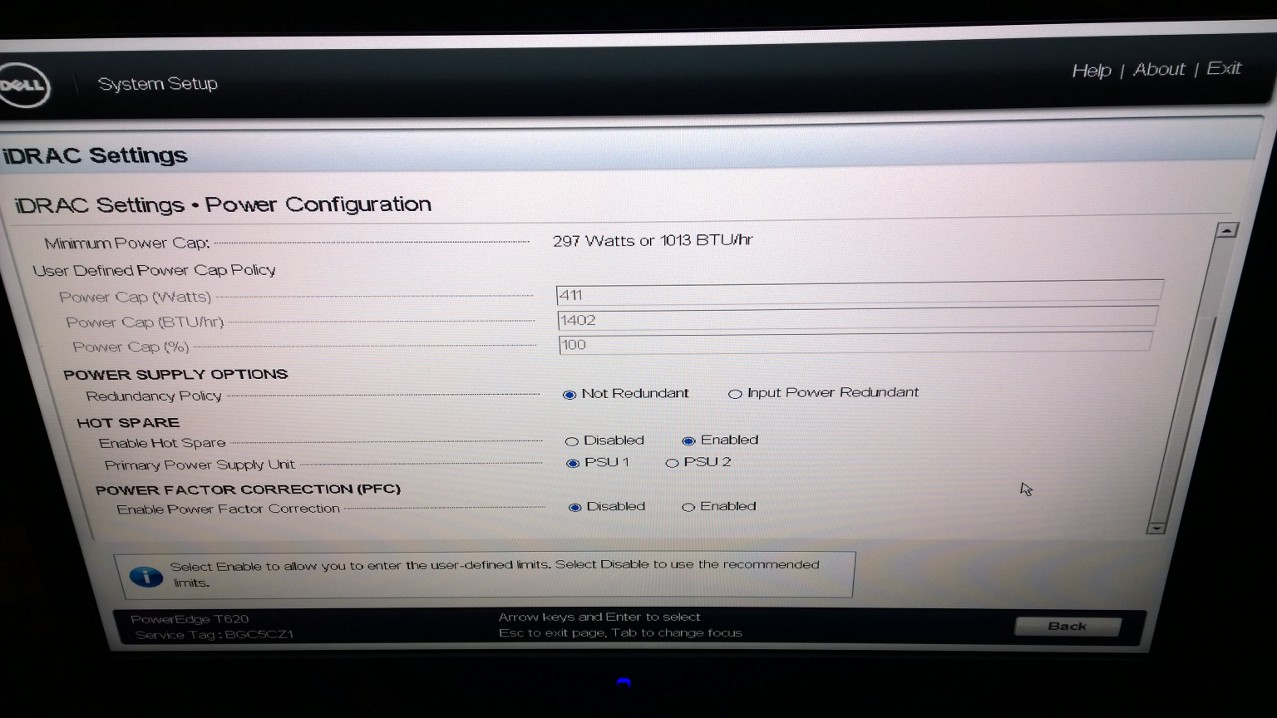
Power Configuration is a really powerful option which provides the capability to set hardware level power capping for the system as well as set the configuration of the redundant PSUs (up to 2). Used in conjunction with Dell OpenManage and vCenter DPM the iDRAC power capping capability can be used to keep server energy consumption at predictable levels and shift resources around as needed when those levels are exceeded in order to maintain the balance. Ultimately this can get as aggressive as choosing to shutdown VMs if needed in order to stay within a “power budget” if architected correctly:

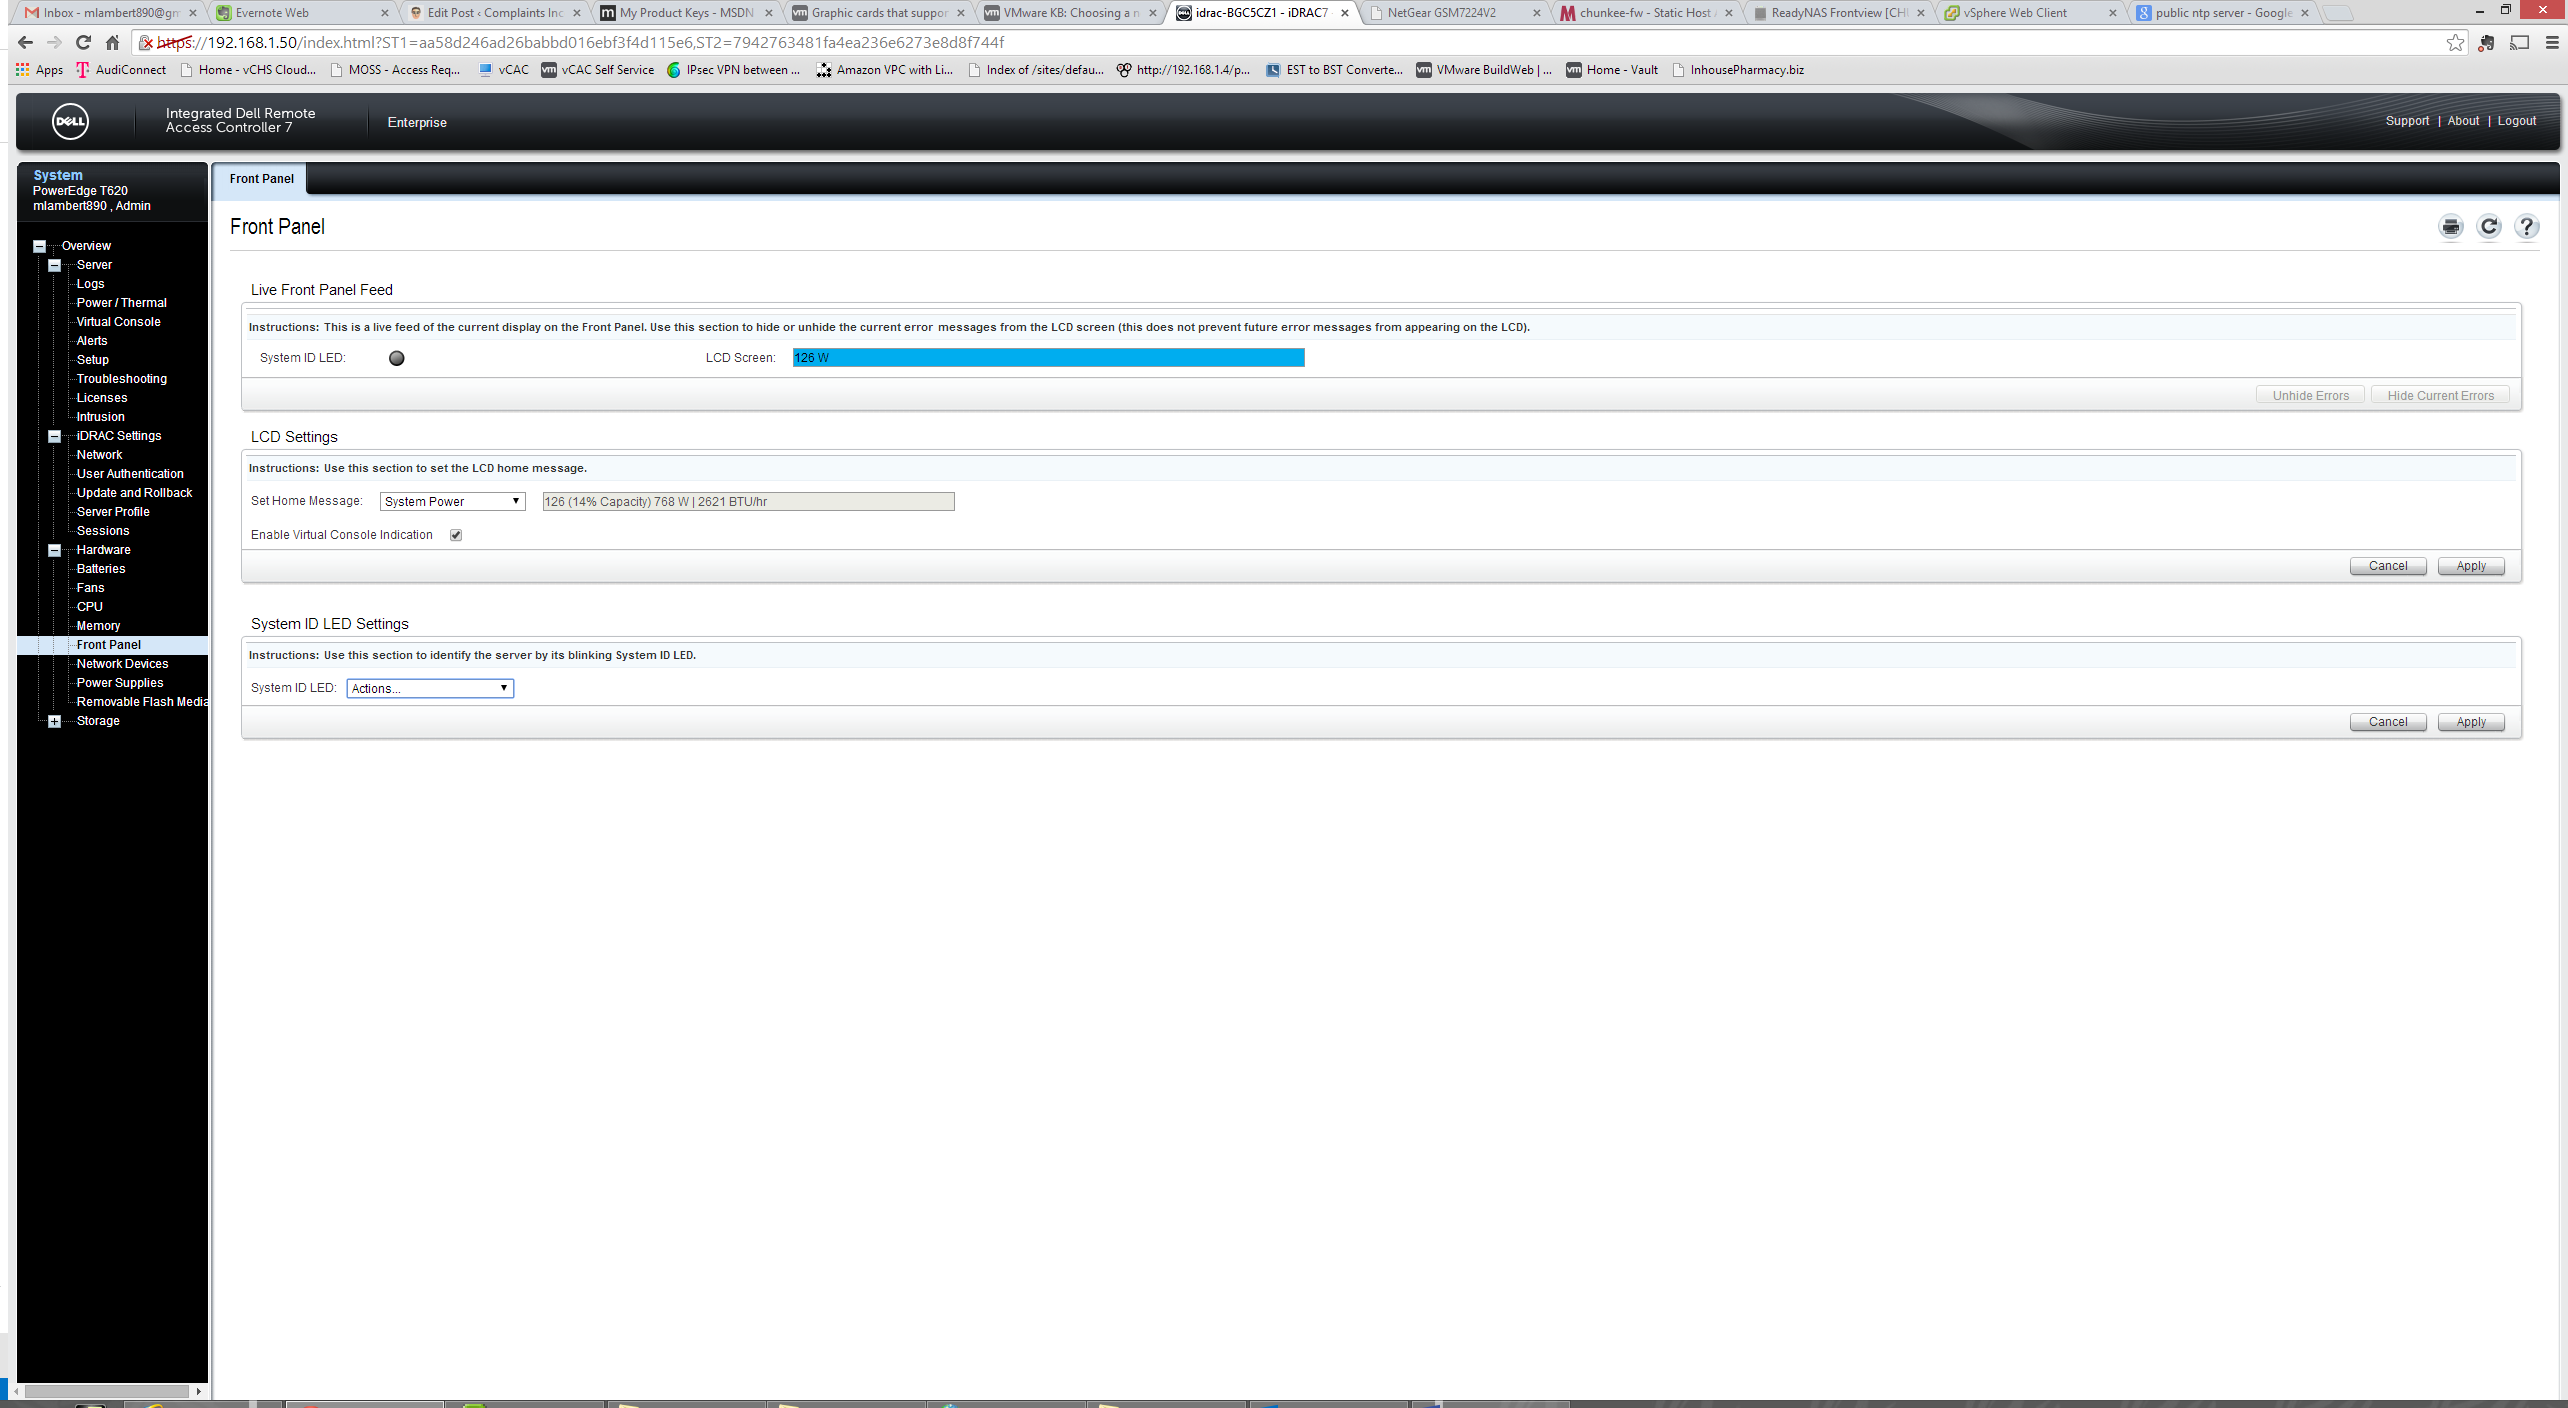
Front Panel Security provides a really rich set of physical security controls for cases where the server is sitting in a real production environment. One neat item is that you can control the message displayed on the front panel LCD:

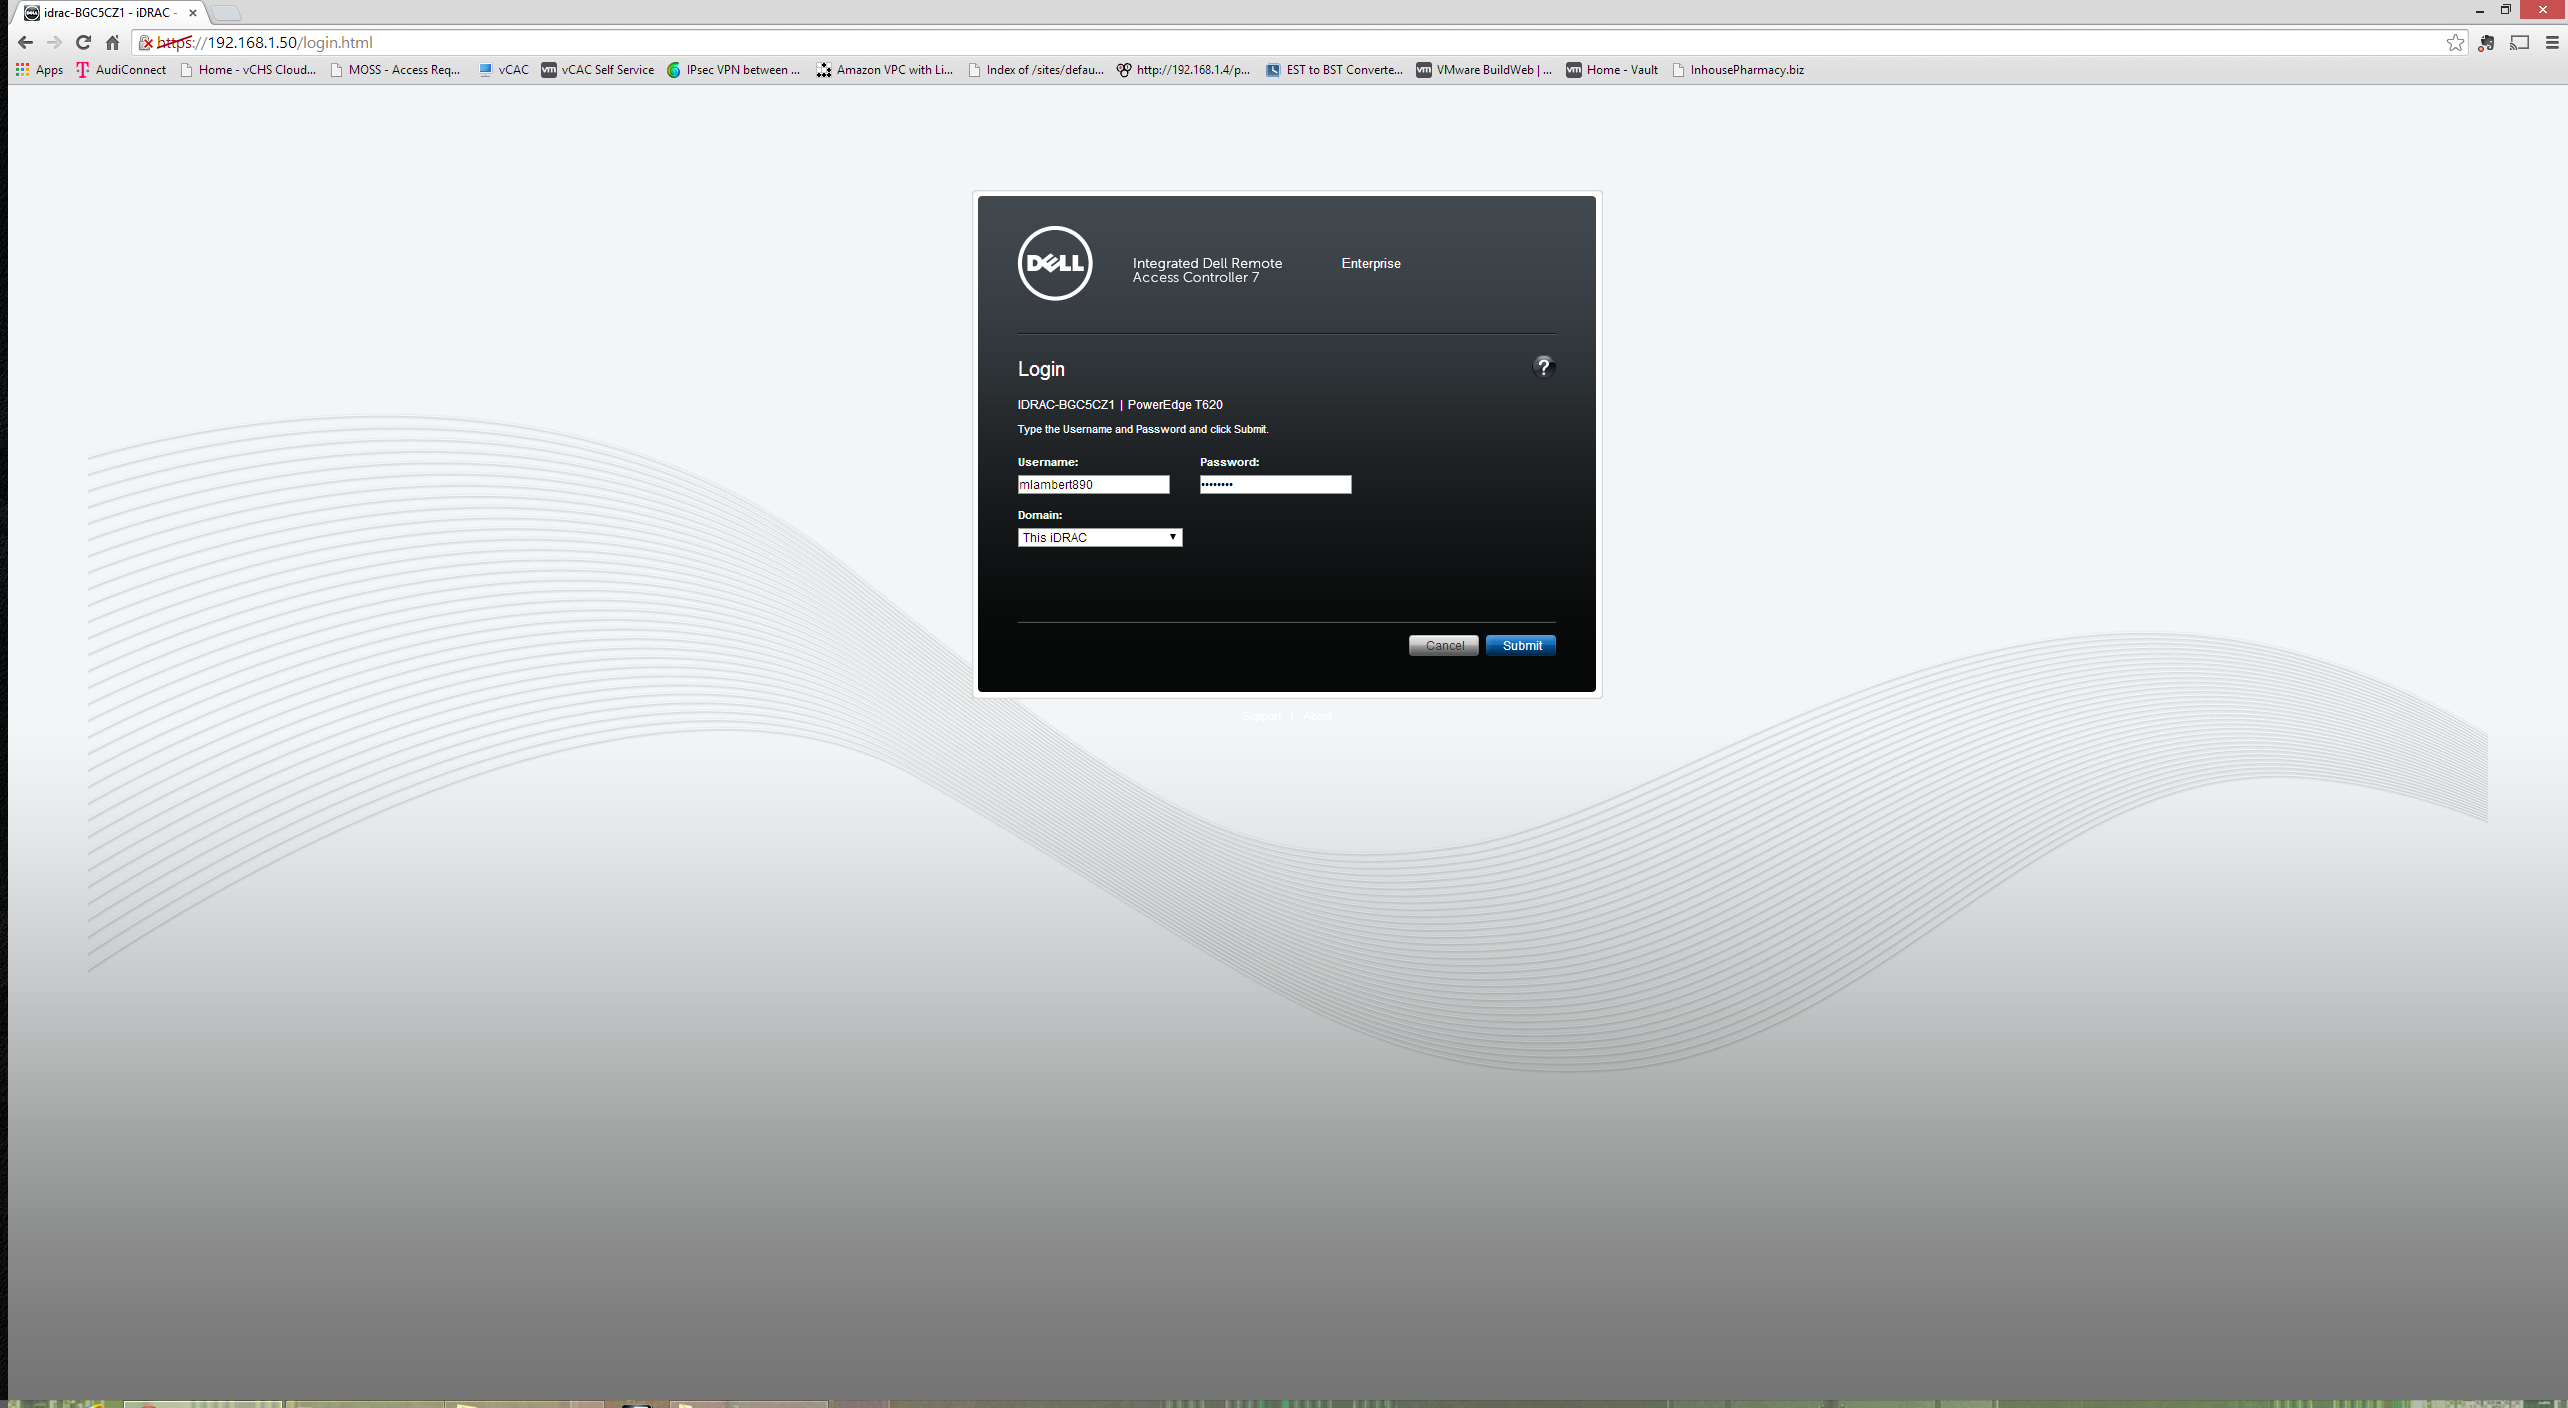
With the iDRAC all configured and the network interface online and cabled up, we can now access the excellent web based interface. Login page is clean and quite slick:

System Summary provides huge detail at a glance as well as hyperlinks for deeper dive info for individual subsystems. You can also see the thumbnail snapshot of the virtual console here. The virtual console is absolutely a killer feature of the iDRAC and provides hardware backed remote console support outside of any OS allowing for bare metal configuration of management even headless:

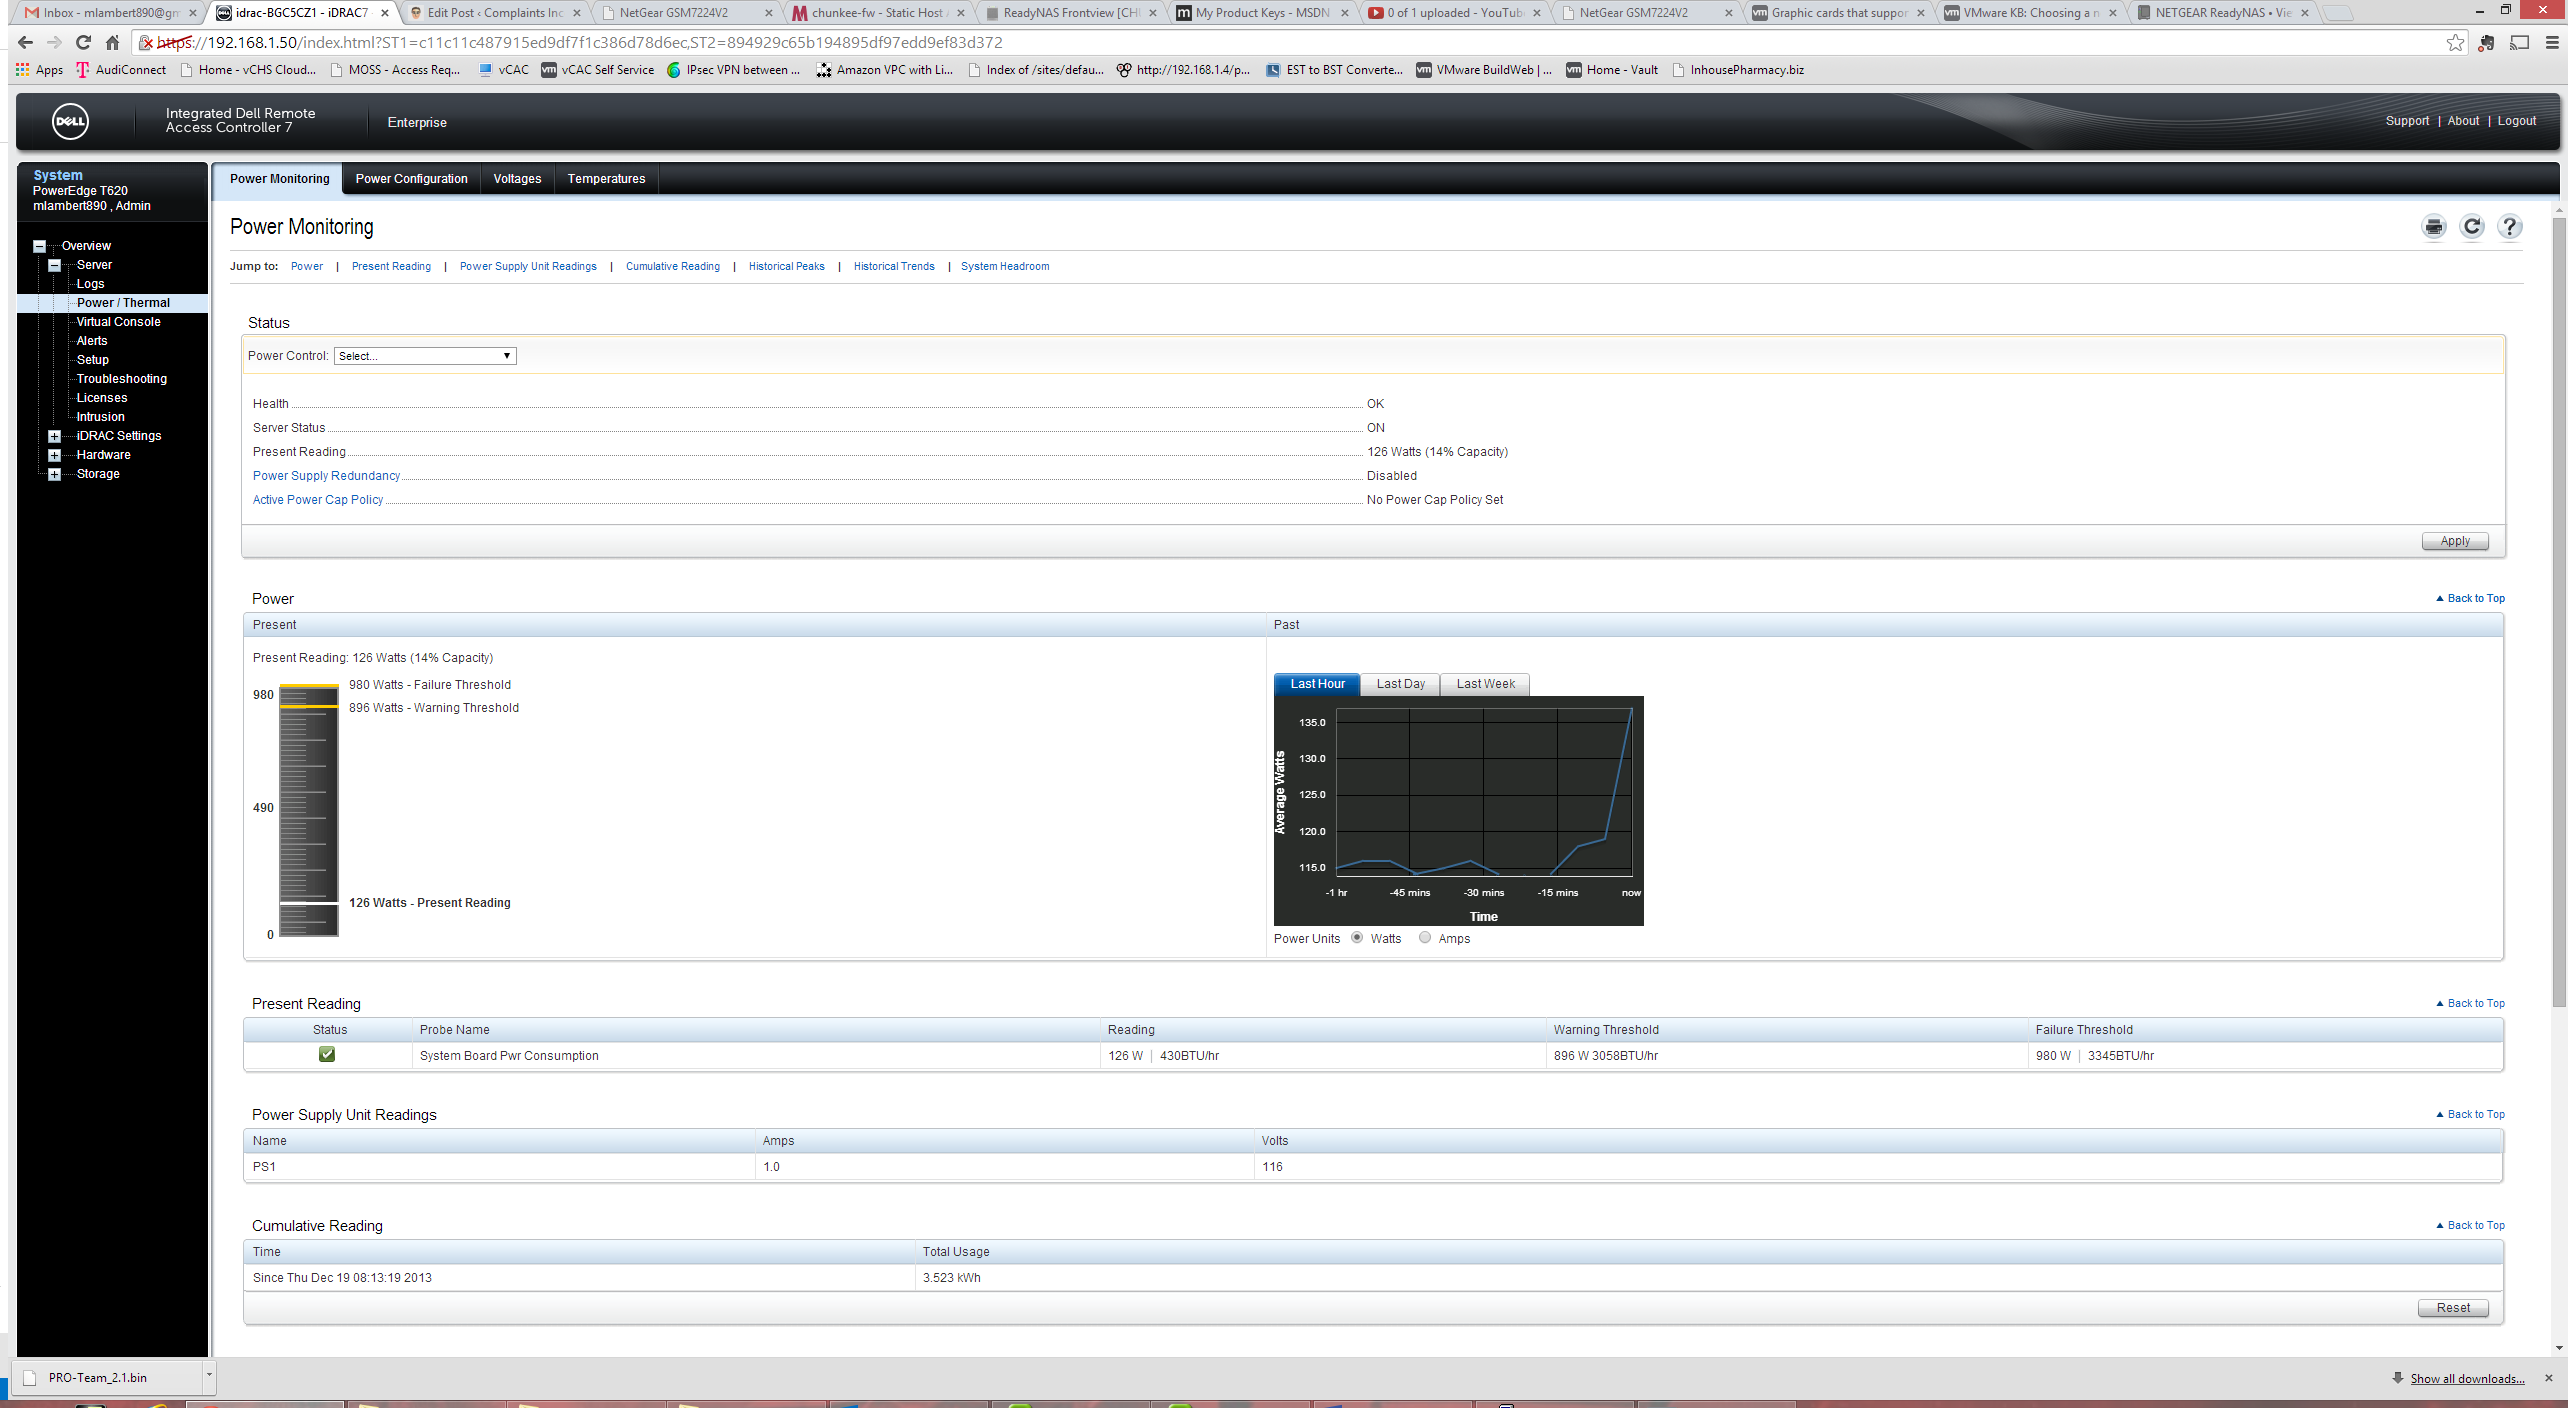
Fantastic view of power consumption both in real time and historically:
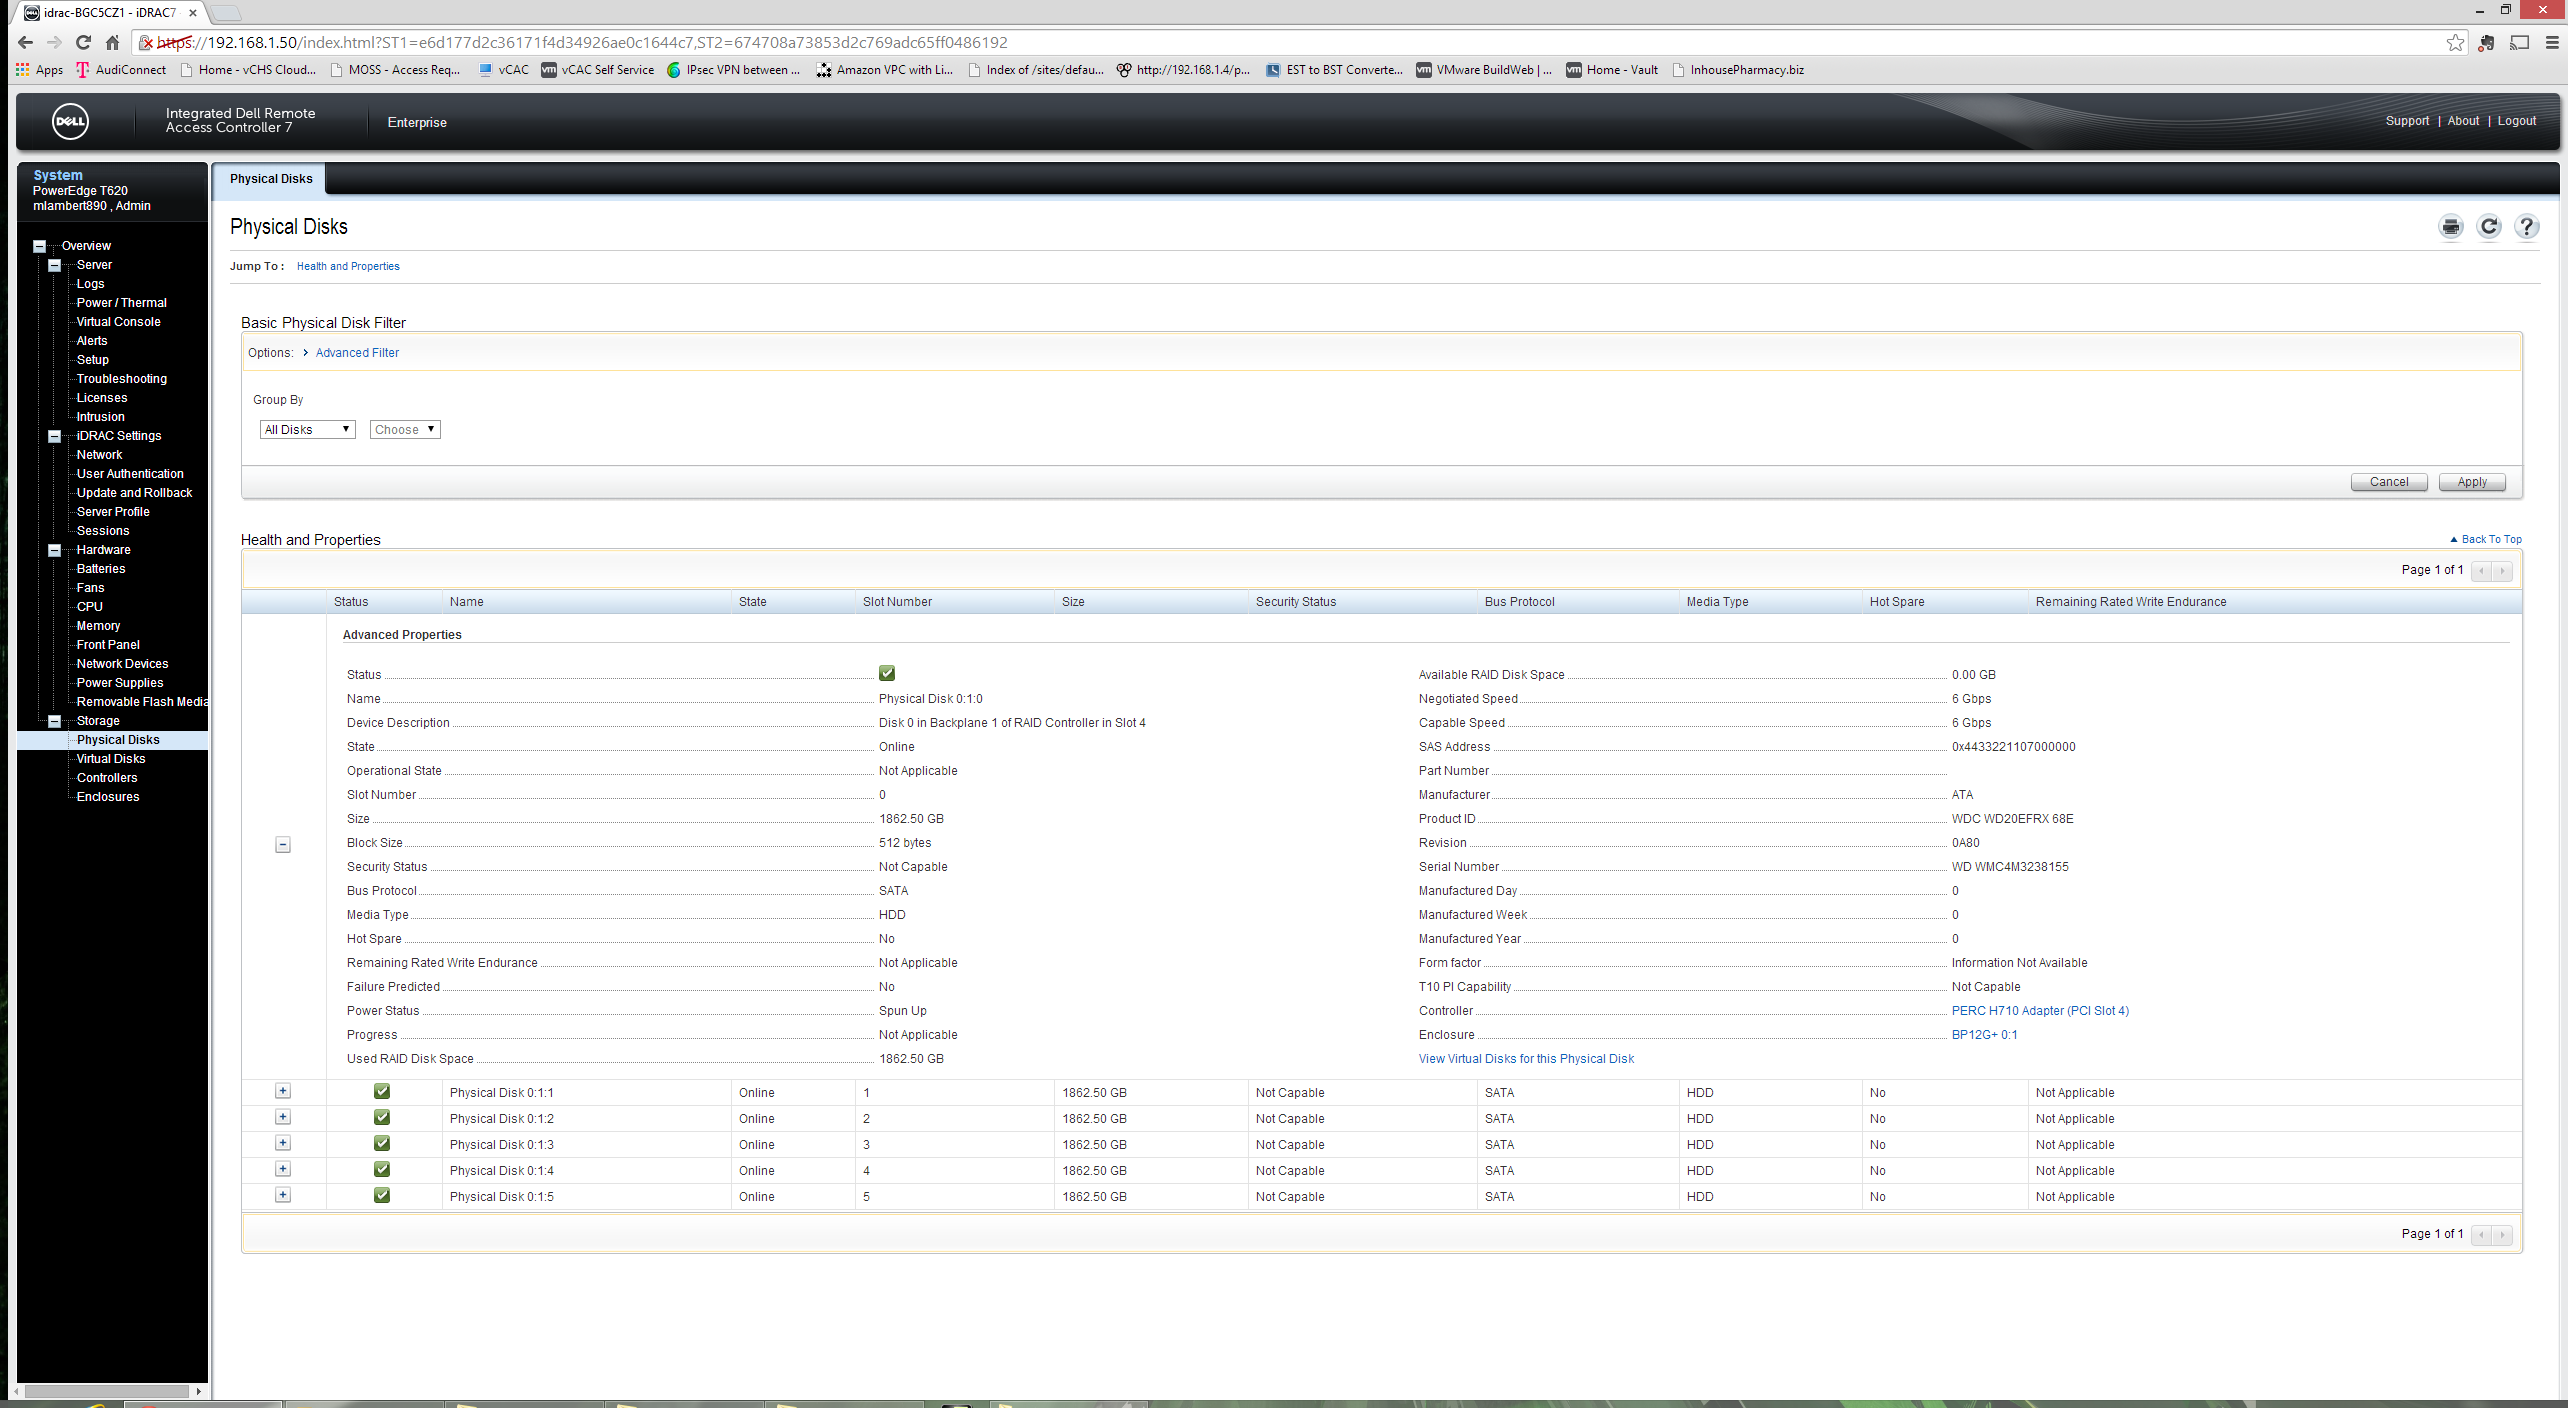
In keeping with the common theme, another fantastically detailed view this time focused on the disk subsystem both Physical:
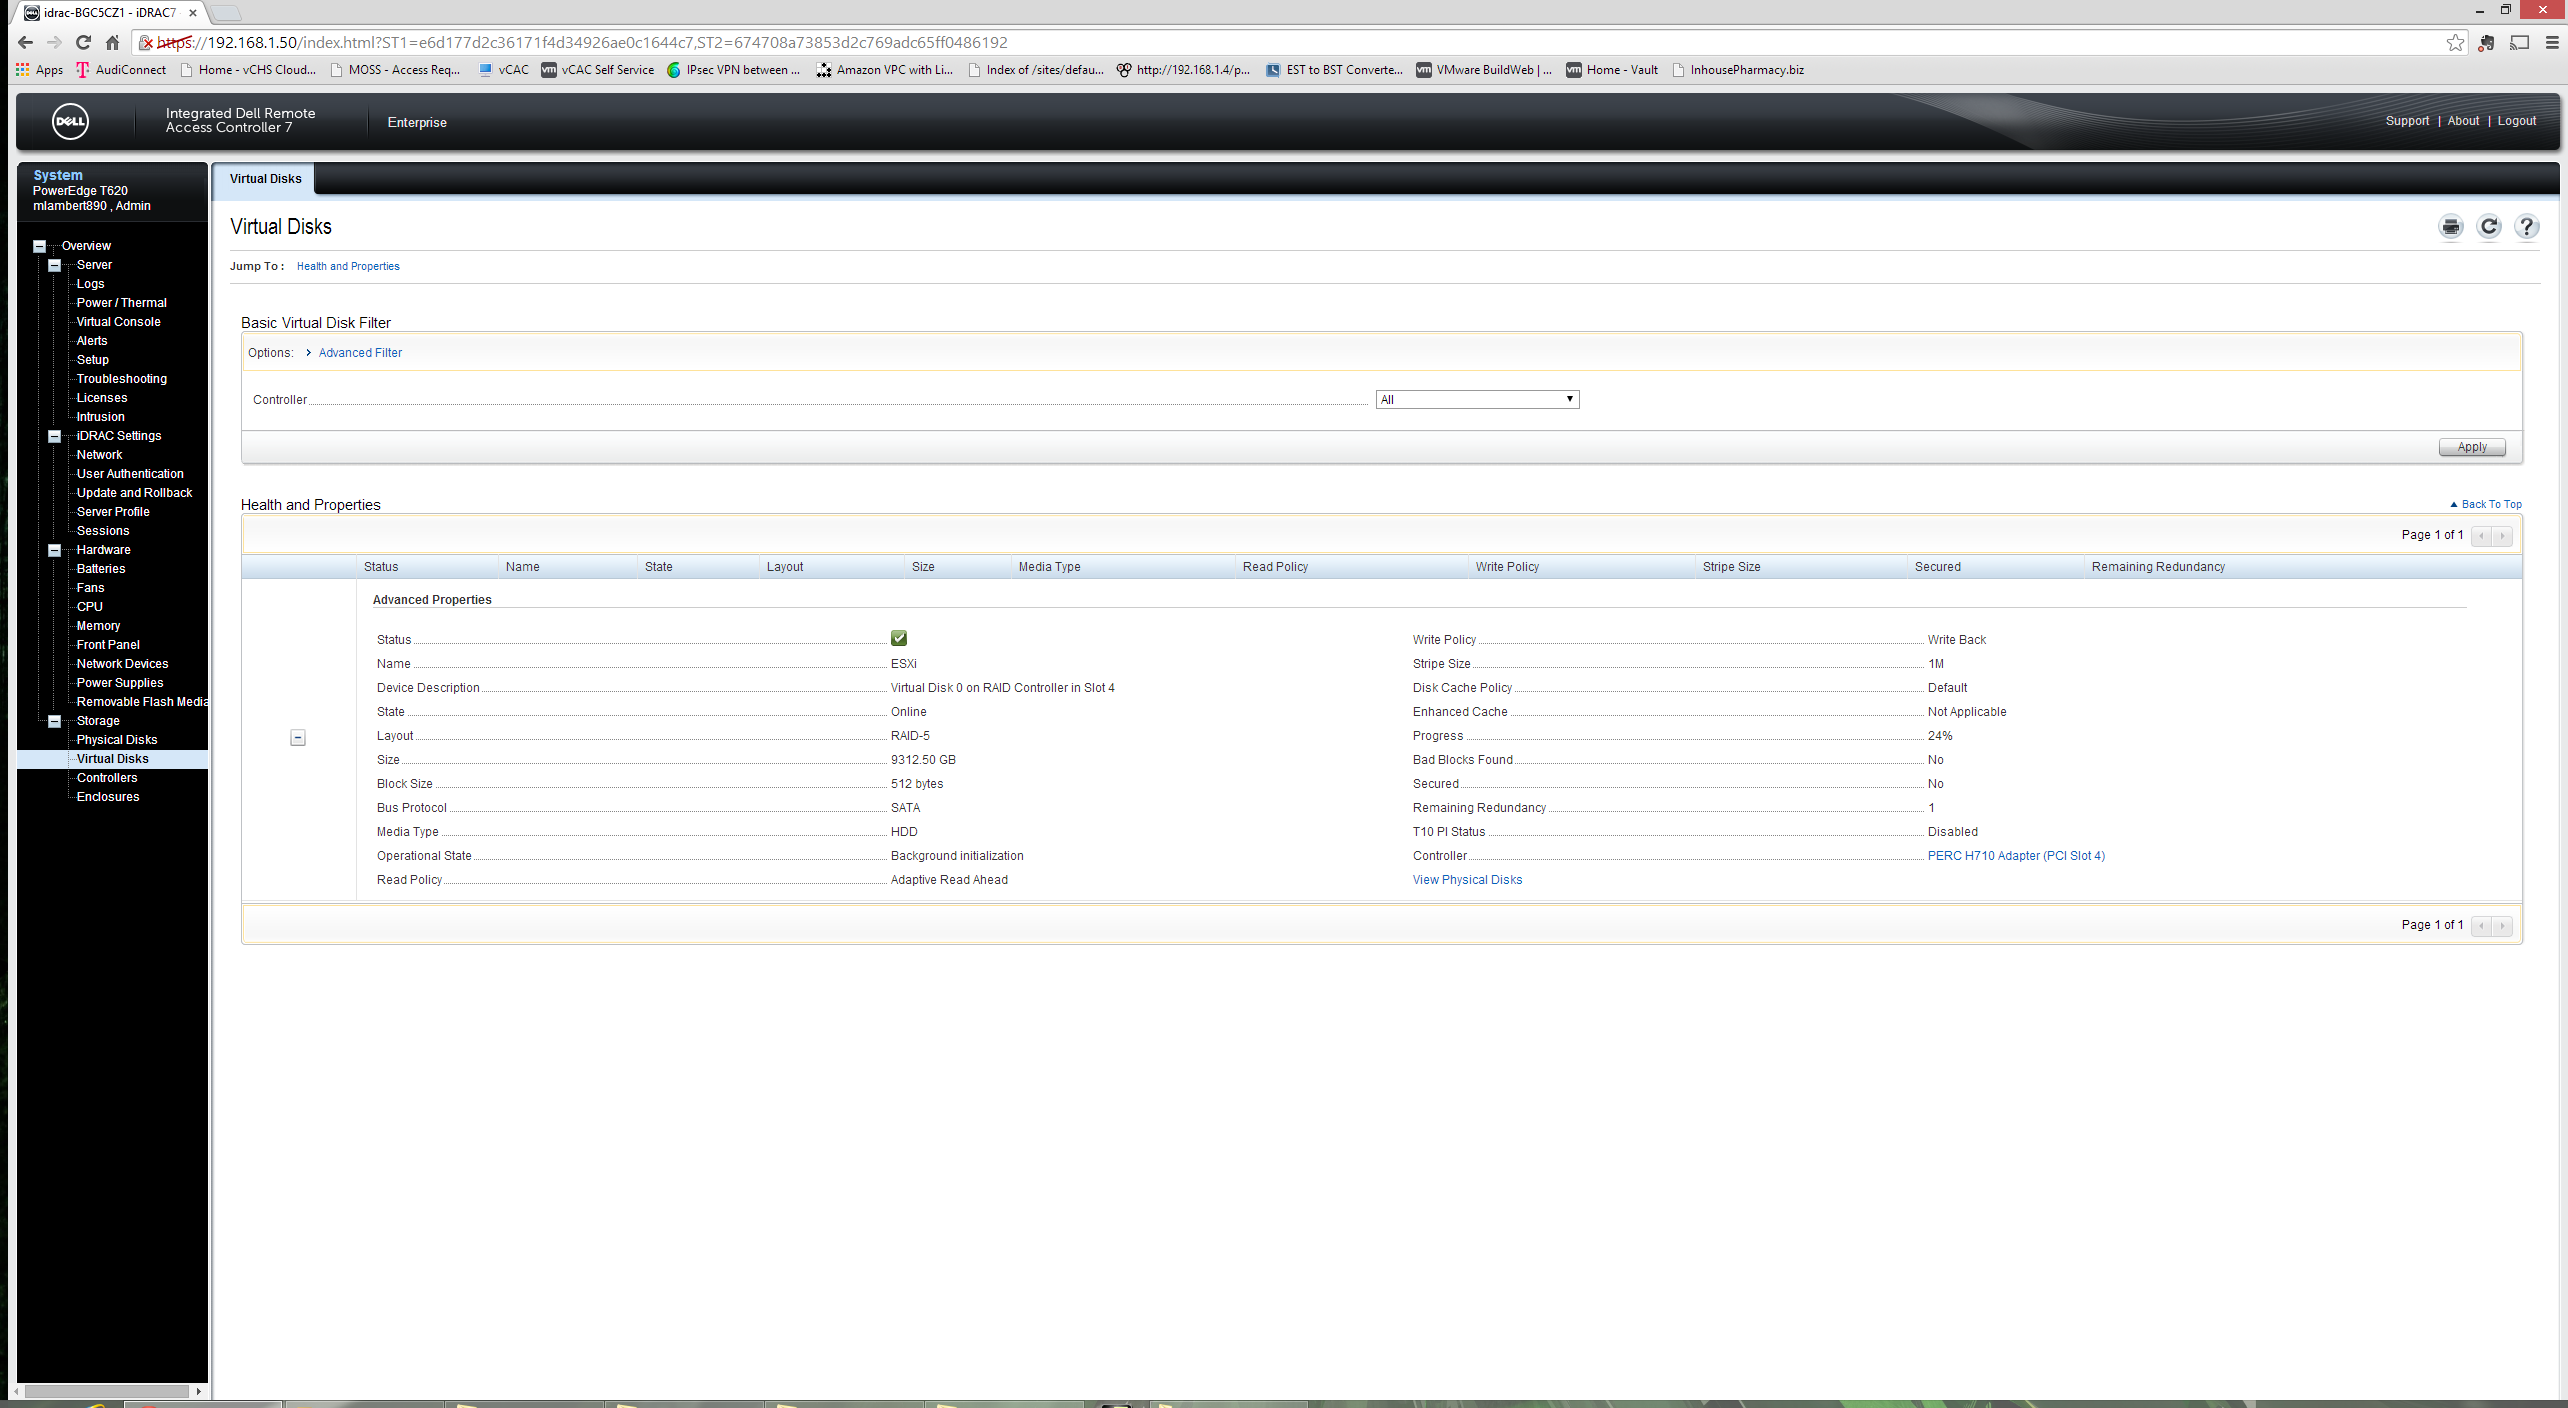
And Virtual:
Last but not least, the bells and whistles. Configuration options here for the front panel LCD. Set to display real-time power consumption:
With the iDRAC rockin’ and rollin’ there is only one top level System Setting sub-menu left – Device Settings. Here we can see enumerated the installed and recognized devices in the system as well as access additional configuration detail. In this build we have the iDRAC, Intel NICs both add-in and embedded, the Broadcomm 10Gb/s NIC and the PERC H710: 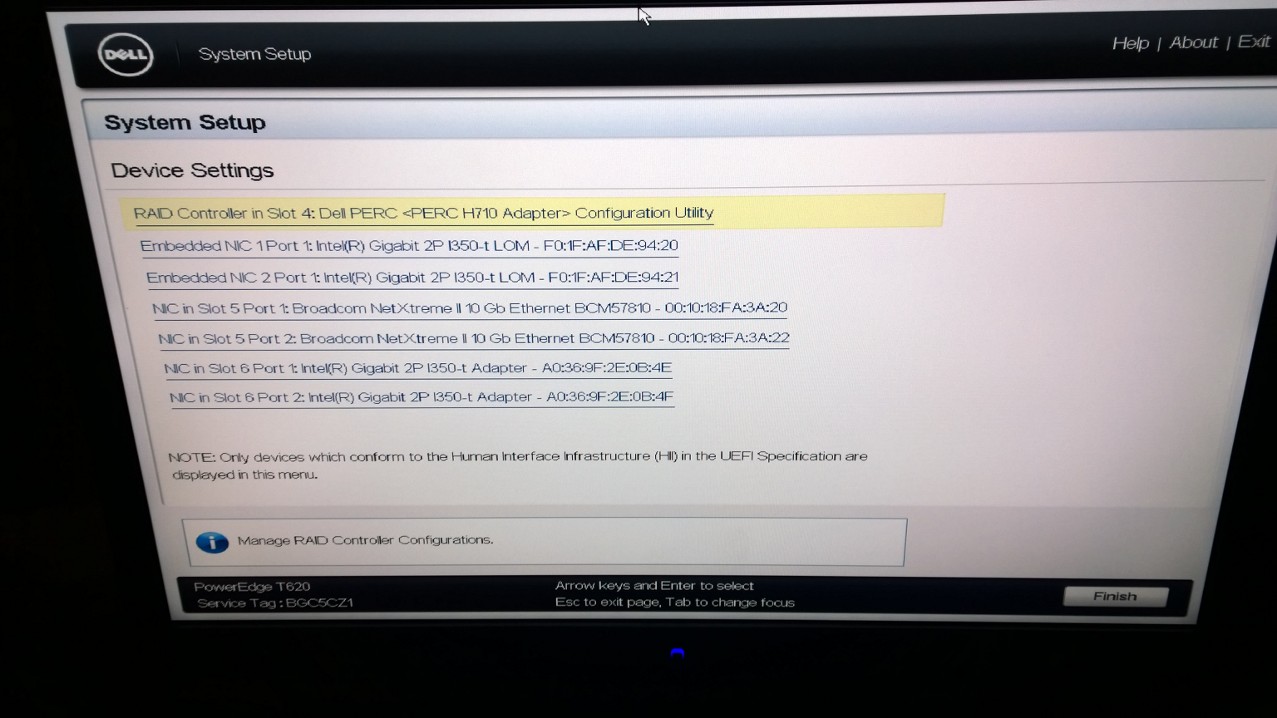
Speaking of which, let’s have a look at the PERC H710 setup. On first boot we determined that the T620 had no problem with the Western Digital Red 2TB OEM disks and, as you can see in the iDRAC physical disk ‘spoiler’ screen above, even recognizes them at 6Gb/s! With a full boat of 6 drives on-board it’s time to make a virtual disk. CTRL-R during POST invokes the RAID BIOS setup utility. I decided to do a quick video of the initial setup:
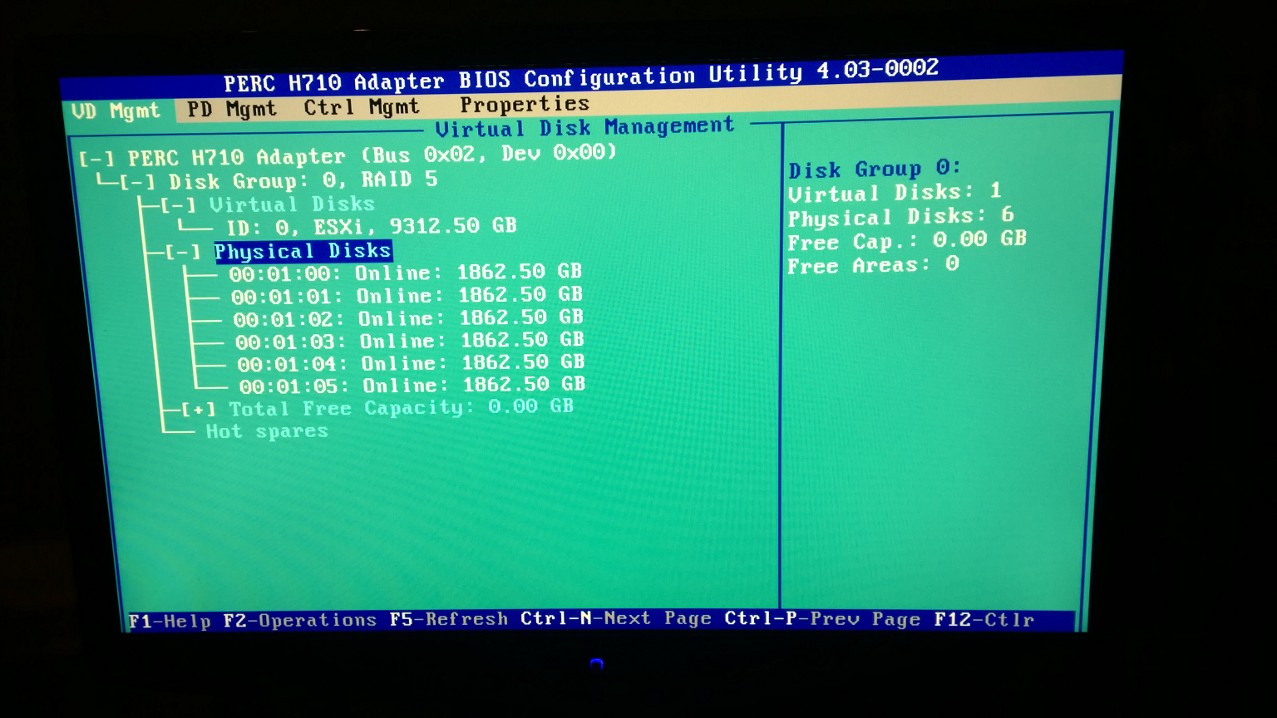
And here are some static shots of the successful configuration. All six physical disks displayed along with the 9.2TB virtual disk:
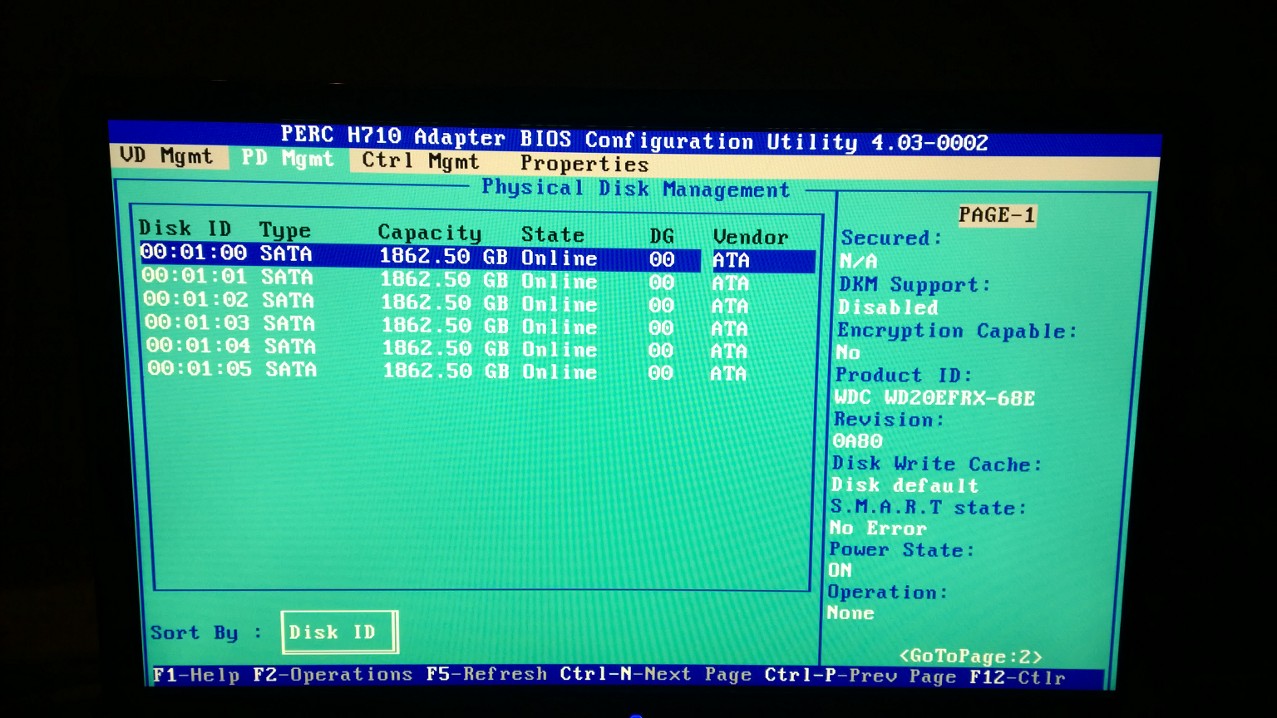
Detailed view of the Physical Disk management tab (product ID correct, no warnings to be found):
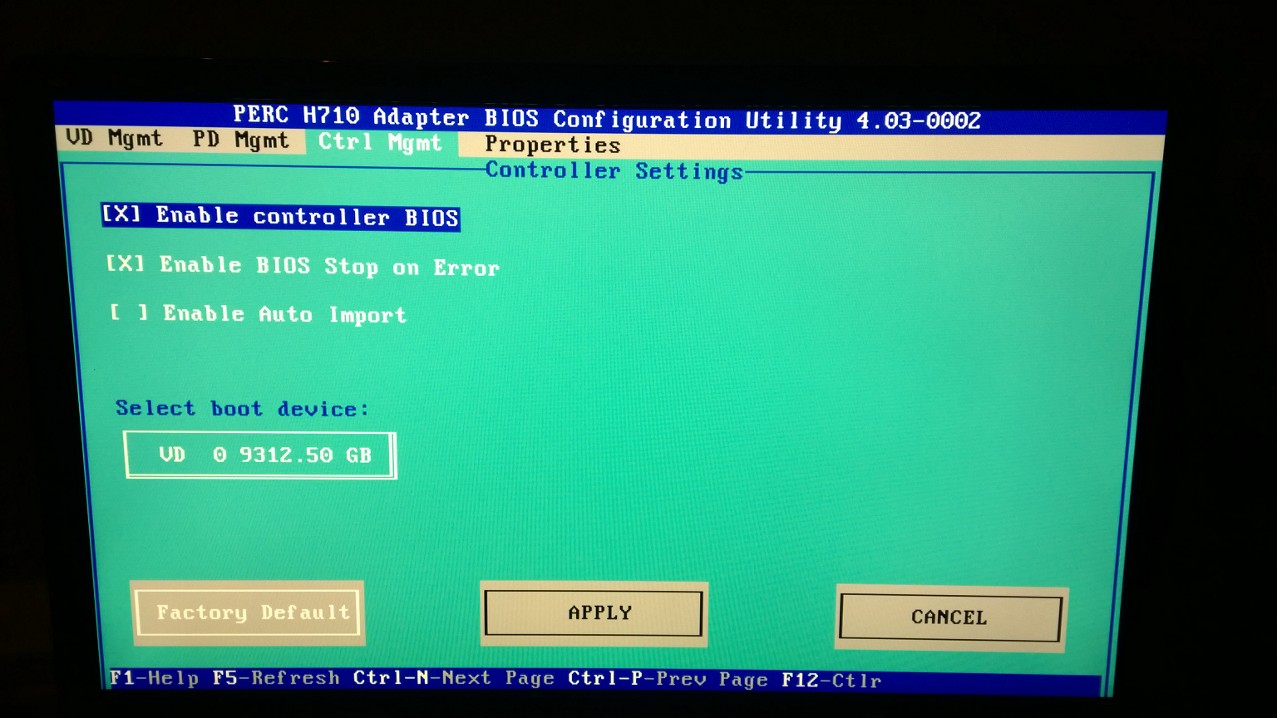
Controller Management tab allowing you to enable the BIOS and control its behavior as well as set the default boot device for the RAID controller:
 Controller properties including temperature. Running at 49C. Seems a bit warm, but certainly acceptable:

And that pretty much wraps up this entry! We now have a fully installed and configured server with out-of-band management ready to go and a nice juicy virtual disk awaiting OS install. Next up, installing ESXi 5.5 so stay tuned!
