
As a youngster consuming any and all content I could get my hands on that was computer related I was a huge fan of Jerry Pournelle and his tales from “Chaos Manor”. I used to dream about the day that I might reign over my own Chaos Manor. Well today while browsing through MicroCenter (ah… my dark mistress called me back so soon!), it struck me that being overlord of a Chaos Manor is a tough job! Of course it has its perks too, namely getting to justify playing around with fun new gear. As it turns out, my VMware test lab (last covered in these pages as part of the ESX White Box Adventure series) was in some serious need of expansion. The two Pentium E5500 nodes have served my testing well, but the latest hybrid cloud architectures really require a larger environment in order to be able to accurately simulate production operations. Also, the current parts from AMD in particular can provide a ton of bang for the buck in a lab environment. So with that in mind, let’s see just how much bang for the buck was possible and what kind of shape the newly updated lab is in!
I started off with a modest set of goals and a pretty open minded approach to the shopping list. The main thing was to add two nodes and the second thing was to do it cheaply. I also wanted a nice number of cores (the current E5500 lab only has 4 HEC) and a small form factor (preferably similar to the Gateway SX boxes to keep a consistent look). So how did the shopping go? Here are the results:

No surprise, but AMD won this round. When the metrics are number of discrete cores balanced by cost, and IPC is a secondary concern, Intel can’t touch them. Here are the gories:
- 2 x AMD FX6100 – 6 core, AM3+, 3.3Ghz
- 2 x Gigabyte 78LMT-USB3, AM3+, mATX
- 2 x Sentey SS1-2420 mATX
- 2 x Kingston 16GB memory kits
- 2 x LG DVD-R SATA 2
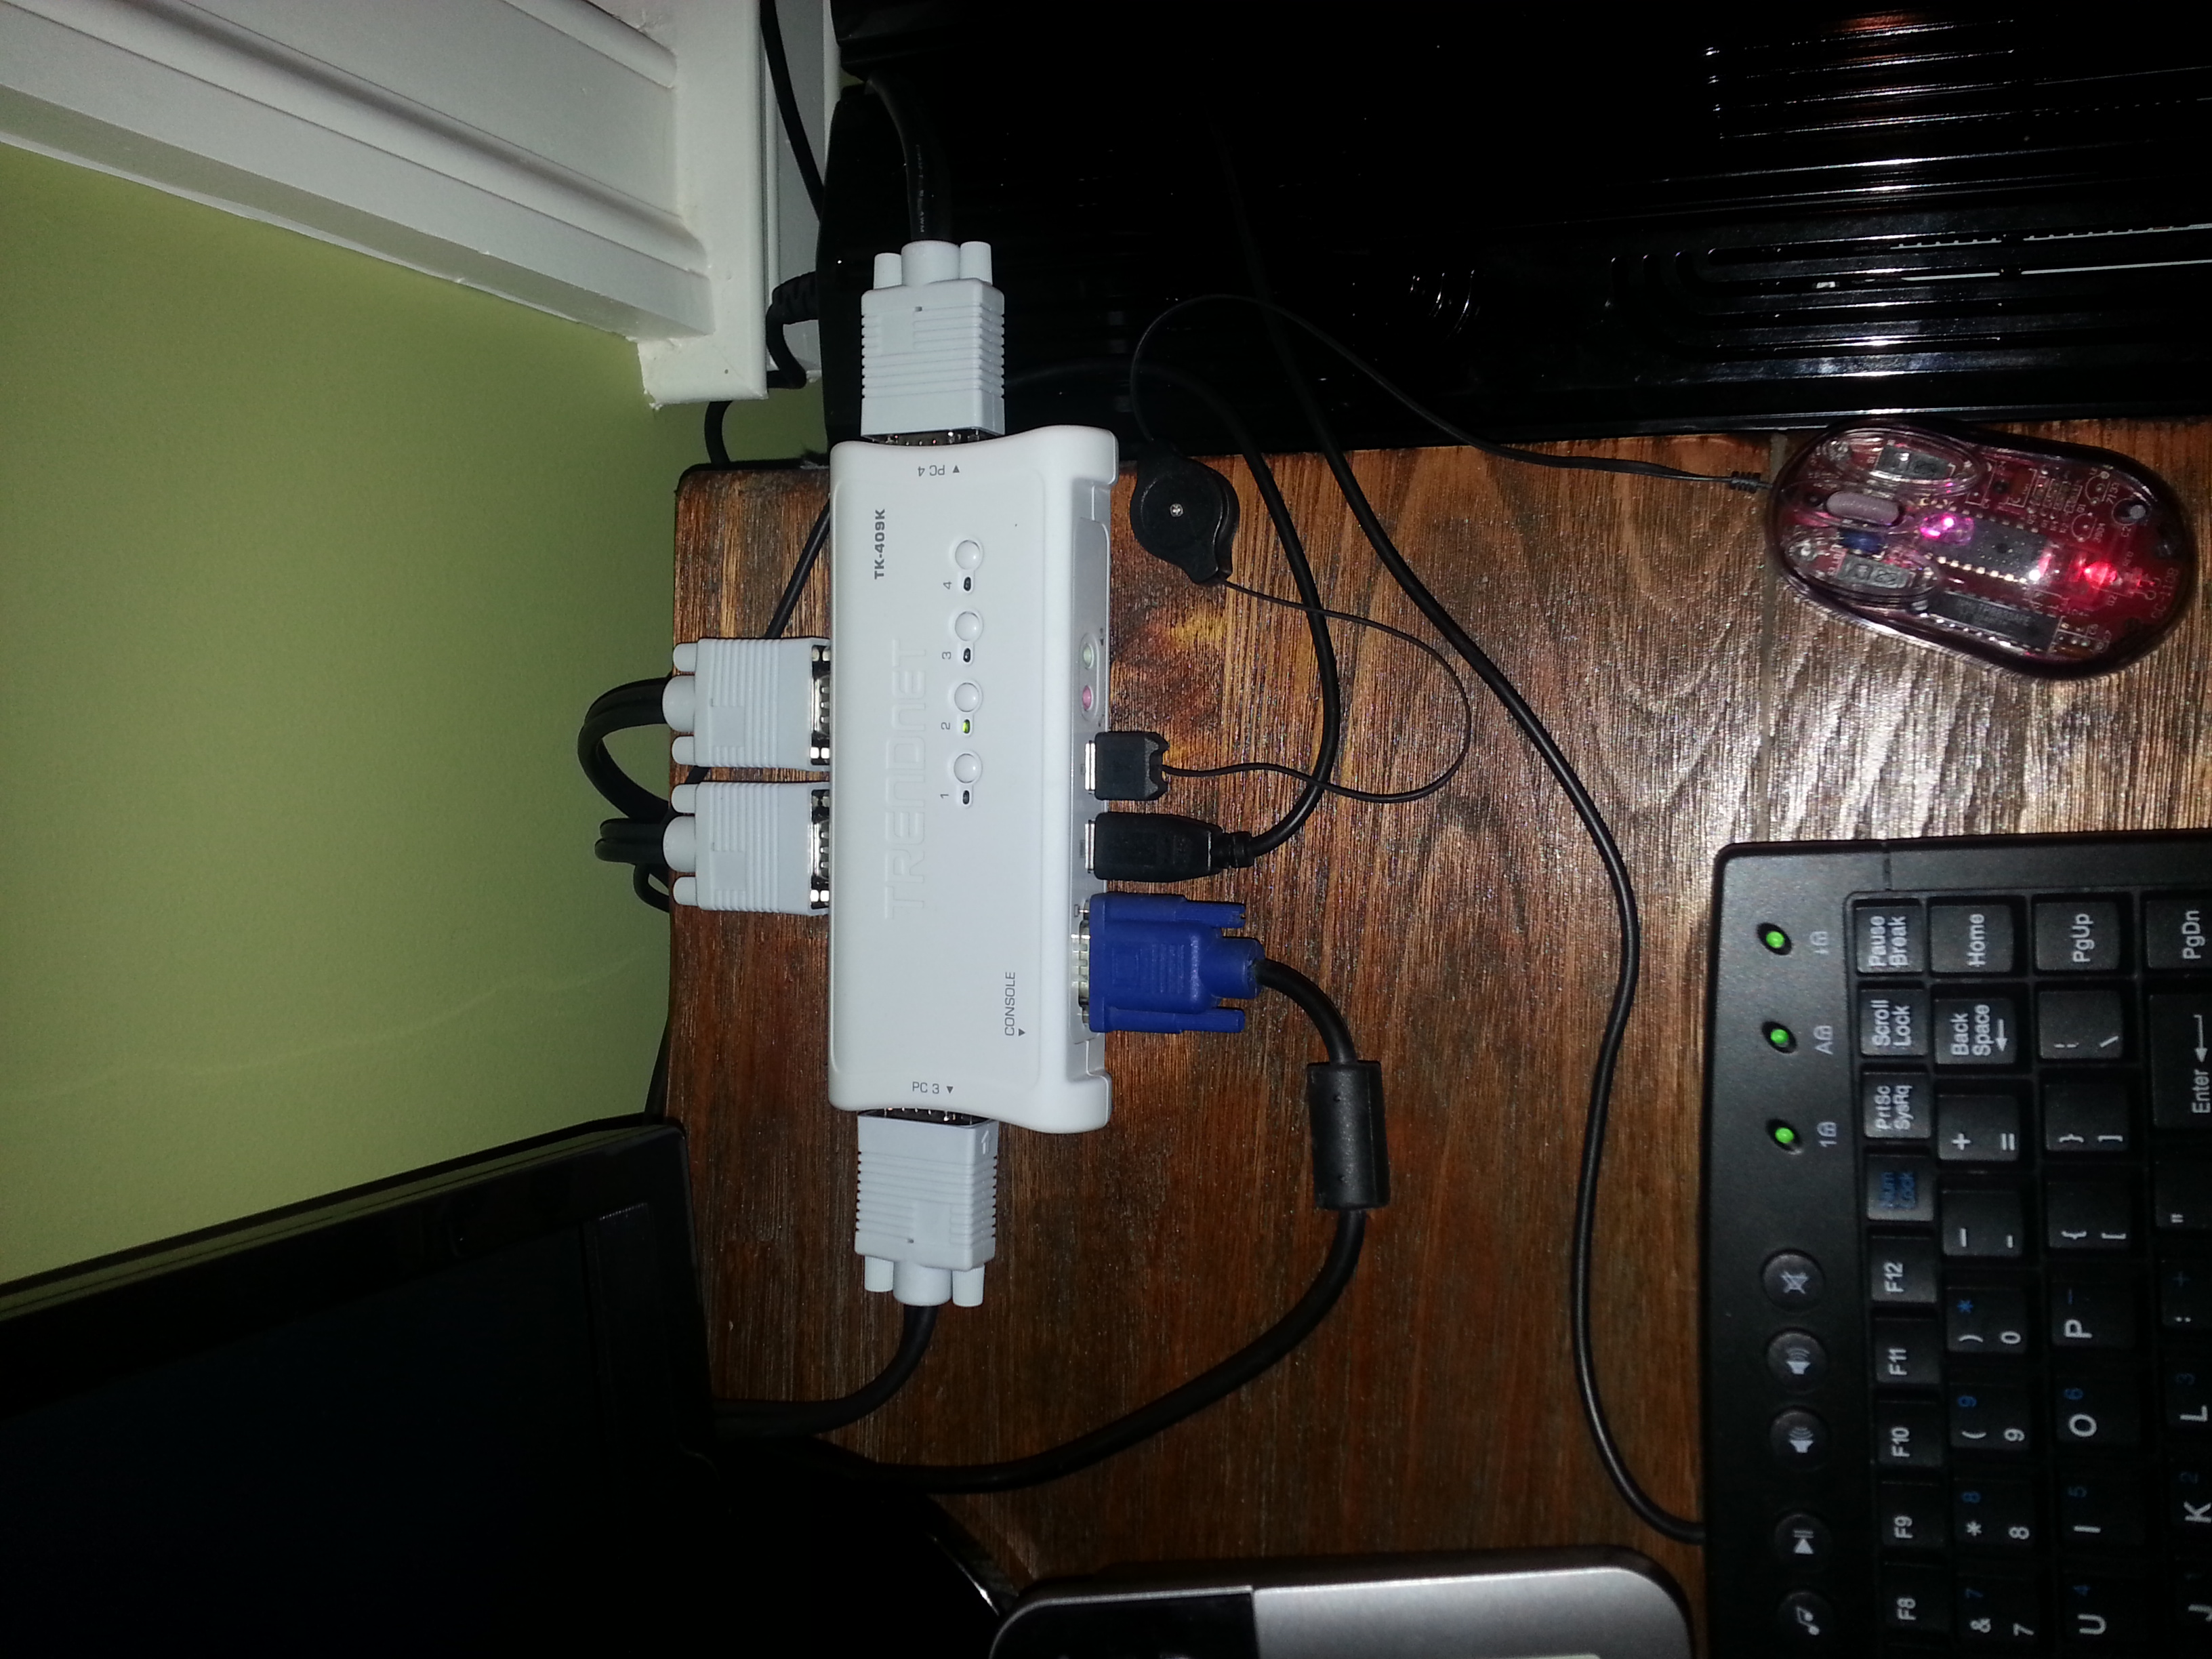
- Trendnet 4 port KVM (I should have bought this piece last time when I short sightedly went for a 2 port!)
- Re-purposed old ATA 133 (!) 200GB drives from “the vault”
The final tally rang up at just over $600. Pretty impressive considering this is two complete 6 core, 16GB builds! That’s slightly cheaper than the Gateways for a lot more computing grunt. Chalk that up to Moore’s law, a good set of MicroCenter weekend deals, and some of the inherent “build vs buy” savings.
The first thing I was eager to check out was this odd case. Sentey? I’d never heard of them and the initial unboxing was a bit scary. It’s a decent looking design, but the build quality, and quality of materials, is clearly bargain basement (of course so is the price at $45!). Here is a look at the full package:

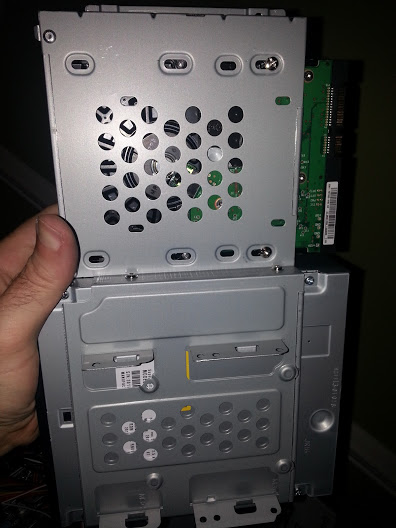
mATX is a big tight to work in, so the first order of business was pulling the drive cage. I braced for the worst, but was pleasantly surprised! Just like that this little budget case was winning me over. The drive cage was well designed and removed smoothly with just two screws. The LG DVD and the (yikes!) old Maxtor PATA 3.5″ drives fit snugly into their respective compartments :
Slightly less impressive than the drive cage design was the included PSU. But hey, at least it was included!

So with the cage removed, populated, and set aside, it was time to have a look at the motherboard. I chose the Gigabyte because it was one of the only 760G, AM3+, mATX boards that had the confirmed ability to go north of 8GB RAM. I had a good experience with Gigabyte on my X58 build, and tend to bounce between them, EVGA and ASUS, so it seemed like a solid choice:
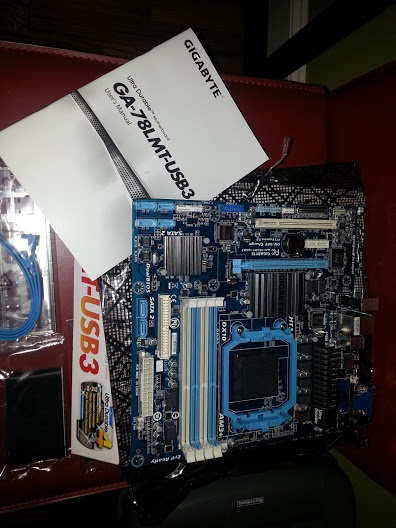
The Giga was well packaged with the expected accessories. No real surprises here other than the “never get used to it” surprise of a SFF motherboard (mATX being less “woah thats small” shocking than mITX of course). With the motherboard unboxed and set aside, it was time to have a look at the FX6100:
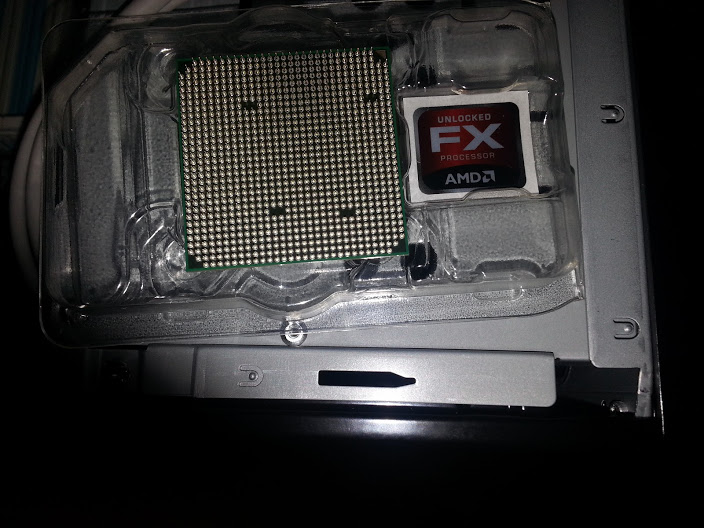
The first thing that struck me was that AMD is still using pin packages for AM3+. That was a cool sort of blast from the past. Actually so far the entire project has been retro feeling with the old PATA drive and the classic CMOS battery on the Giga! The included CPU cooler, on the other hand, was anything but old school, and I mean that in a good way! The standard AMD cooler was a pleasure to install and went on absolutely effortlessly and yielded great temps immediately (more on that later). Here is how things looked with the first pieces seated:
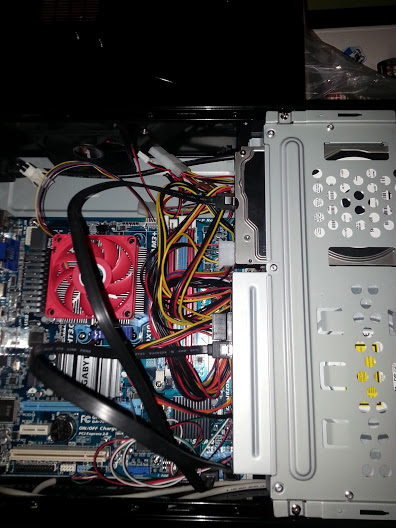
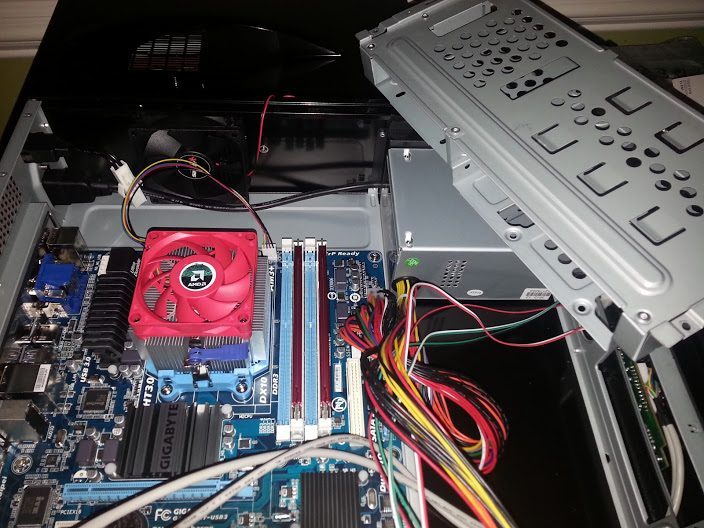 Some interesting notes on the case/mobo marriage… The motherboard wants an 8 pin 12V ATX lead for the CPU power, but the PSU provides a 4 pin lead. Obviously no trouble there, the 4 pin lead occupies the top 4 pins of the 8 pin connector and provides 3 12V lines and 1 ground. When all 8 pins are utilized the bottom 4 are actually all ground connectors, providing a more solid ground, but 4 into 8 certainly works. Other than that, the build went off without a hitch. Here is everything assembled and pre cable tuck-in:
So Rachel Ray style, the second machine came together and the two joined the old Gateways in the lab. Four soldiers standing, slightly, tall and, somewhat, wobbly!

And a final parting shot of the Trendnet KVM to wrap up the physical build segment:
Next up, part II will explore the install of 5.1 on the new hosts and then move on to adding them to the vCenter followed by a look at EVC and an answer to the question “did DirectPath I/O work this time?” Thanks for reading!
