
I’ve gone through a few iterations of vSphere storage configuration over the years. Initially, for simplicity, I had independent ESX servers up with DAS being used for local instance storage and no shared media (and no vCenter or clustering obviously). When I upgraded my NAS to the NetGear ReadyNAS Ultra 6 I decided to migrate the virtual machines to an NFS datastore hosted on the NAS (1Gb/s, managed Cisco switch). That worked well, and was effortless to setup and configure, but at heart I’m a block storage guy and I continually felt the call of iSCSI (especially since NetGear supports it on the RNU). iSCSI can be somewhat intimidating at first to those not familiar with configuring remote block storage, but if you take it one step at a time it is quite straightforward and, in my opinion, definitely easier than typical fiber channel attached SAN configuration. Here is a view of the three main configuration screens for iSCSI on the ReadyNAS along with explanations of what is being presented and how to configure it:
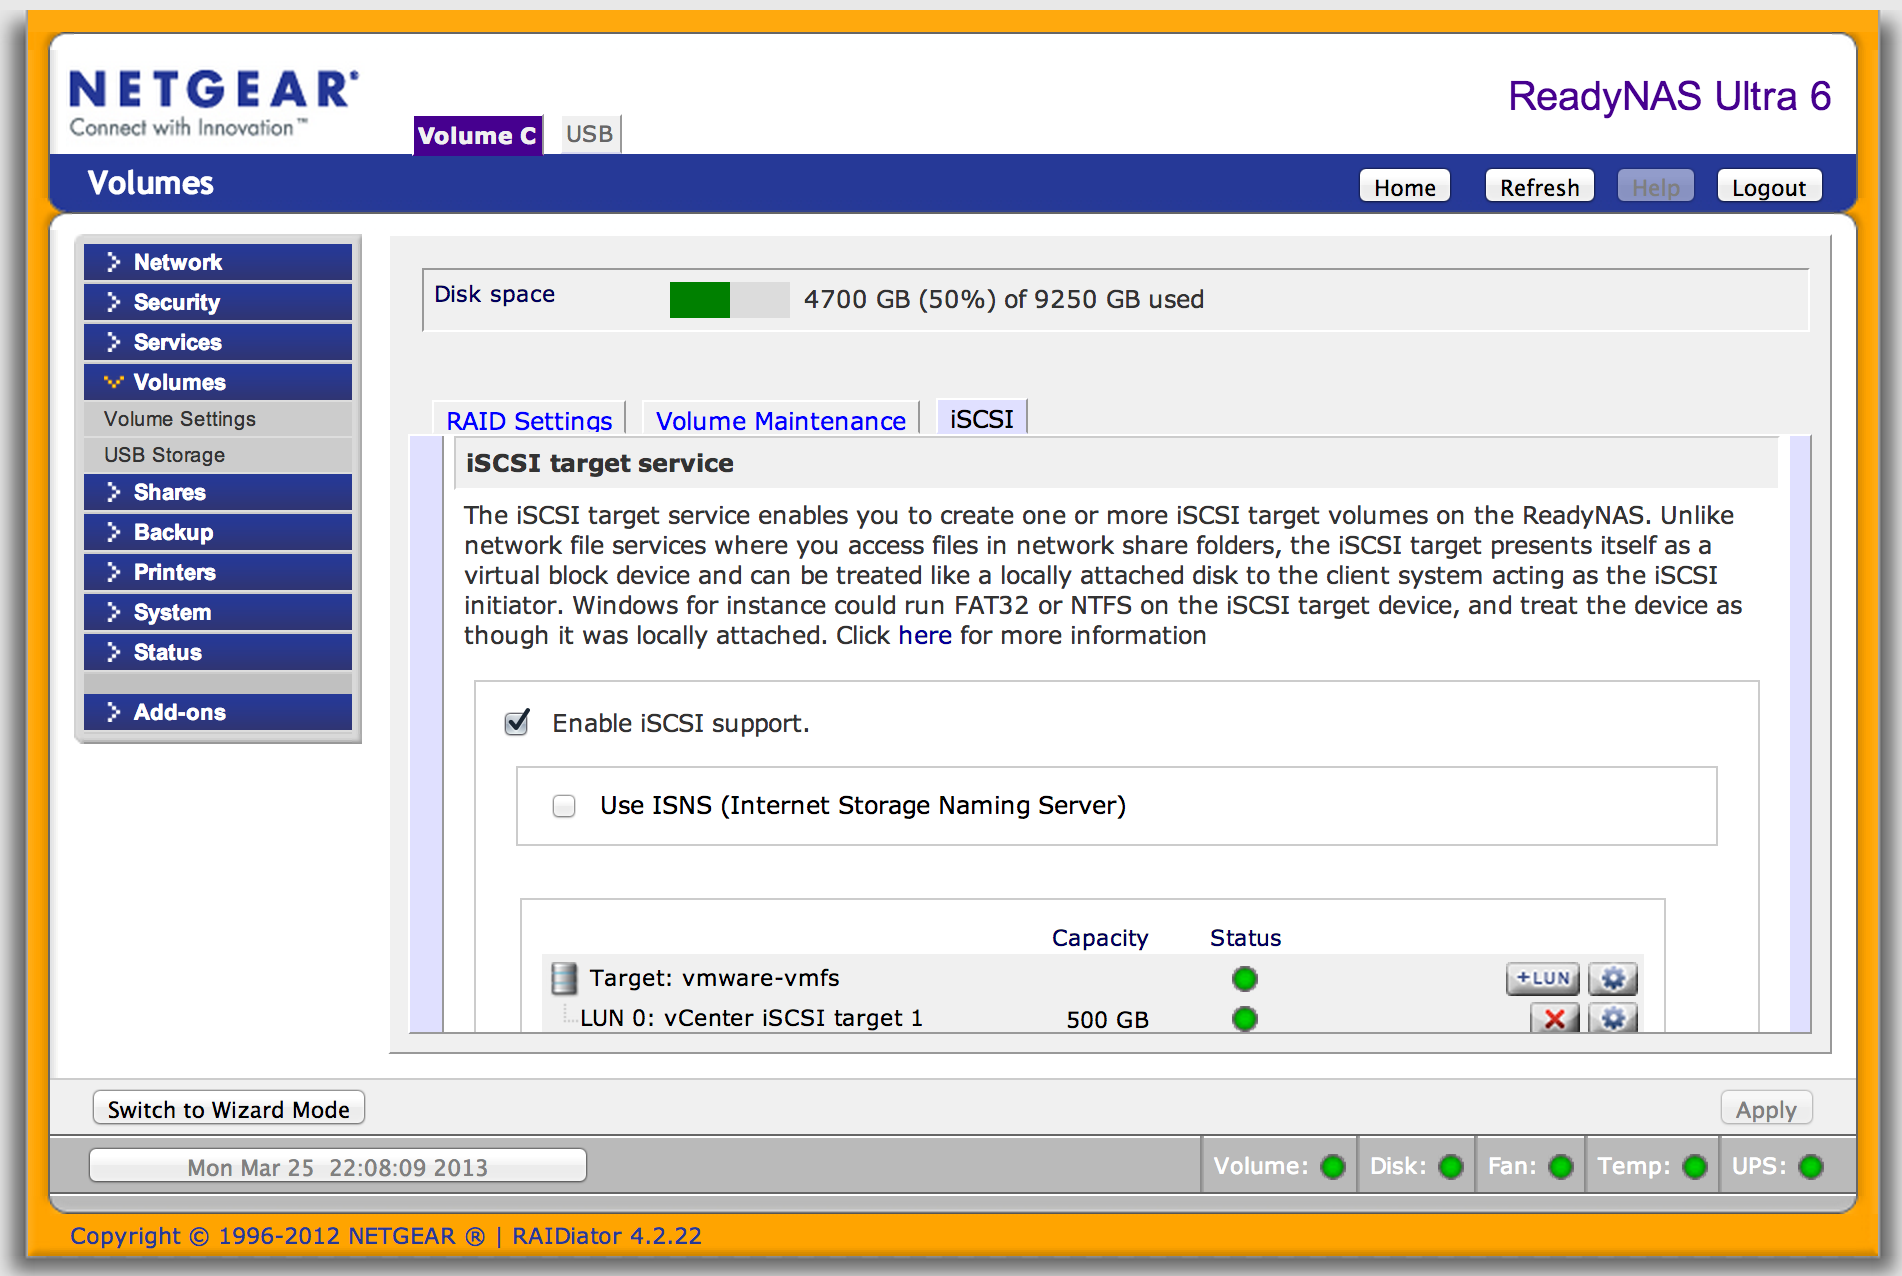
First up, we enable iSCSI support. On the ReadyNAS this is an option under Volumes->Volume Settings which actually has its own tab. There is existing configuration in the screenshot since I have done this before, but for a new install that would be blank. After enabling the support, the first step is to create a target. An iSCSI target is exactly what it sounds like. It is an end-point block device that clients will point at in order to access volumes. The rough SAN equivalent would be the WWN (worldwide name) construct. The key point is that it is the device identifier, rather than the volume identifier. Associated with the target is one or more LUNs (logical unit numbers). The LUN is the volume identifier just as it is universally in storage systems. To add a new iSCSI target, we simply click “add target”. A single NAS can host many targets:
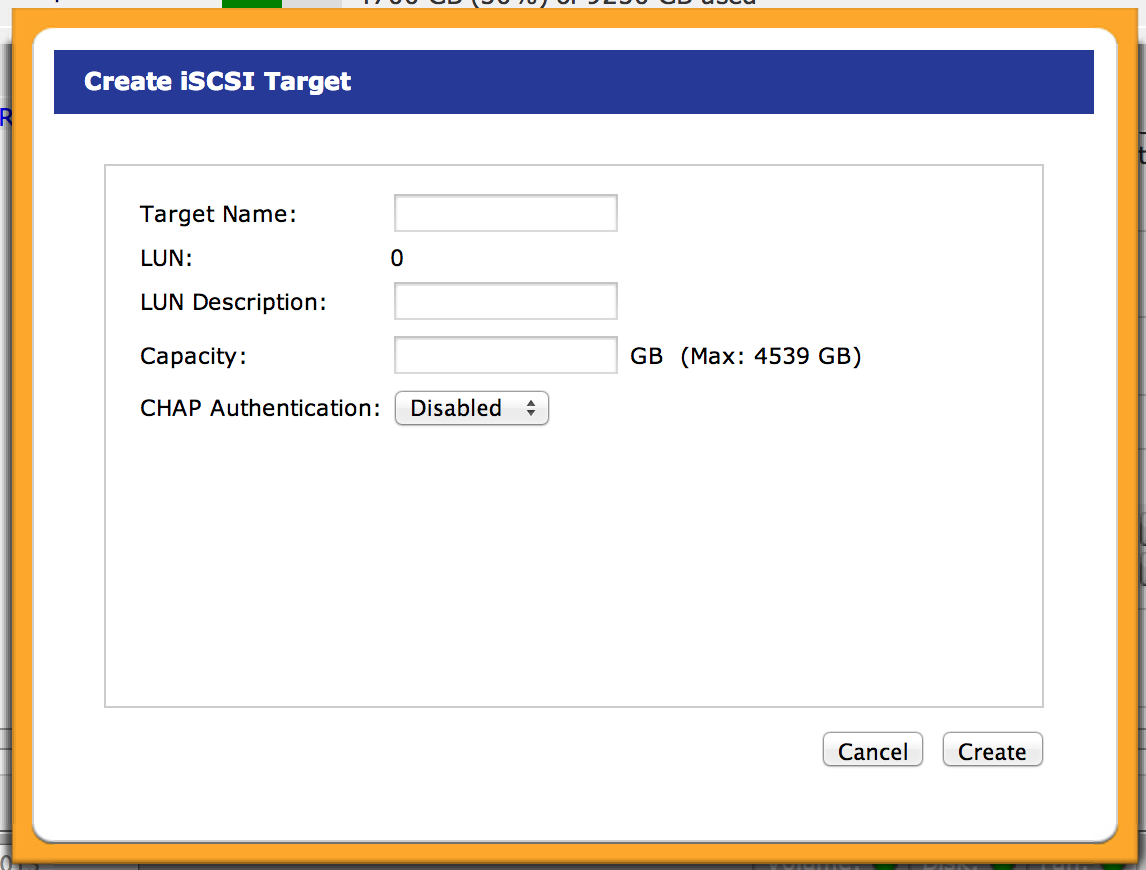
The parameters here are straightforward:
Target Name: this is an identifier for the NAS iSCSI end-point
LUN: on a new target the UI will auto populate “0”. It enforces the creation of at least 1 LUN during the creation of a new target. More can be added later.
LUN Description: as implied, something descriptive about this volume
Capacity: straightforward stuff. Volume size goes here.
CHAP Authentication: this is interesting. iSCSI can be an authenticated protocol. There are various mechanisms that can be used for iSCSI authentication. The ReadyNAS supports CHAP. In addition, there are multiple modes for authentication. Target (the NAS) authenticates the “initiator” (client), the other way around and mutual. In addition authentication can be mandated, forbidden or set to on demand. In my case I keep authentication off to make life easier. Turning it on would require the initiators (clients) to provide authentication info when attempting to connect to the storage volume. The ReadyNAS supports simple account/password authentication so if required, an account would need to be specified in the ReadyNAS config, along with a password, and those credentials would be utilized on the initiators (clients).
Once the target, and its first LUN, have been created, additional LUN’s can be added by clicking “+LUN”:
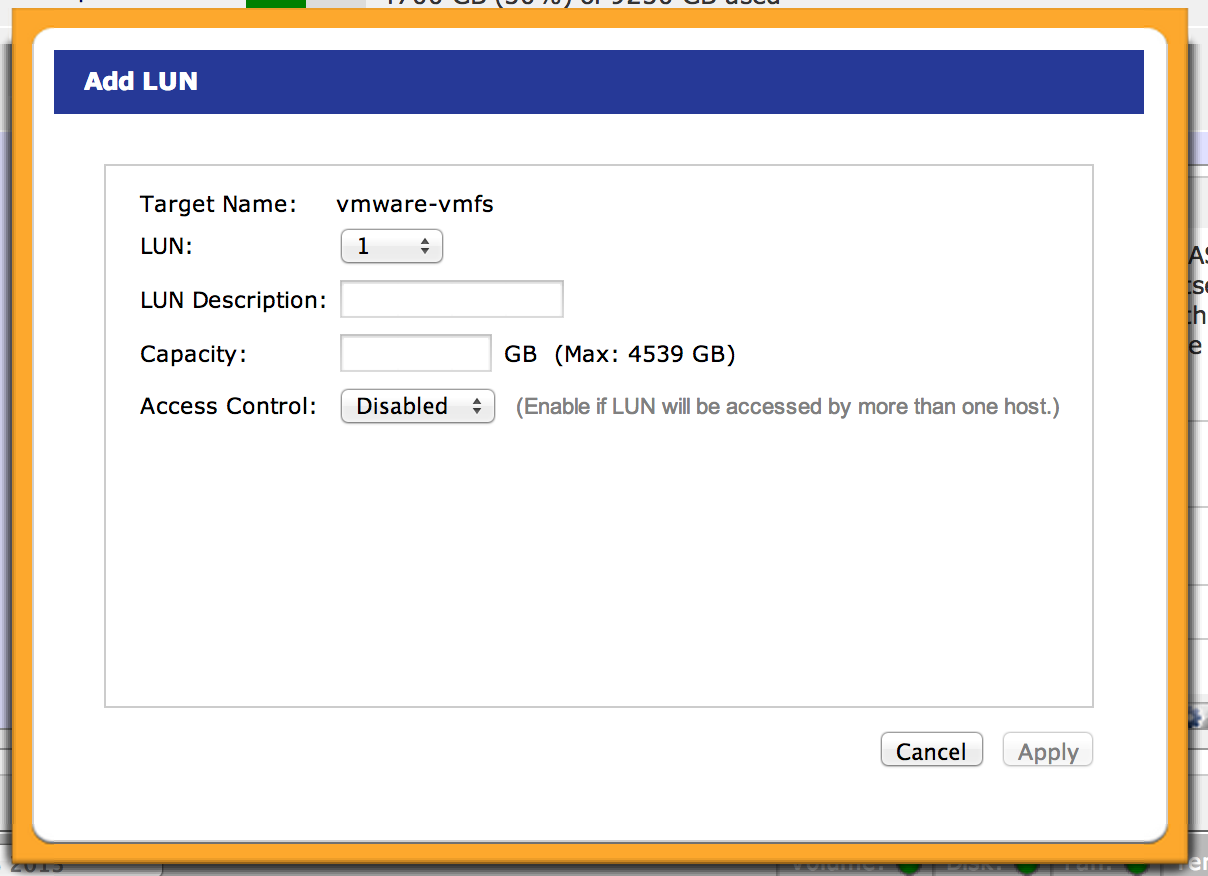
Most of the options are now familiar. Differences are that the LUN number can be specified. Note that access control can be set independently by LUN. So it is possible to have authenticated, and unauthenticated, LUNs under the same target.
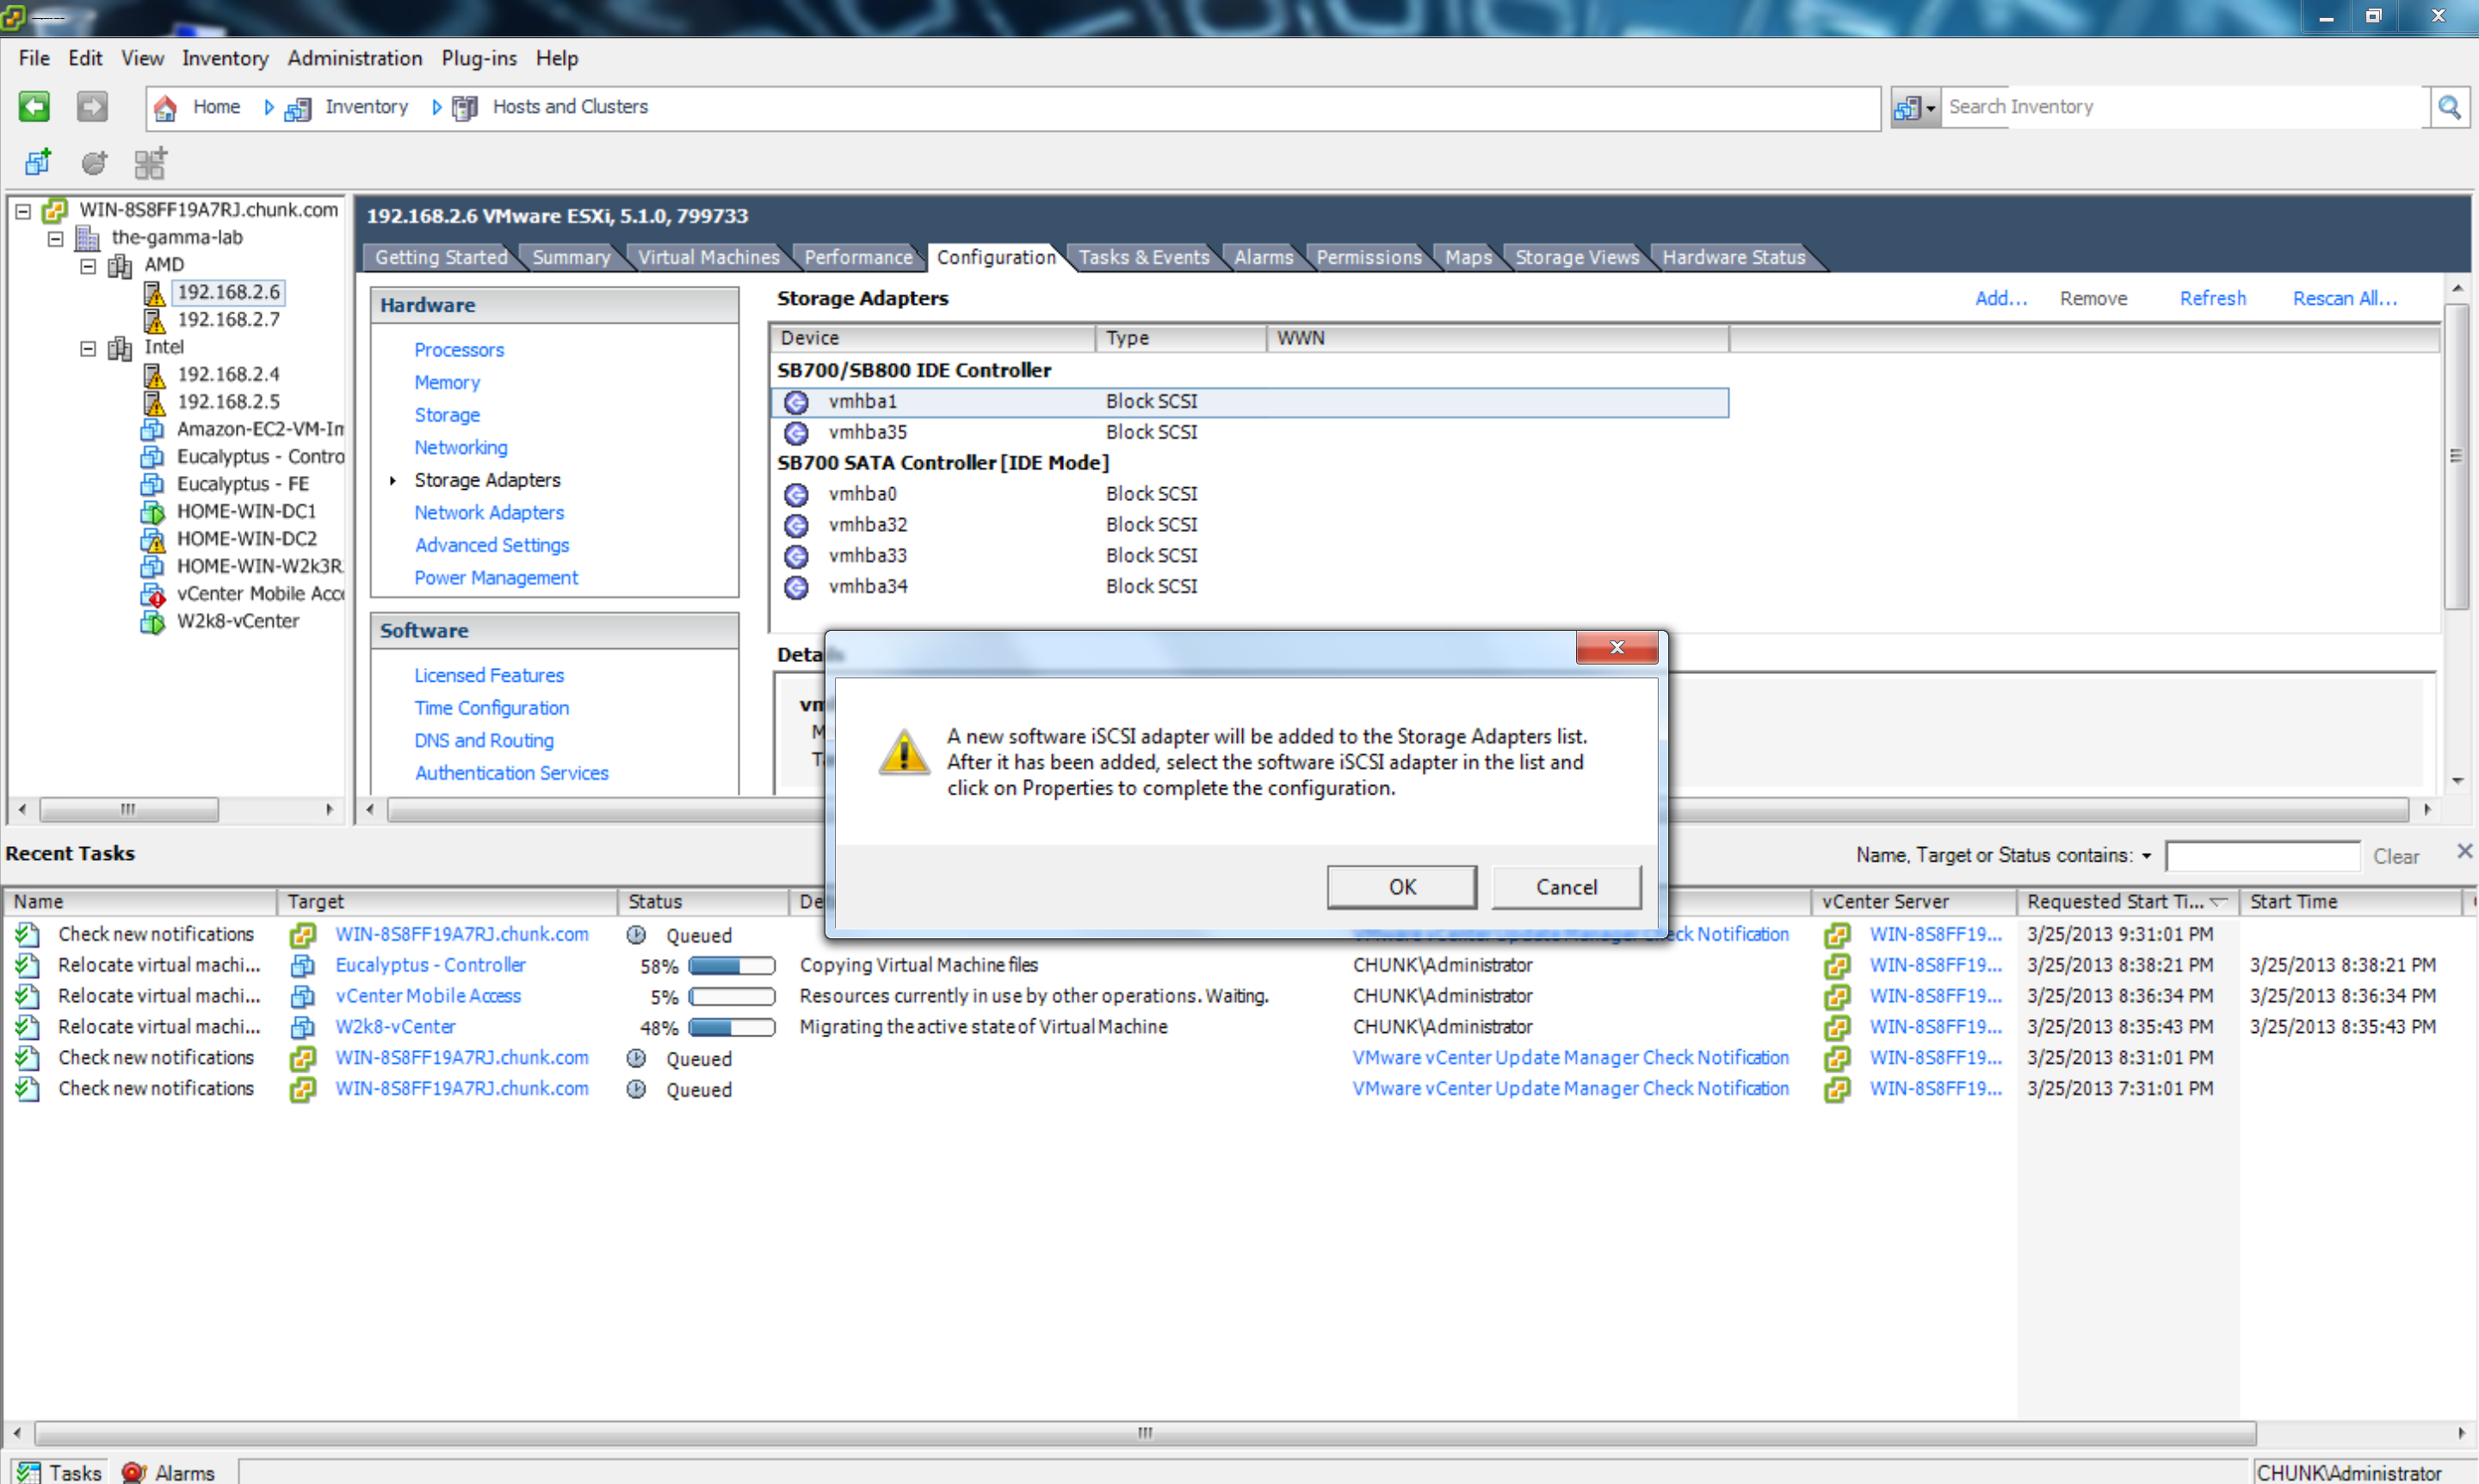
Once a target and associated LUN(s) have been created, it is time to configure some hosts to access it (initiators in iSCSI terminology). In vCenter, the way to initiate this is to add a new Storage Adapter. In vSphere/vCenter 5.1, the iSCSI software adapter is part of the built-in support and can be added to the host capabilities by clicking “add” under the Storage Adapter section of the Configuration tab:
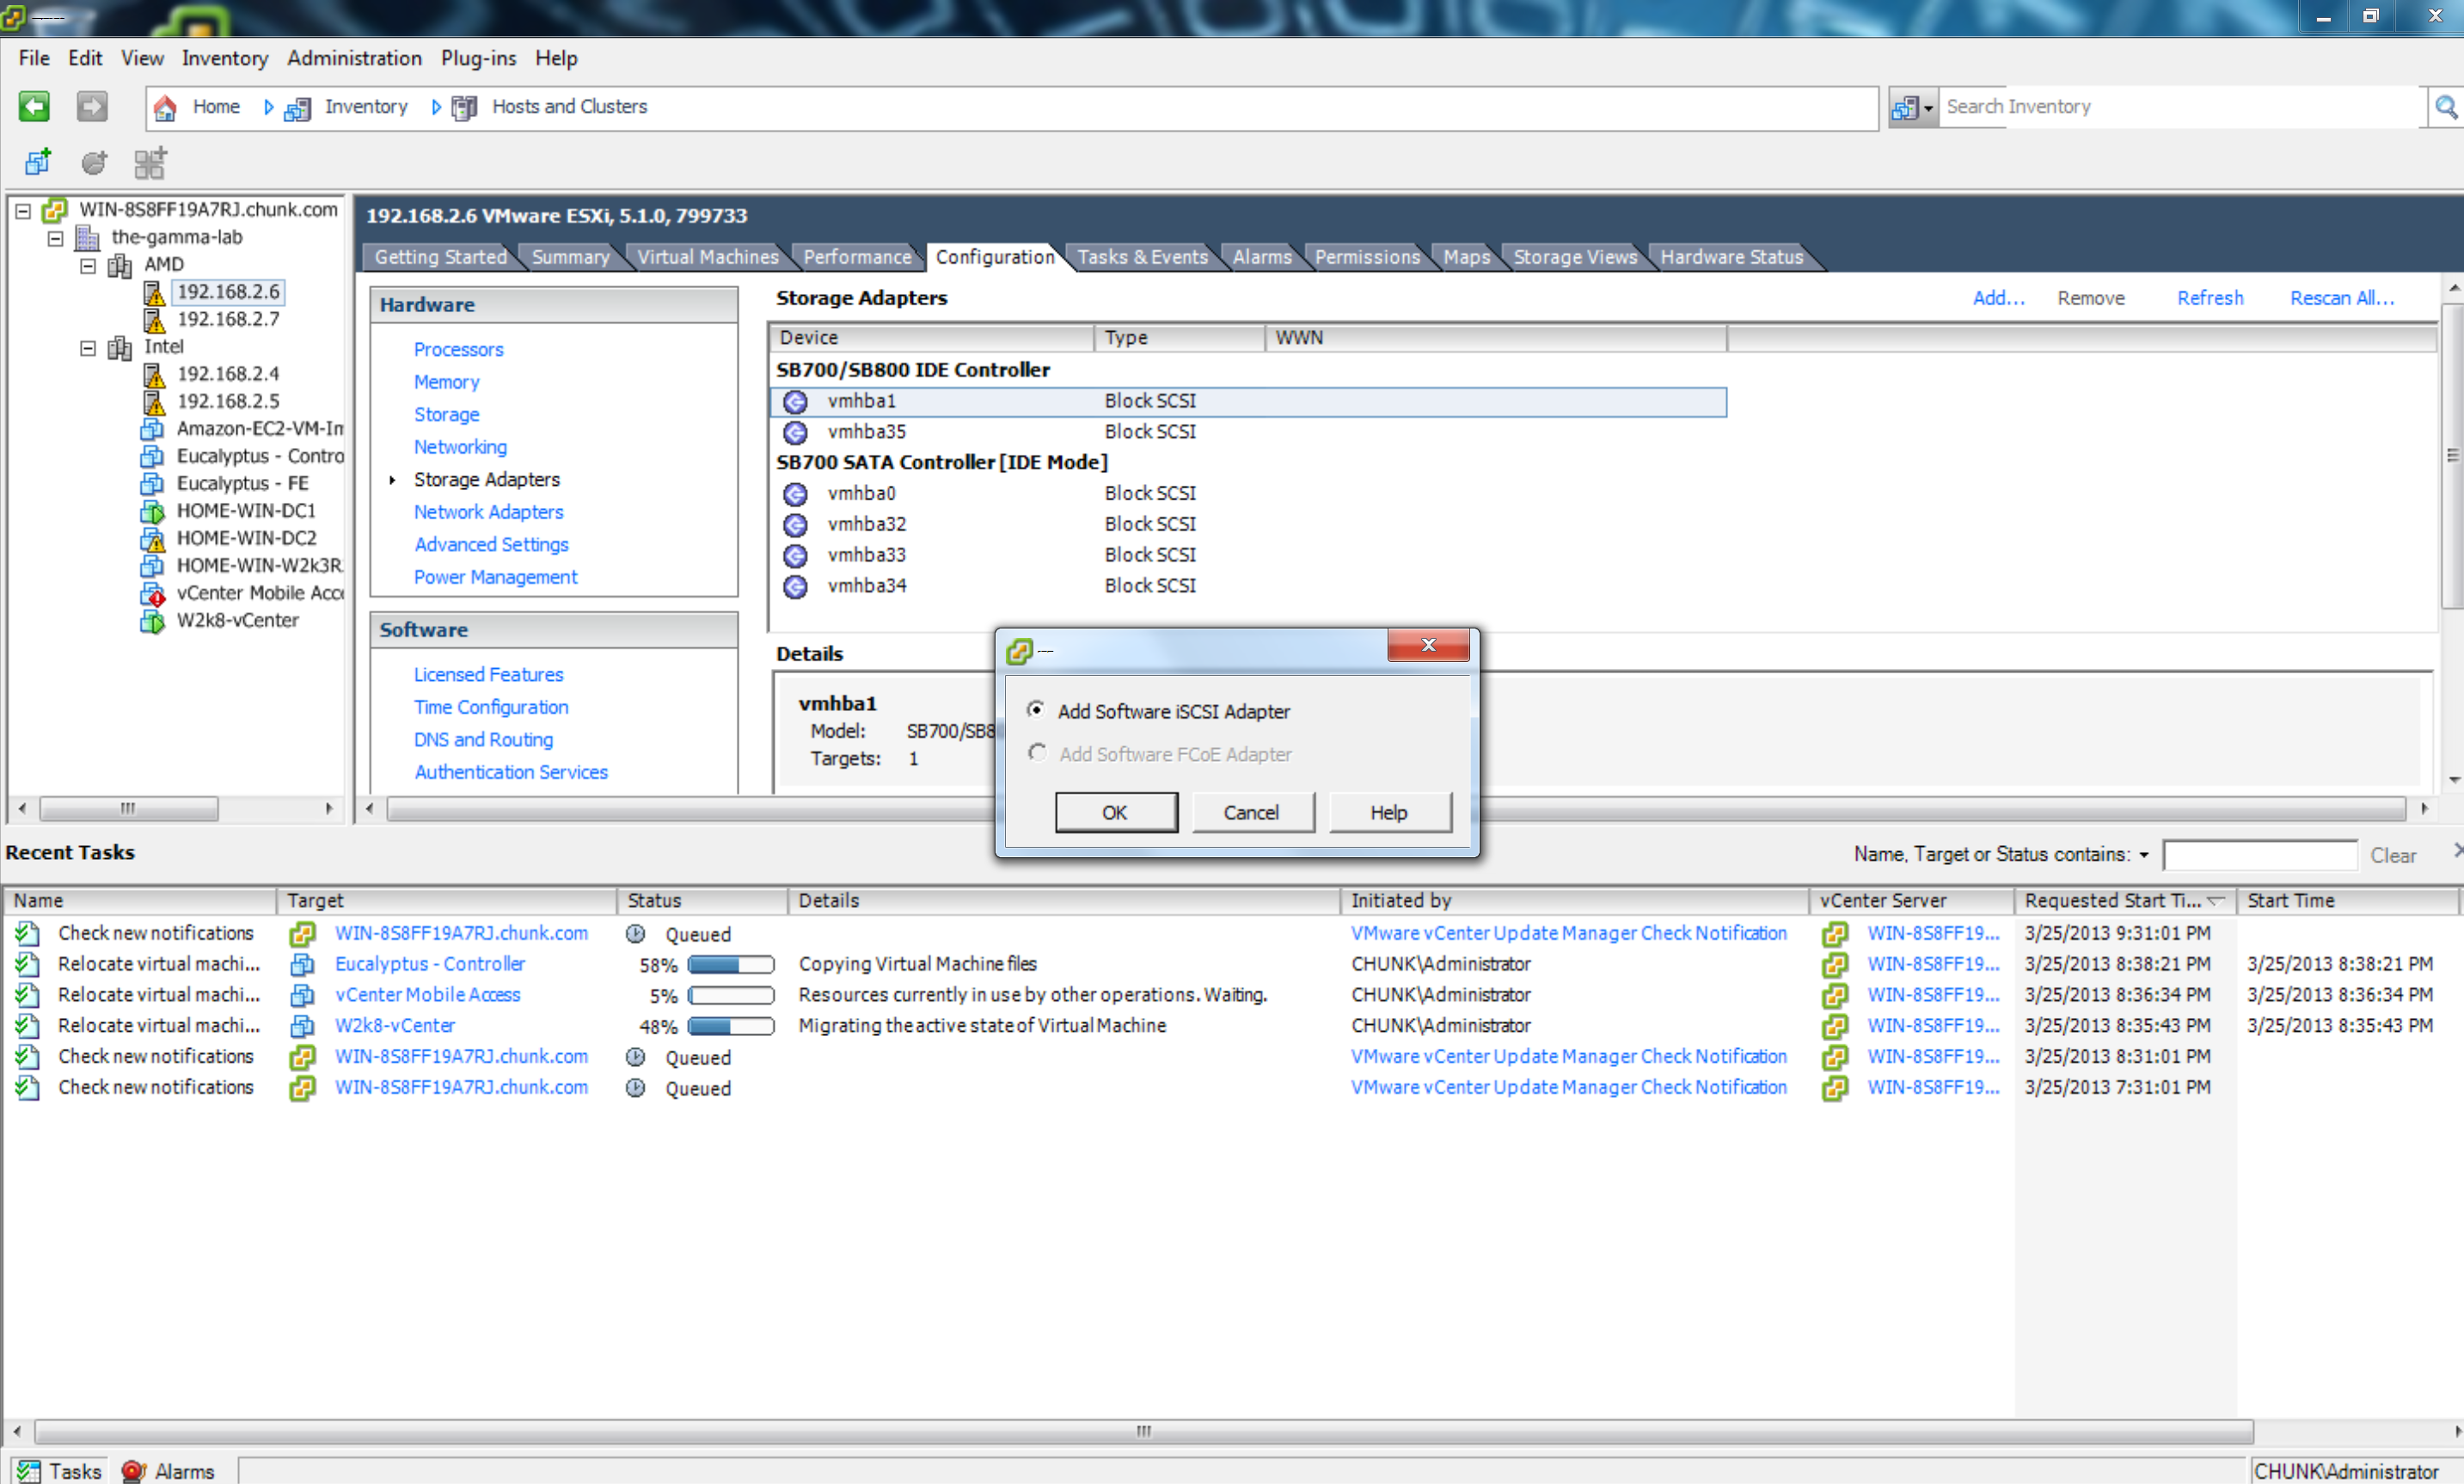
Click OK to add the iSCSI capability:
After acknowledging the dialogue box, force a rescan on the storage adapters in order to see the new iSCSI adapter prior to the normal refresh cycle:

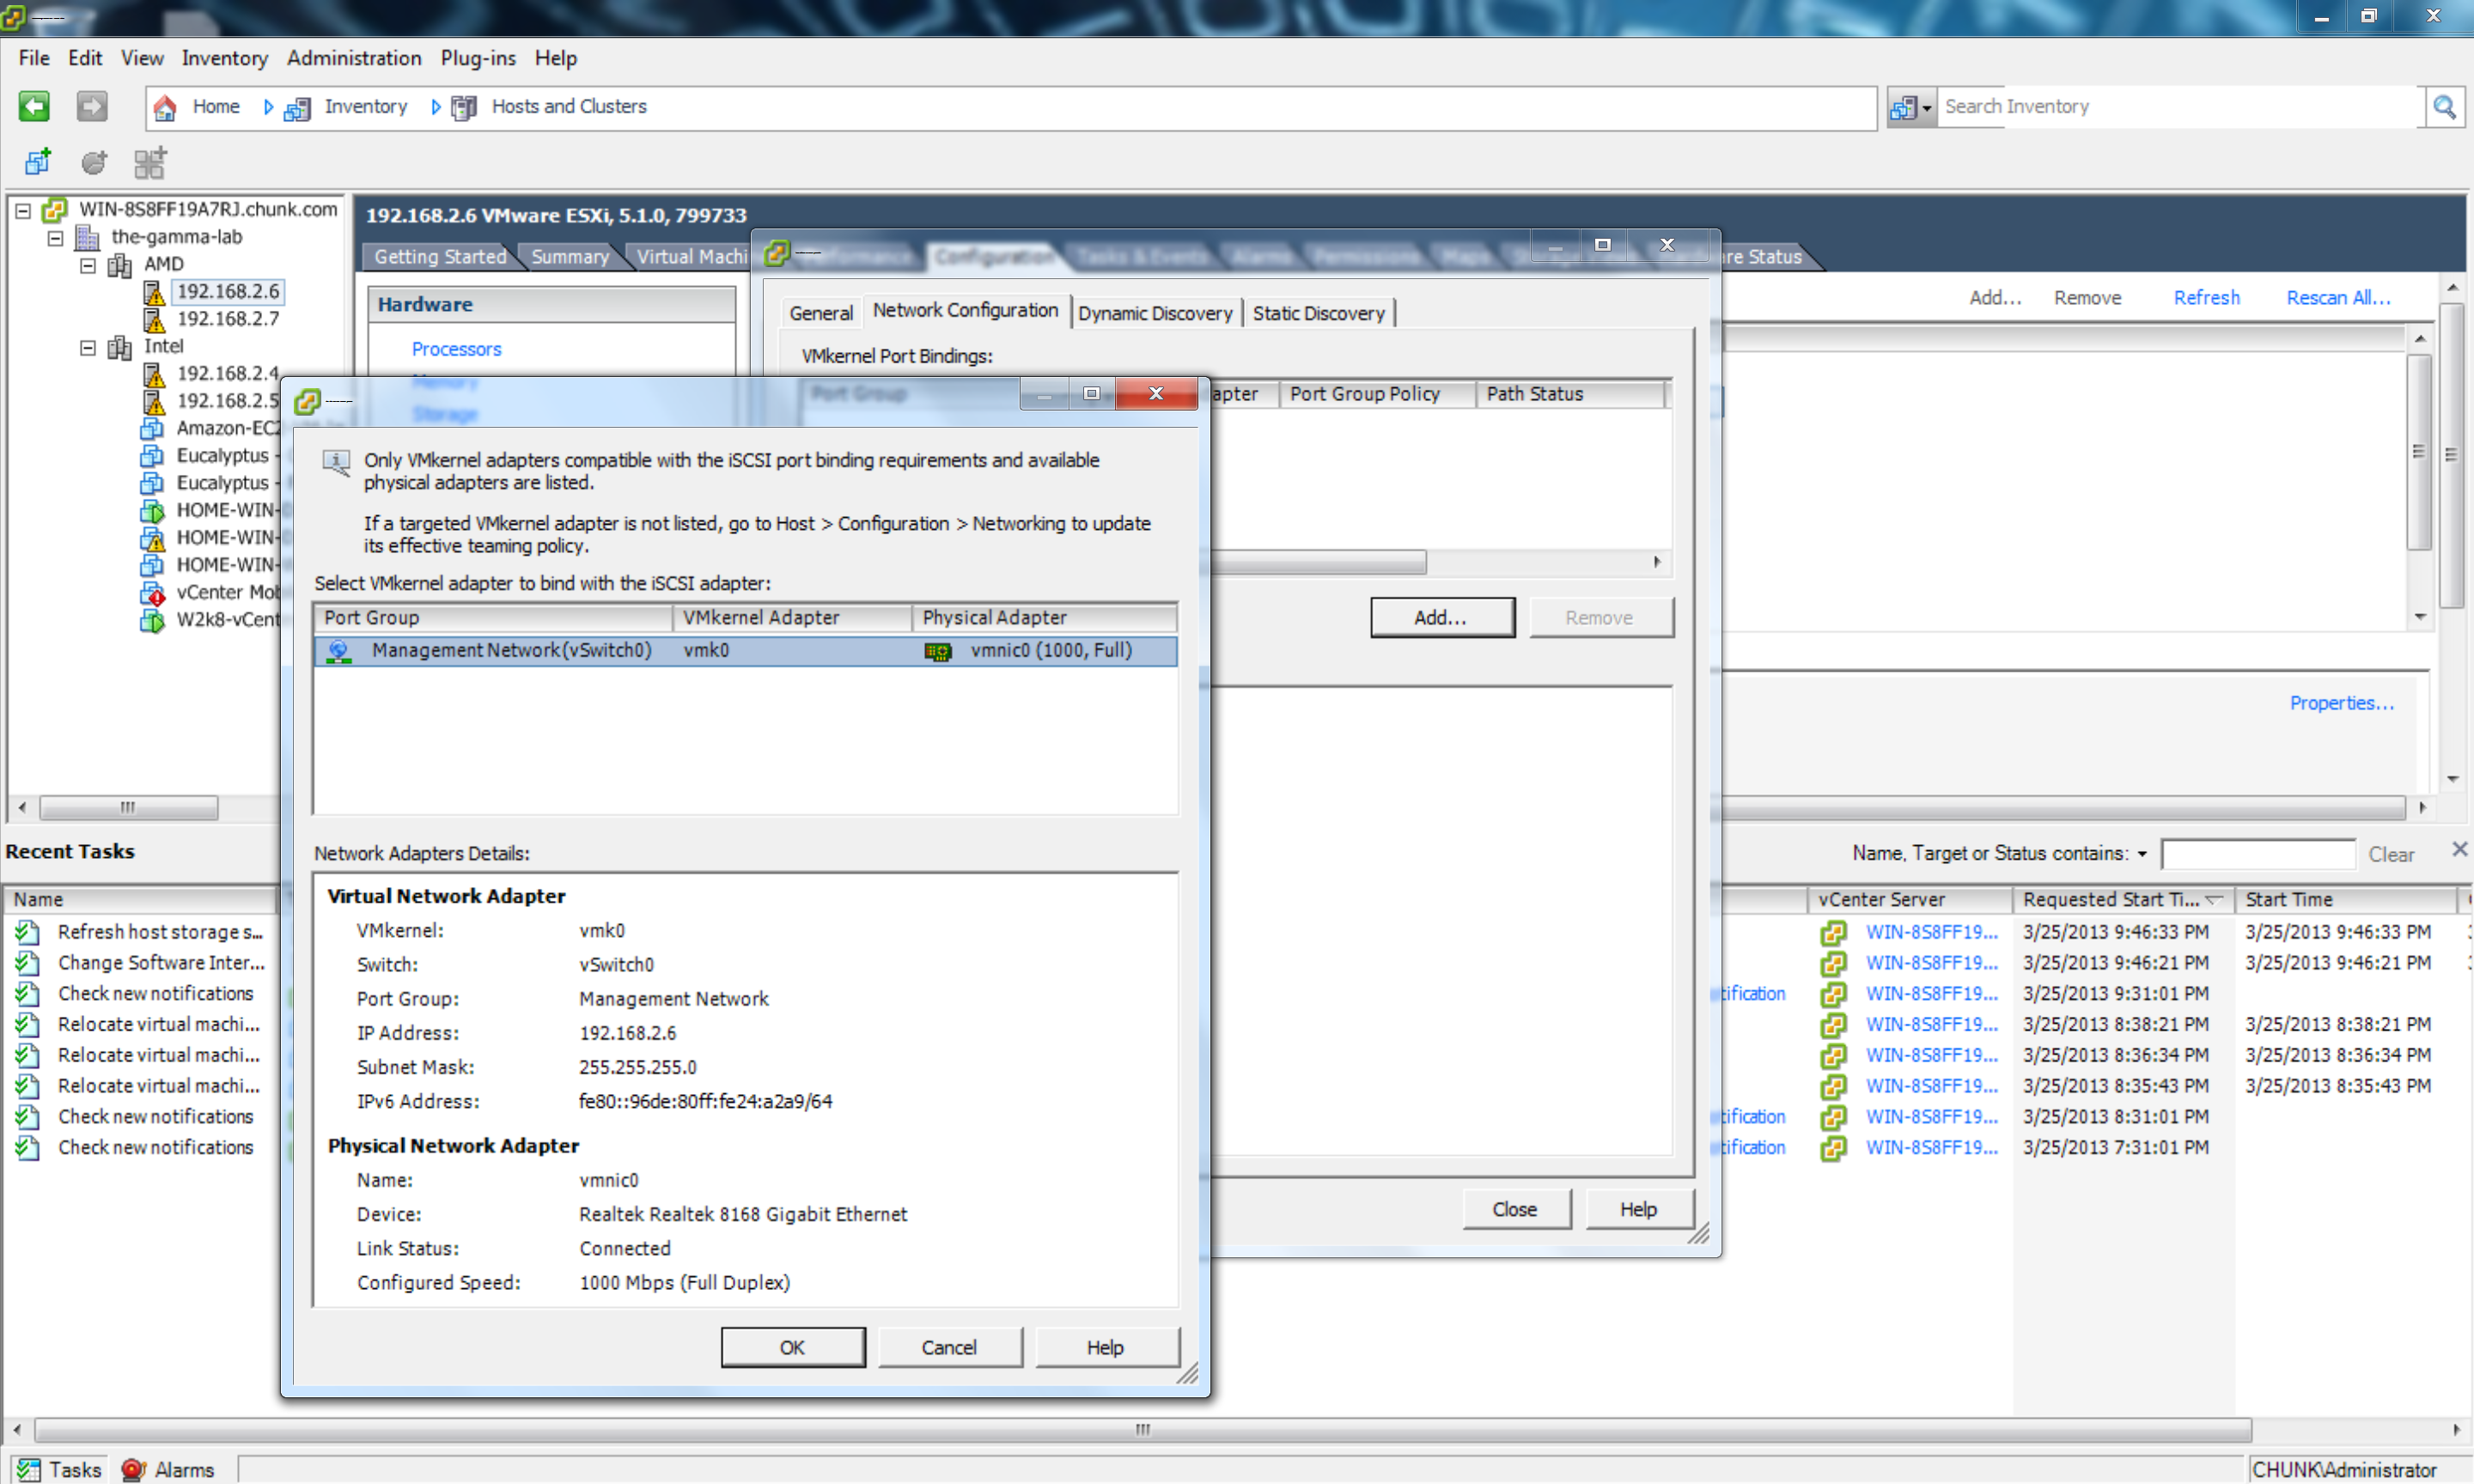
With the new adapter added we can configure the properties. There are a few key things to configure here. The first is the network binding. In my case I use a single NIC on all of my hosts, so this NIC has to be used for everything. I create two separate port groups off of the default vSwitch associated with the physical NIC and run everything through those. The VM Port Group is used by the guests and the Kernel Port is used by the management network (iSCSI, management, fault tolerance, etc). When configuring the iSCSI adapter, on the network tab, the port group allocated for iSCSI should be added as an association:
With the network configuration set an iSCSI target can be added. Targets can be either dynamically discovered by providing a server address and TCP port number, or added statically. I prefer dynamic discovery and this is how I have my hosts configured. In addition to the server address and port number, authentication settings can be configured for the target under “CHAP” and advanced options can be configured, if required, as well:

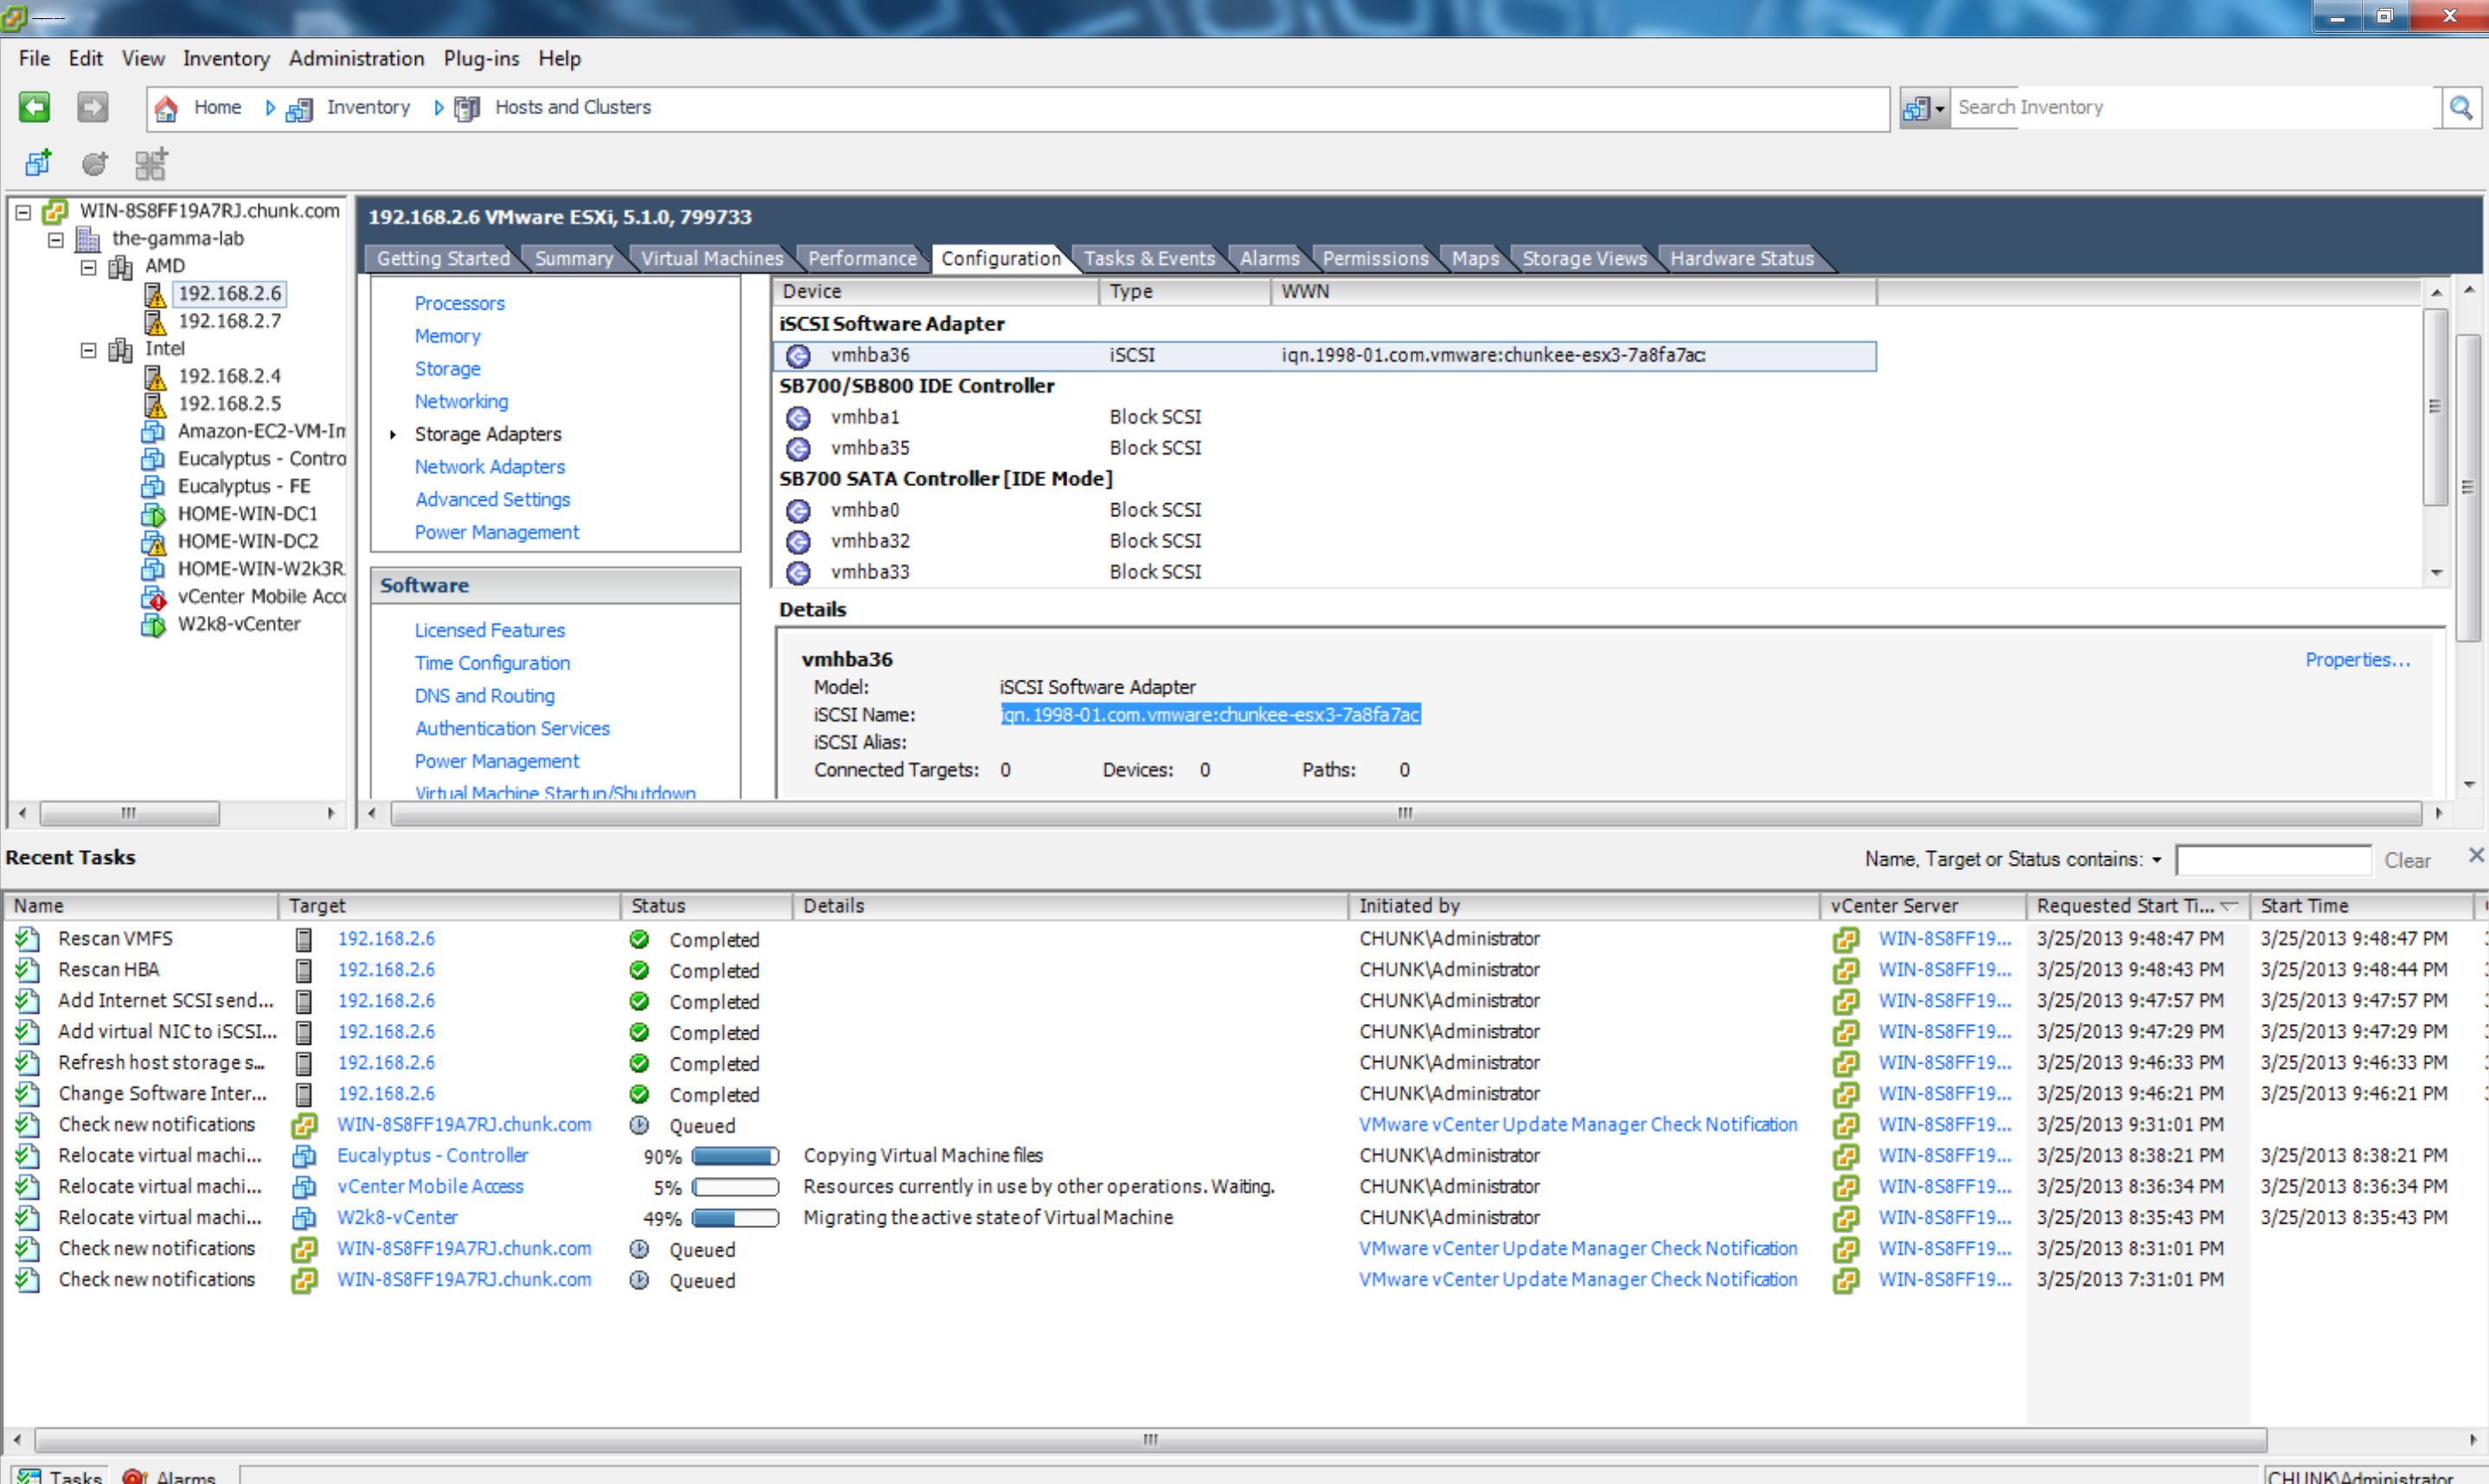
Thats about all that is required for the virtual iSCSI adapter configuration. The next step is to enable access on the target side and configure the NAS to accept the newly added initiator. It is easies to utilize the clipboard to avoid typing and typos by copying/pasting the initiator identifier (iSCSI name):
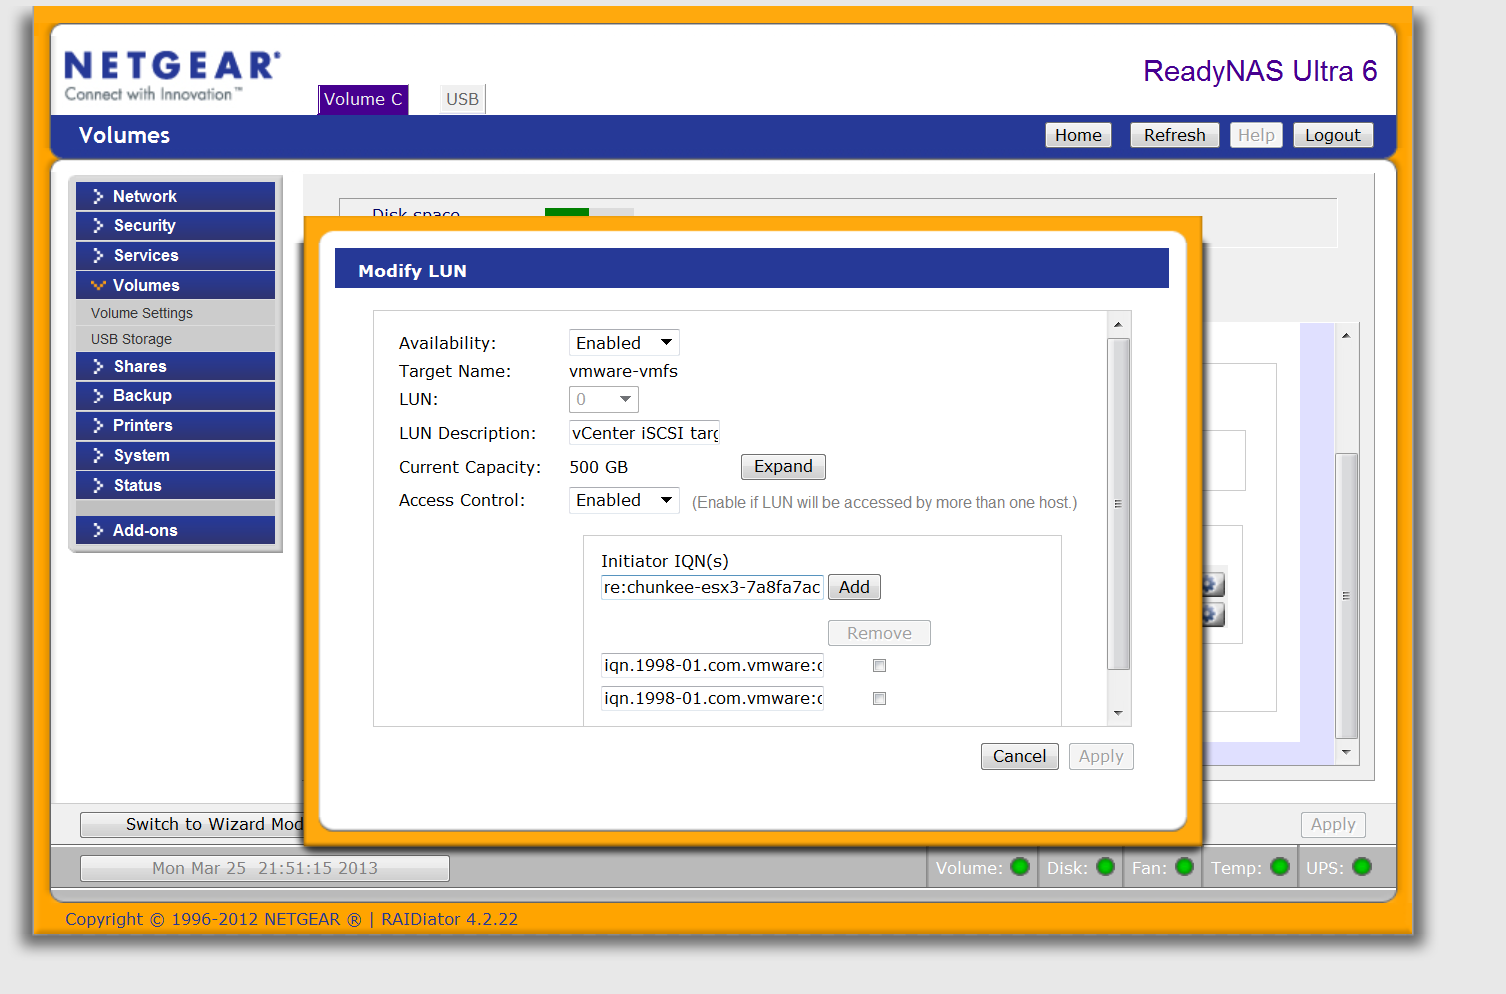
Back in the NAS config UI, the new initiator can be granted permission to the target by pasting in the iSCSI name from vCenter into the access control section of the LUN configuration under Initiator IQN (iSCSI qualified name):

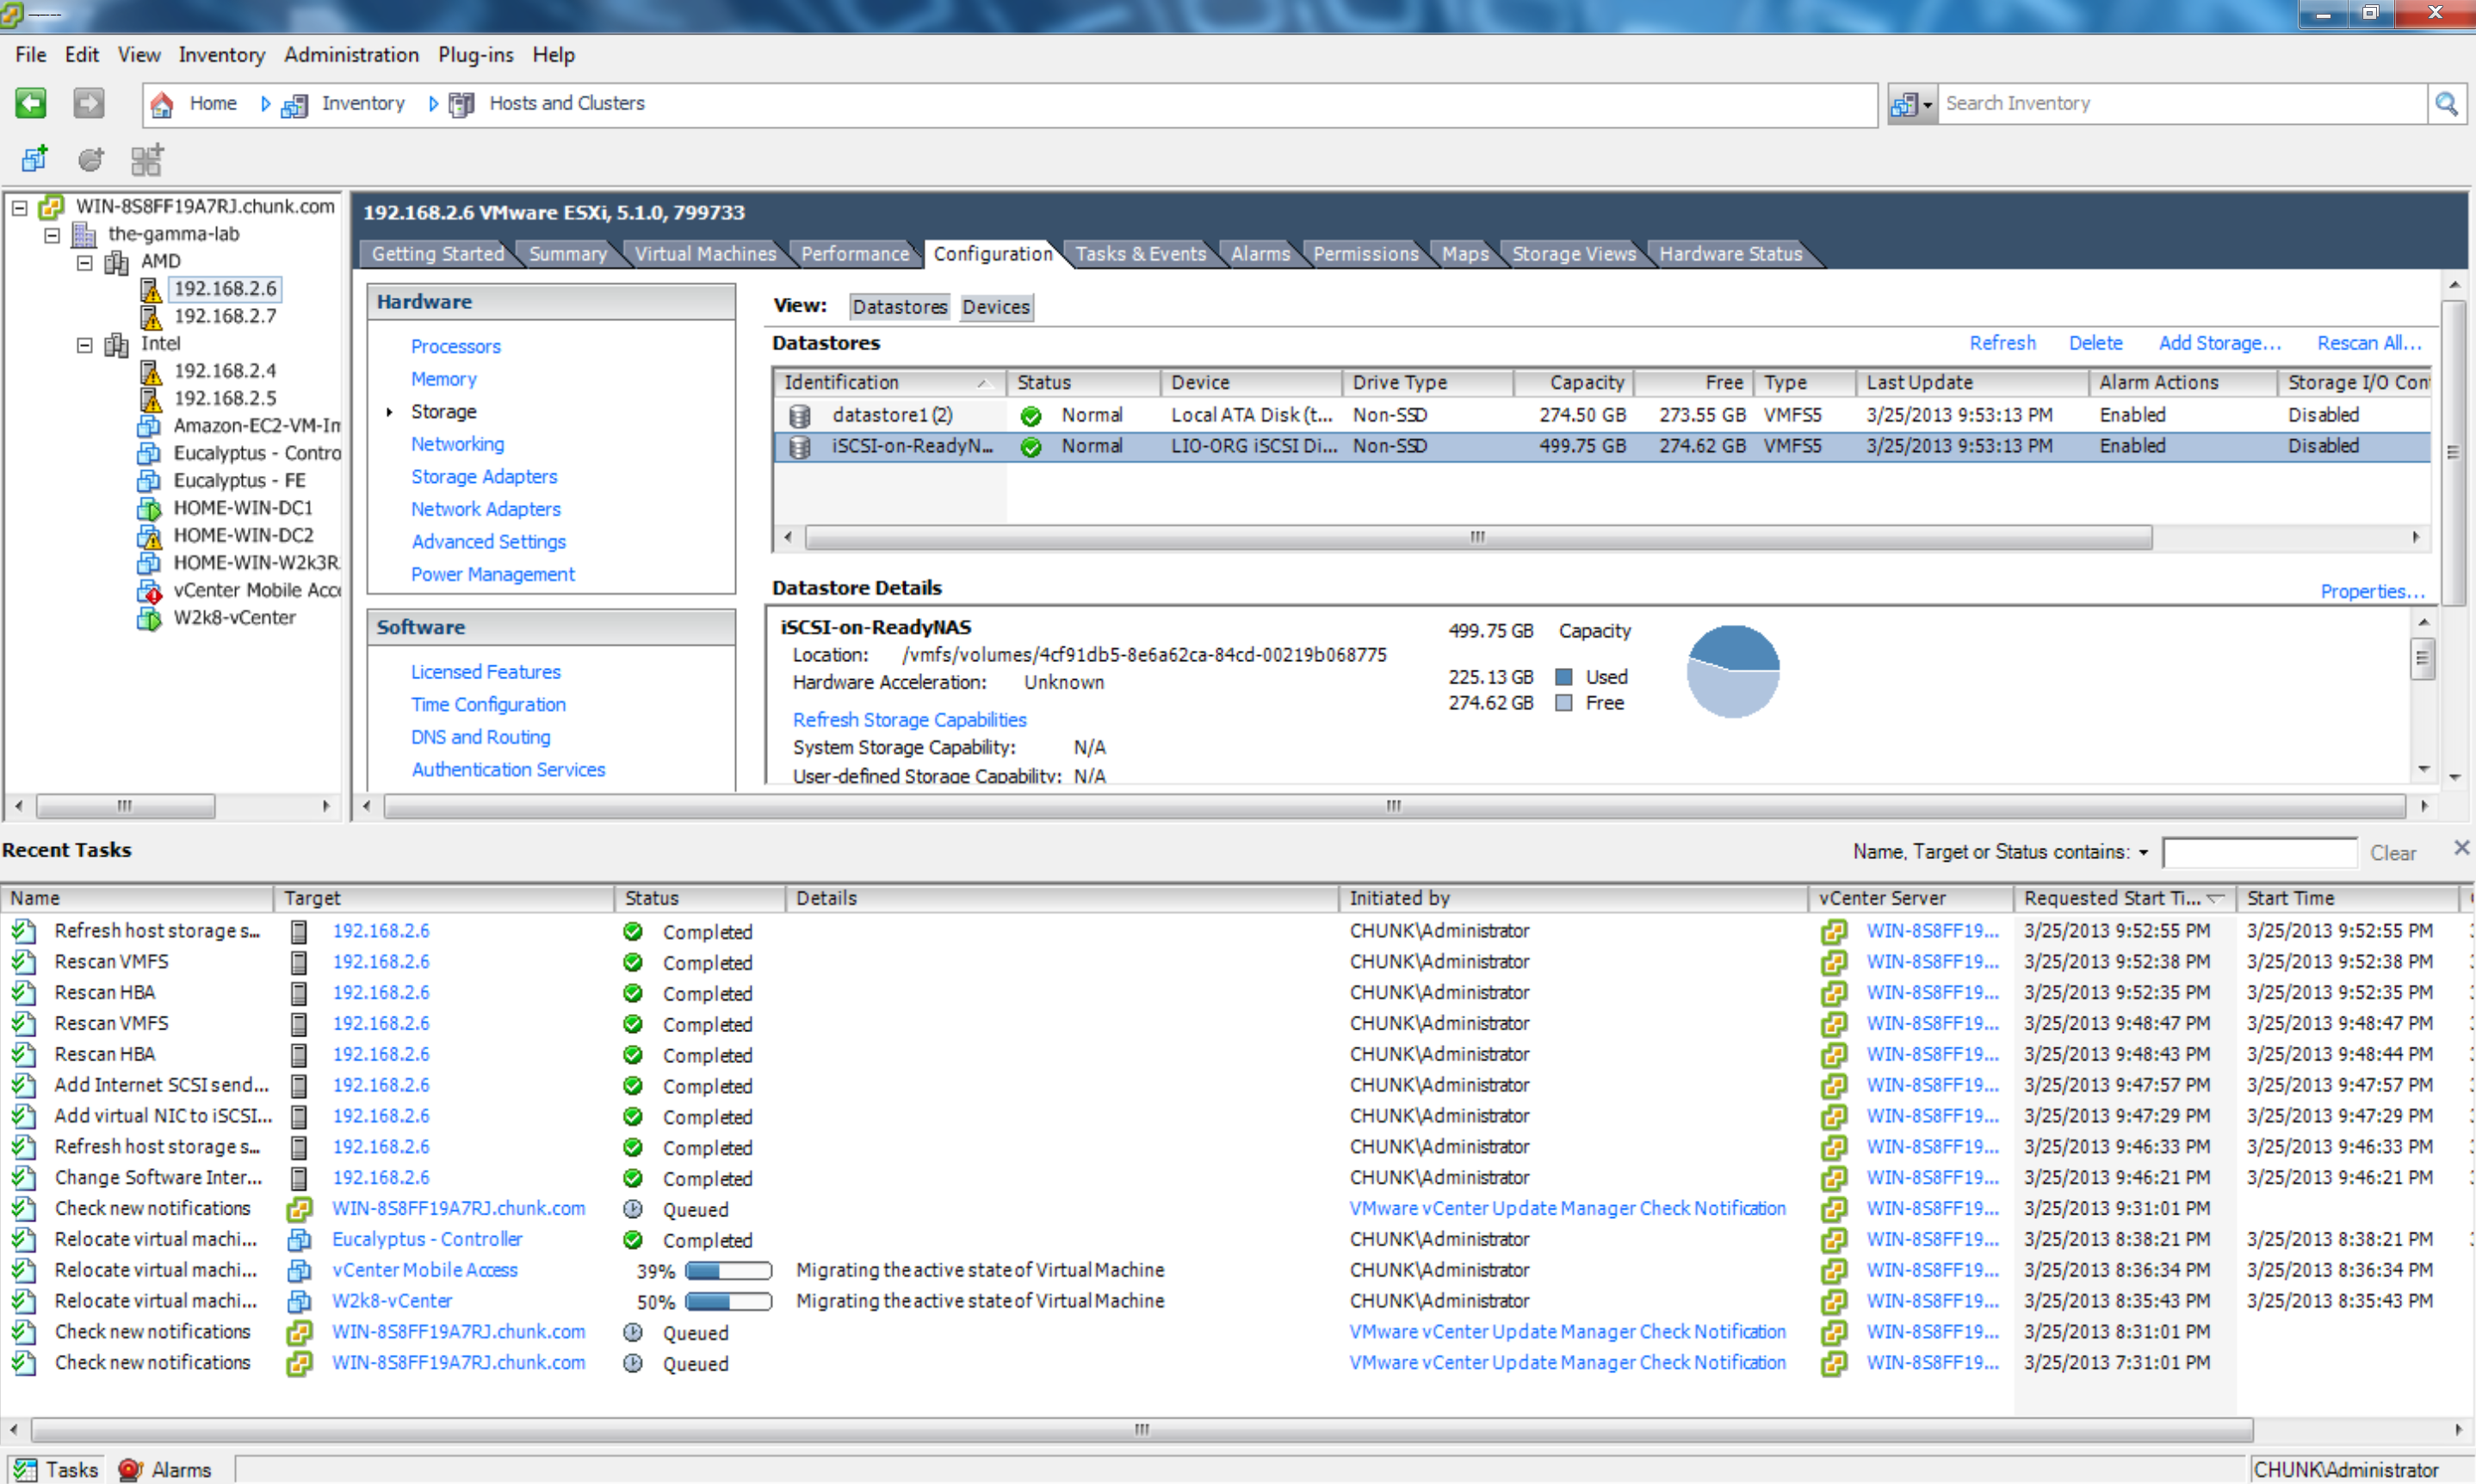
Once the access control list has been updated on the NAS, a rescan/refresh in vCenter should update promptly with the newly available target and volume:

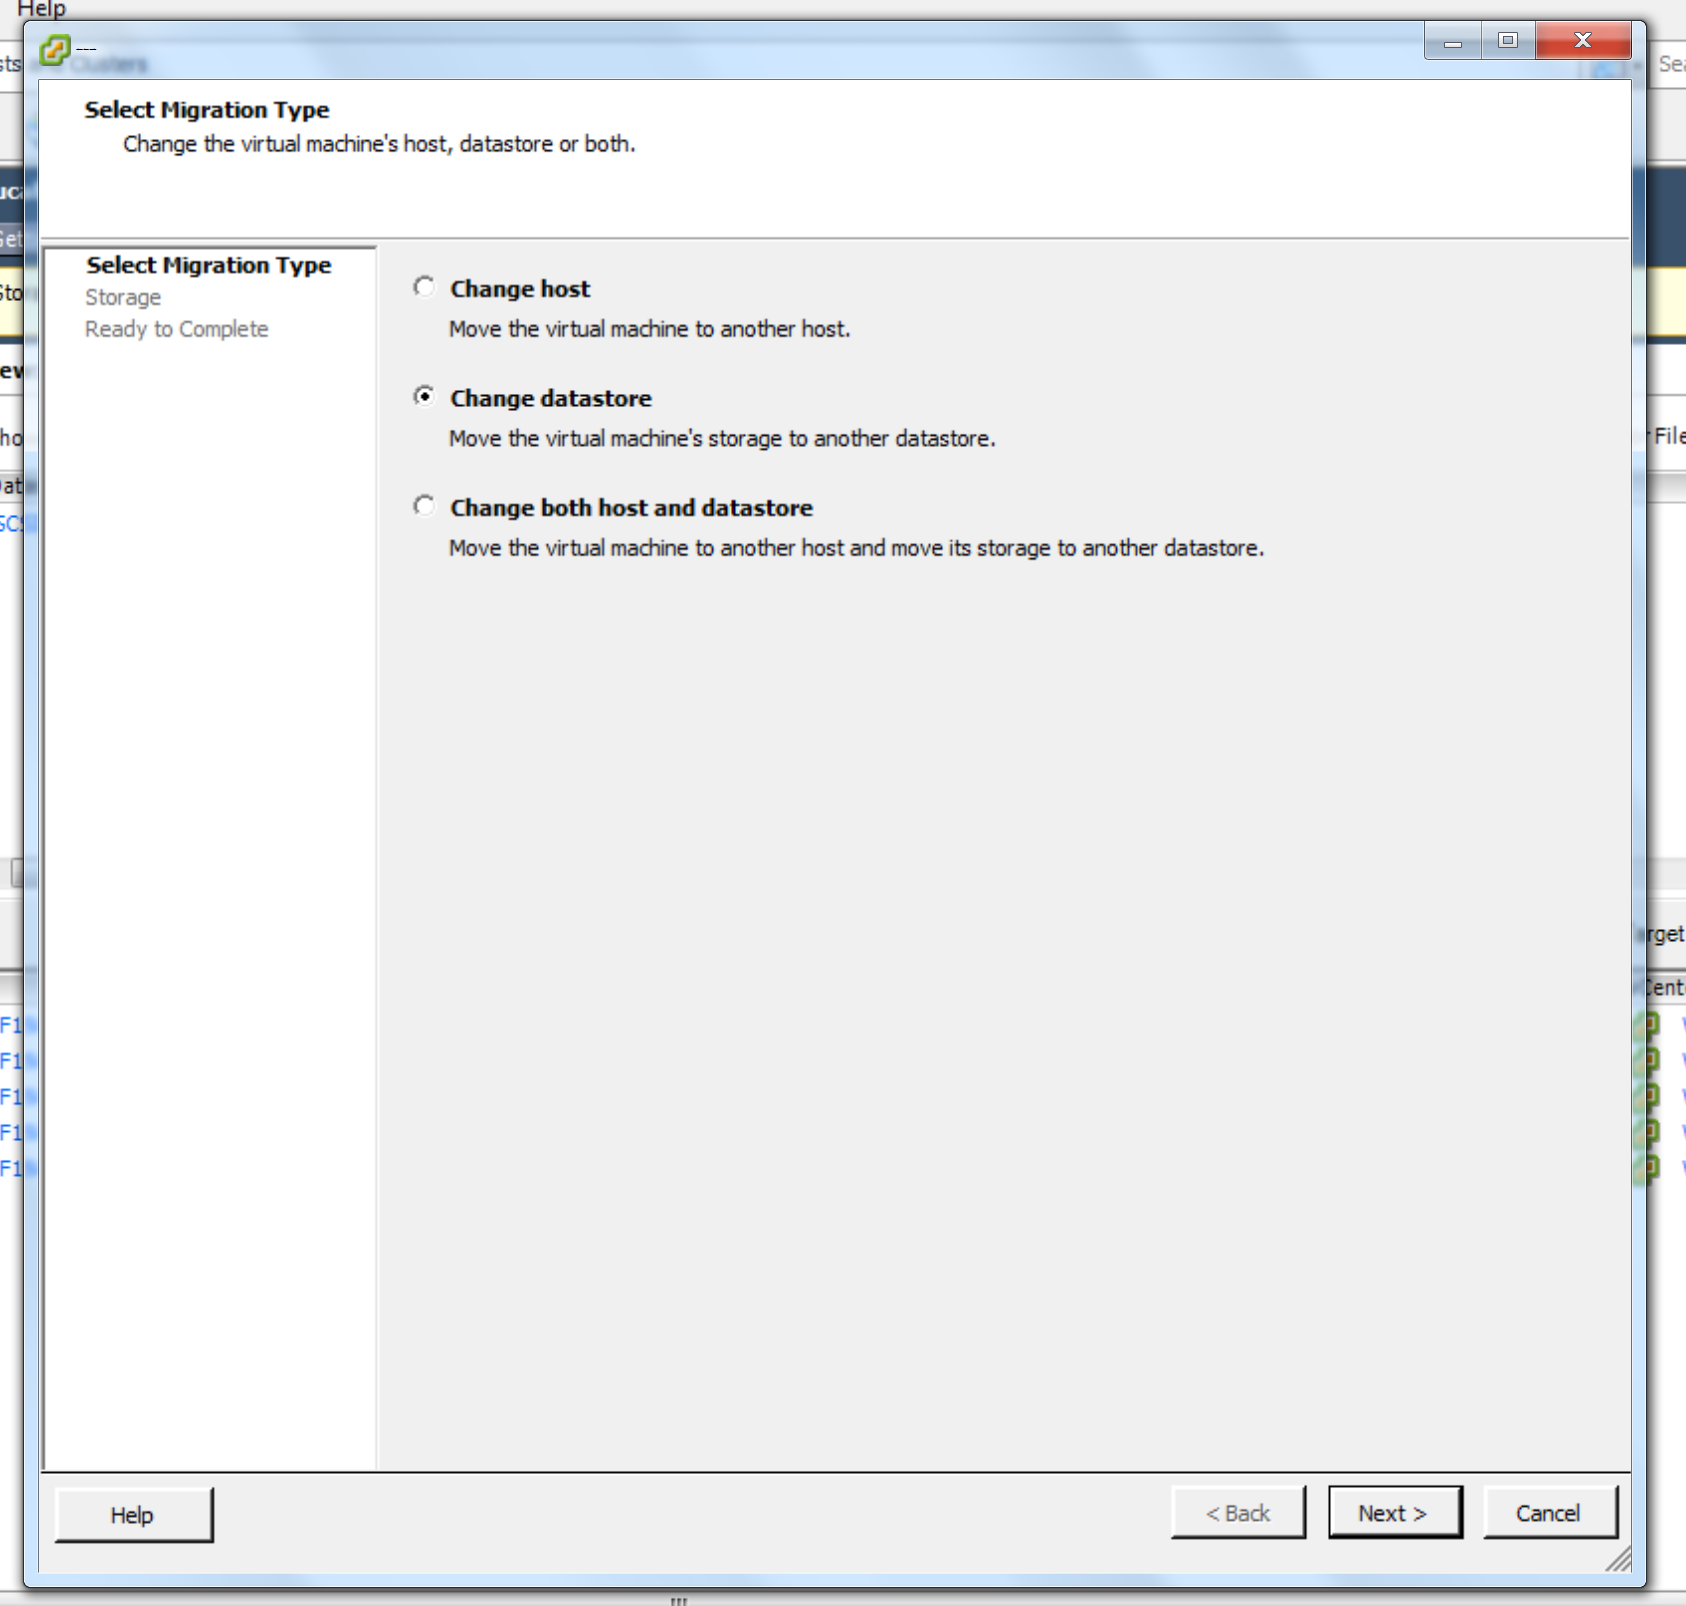
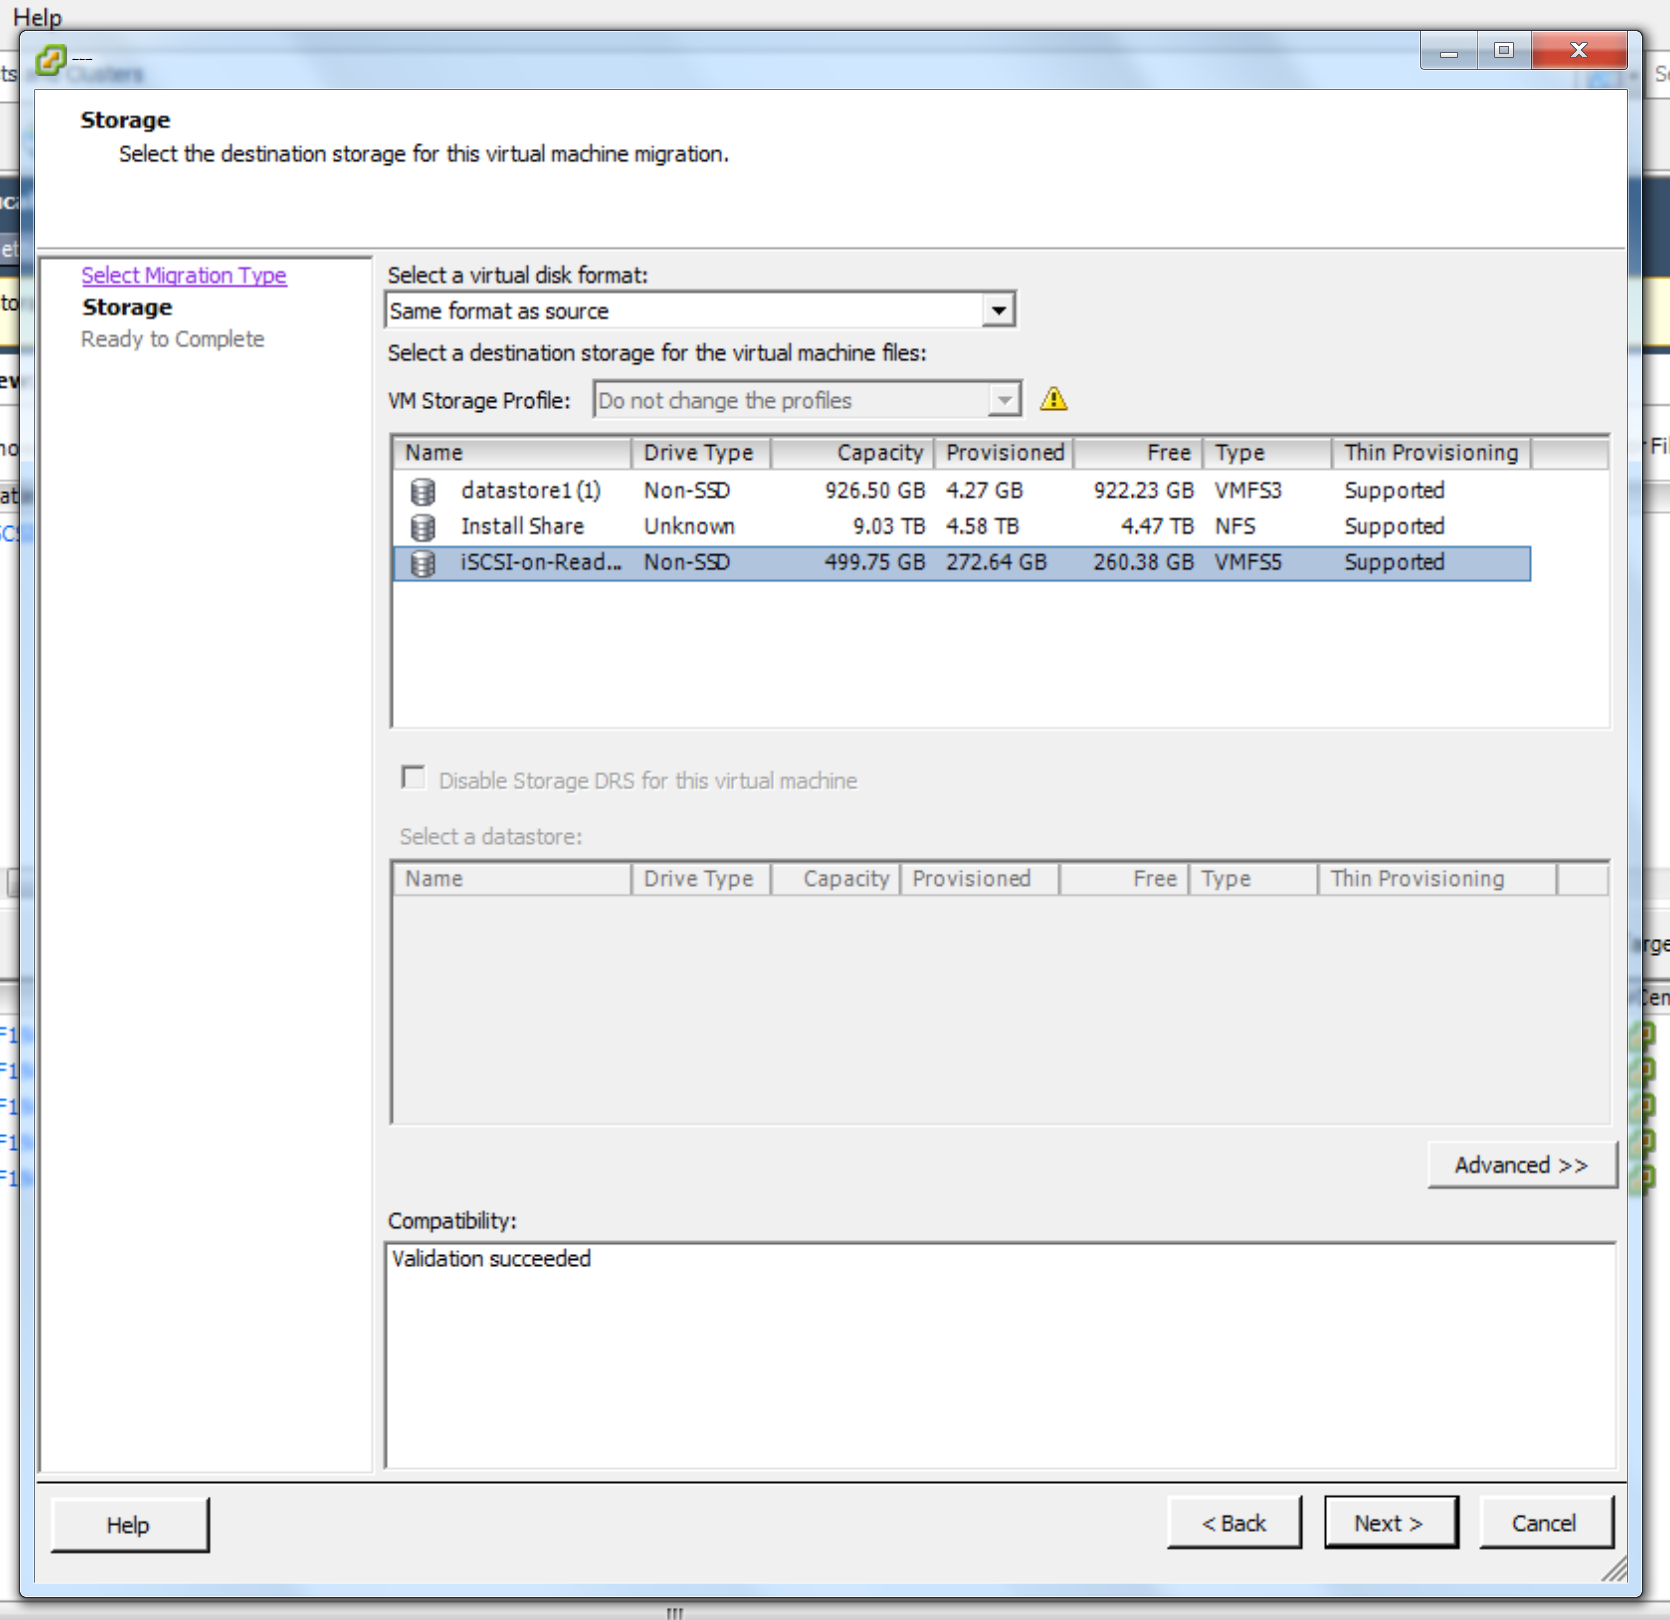
With iSCSI configured and the new datastore available VMs can now easily be migrated over in the usual way by highlighting a VM, right-clicking, and selecting “migrate datastore”. The click-through is straightforward, selecting the target datastore and initiating the move:
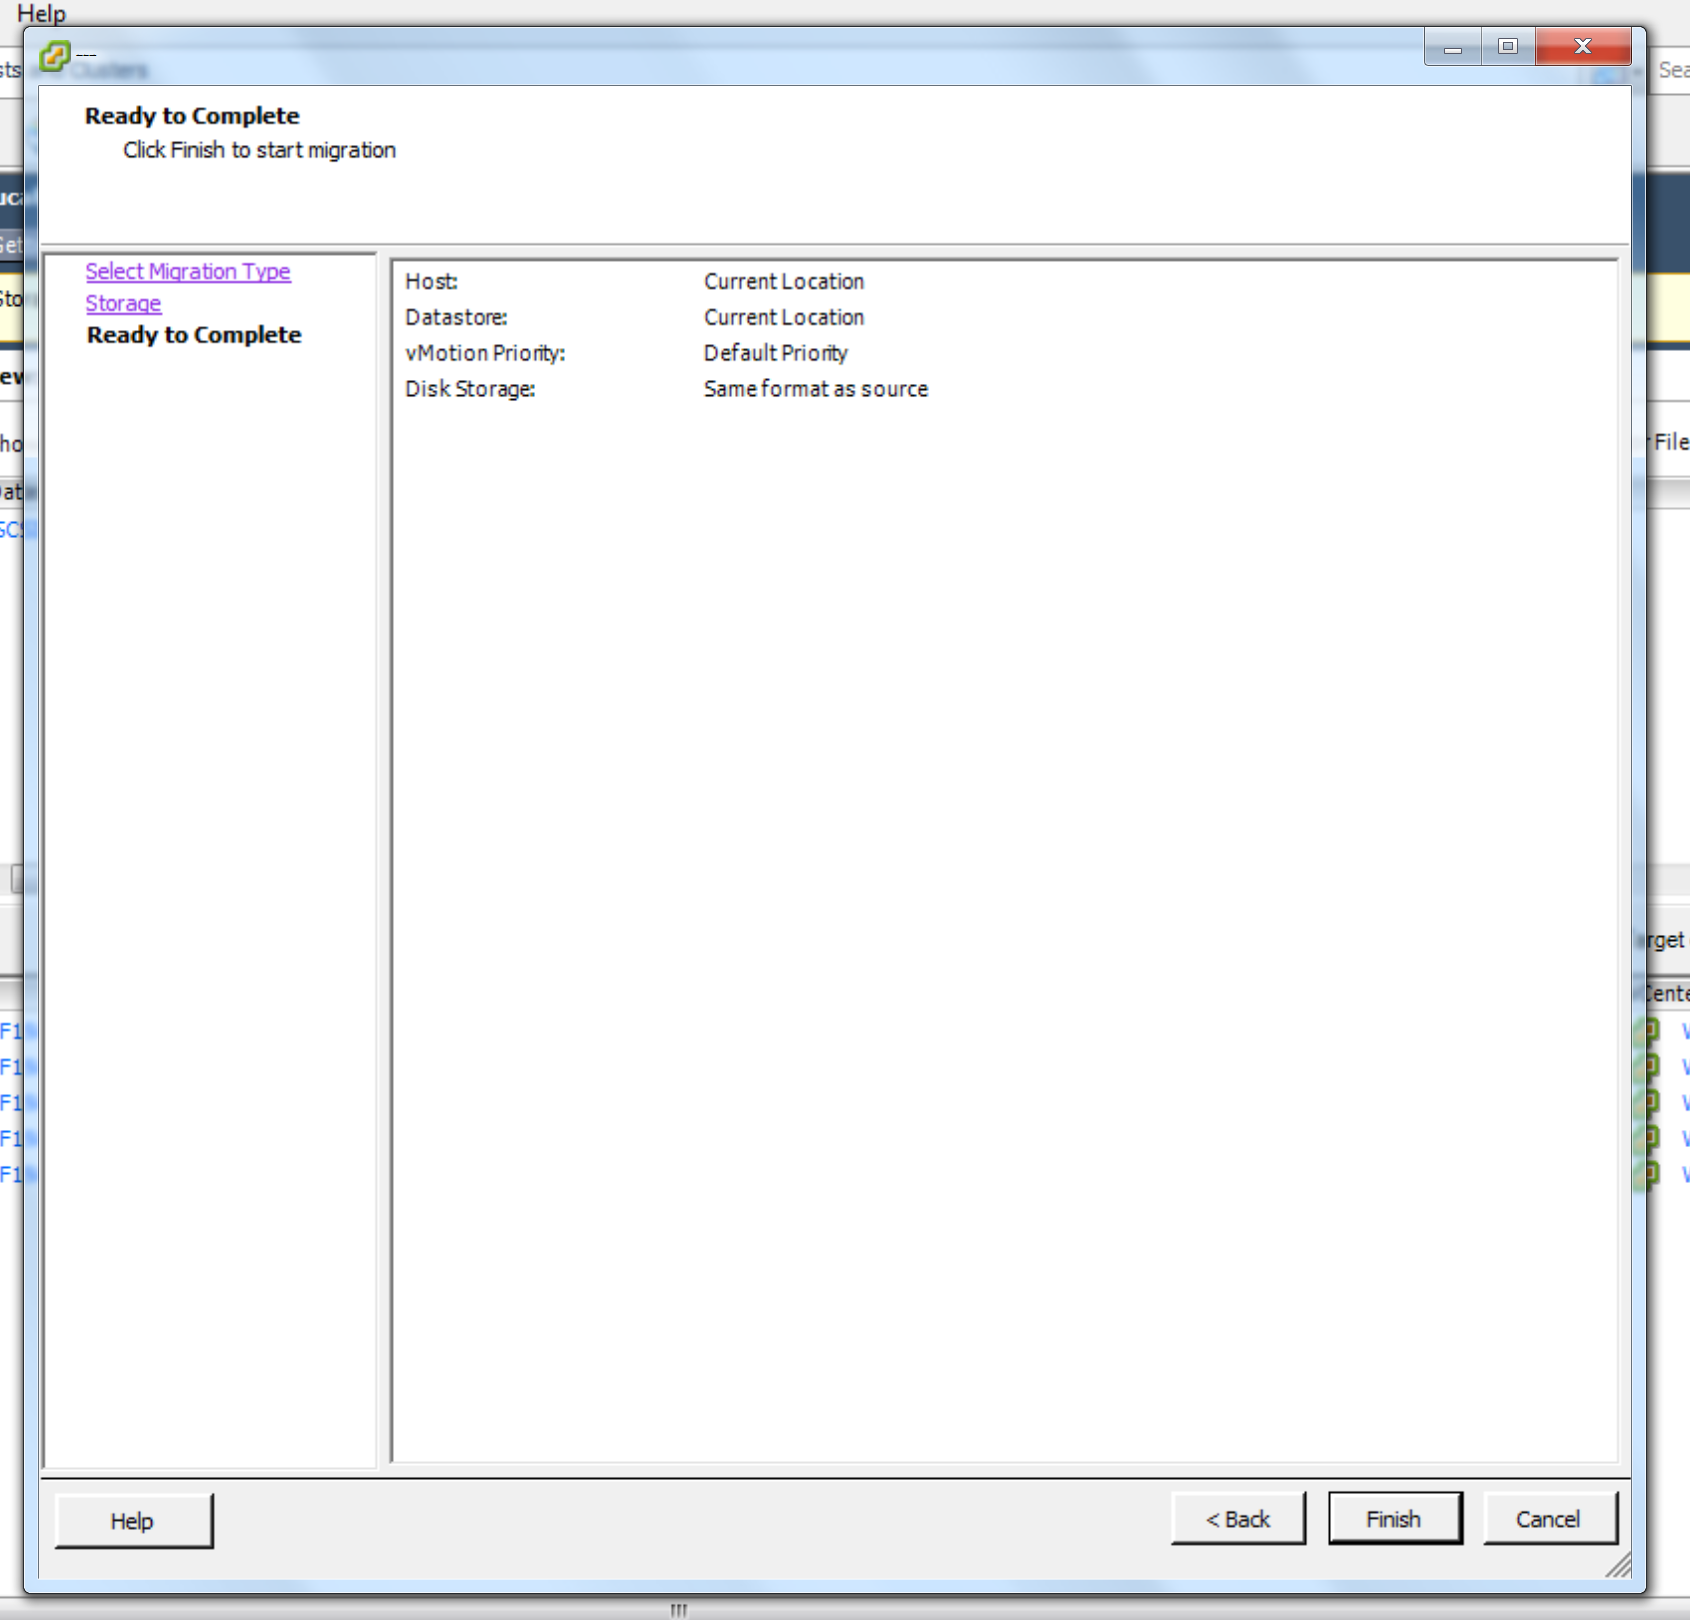
The move took quite a while (about 70 minutes) for my existing VMs owing to the fact that the network is only 1Gb/s and there was about 100GB of data. With all hosts and the existing VM catalogue migrated to iSCSI the next step was to do some vCenter reconfiguration to accomodate the new hosts. Stay tuned for part IV!
