
With management and orchestration being the real future battleground for cloud, I’ve decided to increase my focus on the existing toolsets (both ISV and OpenSource). Microsoft has been expanding and refining the System Center suite for well over a decade now and in recent years it has become a proper cloud management support even going so far as to have a hint of heterogeneity. As a follow-on to my cloud performance benchmarking entries it seemed like a good time to explore System Center Operations Manager support for AWS and Azure.
First up is to of course install and configure System Center Operations Manager 2012. For anyone not familiar with the product, it is Microsoft’s monitoring platform (which started its life as SeNTry back in the 90s) that has grown to encompass both extreme depth (particularly for Microsoft products) and breadth (through extensibility via the partner ecosystem) of network and system monitoring and management tasks. The goal of the product was always to aggregate the massive volume of event data that modern systems generate and apply some expert system intelligence to it in order to produce efficient health reports and provide predictive notification of impending trouble (event X + event Y when event Z is occurring = possible hardware problem, for example). For more info on System Center Operations Manager, and detail on implementation (out of scope for this entry), take a look at the Microsoft System Center support site.
Once you have a working installation of SCOM, the next step is to download and install the new management packs for AWS and Azure (management packs are the handy extensibility construct for SCOM). For AWS, the management pack can be found on the AWS site, and for Azure it can, of course, be found on the Microsoft site. Once downloaded, extract and install the MSI (Azure) which will create a path under C:\Program Files (x86|\System Center Management Packs, then extract the .mpb file (AWS) to that same path (no installer for AWS). With the .mpb files on-hand, the first step is to import them. For all configuration, we are going to use the SCOM Operations Manager console.
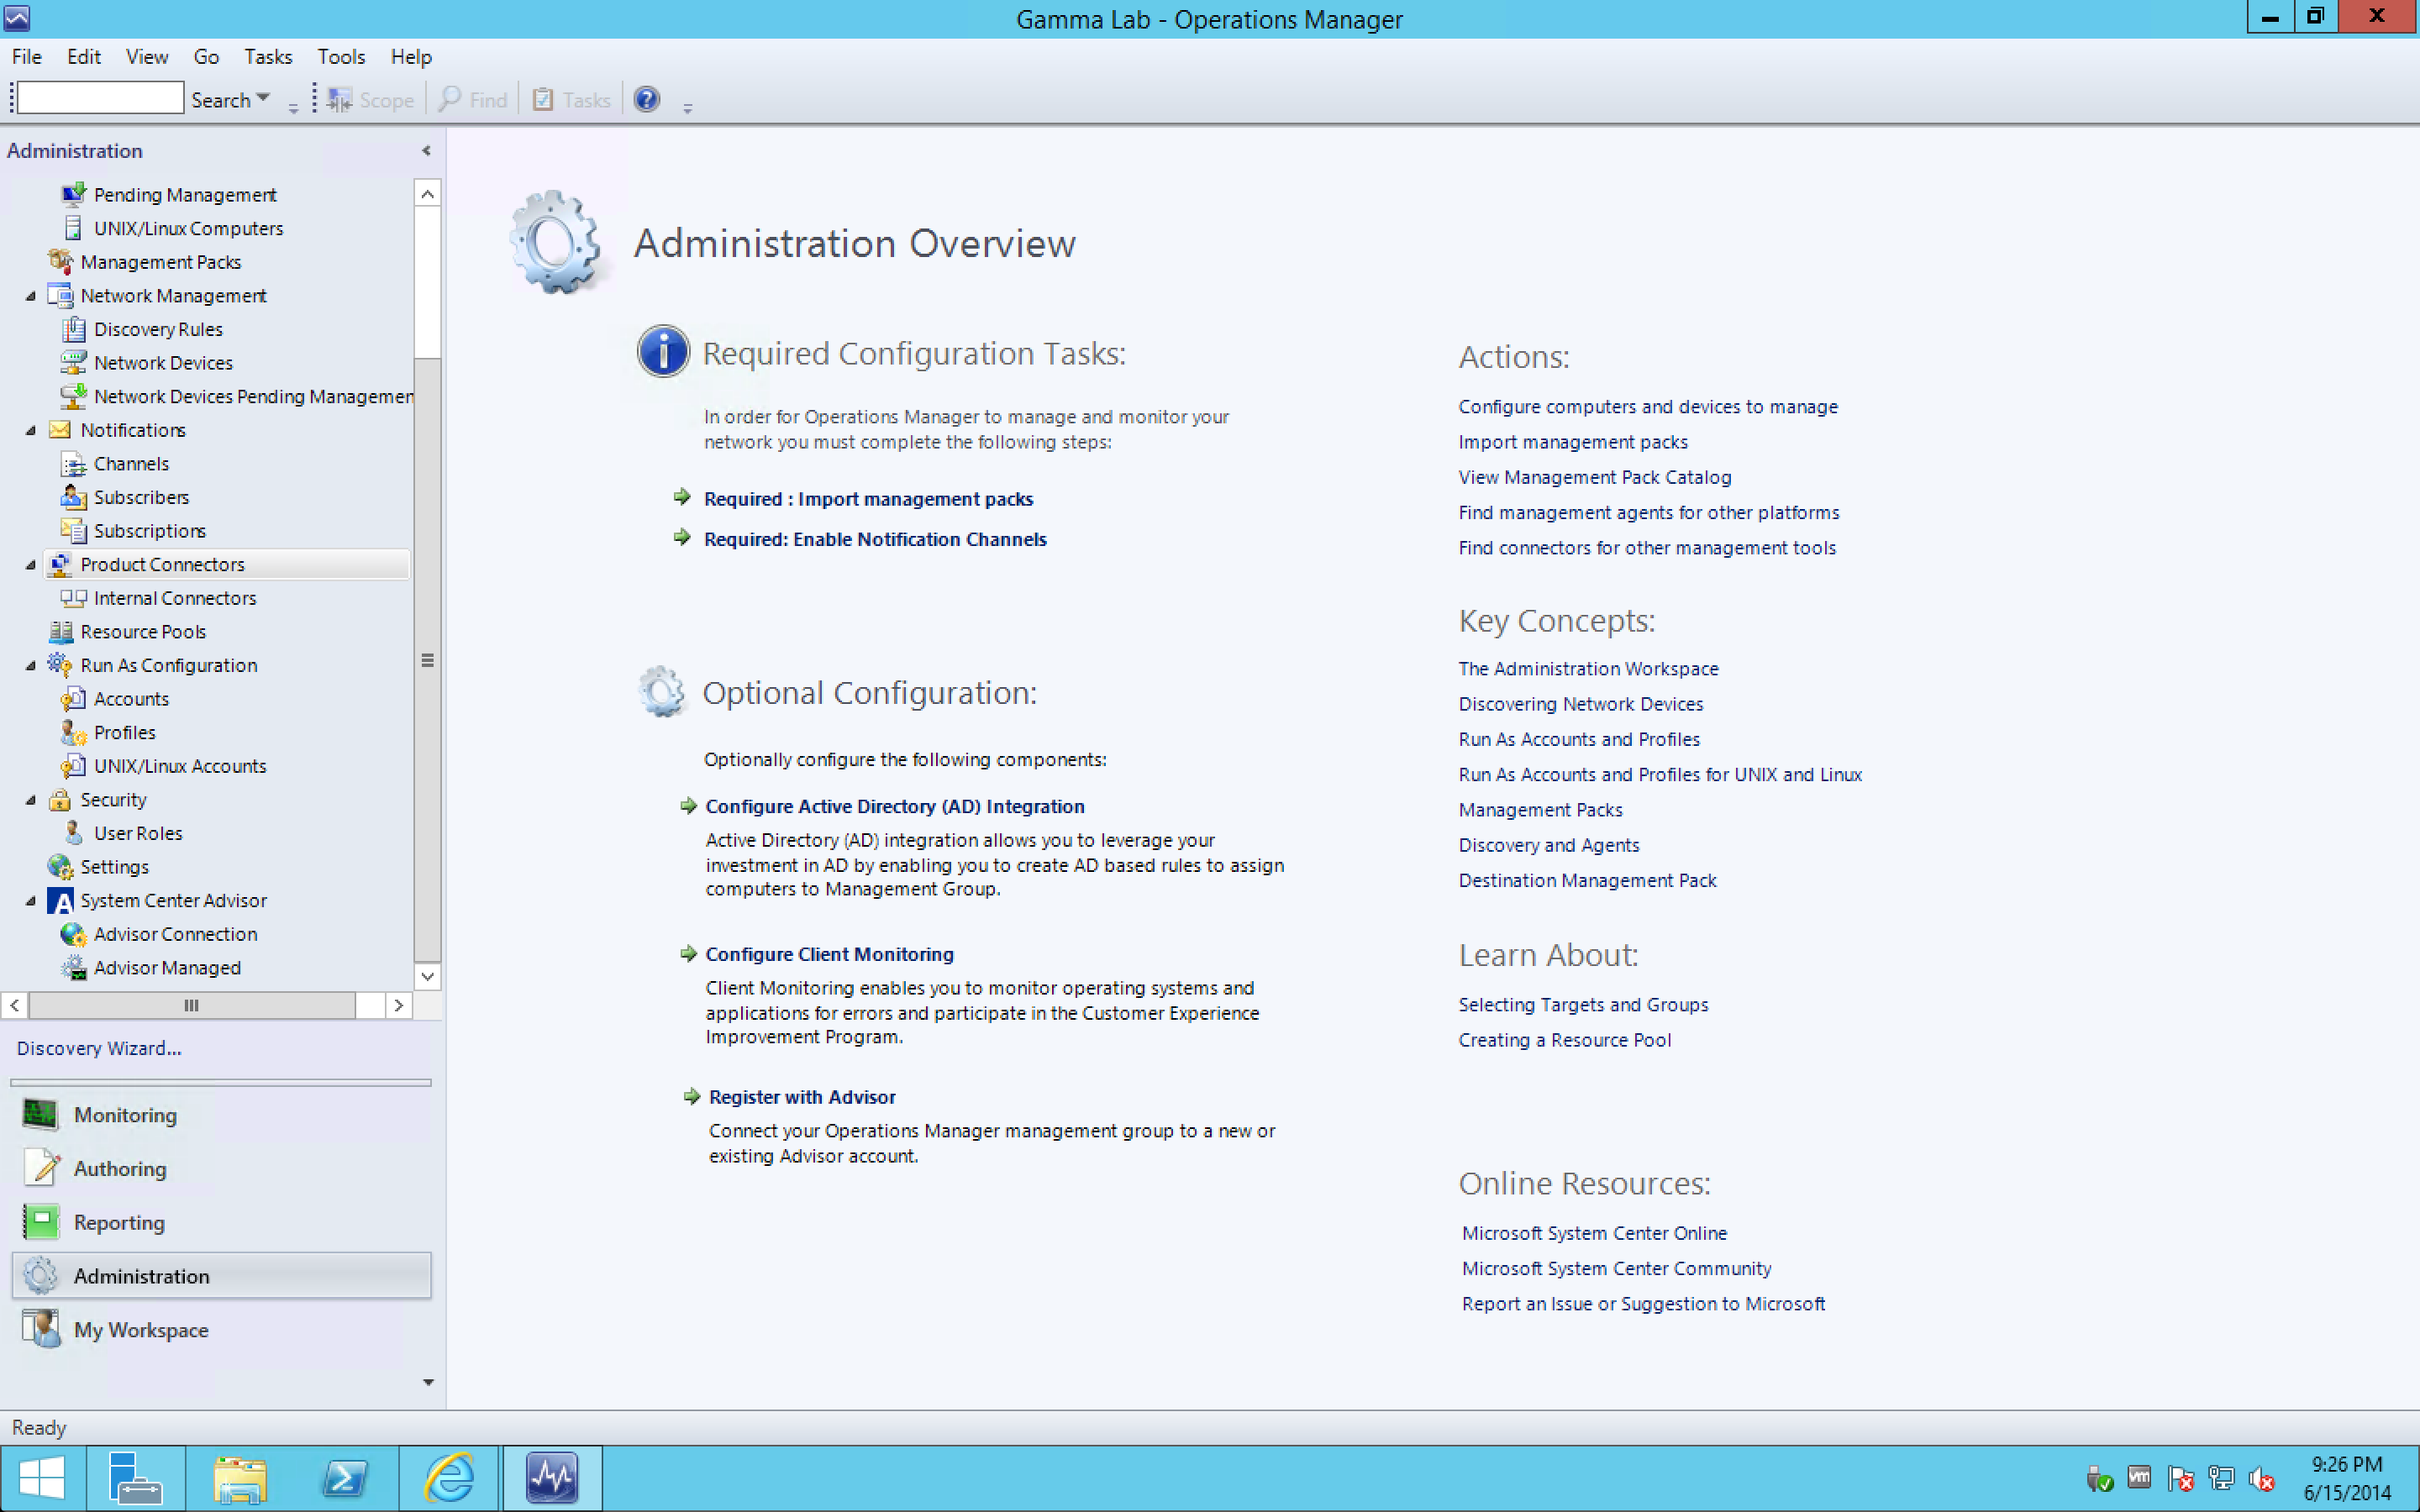
To get started, click on the Administration section and highlight “Product Connectors”. A summary will appear in the main pane. From here, we can select “Import Management Packs” to get the process started. Let’s walk through both AWS and Azure, starting with AWS.
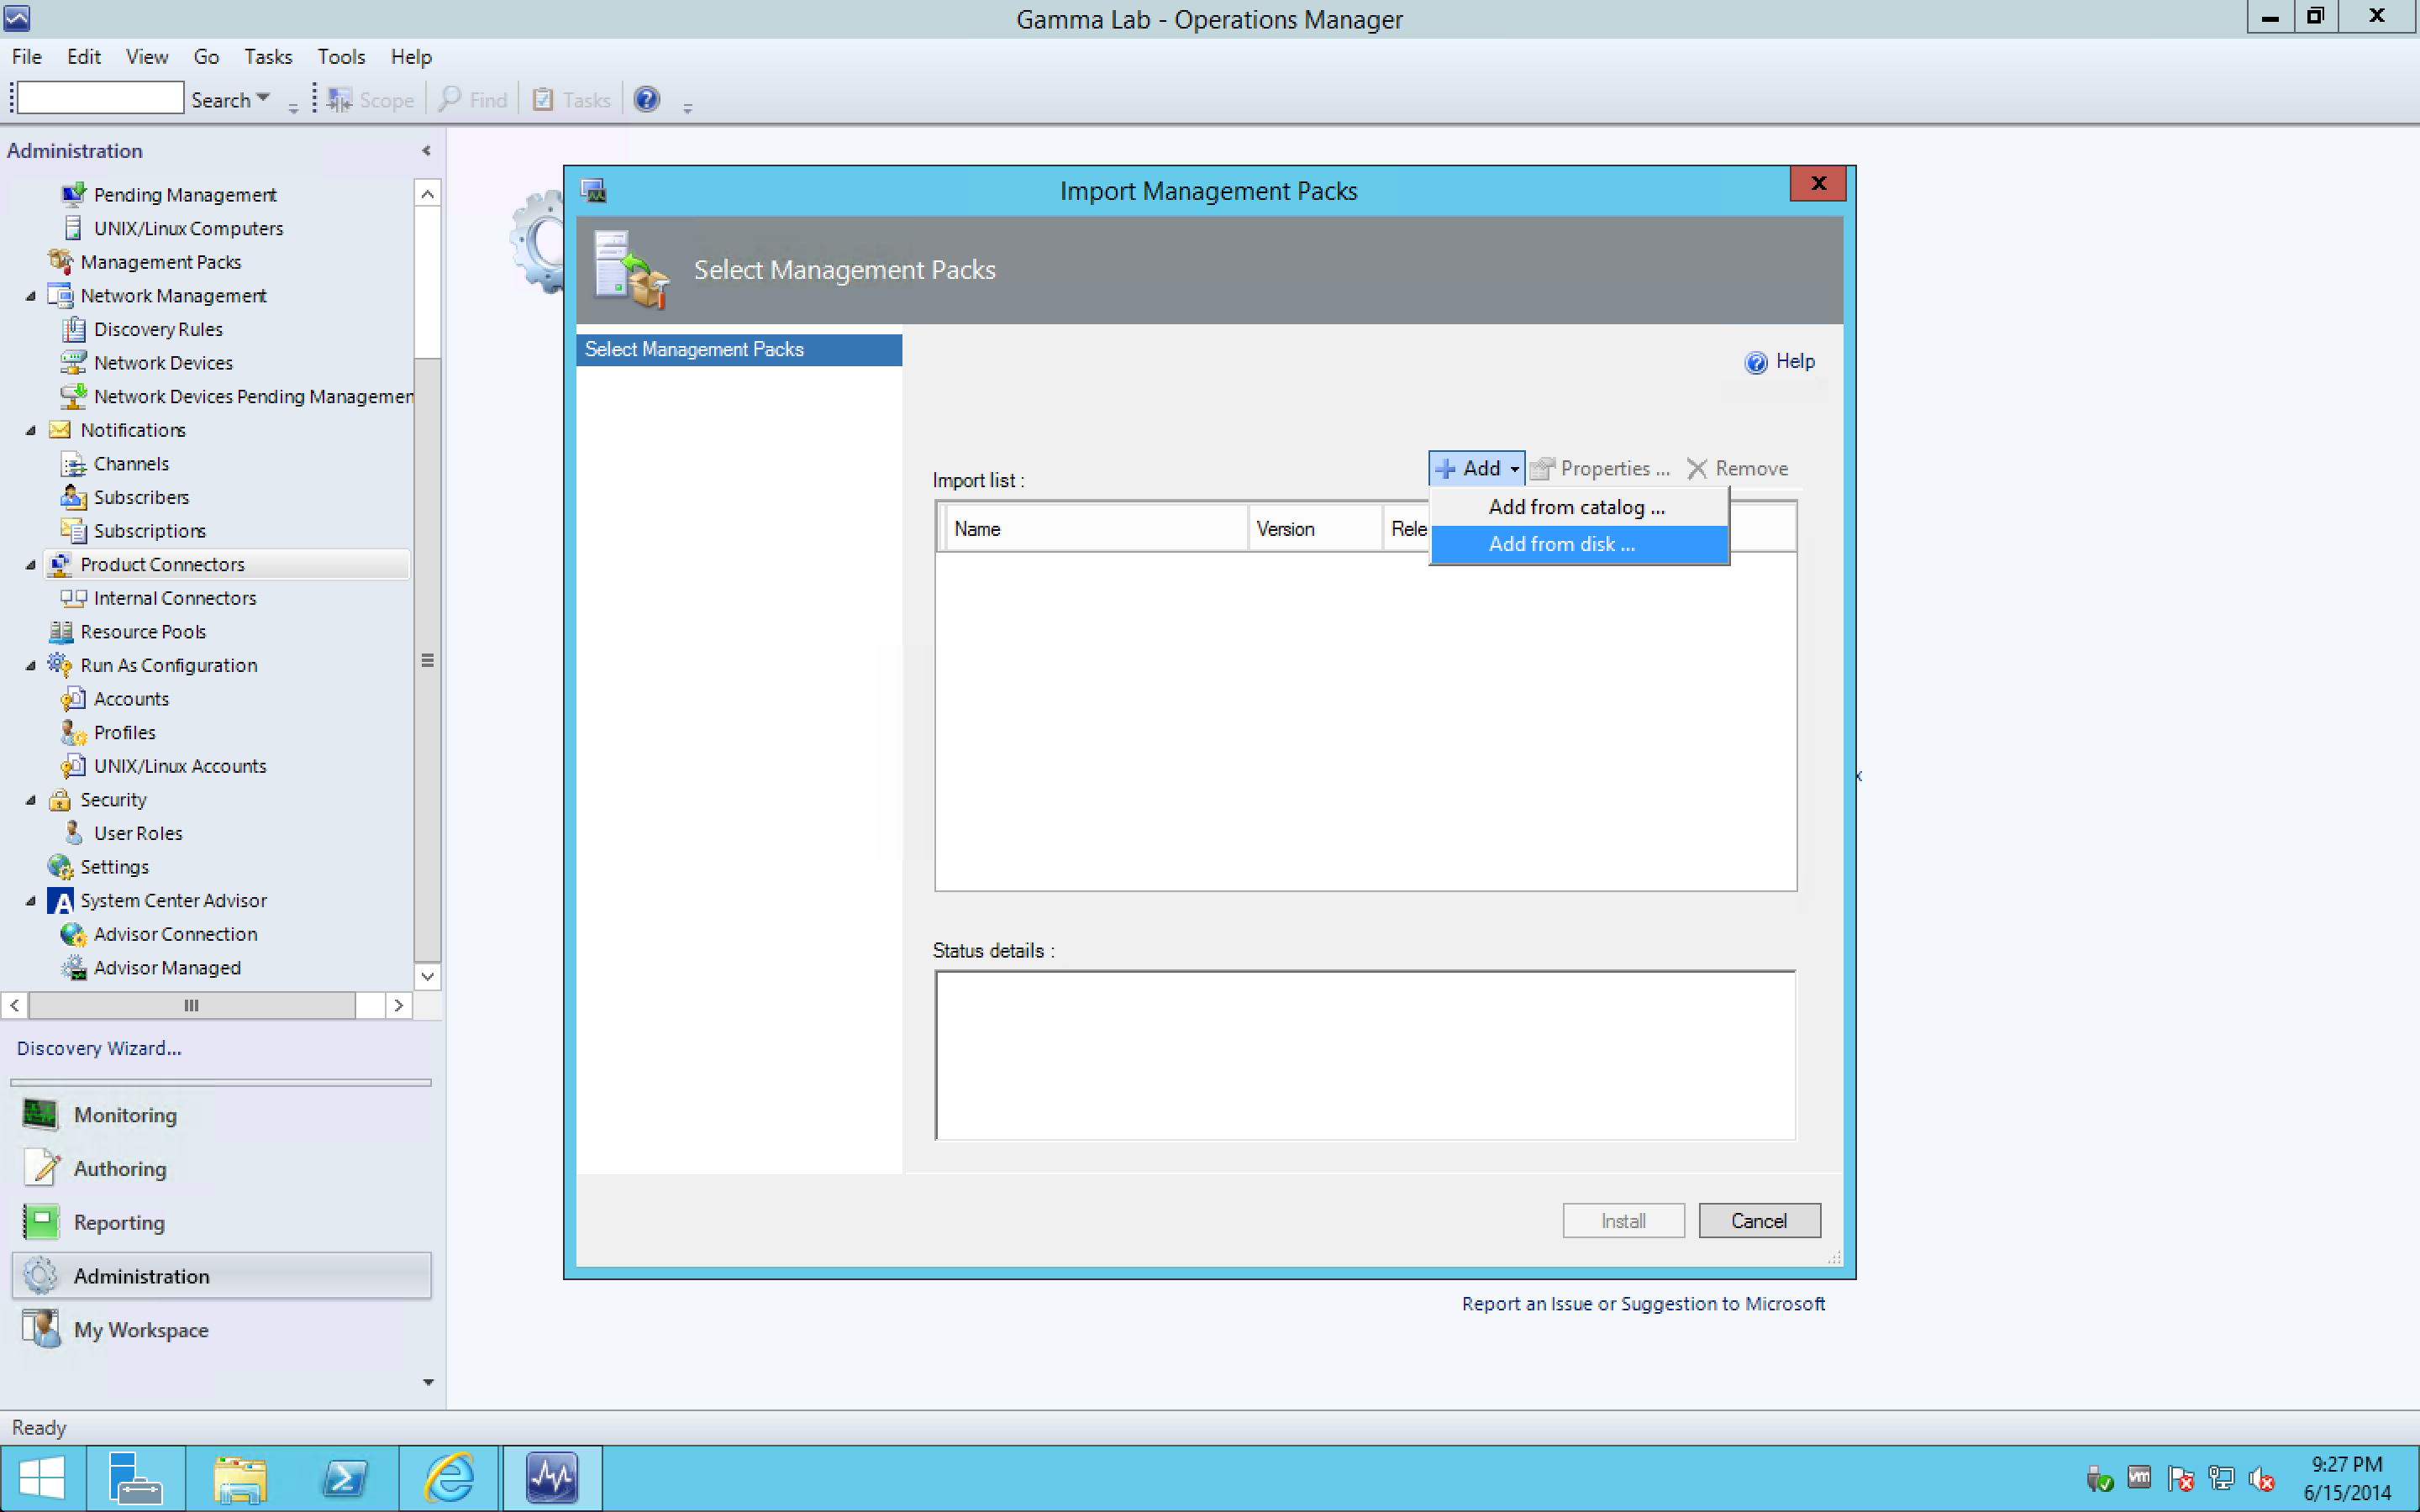
This is a simple process. First step is to click “Add” to locate the management pack we will be importing:

Before we locate the .mpb file, we have a decision point on automated dependency discovery. This is a good idea since cloud component updates often happen in realtime, so I allow it and click Yes.
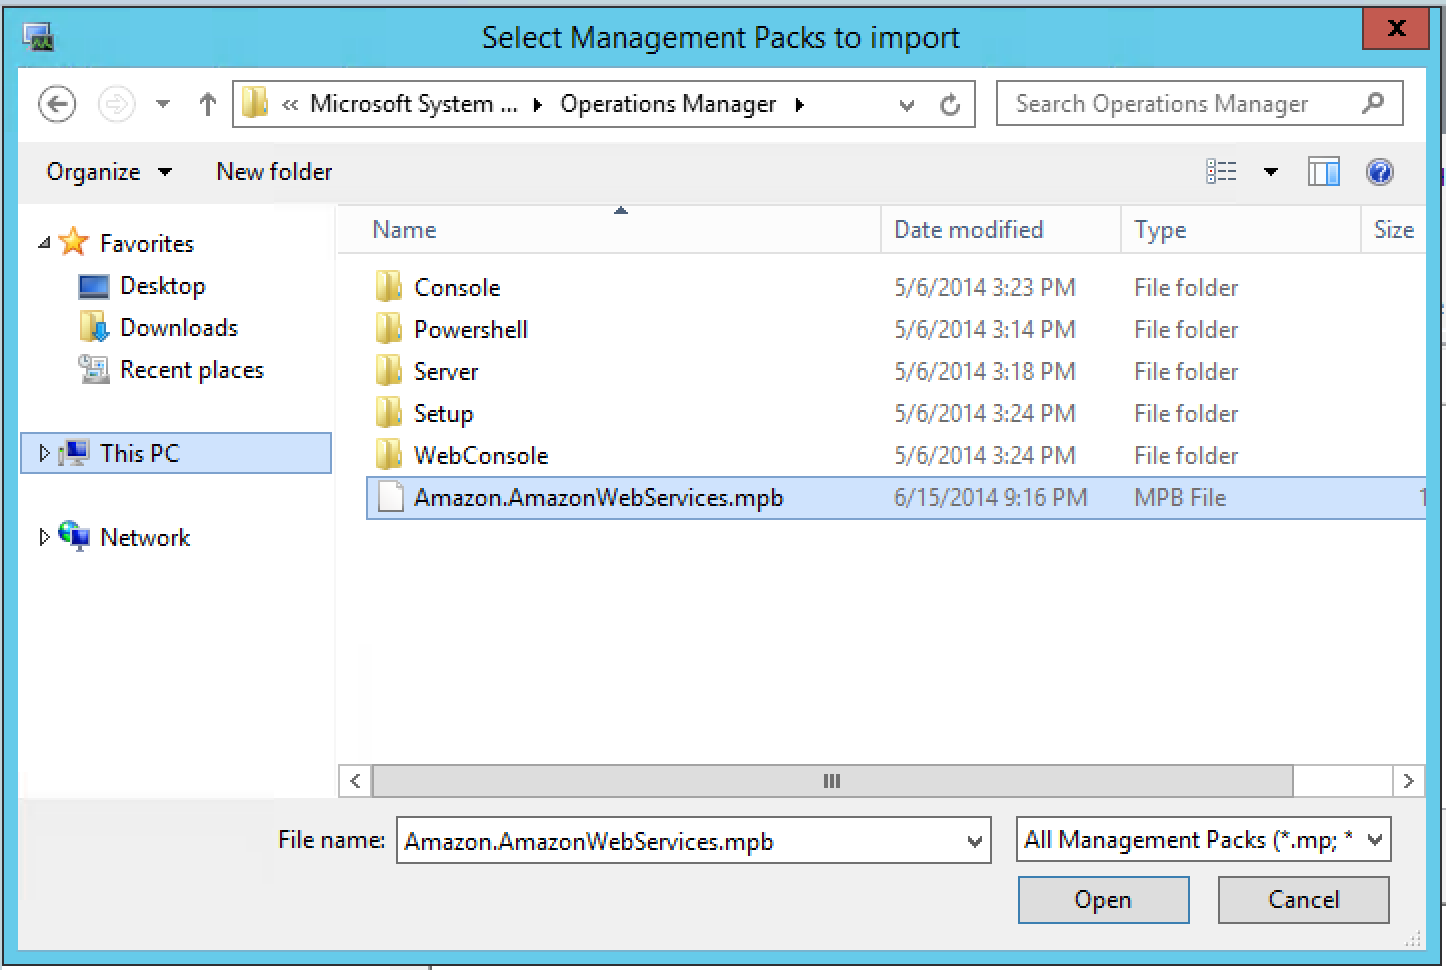
Next we can select the management pack. Navigate to the .mpb file and click Open.
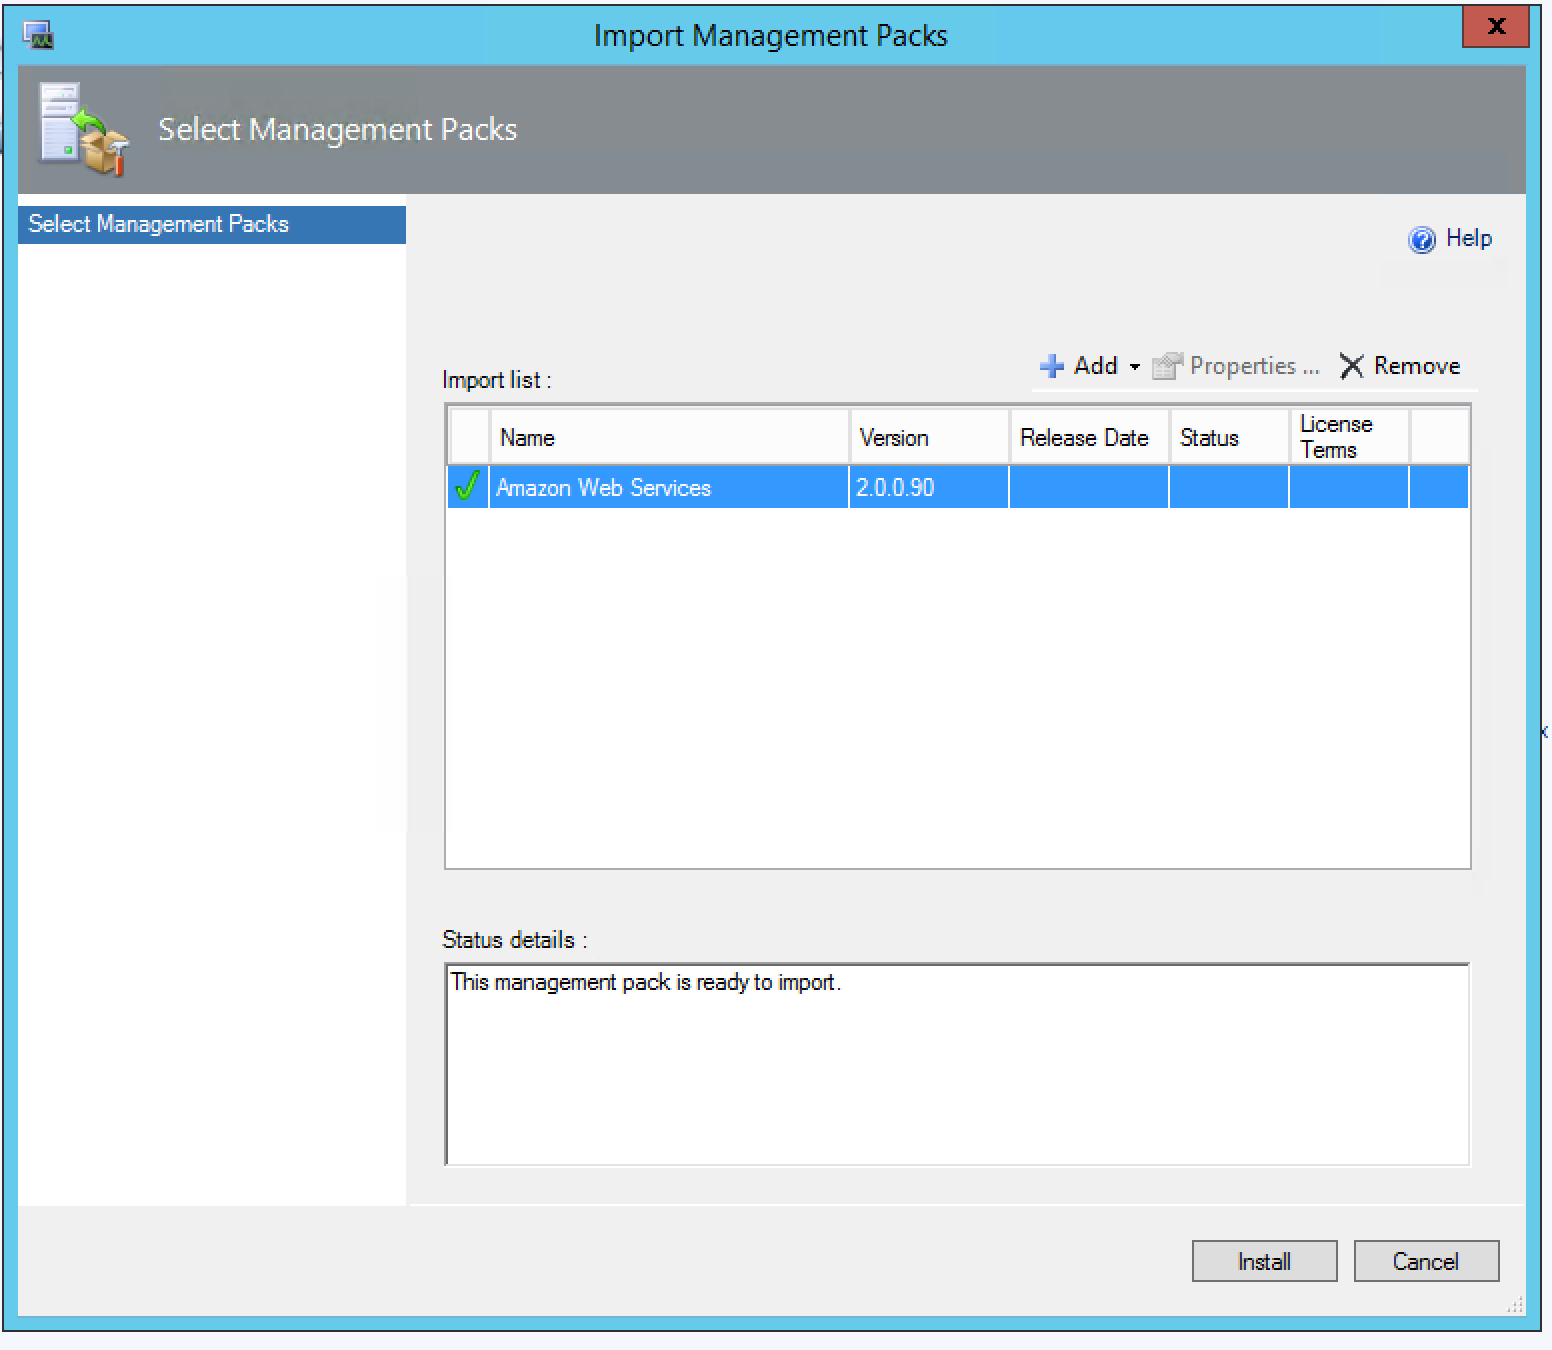
If the file passes the initial validation check a green check will light up. At that point we can go ahead and click Install.
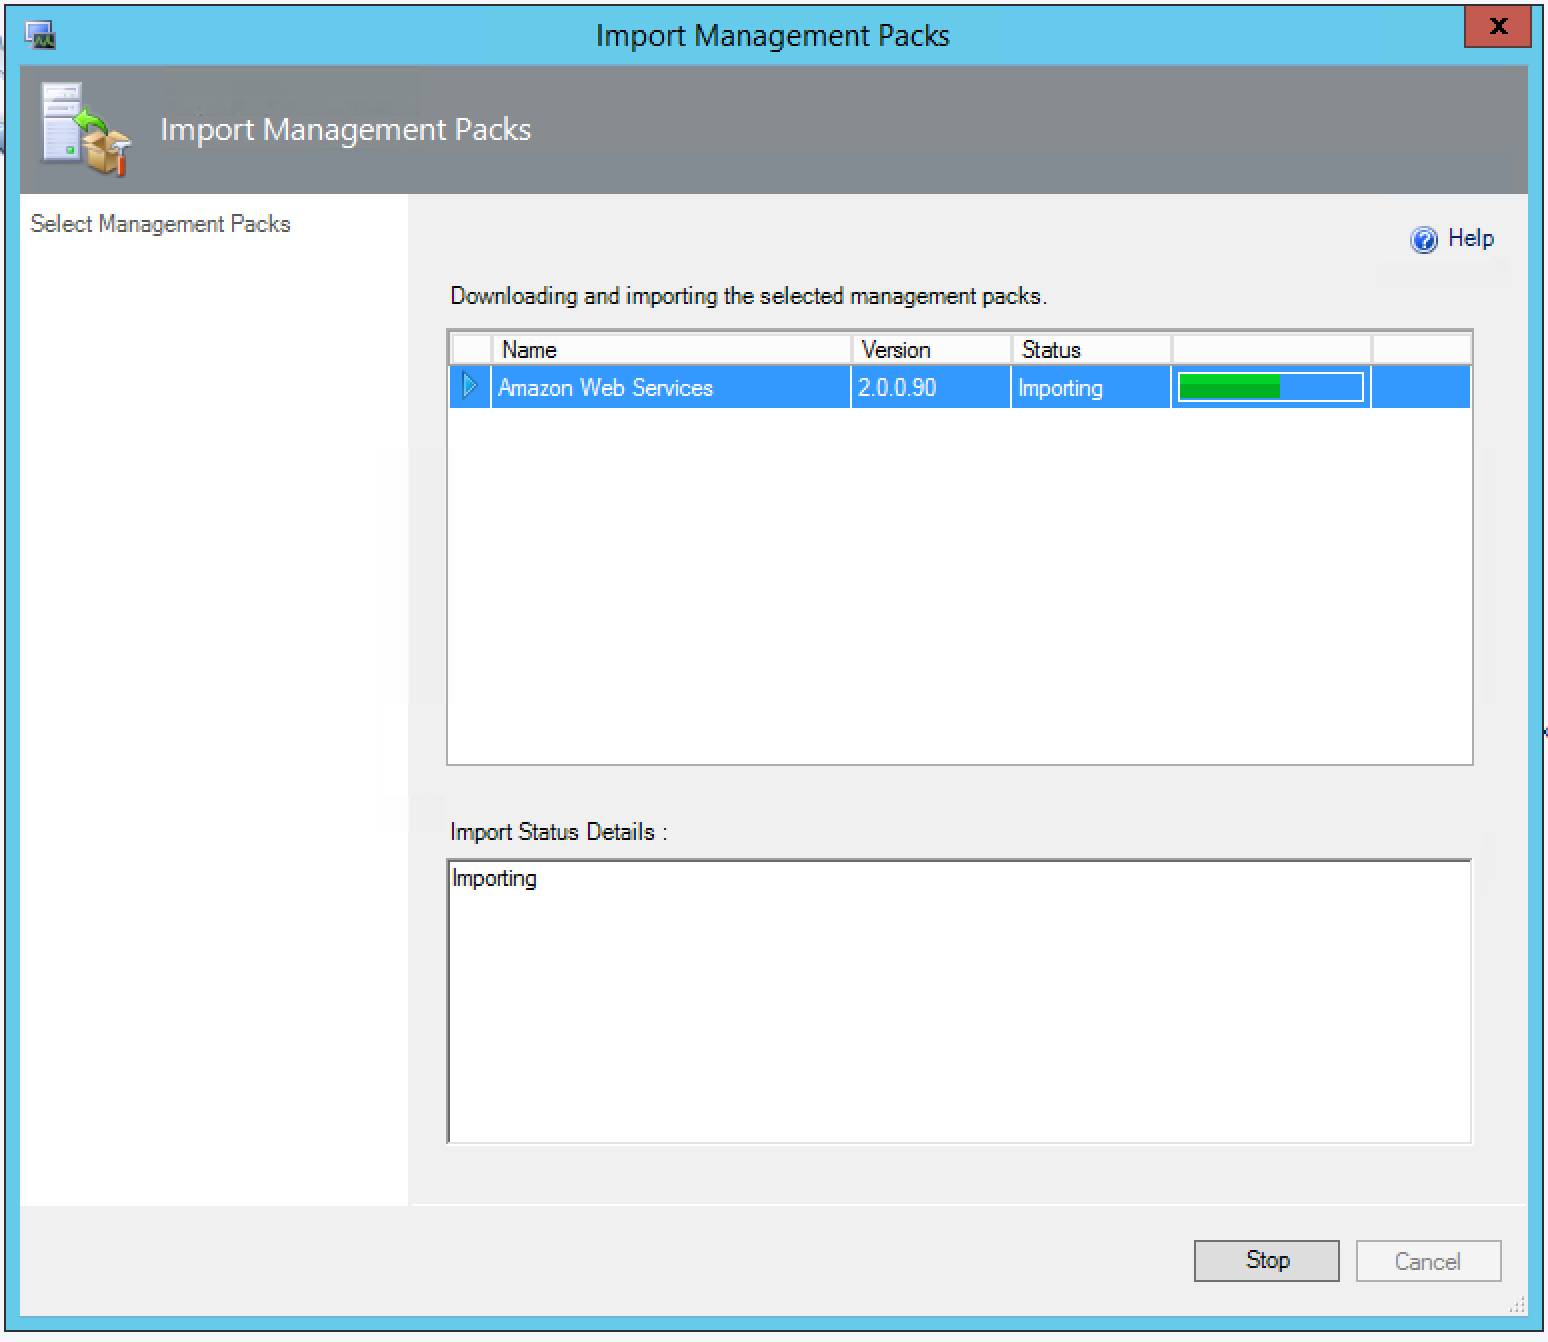
The status will change to “Importing” and a live progress bar will track the process. It should take about 30 seconds. Above is the AWS pack install dialog, below is the Azure pack install (for reference).

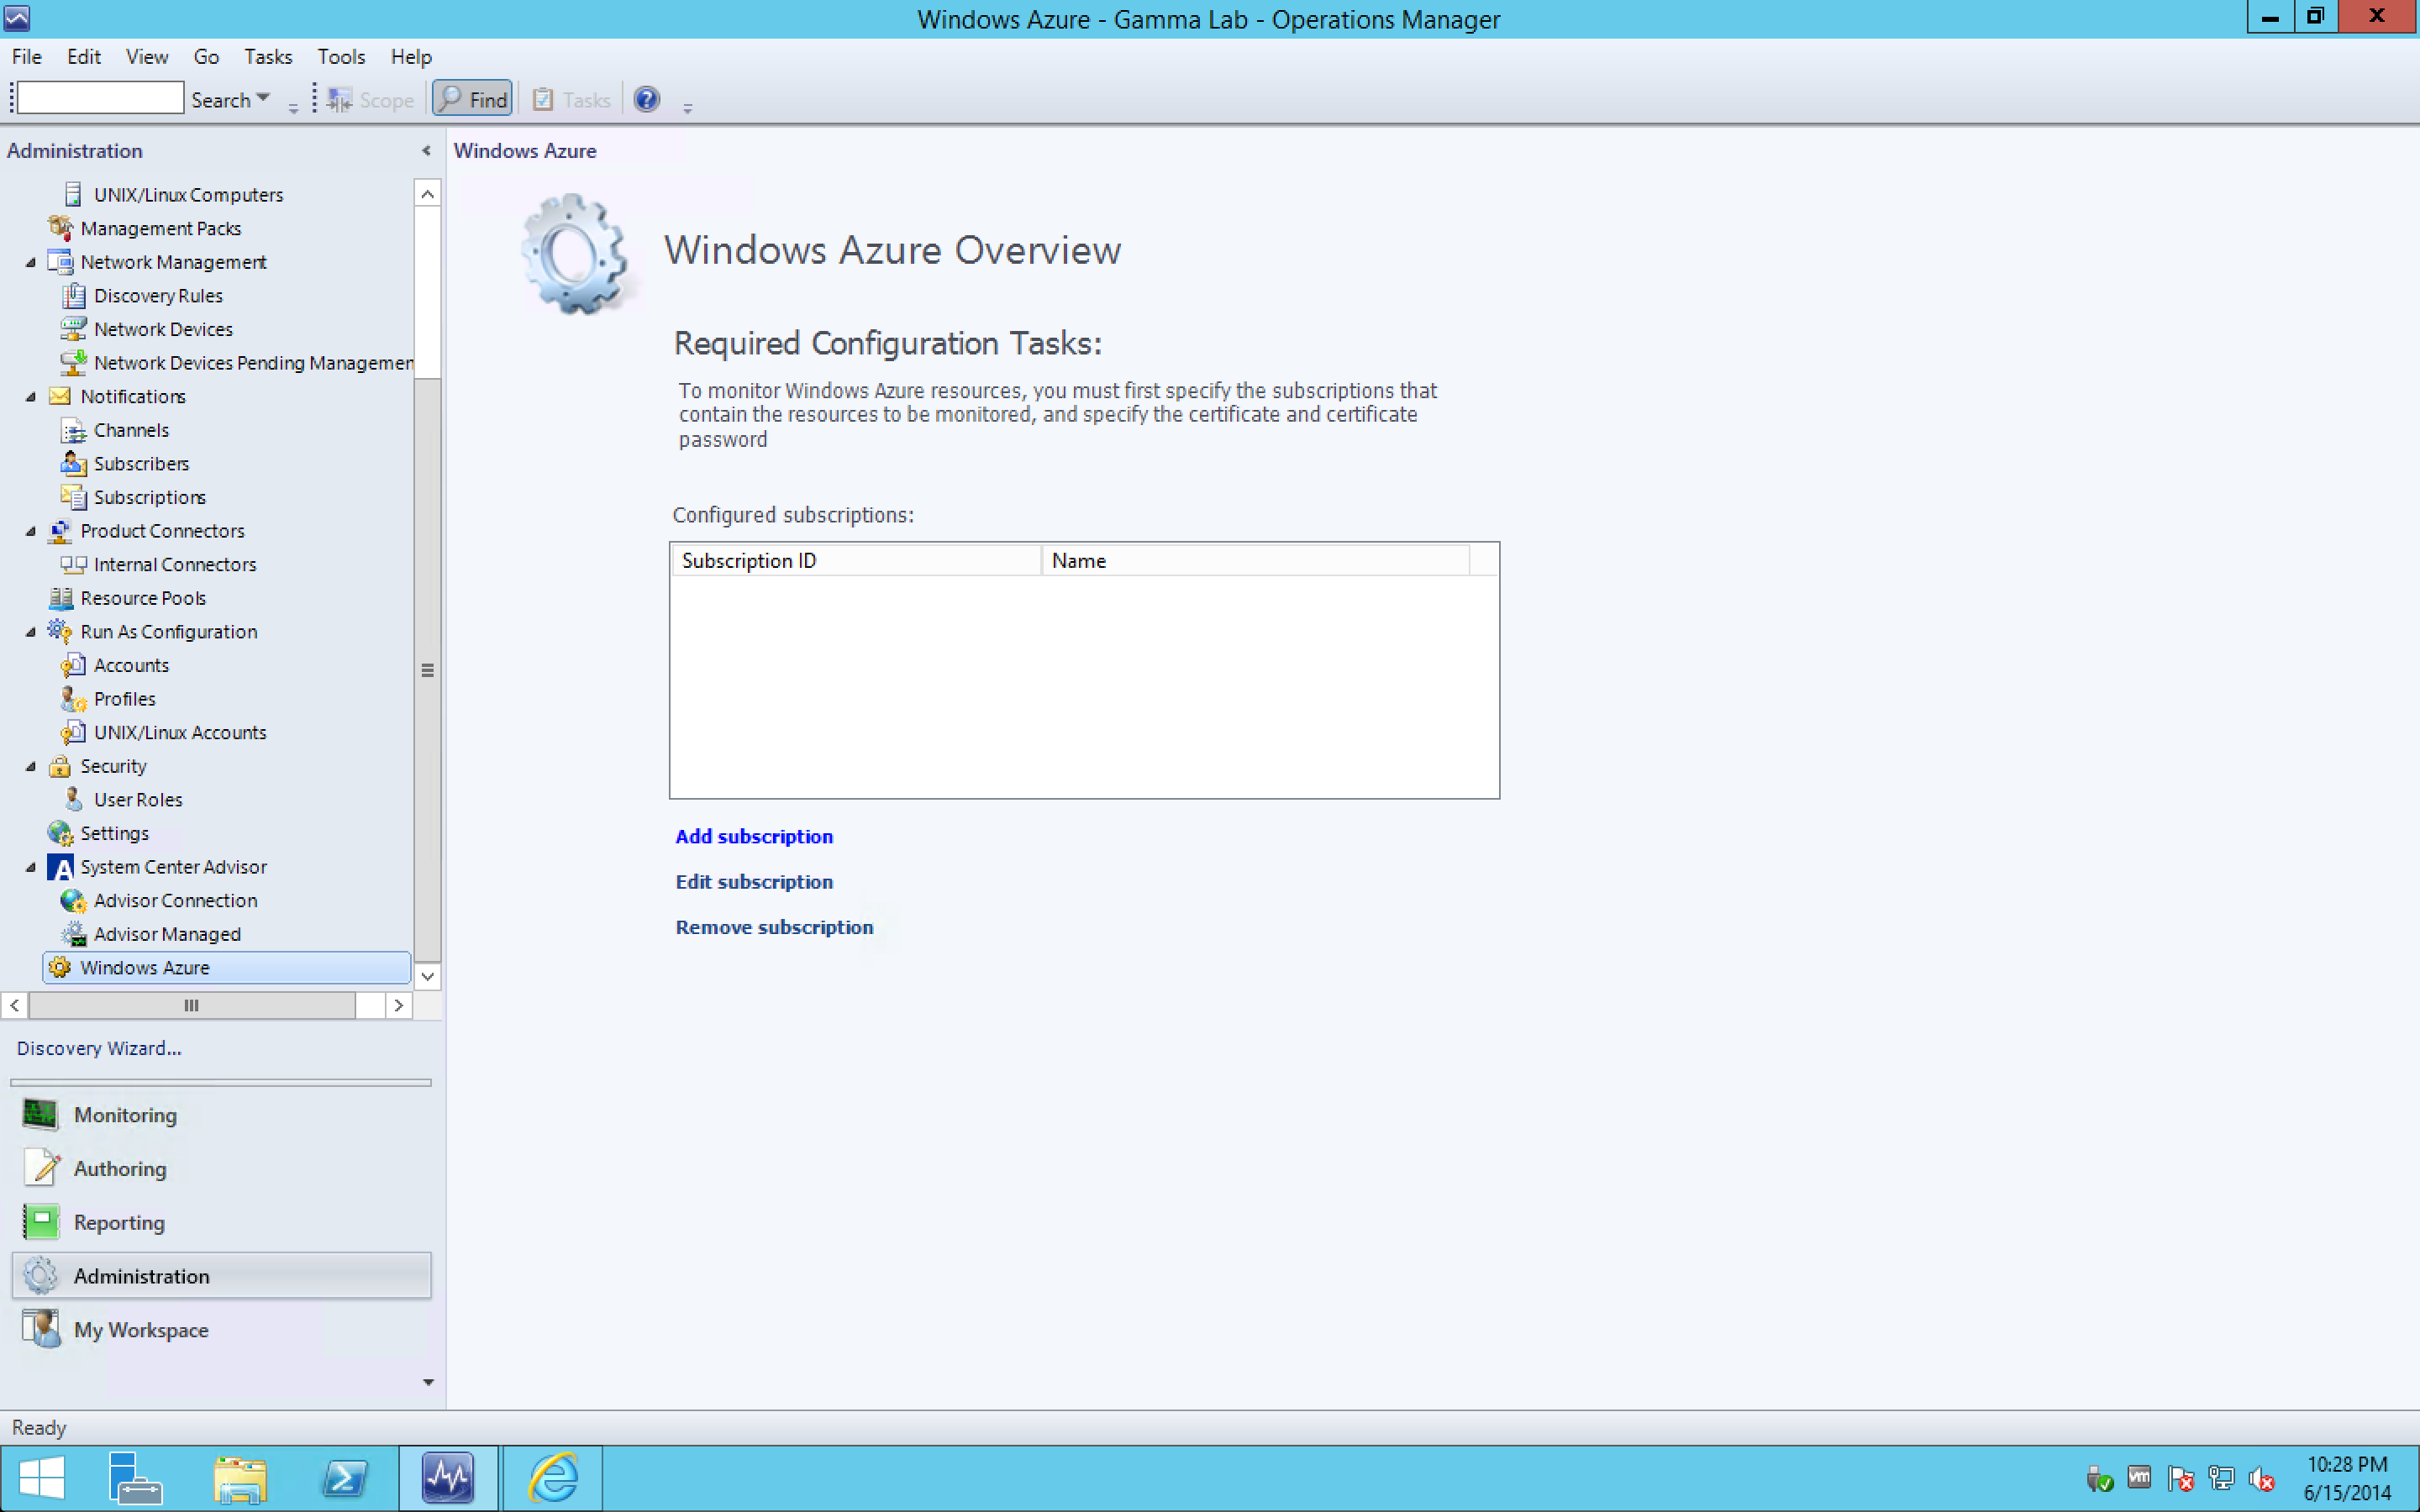
Once the import process is completed, we can close the wizard and move on to the next step. For Azure, there is a brief interlude here as the Azure Management Pack includes specific support for subscription management (the AWS management pack just uses standard SCOM “RunAs Credentials”). To setup our Azure subscription, we can now select the Azure administration subsection which has been added to the Administration tasks following the import and, from the main pane, click “Add subscription”
The first dialog has a fair bit of complexity and a few prerequisite steps are required. You’ll want to have your Azure subscription id on hand. This can be found from the account management portal. From the Azure management console, click “View My Bill”. This will invoke the subscription overview console.

To get the subscription id, we need to dive a level deeper by clicking on the subscription entry. This will invoke the billing detail page. The subscription id is located on the bottom right.
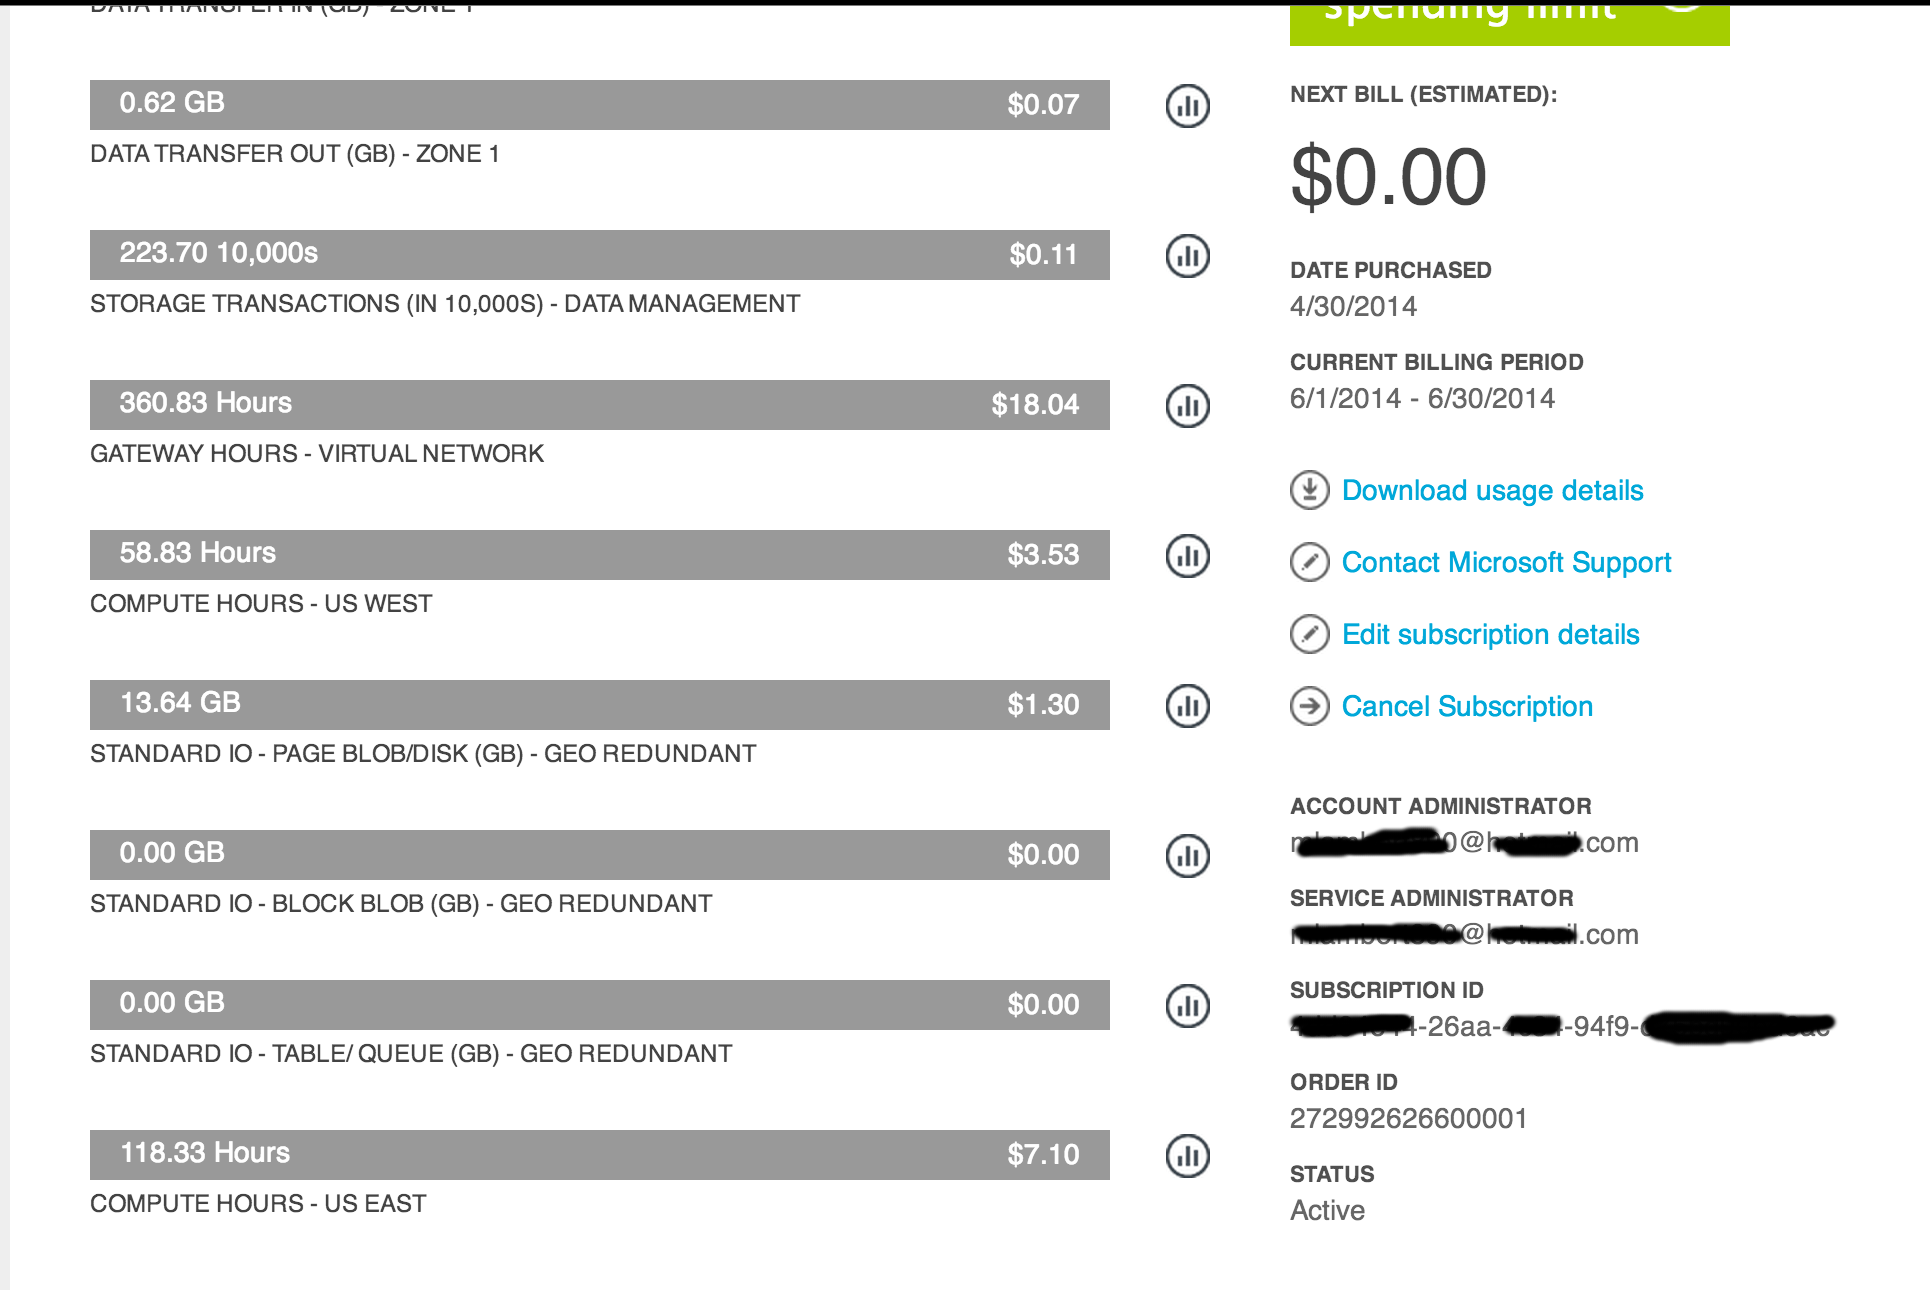
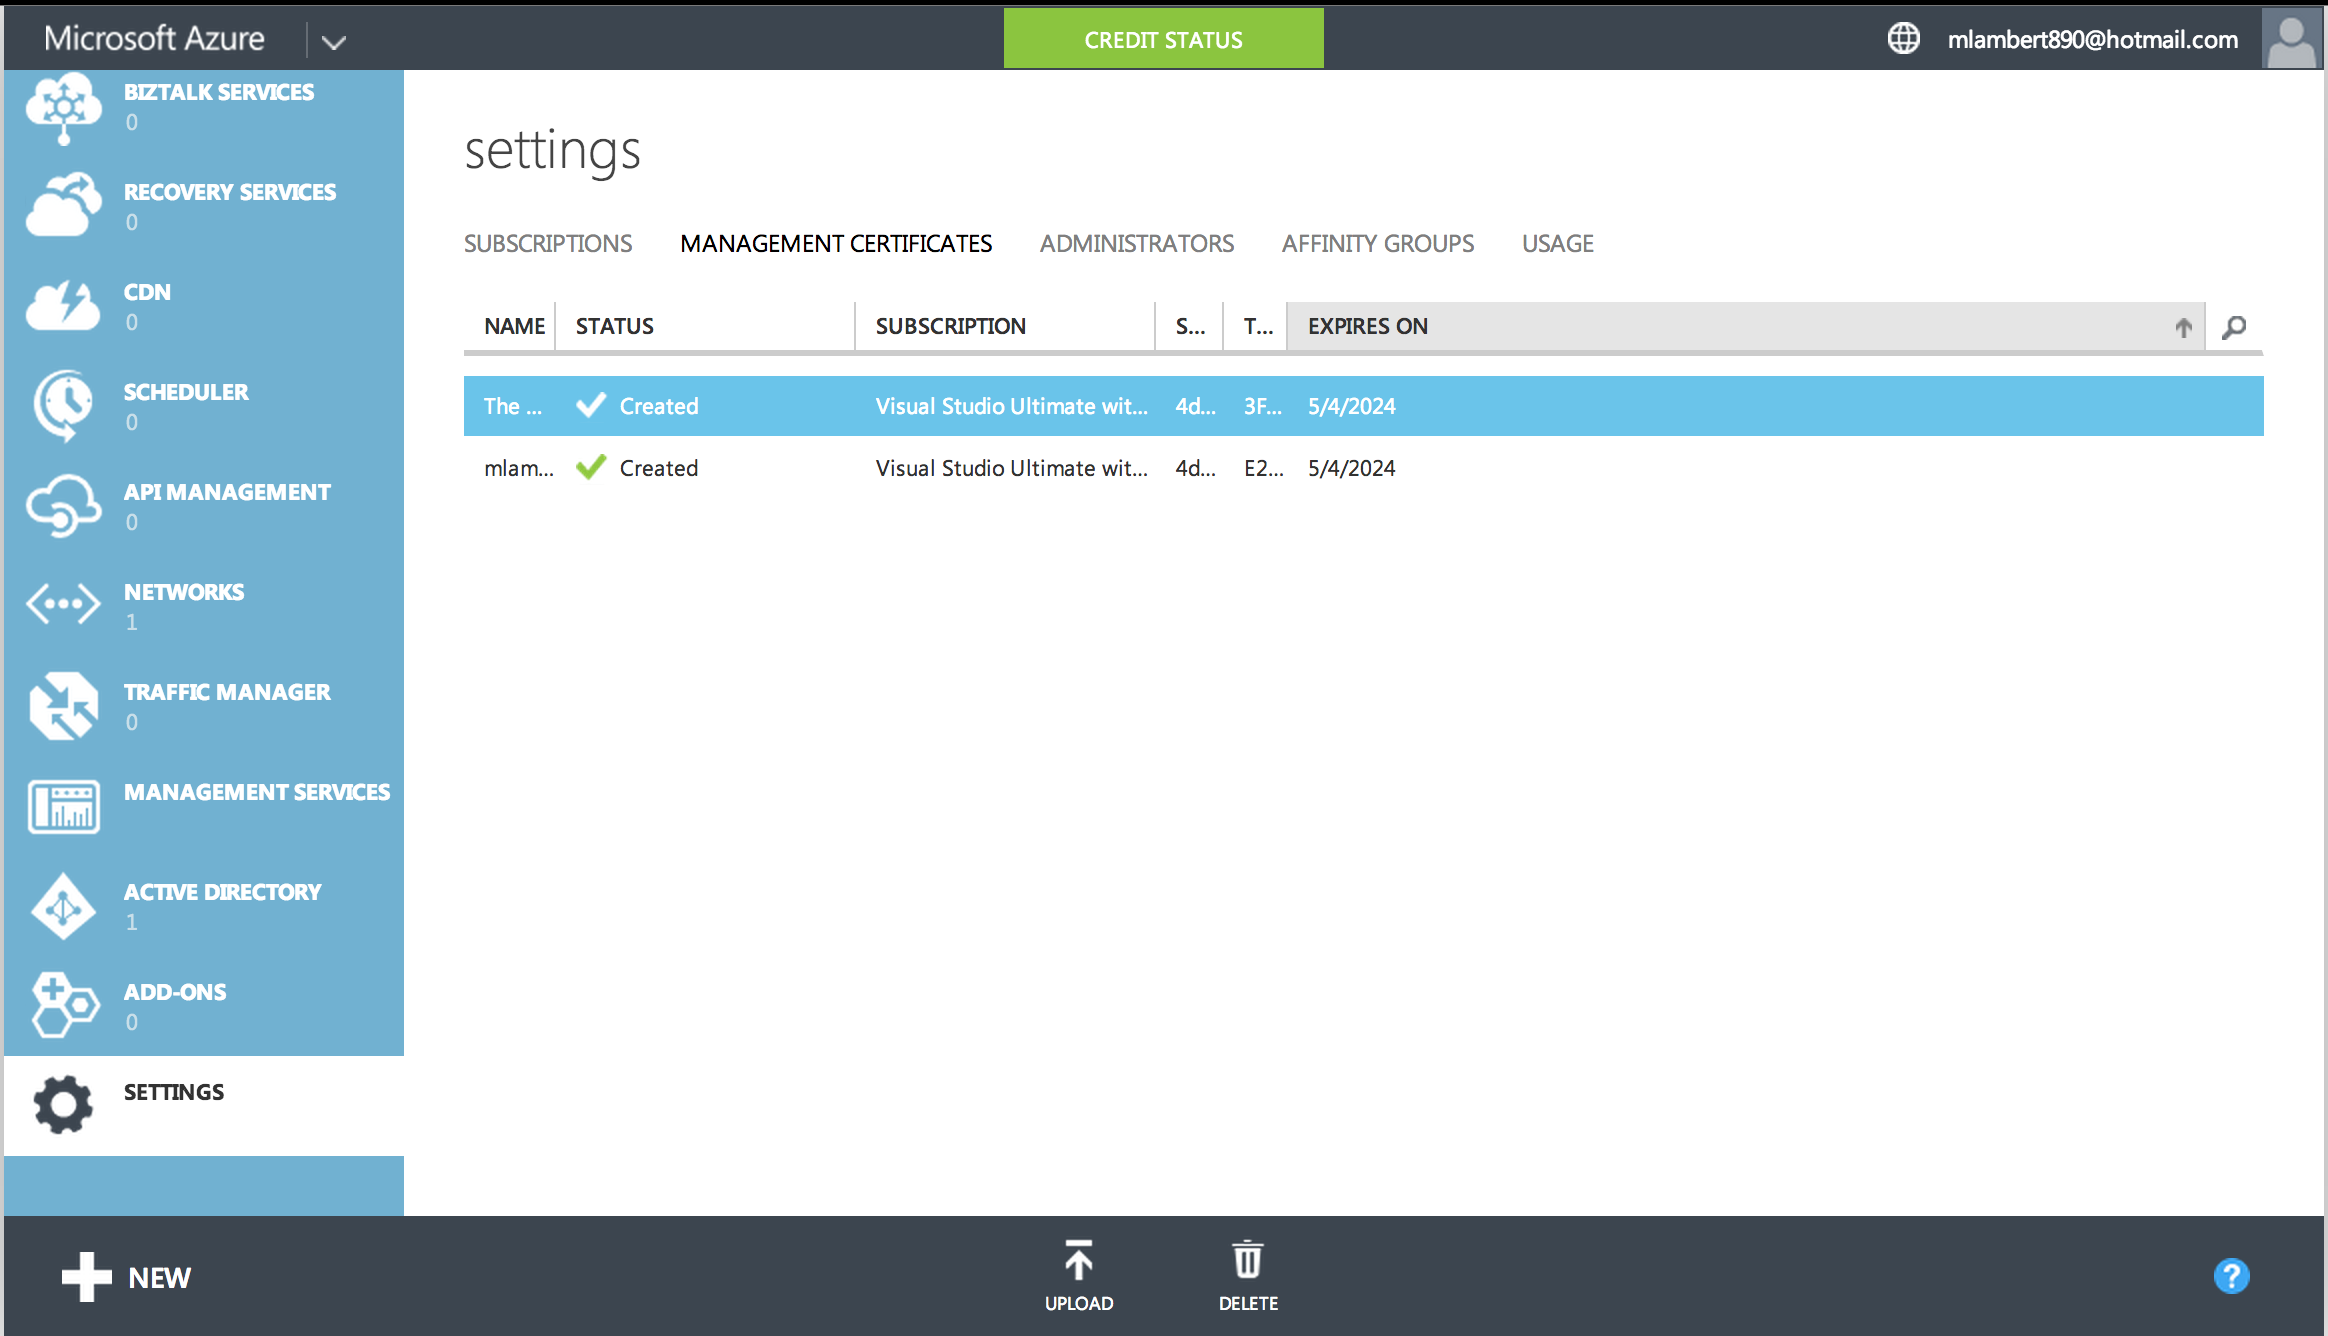
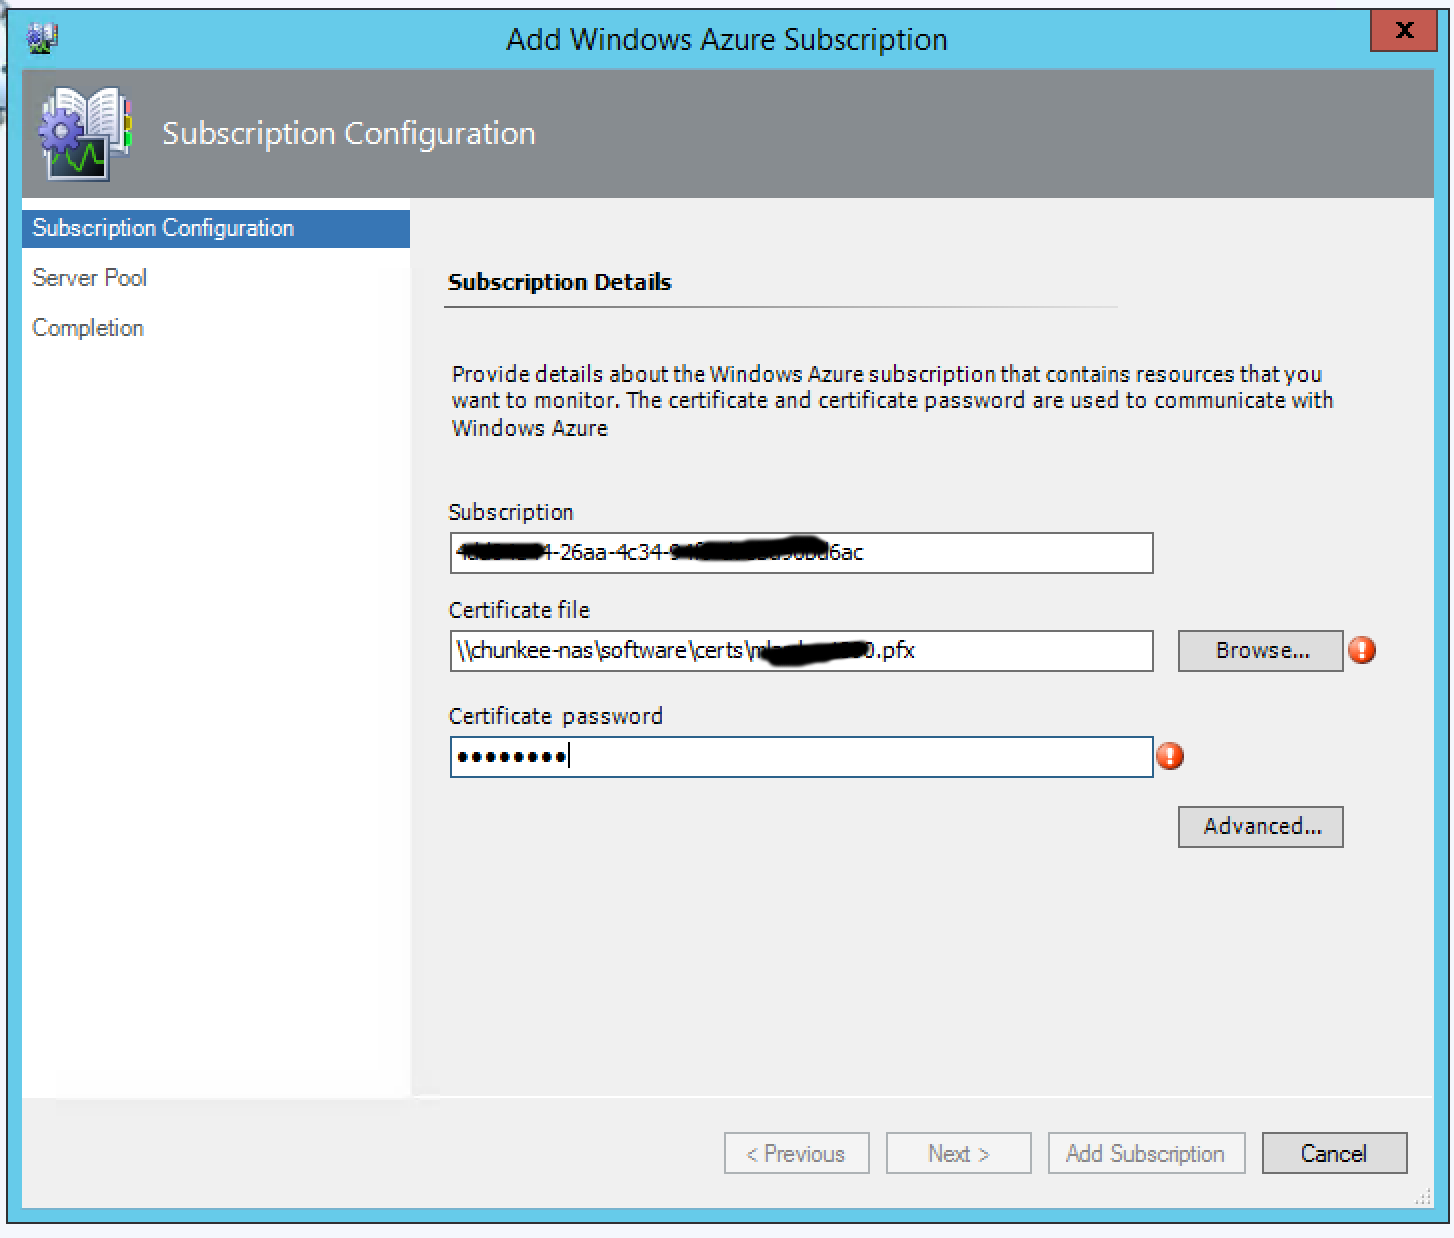
Make a note of the subscription id. This will be key for the next step in SCOM. The next thing we’ll need is our Azure management certificate (or to create one if you haven’t already!). Azure allows you to build a library of X.509 certs that can be used for authentication of managed services. The administration of this certificate store is managed from the main Azure Management Portal under Settings\Certificates. If none have been configured, a cert will need to be generated (password protected), using OpenSSL (or any other cert utility) and imported. The process of creating a self-signed cert is straightforward, but cumbersome and pretty difficult to remember, so keep a reference handy. The basic idea is that you generate a private key, create a certificate signing request (a request for a new cert), then essentially submit the request to yourself in order to generate a new (valid) cert signed by the private key. Azure expects the certificate to be password protected and in .pfx format. Once generated and imported, keep the .pfx file handy.
With the prerequisite info collected, we can head back to SCOM and add our subscription info.
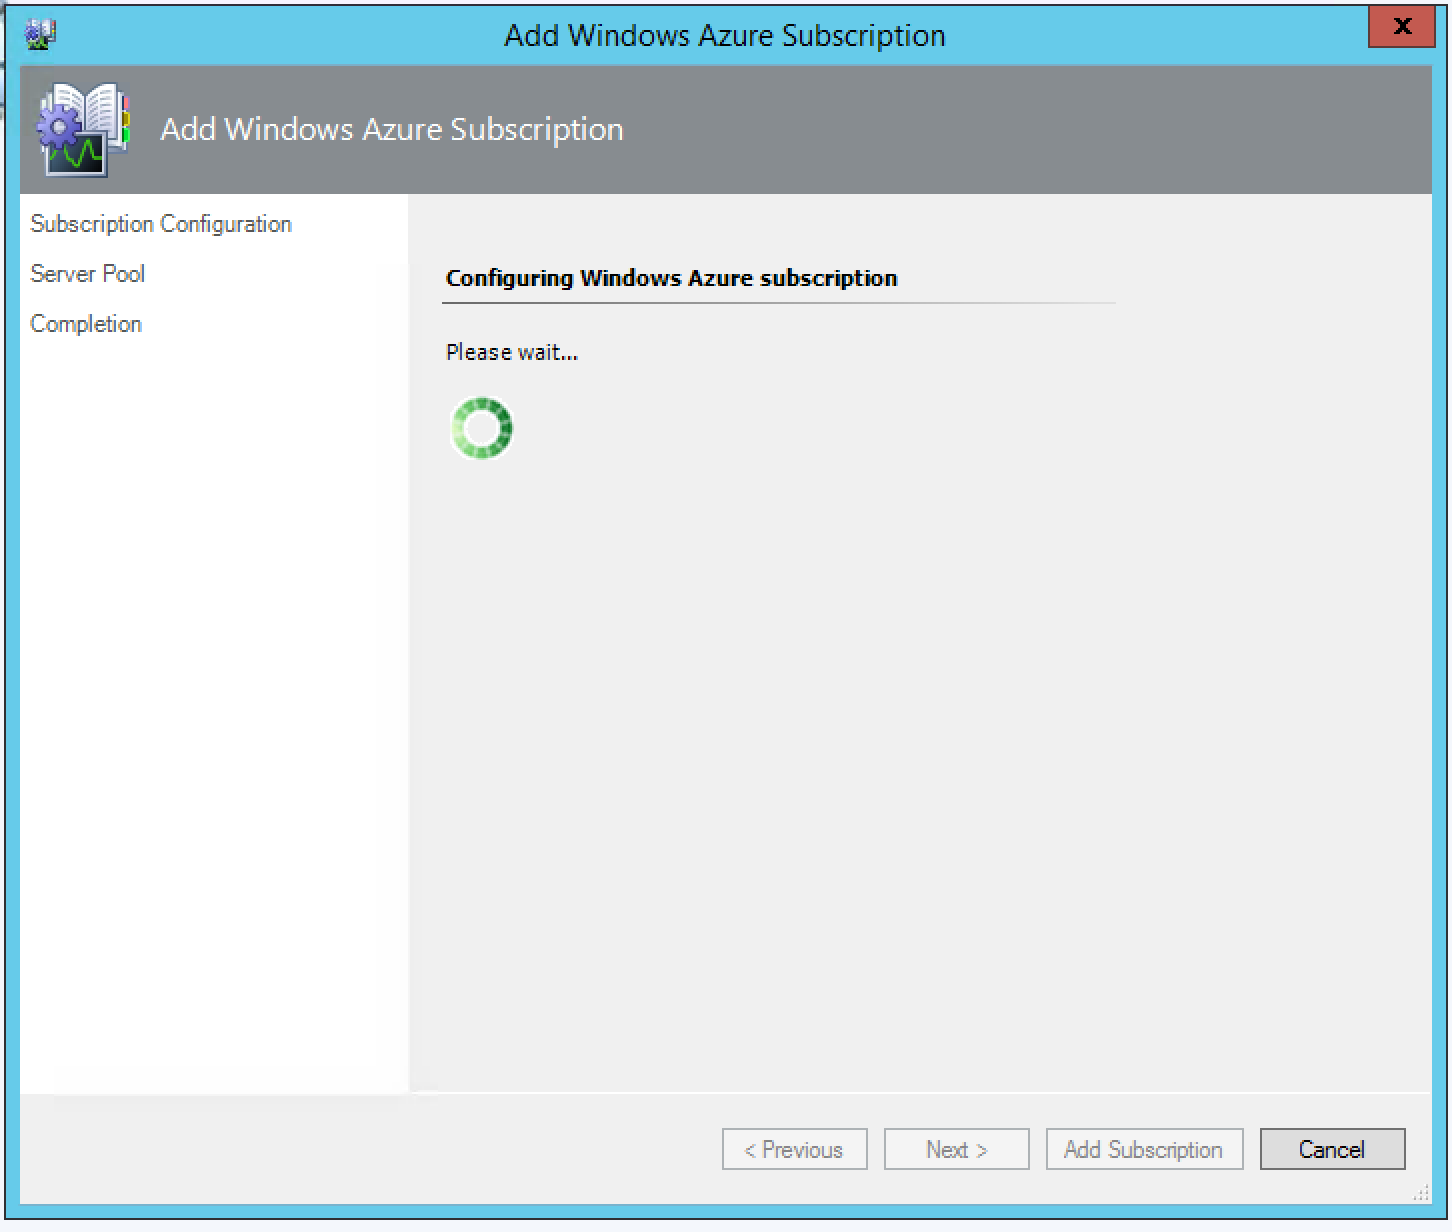
If the subscription info is valid, the setup will continue. The next step is to select a management pool to be authorized to communicate with Azure. This is an opportunity to limit Azure access to specific management server pools or authorize all management servers. This is also an opportunity to direct outbound connectivity to Azure through a proxy.

With the scope set, the subscription can be added.
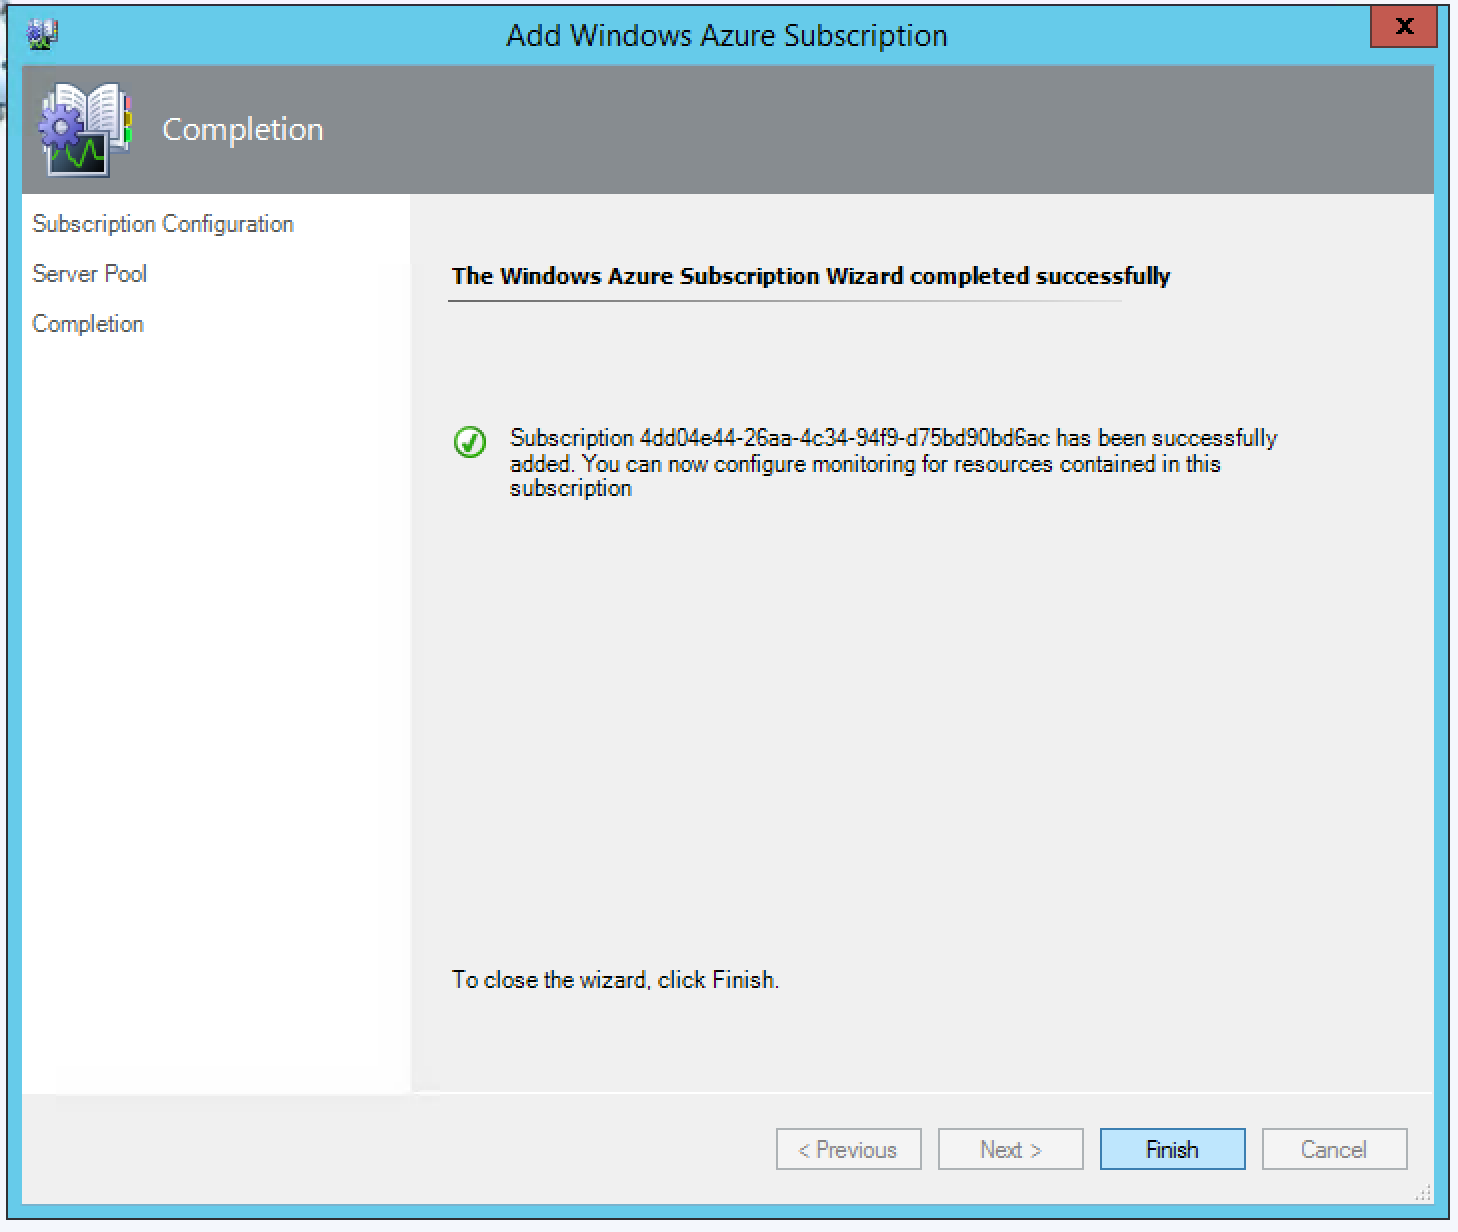
If everything is in order the wizard will indicate that the subscription has been successfully added. Once complete we are ready to return to the next step of integrating Azure.
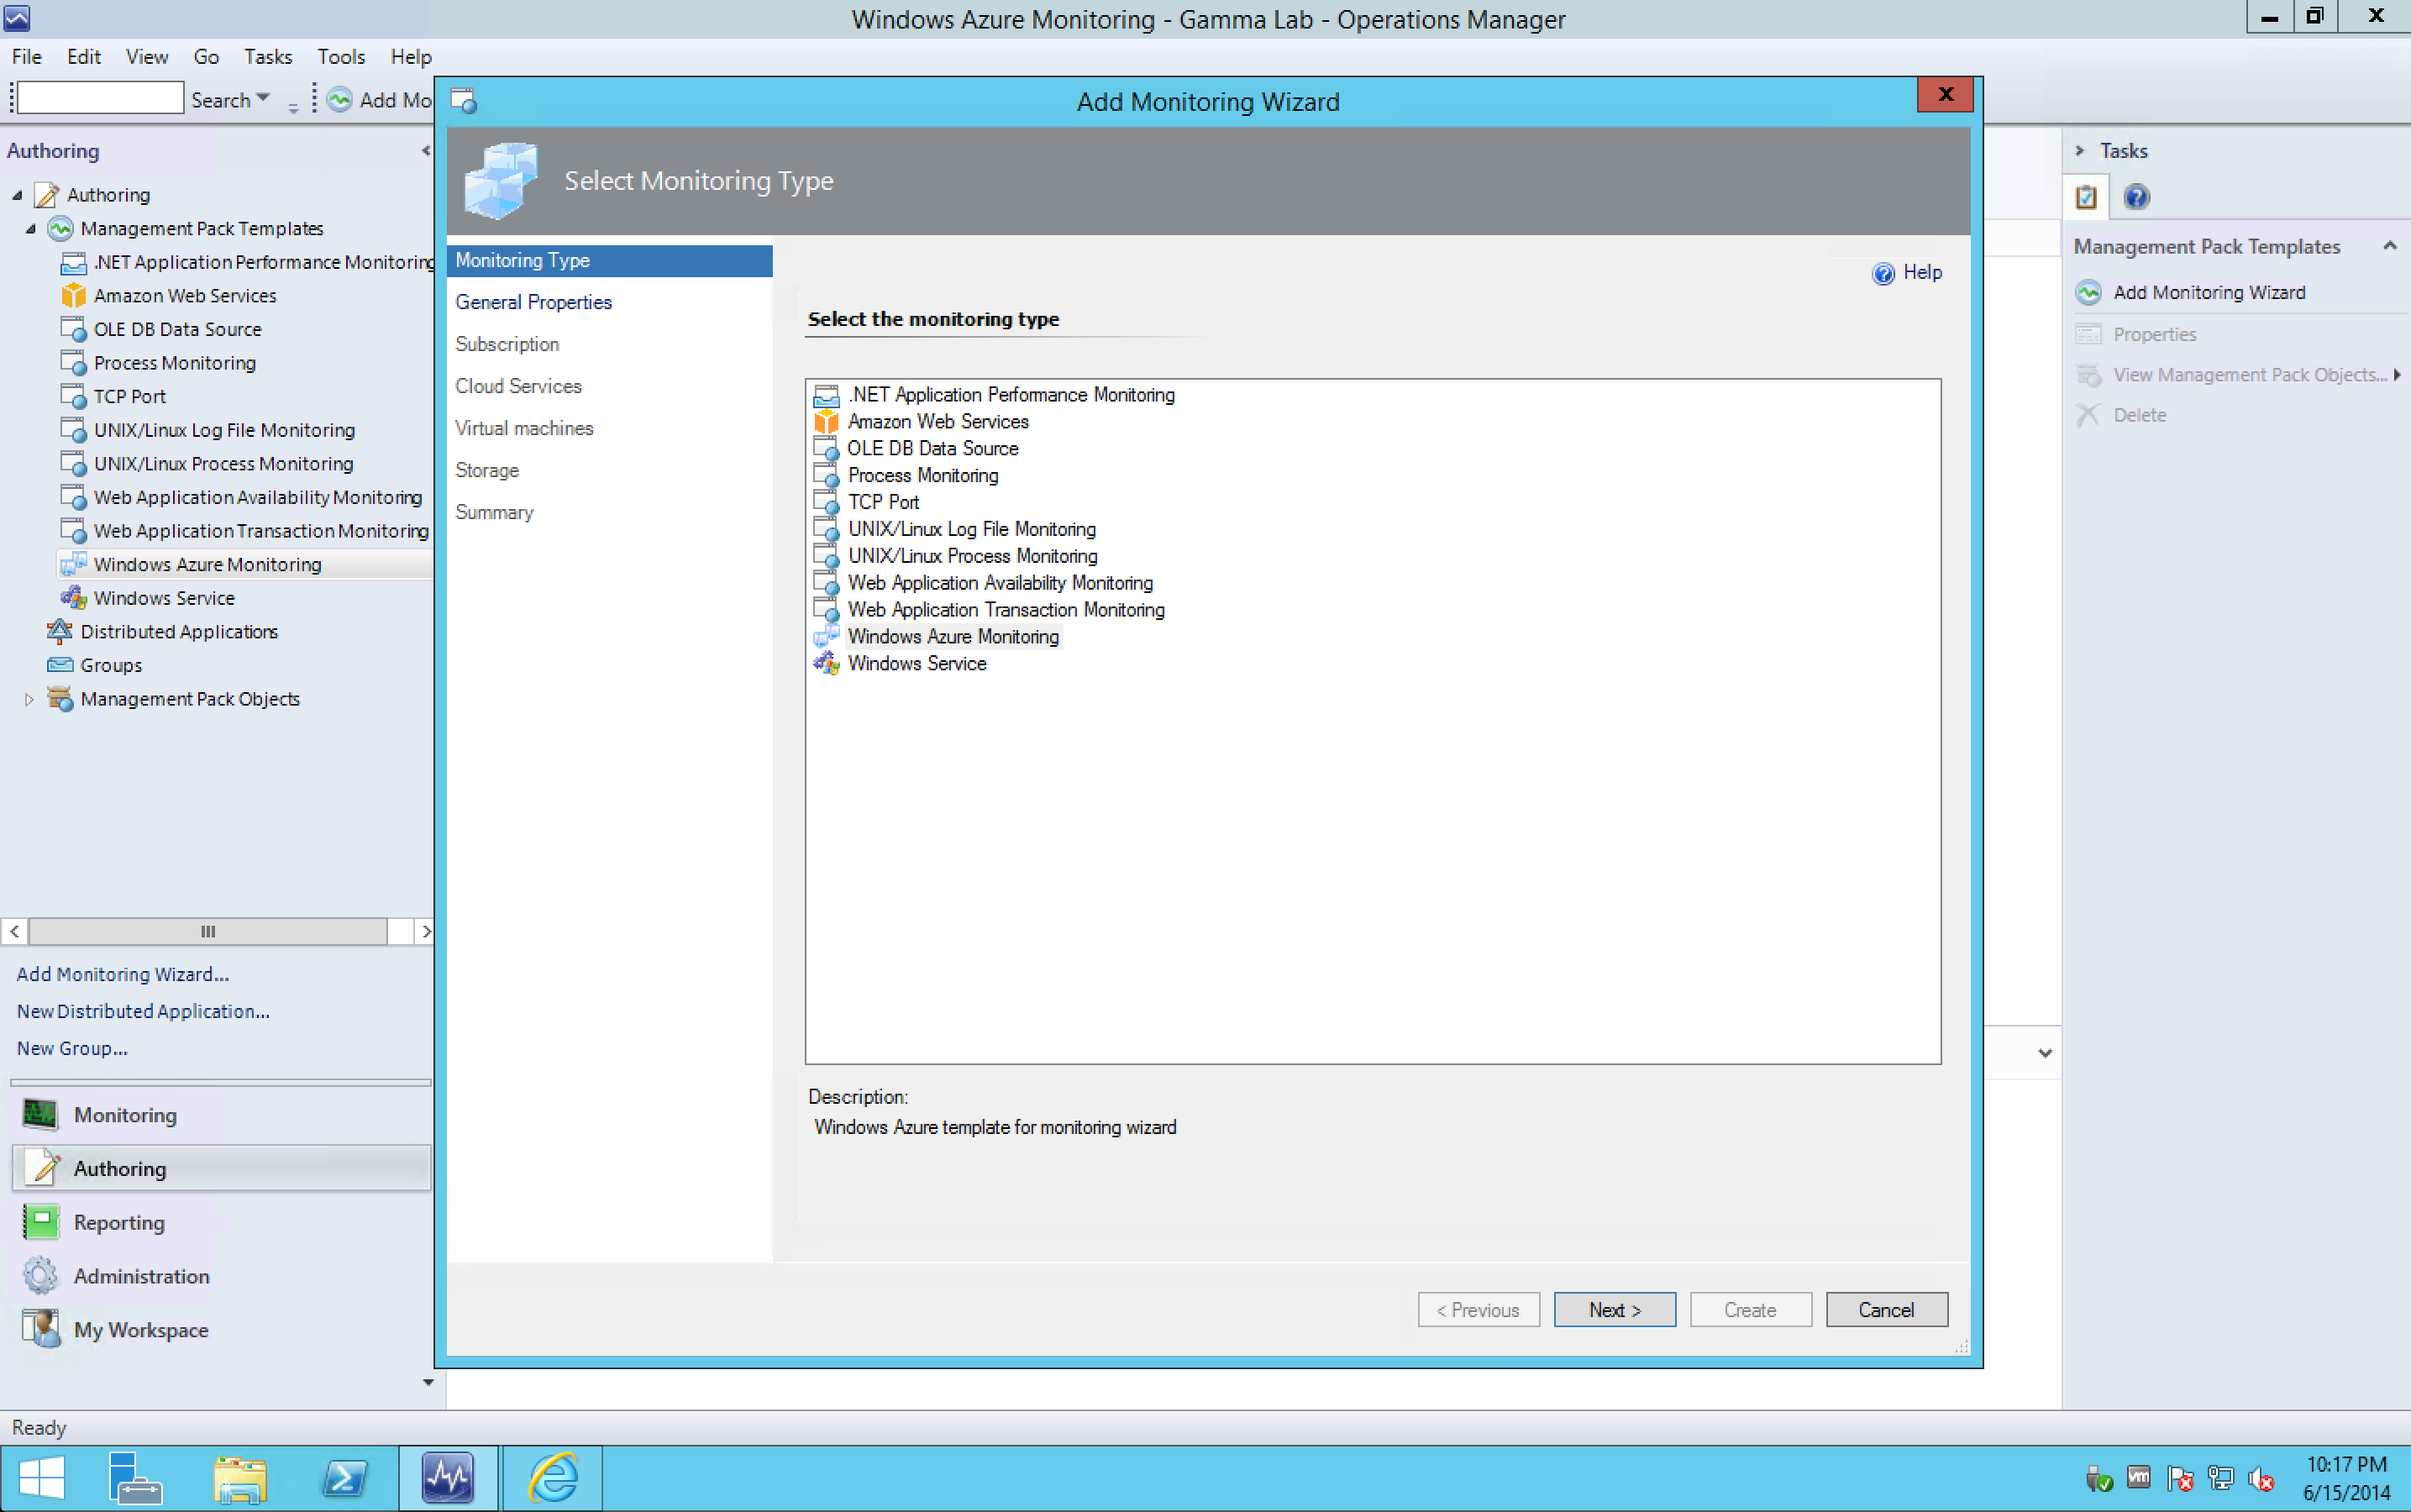
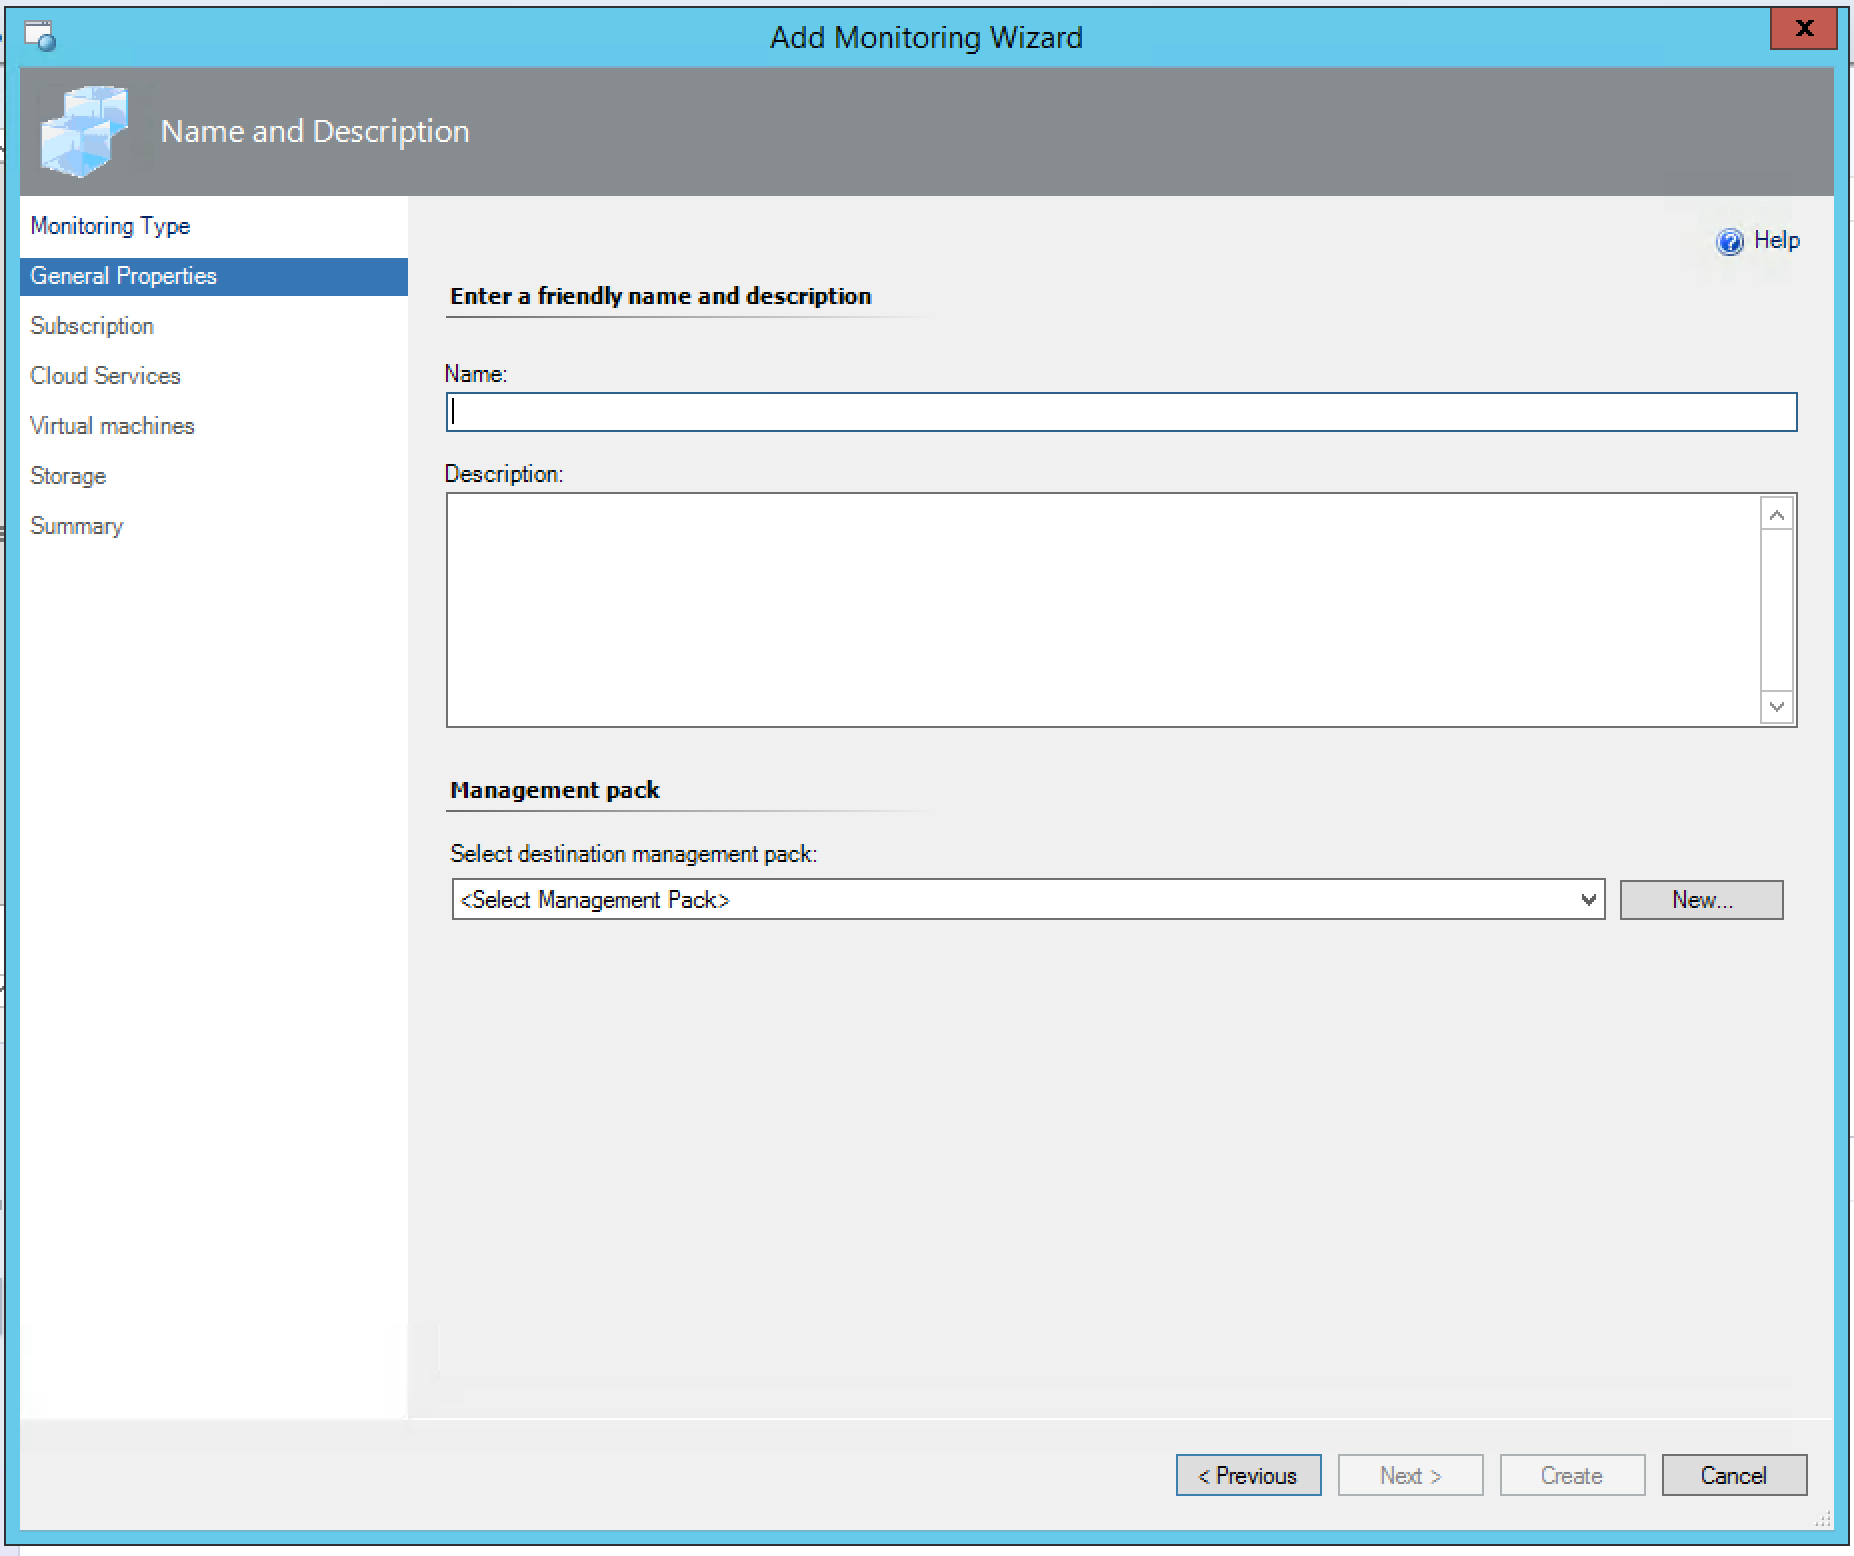
After installing new management packs, the next step in operationalizing them in SCOM is to add them to the monitoring configuration. From the main menu, select Authoring tasks. In the Authoring tasks subsection, AWS and Azure sections are listed now that we imported the management packs. Right clicking on Azure Monitoring presents the option of starting the “Add Monitoring Wizard”. The first step is to select the monitoring type. In this case we will select Azure (next round we will repeat the process for AWS).
First we provide a name. In my case I kept it simple selecting “AWS Monitoring Account” for AWS and “Azure Monitoring Account” for Azure. Next we assign a management pack to this monitoring configuration. In our case since we are setting up monitoring for add-on management packs, we are going to “create a new destination management pack” for both Azure and AWS.
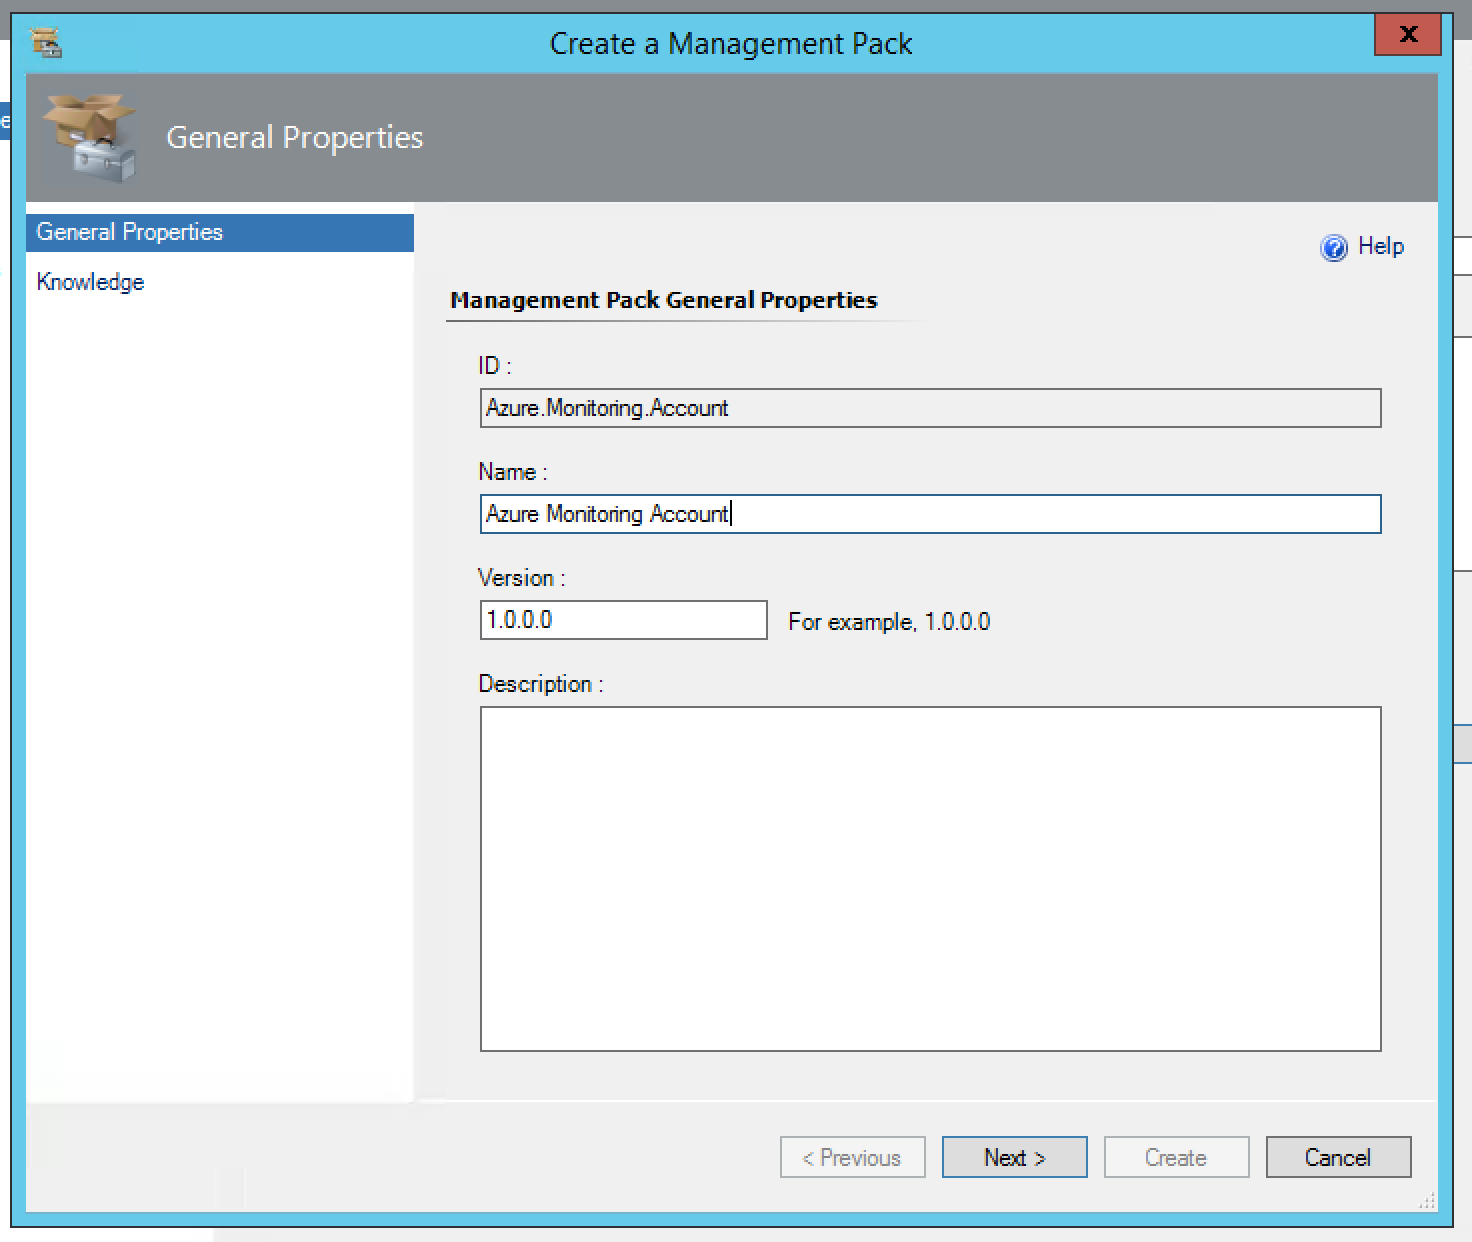
Creating the new destination is very straightforward. All that is required is a name. I chose to name the management pack entry the same as the monitoring entity for simplicity. Azure is shown below as an example. Clicking next will allow the “knowledge” configuration to be edited. This is an opportunity to build a custom processing module if the SDK is present. In our case we can click through and complete the management pack creation wizard and return to the main monitoring configuration workflow.
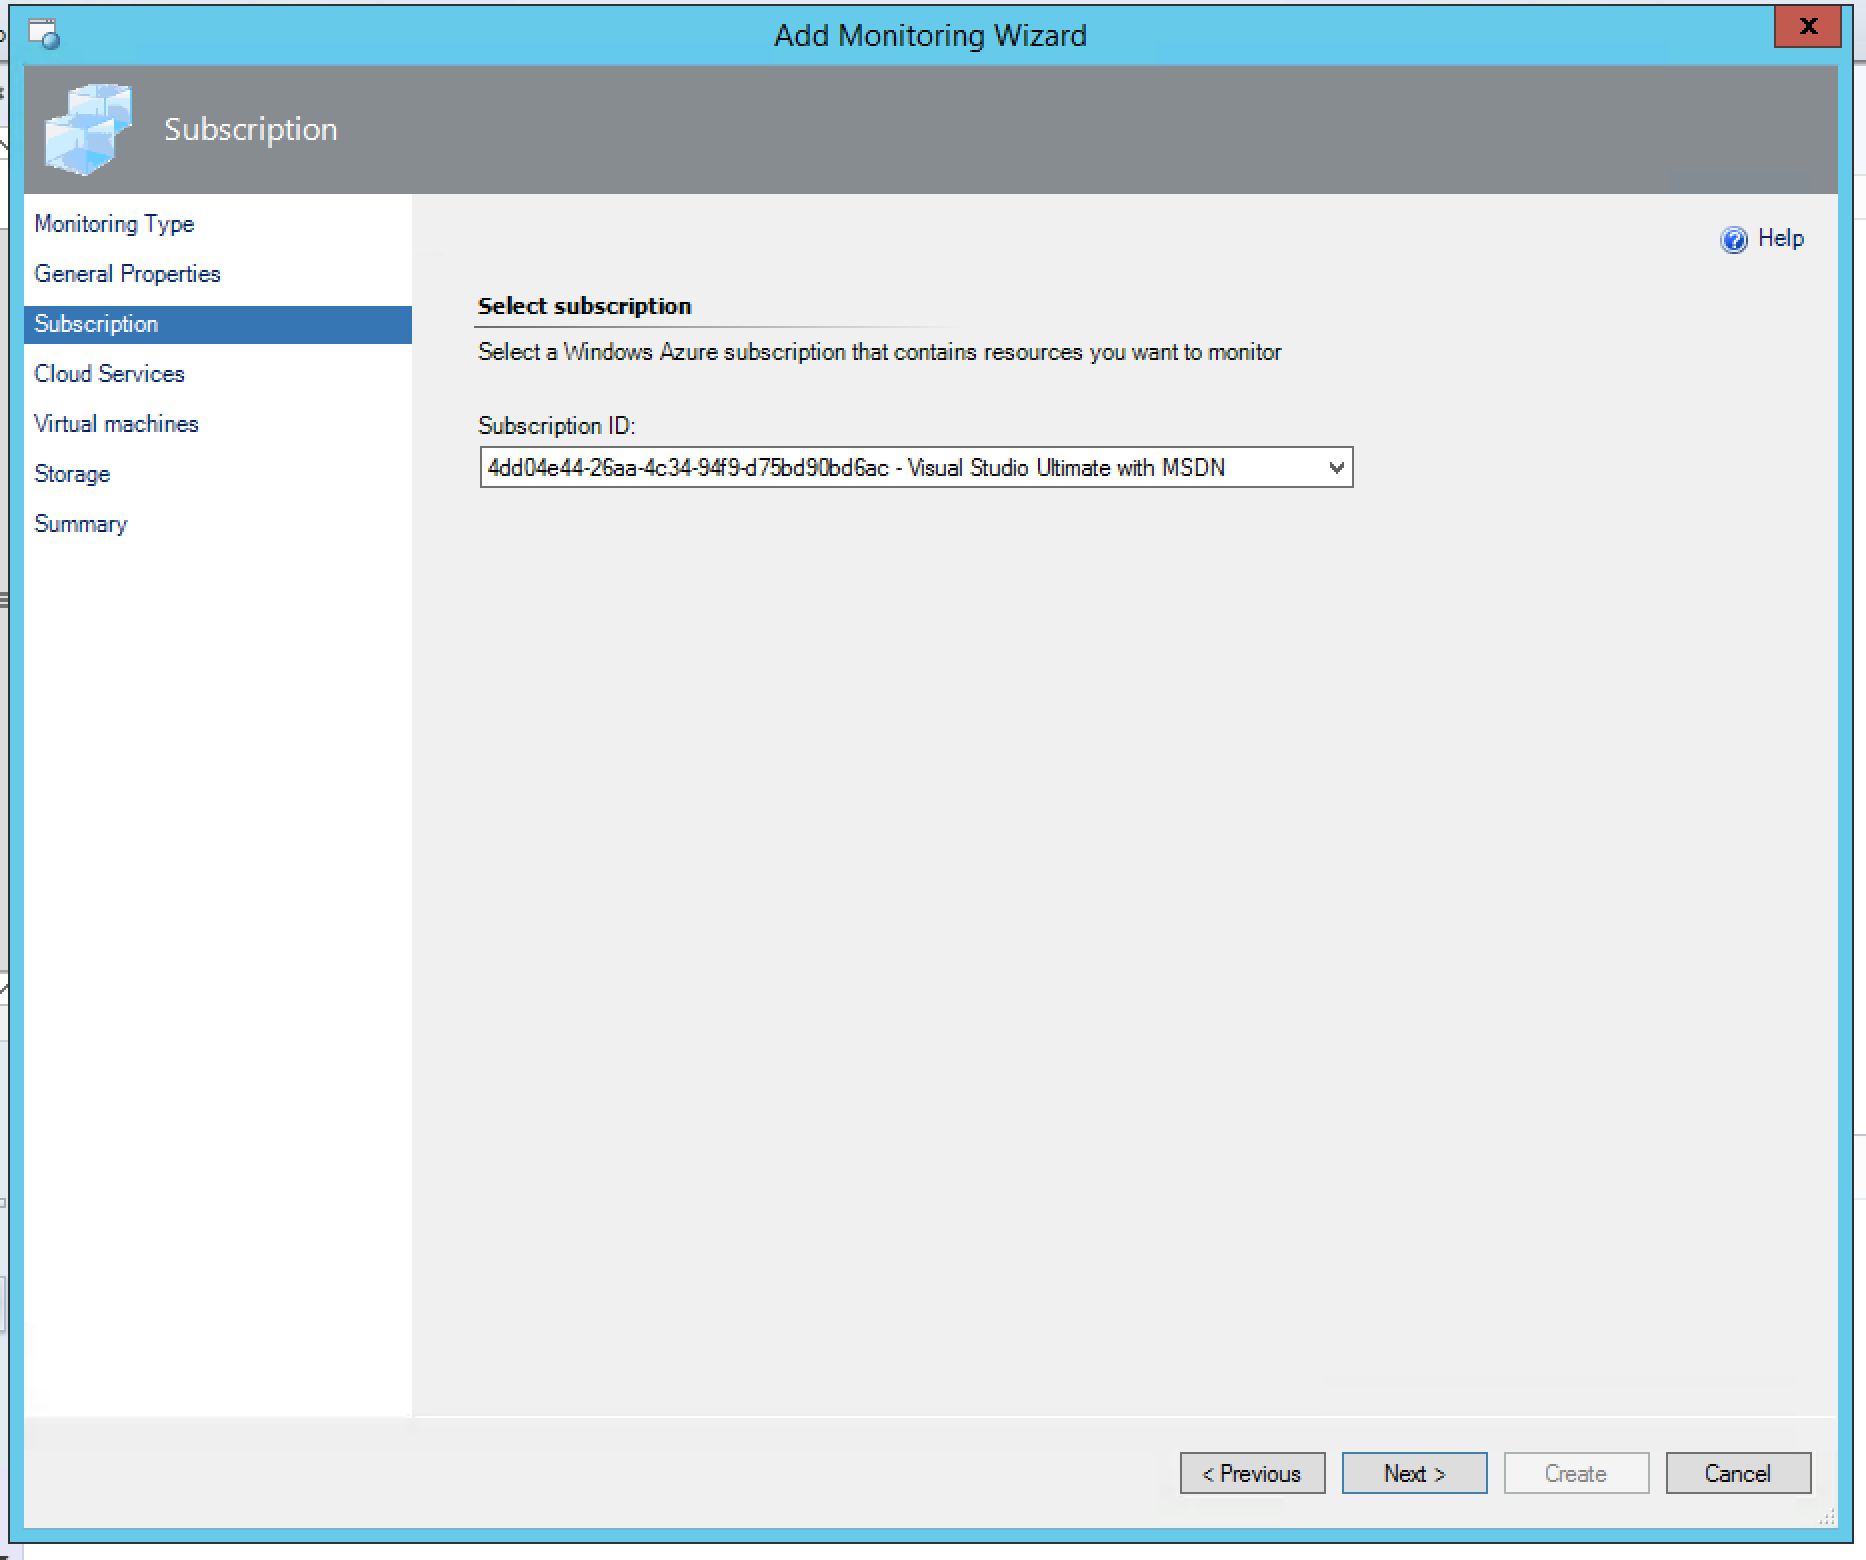
At this point, the AWS and Azure workflows diverge a bit. In the Azure workflow, we now select the subscription that we added to SCOM in the previous section.
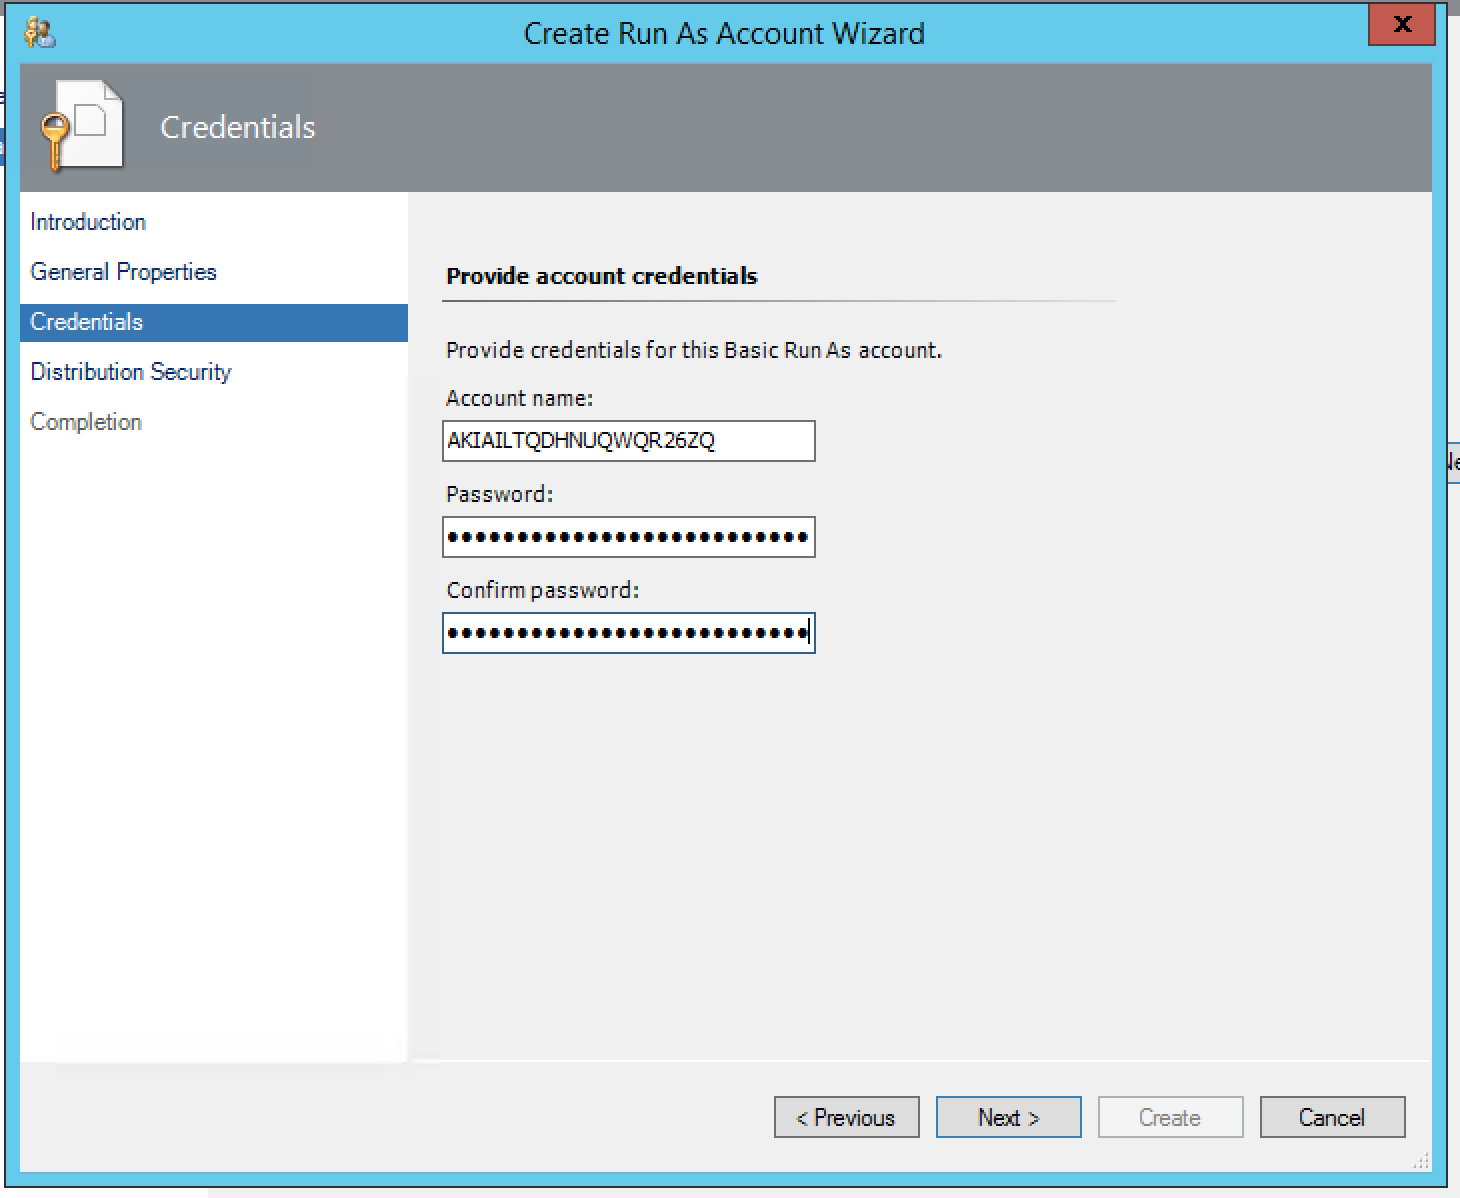
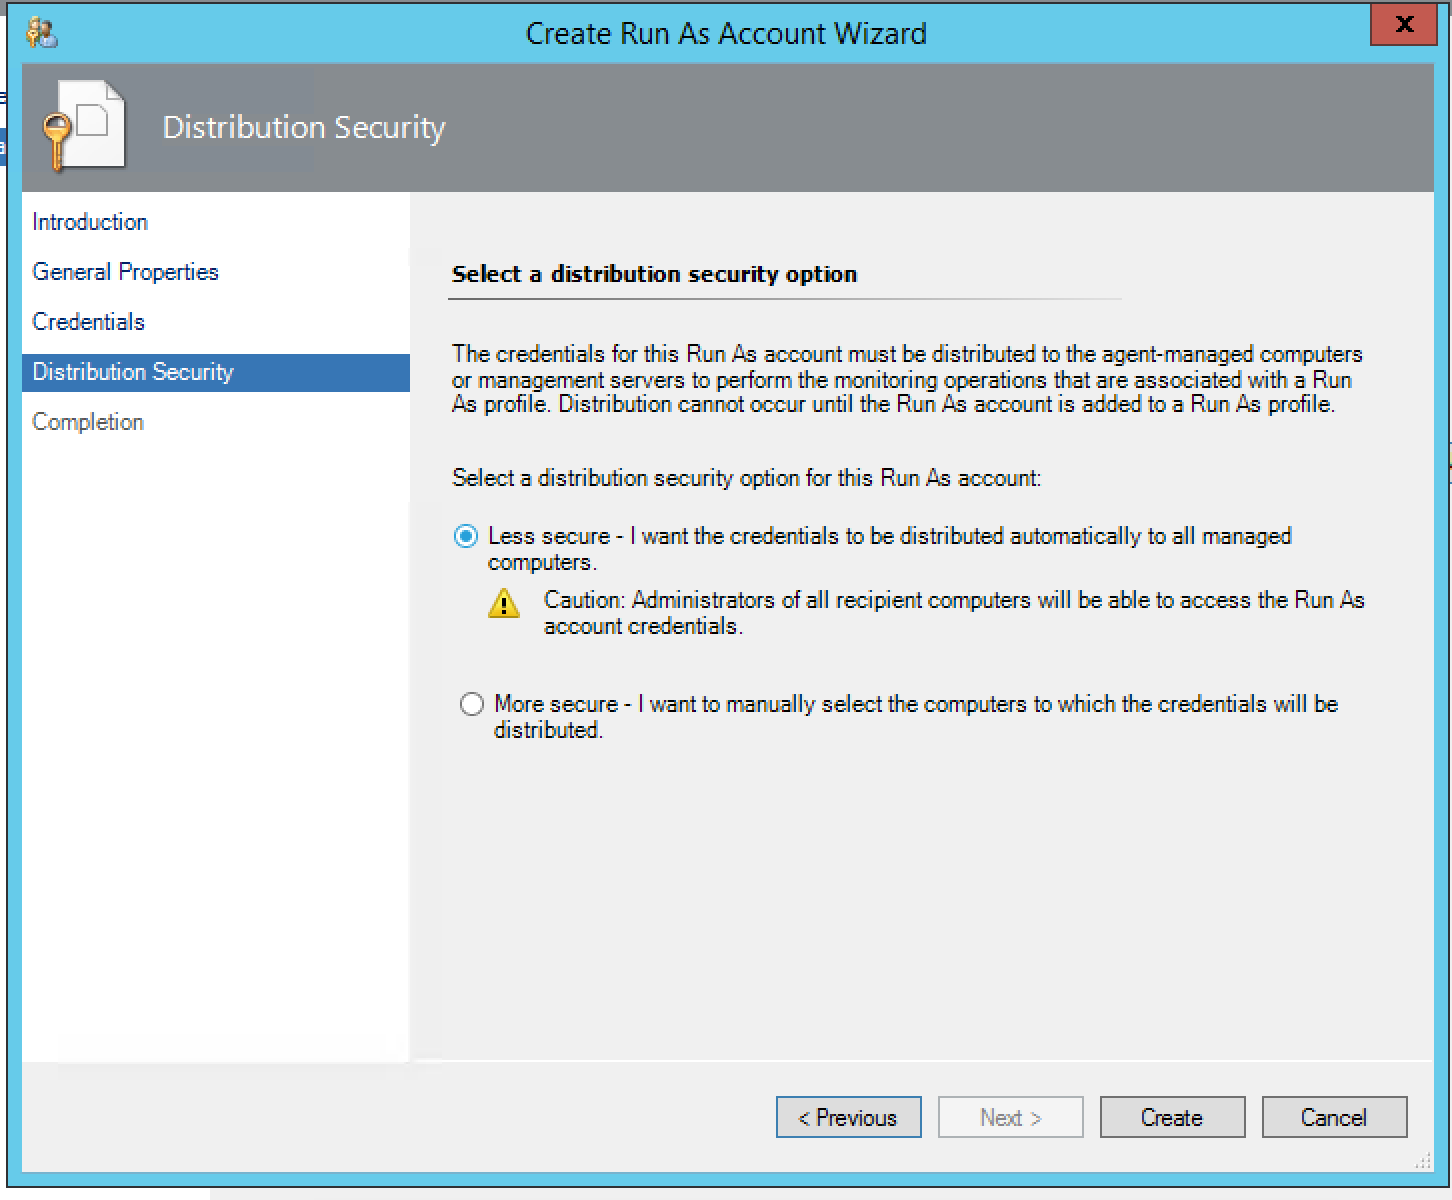
For AWS, the next step in the wizard will be to create “RunAs” credentials that SCOM can use (standard SCOM process for connecting to external systems). Since this is our first time through, we need to create a new RunAs set using the RunAs wizard. For AWS, the correct account type is Basic Authentication. The Display Name can be anything that makes sense.

Next up we provide the credentials themselves. Account Name should be set to the AWS Access Key of either the main AWS account or an IAM user correctly privileged to monitor AWS resources (IAM policy out of scope for this entry, but there are many great resources for IAM policy creation over at the AWS support site). The Password should be set to the AWS Secret Key.
The next step is a decision point on the scope of the RunAs credentials. You can choose to share them with all managed systems, or manually control distribution of the credentials. For the lab, I select the less secure path for convenience. Obviously real world production configuration would be more restrictive.
With the RunAs credentials created, they can now be associated with the new monitoring configuration back at the Monitoring Wizard. With this configuration step complete we can go ahead and create the new monitoring entry.

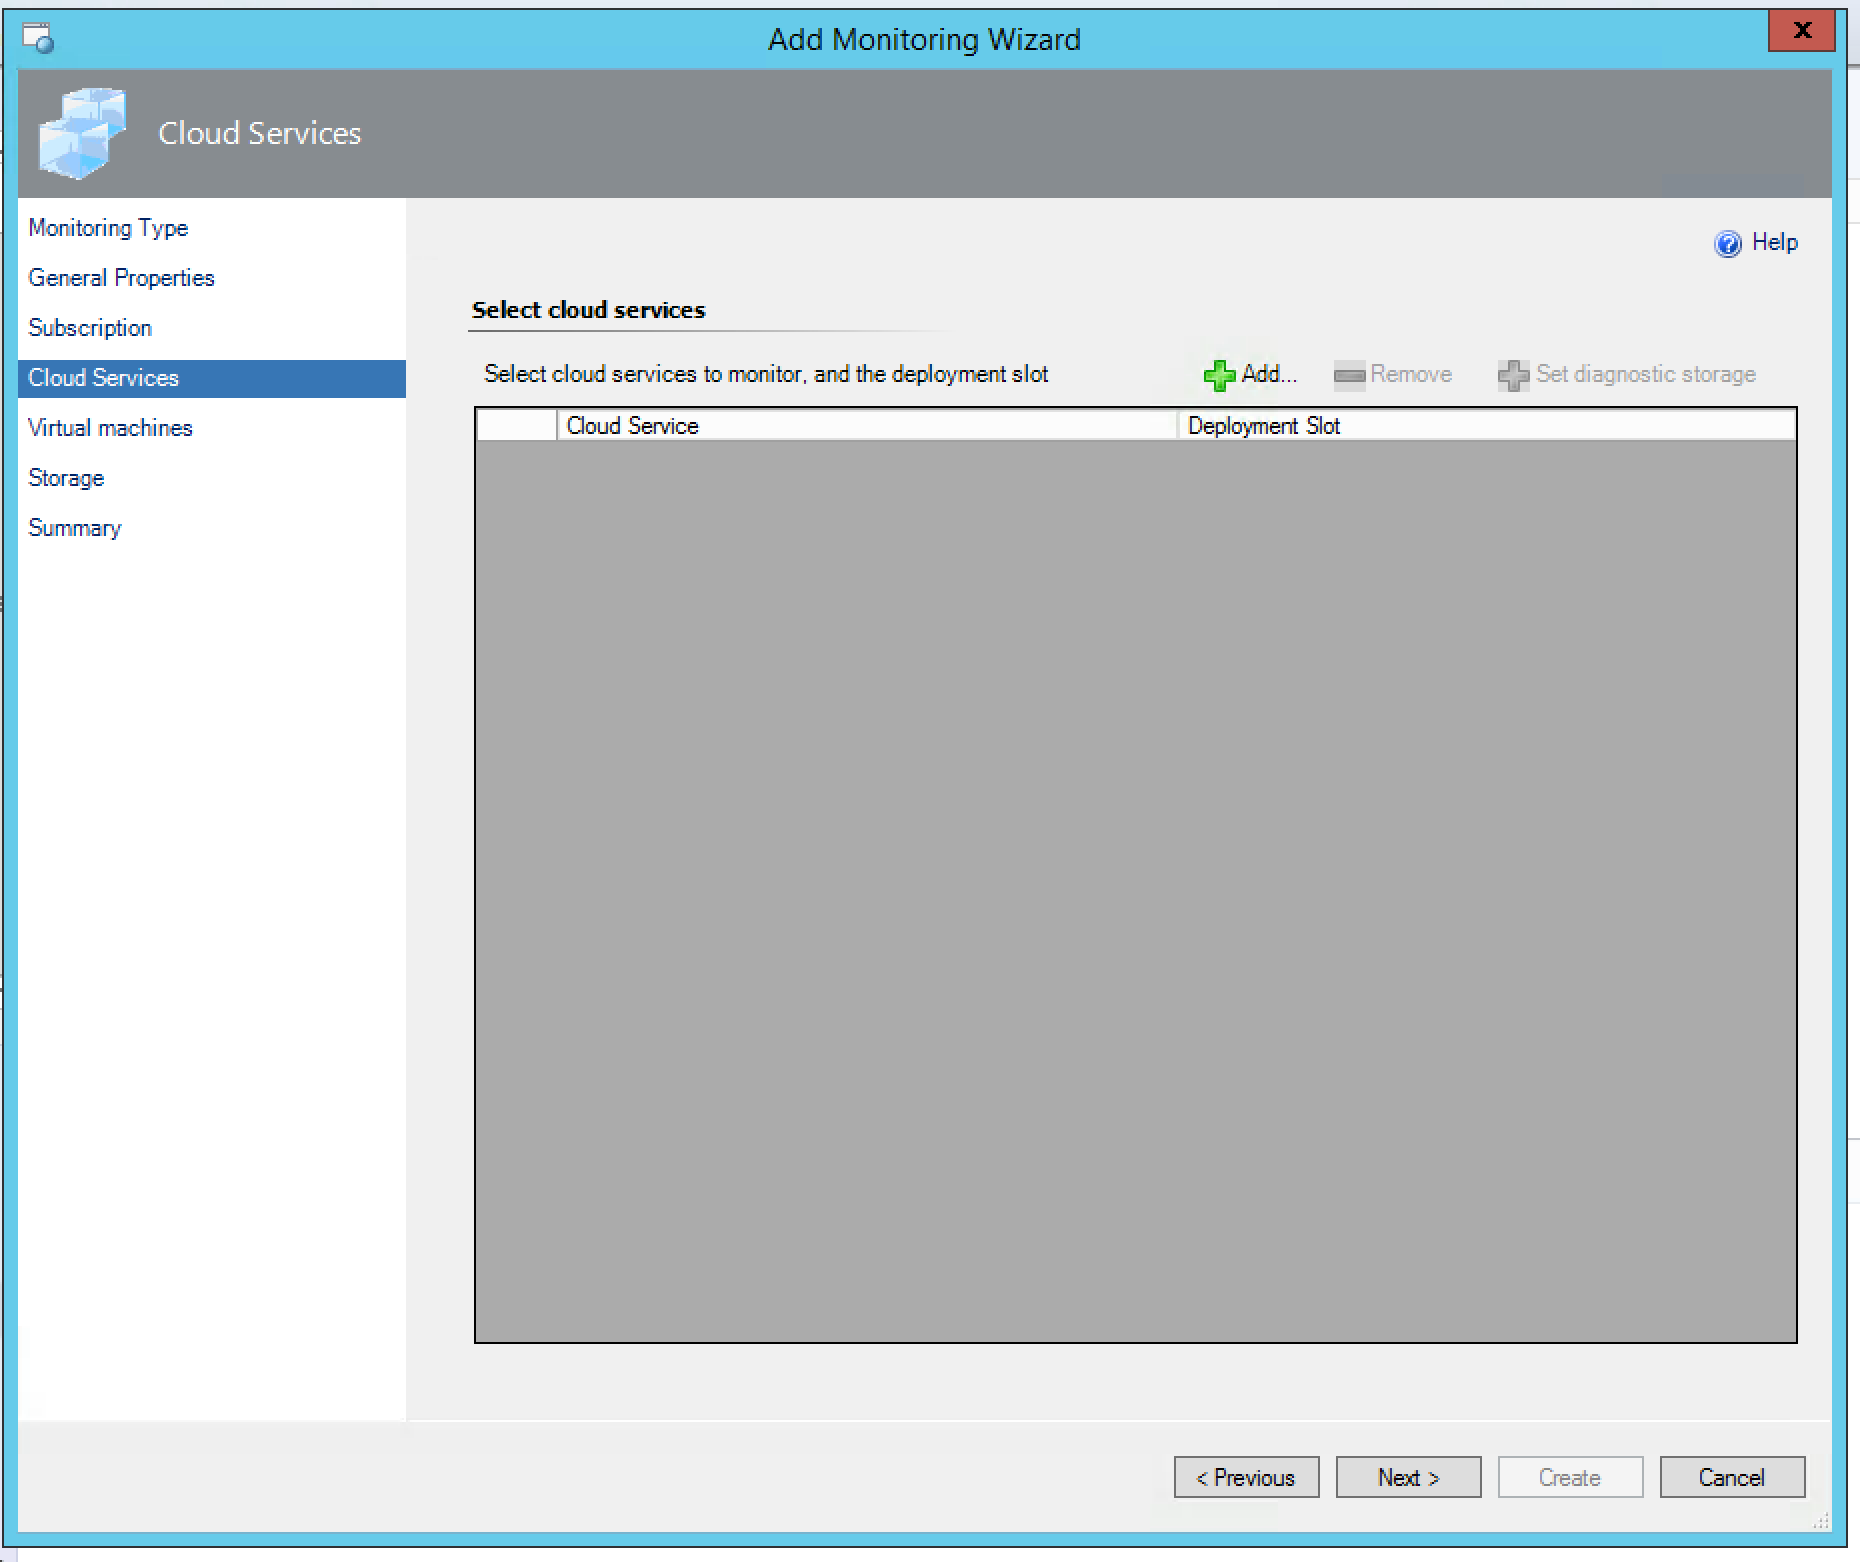
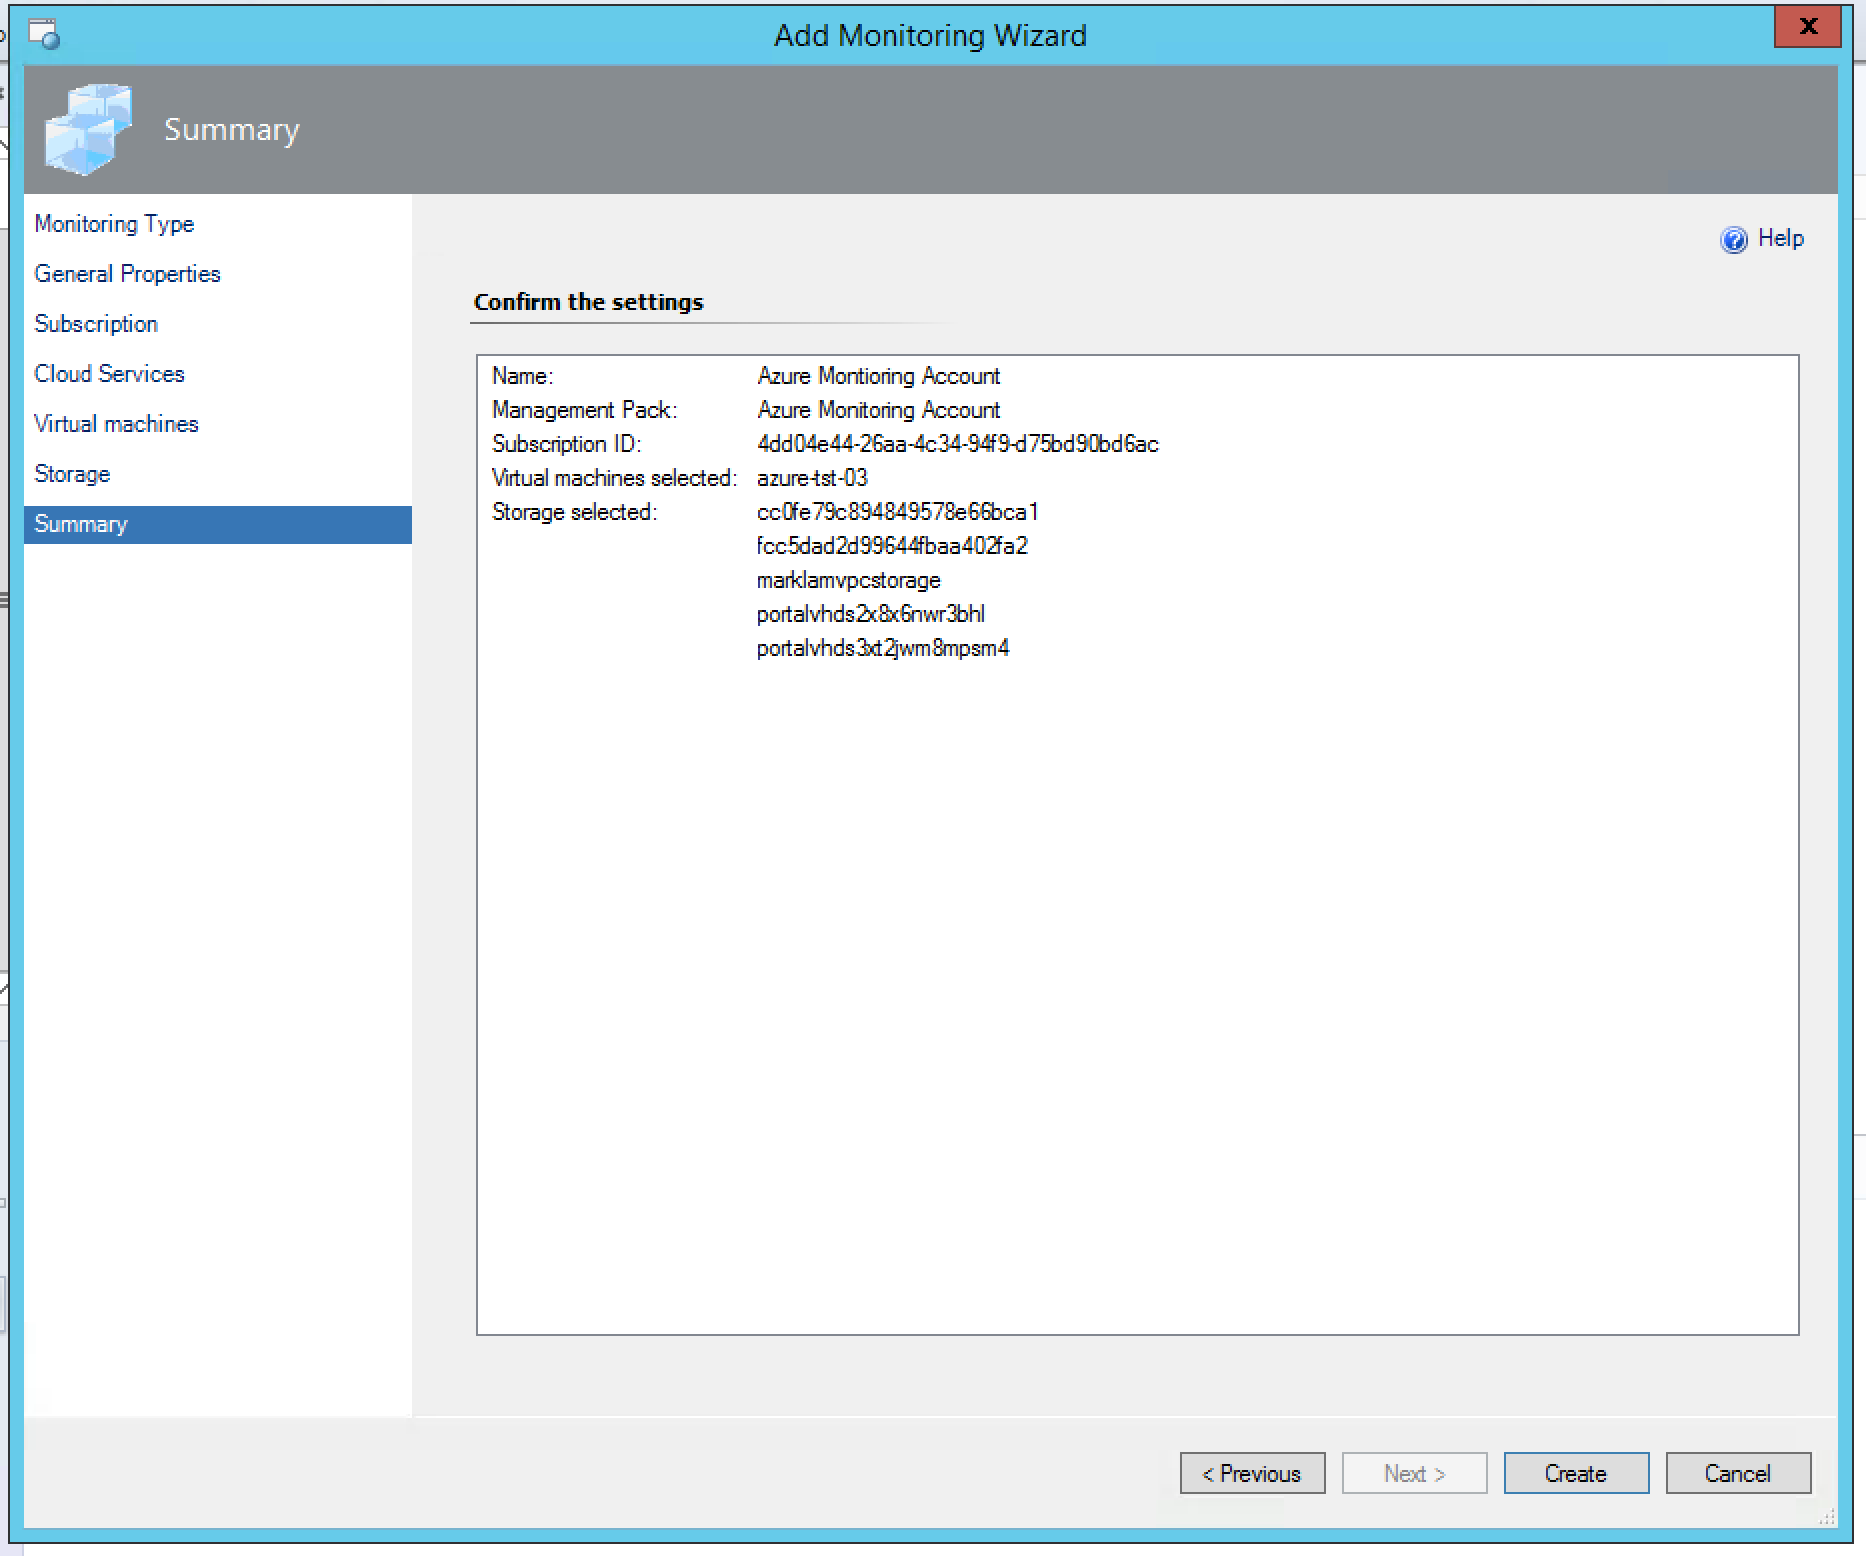
Back on the Azure side of the house, the next step is to start configuring the actual scope of resources to be monitored within Azure. First up is Cloud Services. I actually don’t have any Cloud Services to monitor, but this is where they would be added.
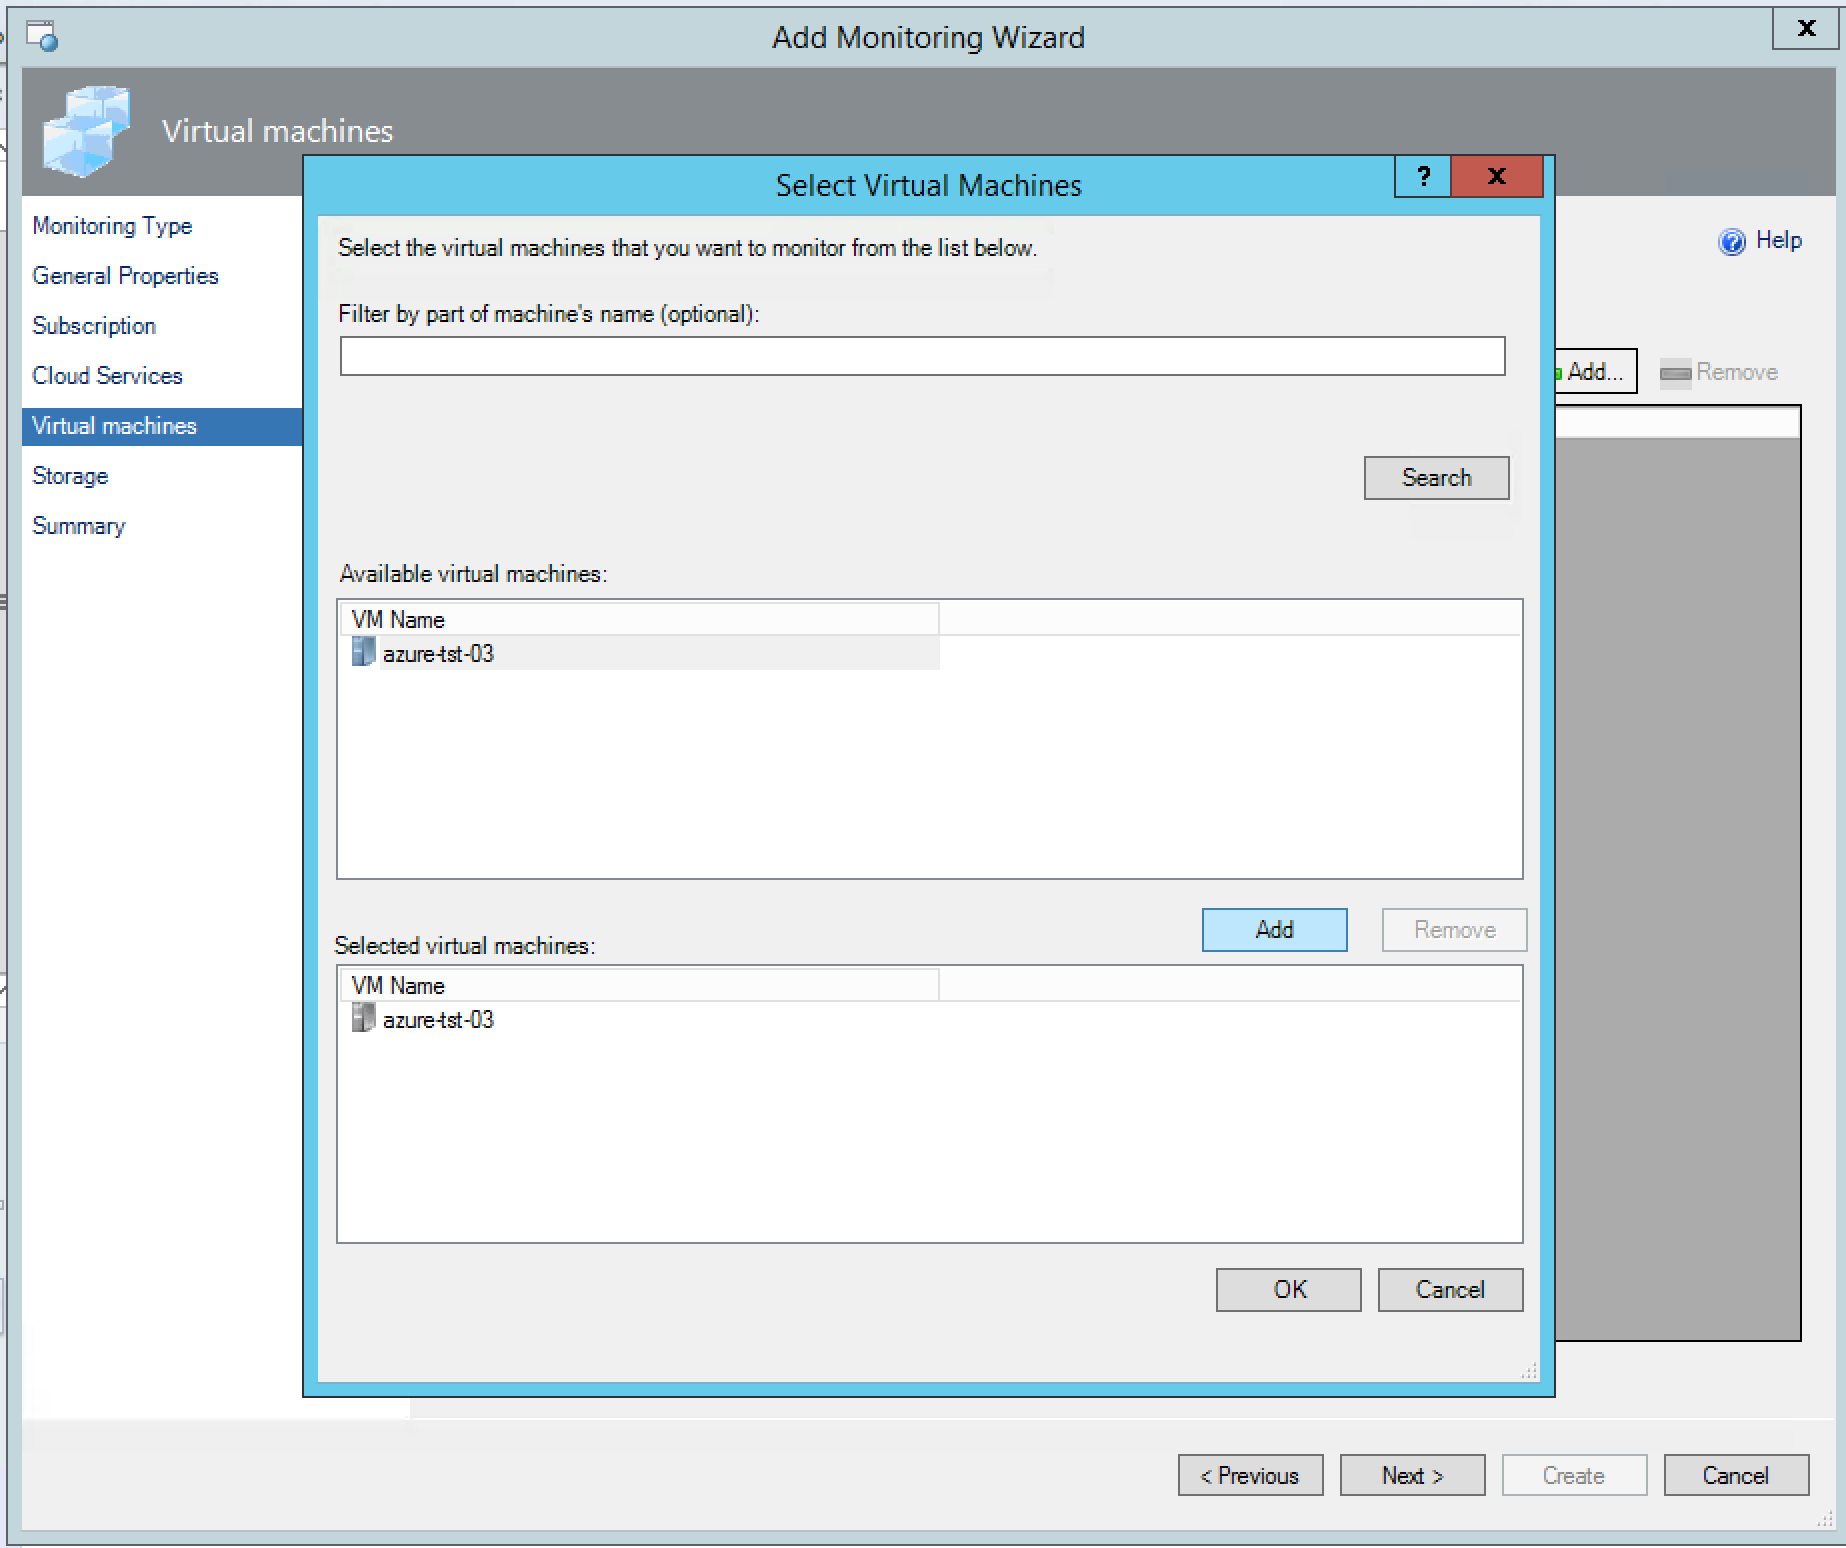
I do have Virtual Machines, so I go ahead and click Add which invokes the Select Virtual Machines dialog. For dense installations, filters can be built to parse the resource list. I leave the filter blank and go ahead and search since I have a very small set of VMs (1 to be exact!) I highlight my one VM and add it to the monitored set.
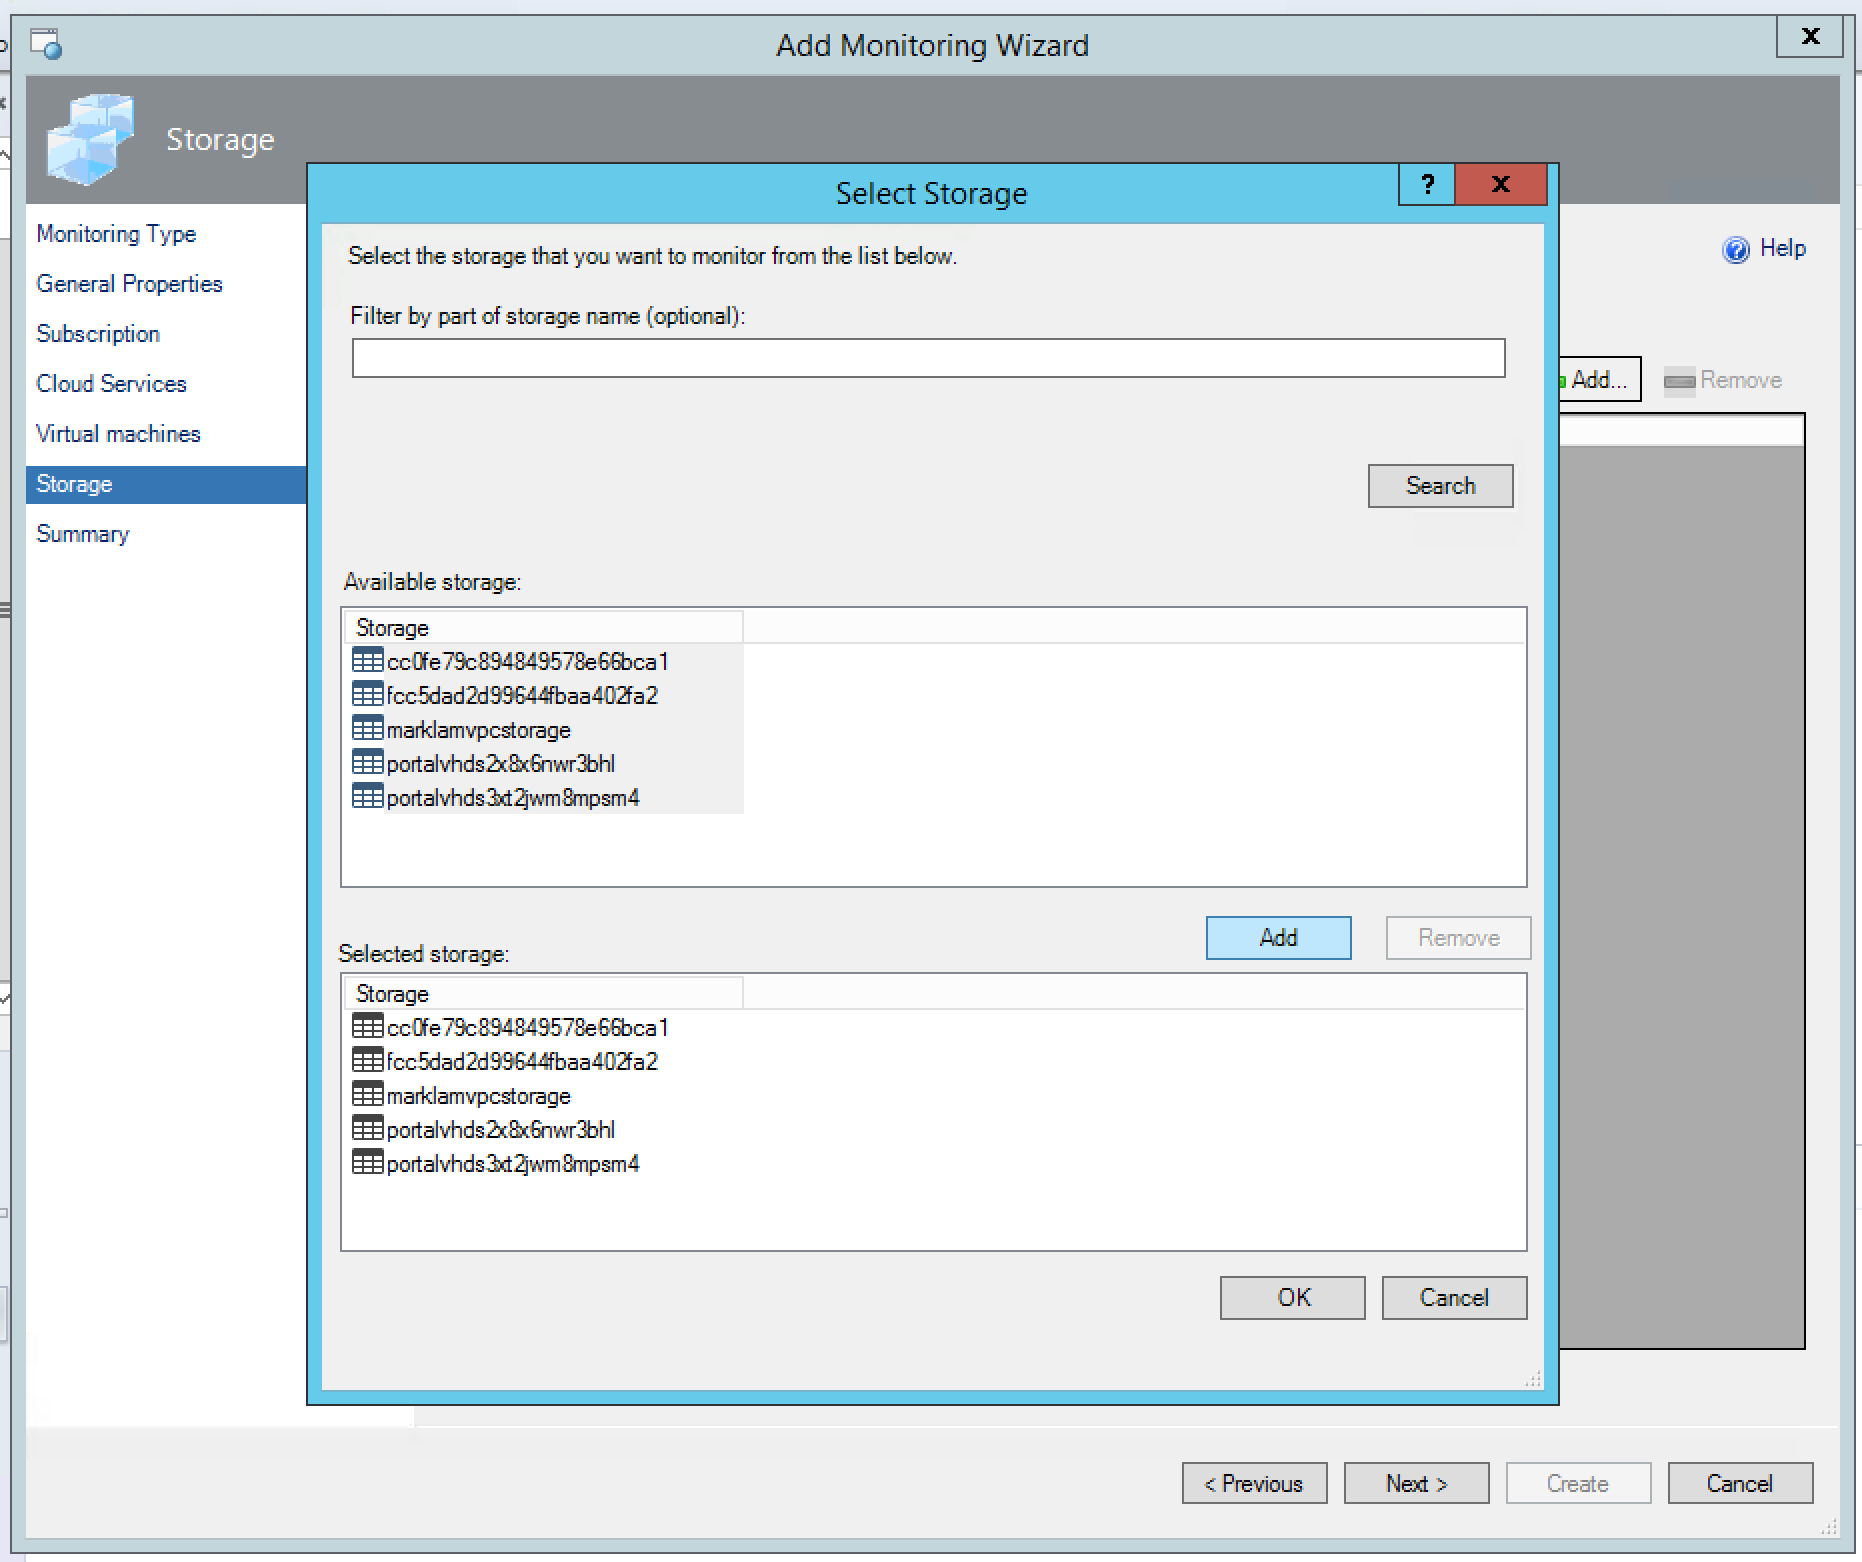
Next up the process repeats for storage. (Slightly) more to see here.
With all resources added, we can now finalize the setup and create the new monitoring configuration.
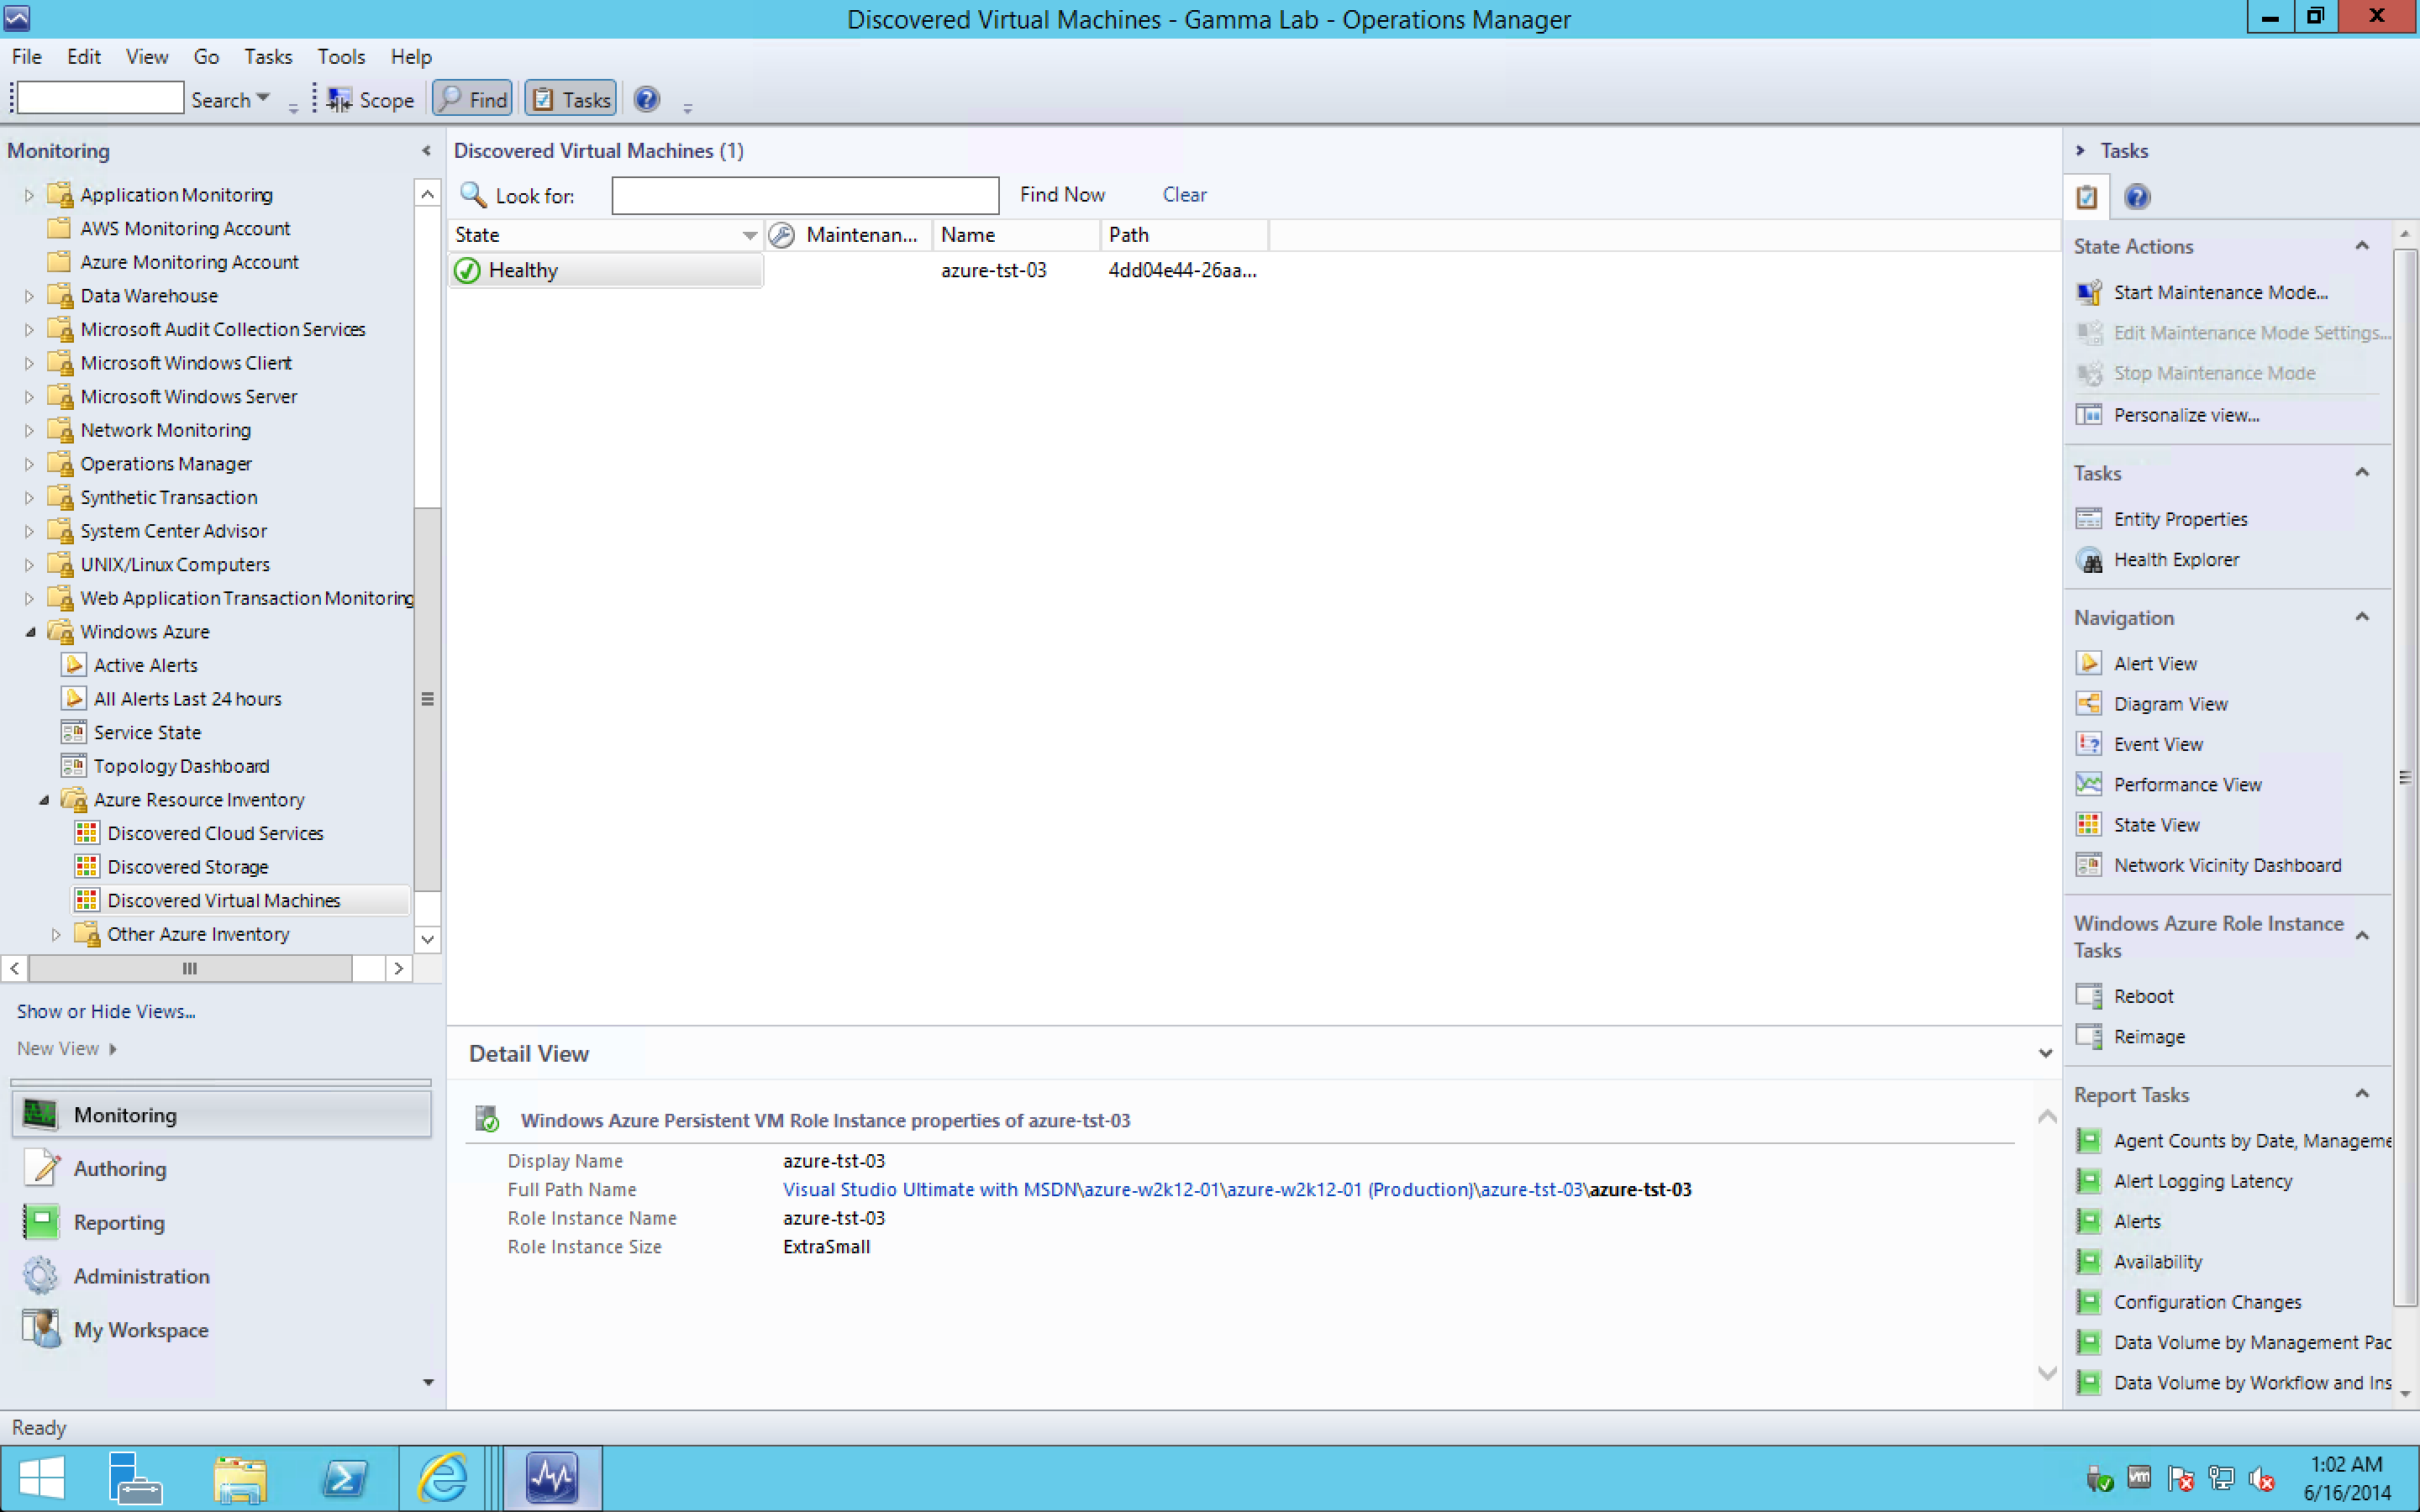
With management packs imported and configured, and new monitoring configurations in place for Azure and AWS, we can go ahead and take a look at our resources within SCOM. To do this we select the Monitoring section from the main UI. There will be subsections for Azure and AWS now that the monitoring wizards have been successfully completed. If we expand the Azure tree, we can drill down to virtual machine resource status. Here is a view of my VMs.
With AWS, same rules apply. In my case no EC2 instances are currently online, but this is where they would appear.

That’s it for basic configuration! Next up I may do some deeper dives into SCOM. In the meantime, happy monitoring!
