
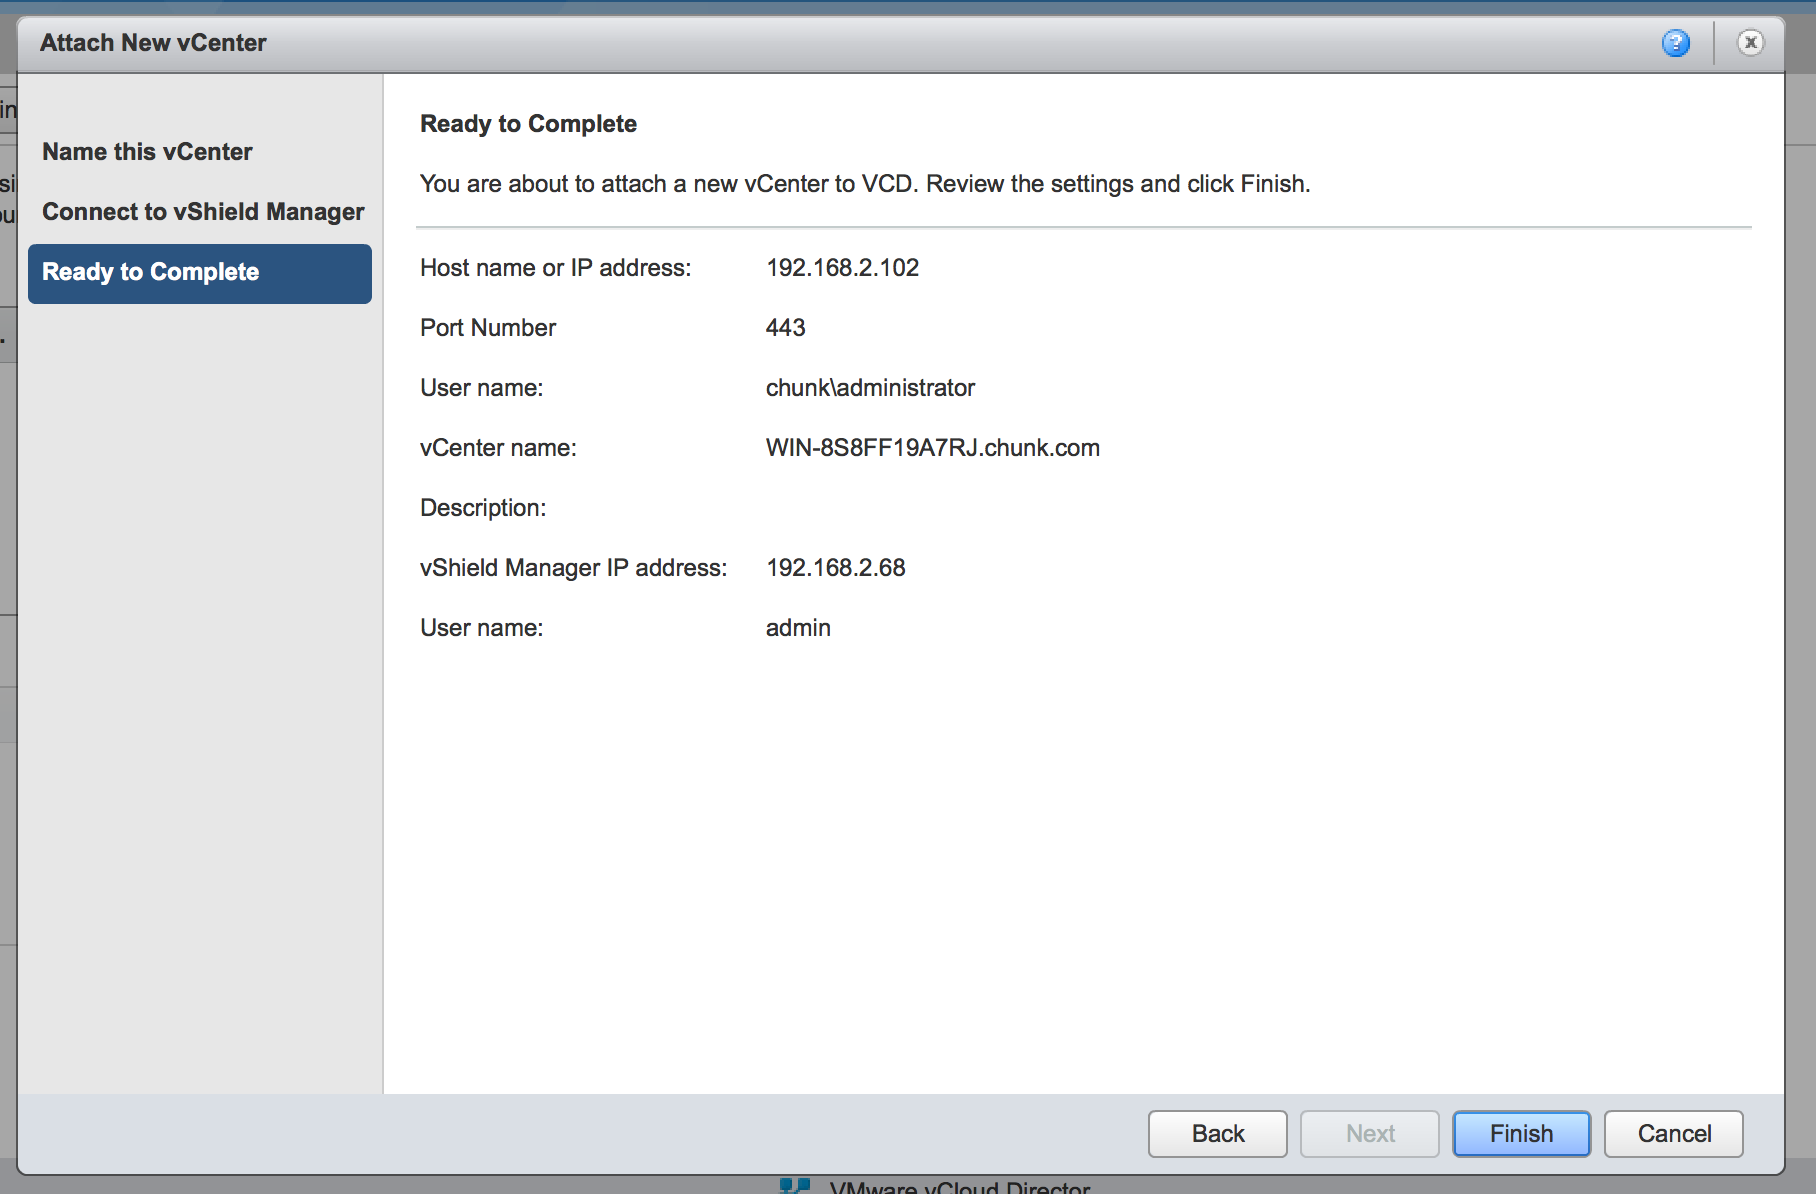
In the last entry we left off with vShield Manager having been installed and brought online. With that step complete we can return to the vCloud Director initial setup and complete the “Attach New vCenter” step. The screenshot below shows the final step populated with all vCenter info:
With the vCD core configuration complete it is time to move ahead and configure the Provider Virtual Datacenter. It is worth spending some time at this point to walk through the vCD constructs. VMWare, with the introduction of vCenter years ago, introduced the concept of “Virtual Datacenters”, or vDC. The vDC is a logical grouping of resources within the management interface. Essentially, it is a way to partition an ESX estate, separating clusters and their member hosts into logical groupings that share some commonality. The vDC is an important management boundary and vCloud Director builds on it in order to create a multi-tenant cloud foundation. Building on the vDC, vCD introduces two new management domain definitions:
- Provider Virtual Datacenter: the key thing to remember is that the Provider vDC groups resources together. Consider a cloud service example. There might be thousands of hosts widely distributed across multiple geographies. These hosts would have a range of capabilities and connect to some backend storage system (potentially a range of different systems). The basic premise of the service is to allocate these resources to end-customers in a multi-tenant fashion and monetize them. To this end, the Provide vDC construct provides mechanisms to define tiers of resources, apply costing to them, assign rules to how they are consumed, and group them logically. This will be covered in more detail in the configuration screenshots later in this entry
- Organizational Virtual Datacenter: as the logical companion to the Provider vDC, which organizes resources, the Organizational vDC provides a logical boundary for the isolation of tenants. It provides interesting constructs like catalogues of Virtual Machines (services), that can both be organization public, or widely available throughout the service (exposed to multiple tenants), and also allows for restrictions on the way tenants (the organizations) can consume resources that are provided by the Provider vDC.
With these definitions in mind, let’s look at the setup steps for creating the first PvDC and OvDC entities in our vCloud:

The first step is straightforward. Name the Provider vDC, set its maximum supported hardware version (hardware version 7 allows the usage of both ESX 5.x and ESX 4.x) and provide a description if desired. There is also an option here to keep the Provider vDC disabled after creation. Of course in this case it would need to be enabled before the resources could be utilized in an Organizational vDC.
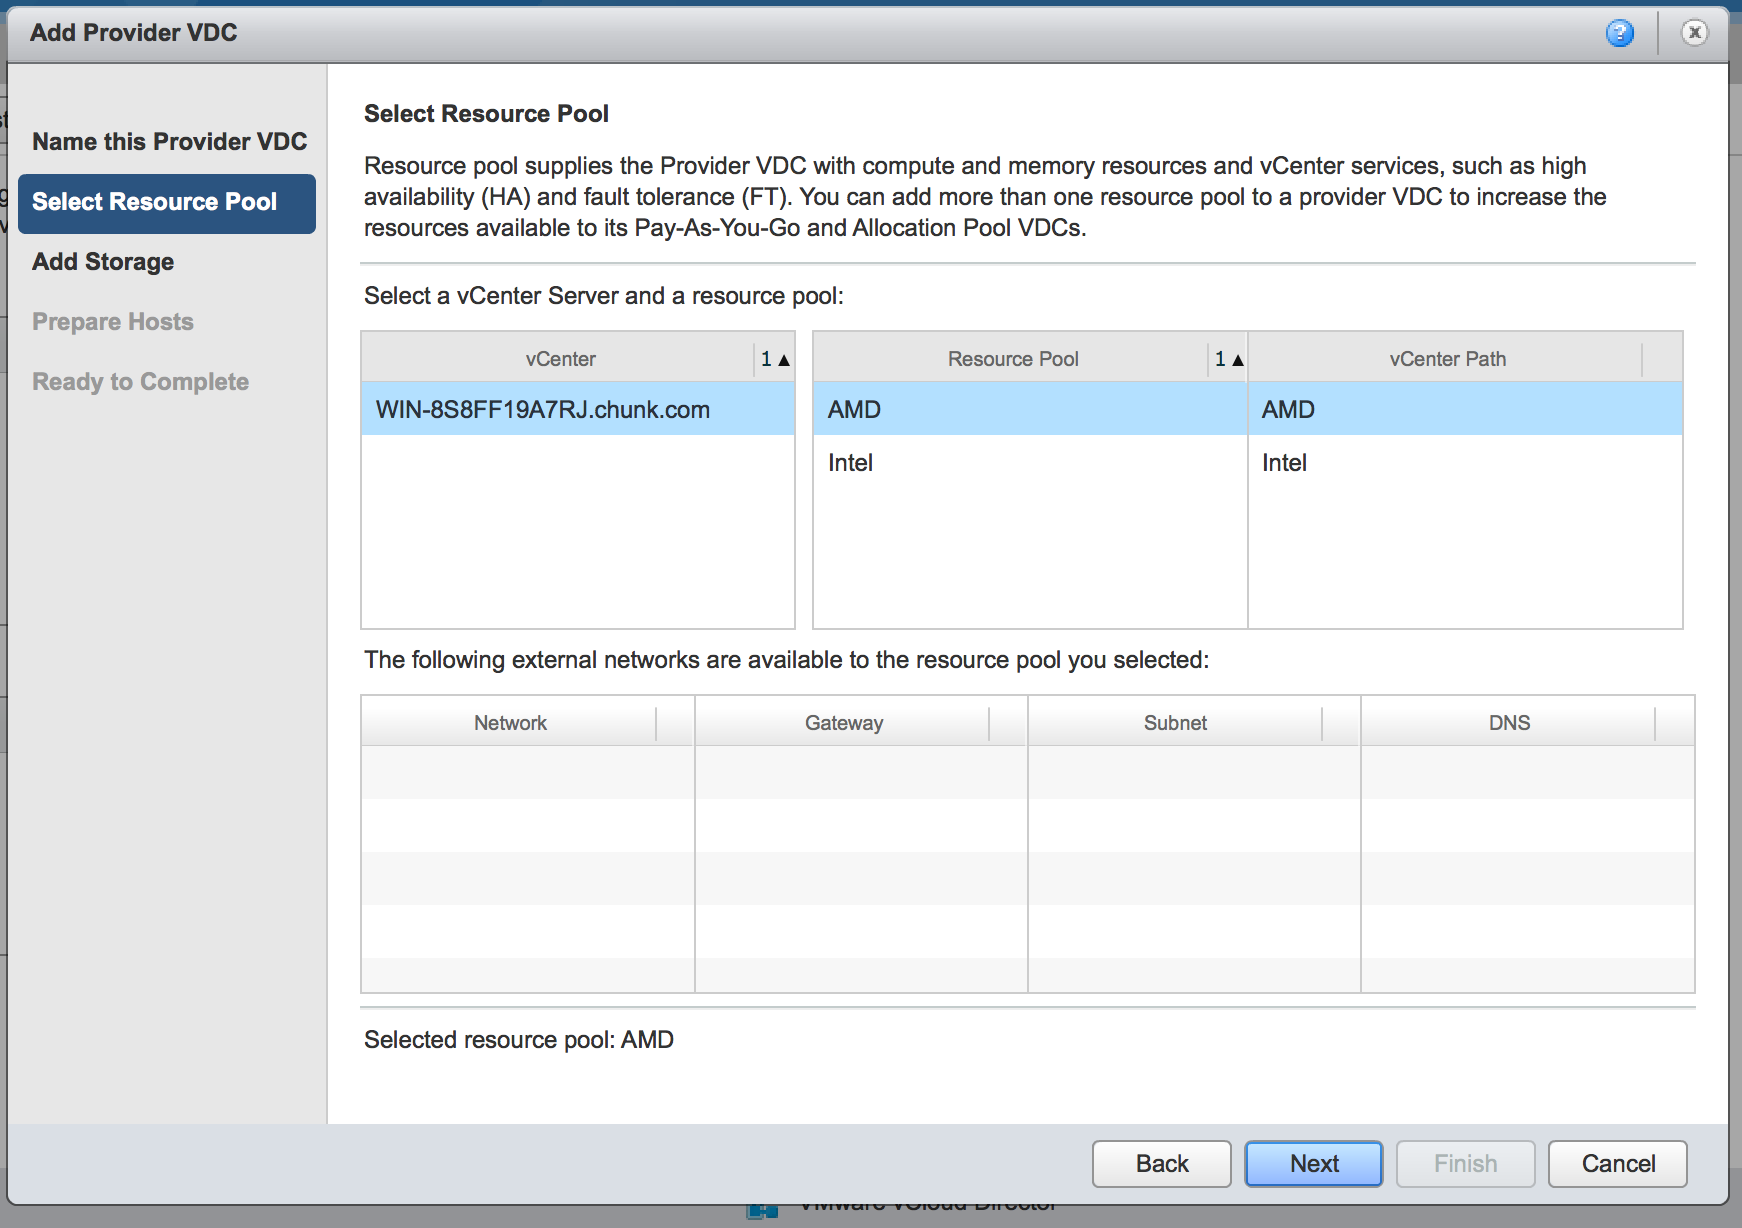
The next step after setting up the basics is to assign some actual resources to the vDC. Any vCenters attached to the vCloud will show as available in the vCenter panel. Their respective resource pools will be made available for assignment in the Resource Pool panel. In additional, external networks assigned to the available resource pools will be made available for assignment in the lower panel. In my case I have not defined any external networks, so there is nothing to assign. This can of course be updated later by modifying the Provider vDC in this same console UI.
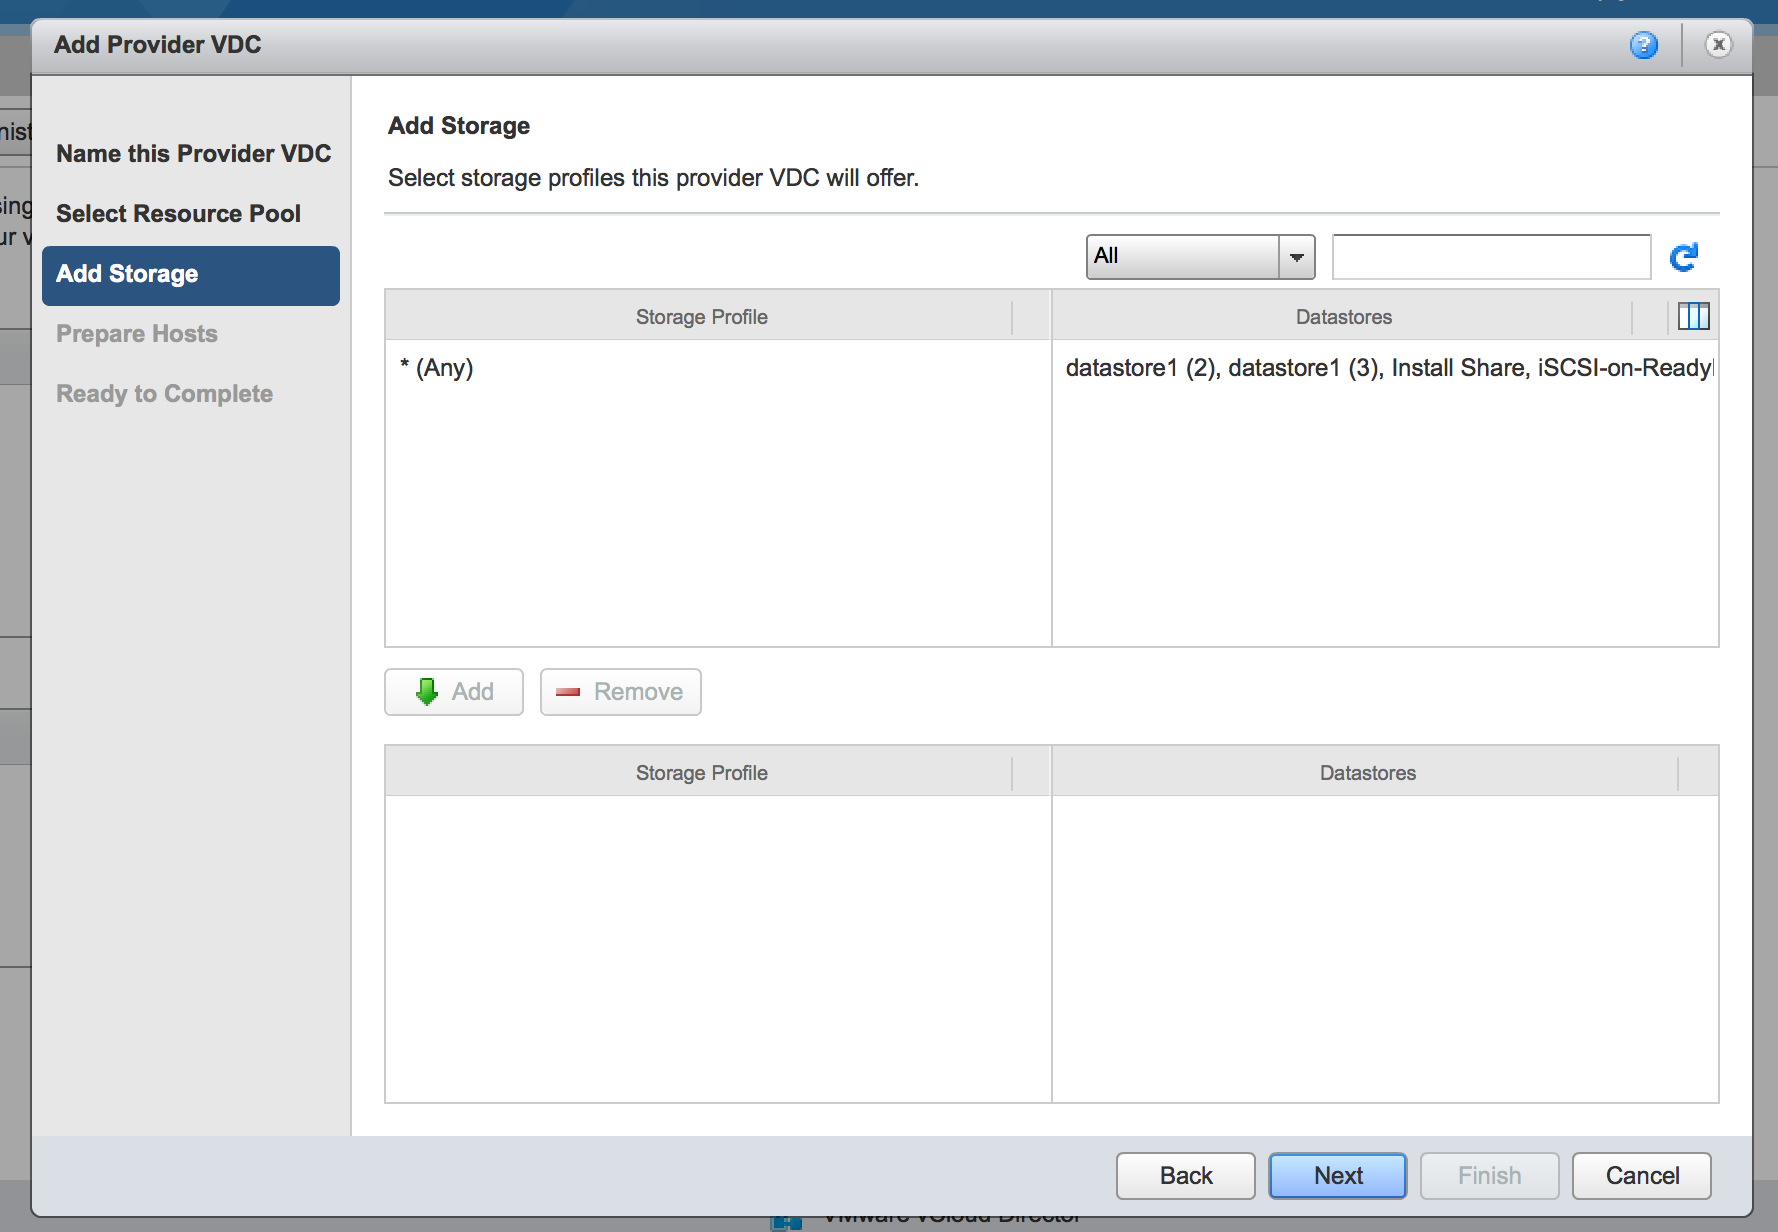
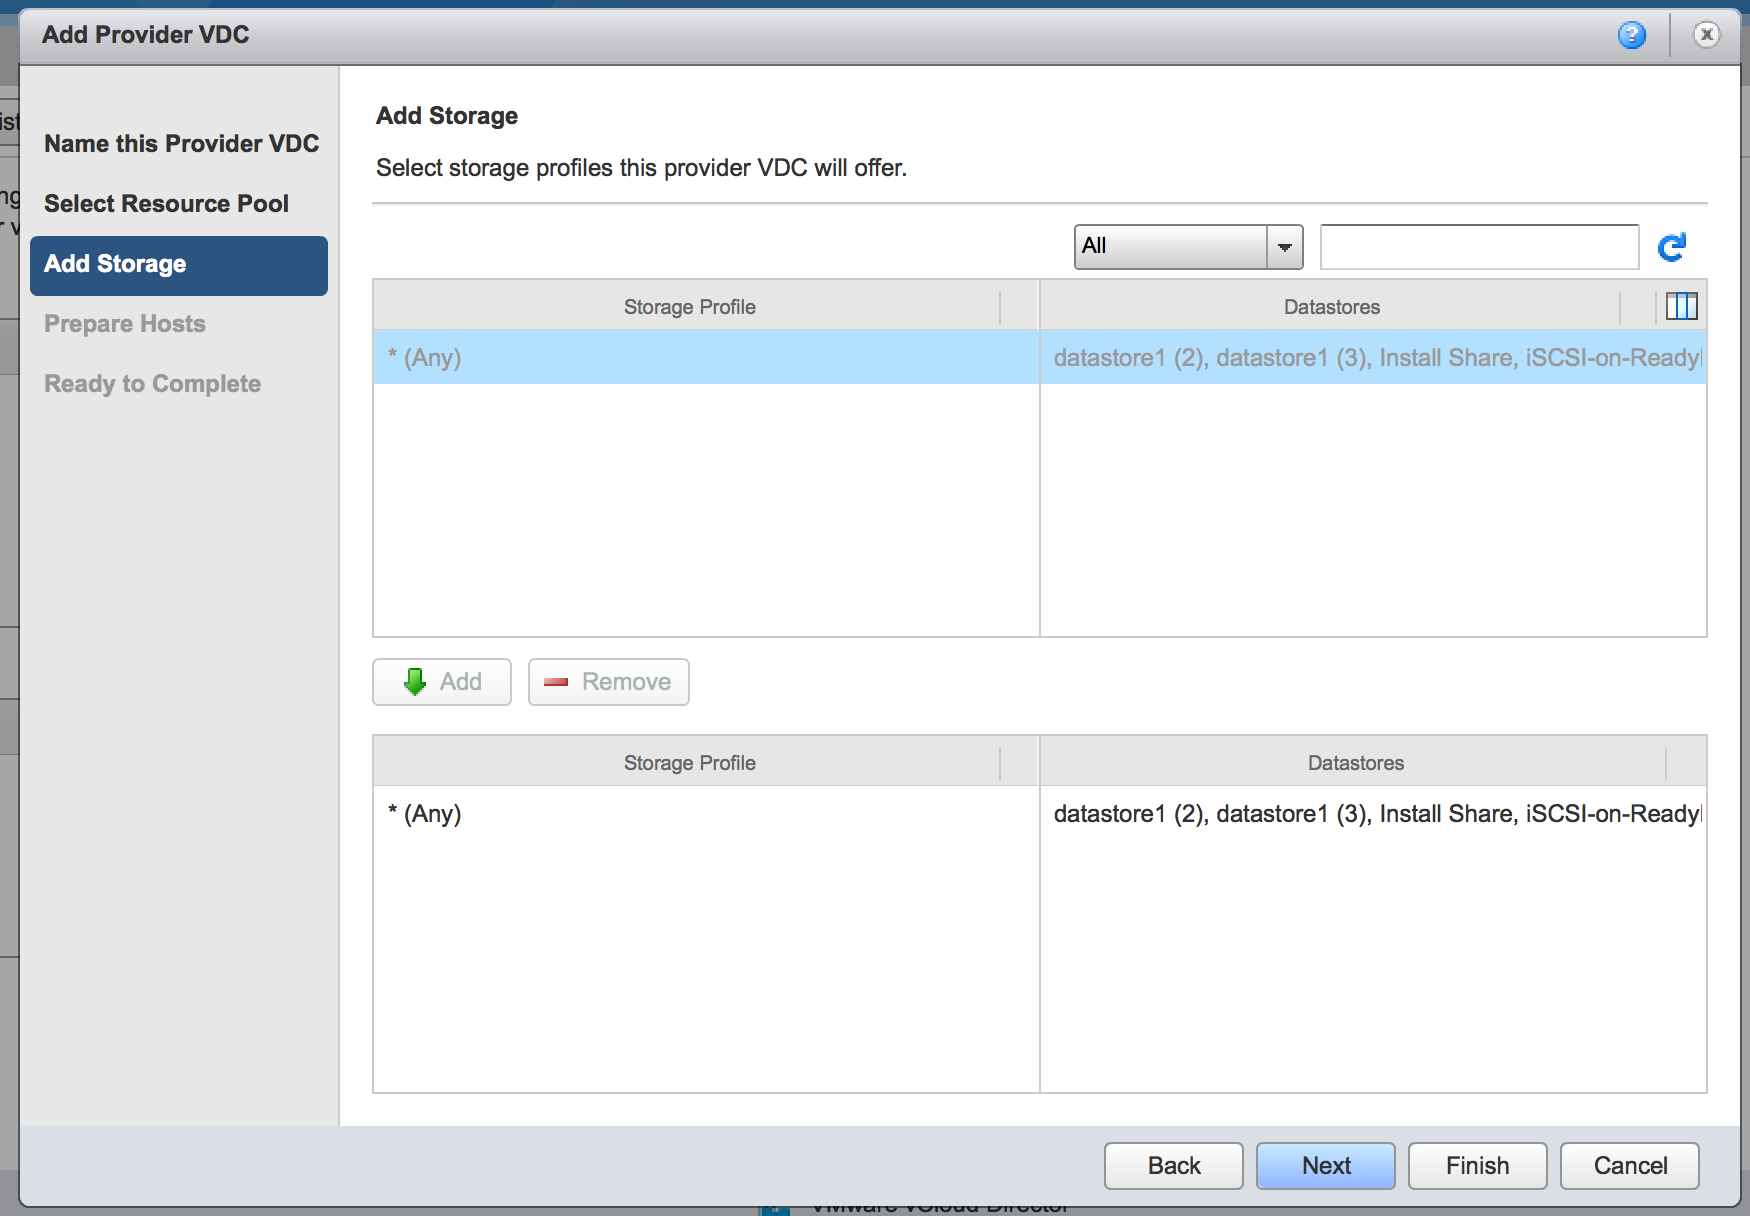
As with compute and network,the next step is to assign storage. Available storage profiles and datastores will be shown as available for assignment in their respective panels. In my case I have allocated an entire cluster, and all of it’s storage resources, to vCD. In a real deployment there would certainly be multiple storage profiles, which would likely map to storage tiers, available for selective assignment here. Some possible scenarios are “platinum storage”, with high IO capability, being assigned to a “Premium Provider vDC” with, perhaps, “bronze storage”, with low IO capability, being reserved for assignment to a “Commodity Provider vDC”.
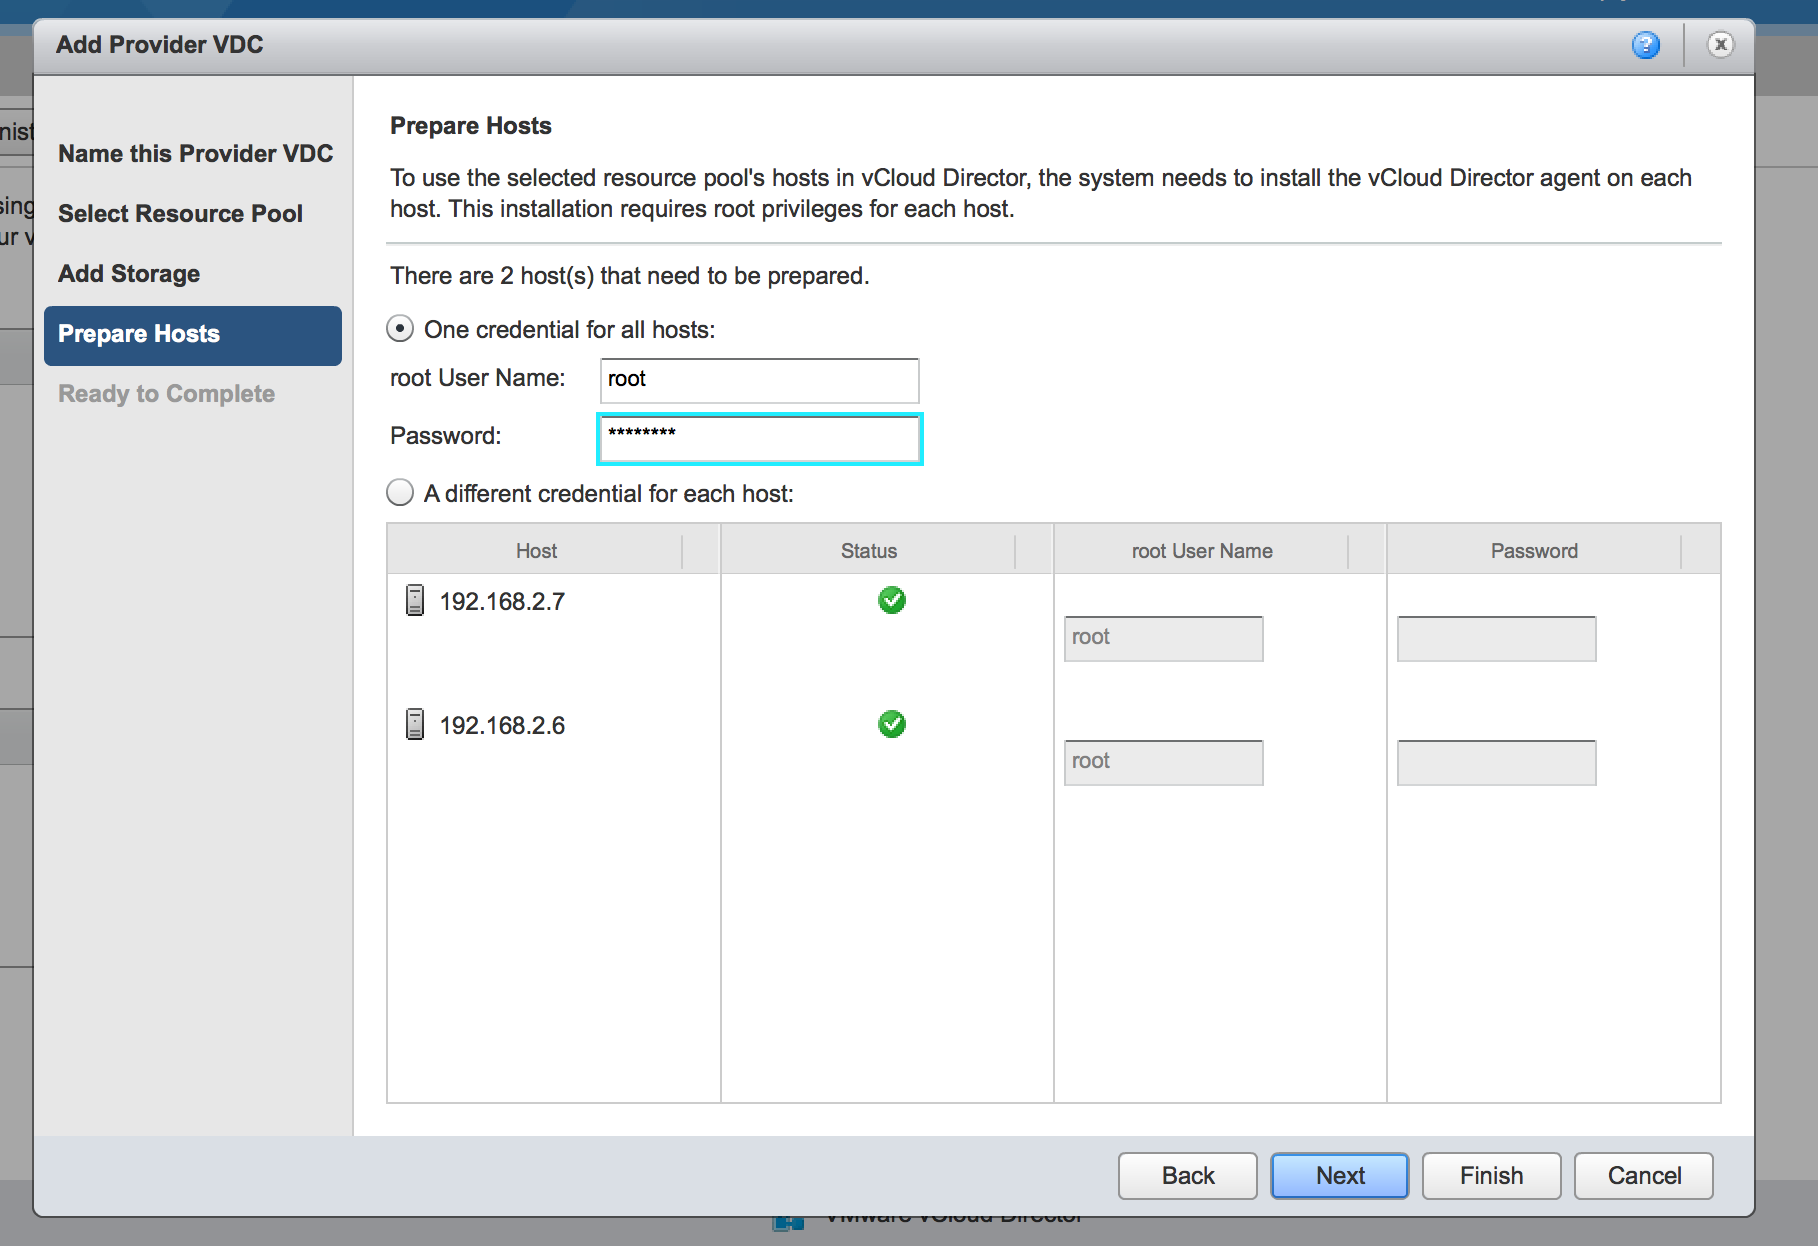
The next step is to prepare the hosts for inclusion in the vCD resource pool. What is happening is an agent, in the form of a VIB, is being pushed to each host (hence the need for admin credentials), and the VIB then installed and the newly enabled host “prepared” by inclusion into the vCD configuration. This step actually gave me some serious trouble. In checking the web I found that it is not entirely uncommon, and it is possible that there is a RTFM element to this, but in any event what ended up happening is that the installation/preparation process ended up hung on a reattempt after failing to complete. The interesting thing is that this state persisted through reboots of the vCD server (and of the actual host). Before getting to the fix, some notes on this process:
- in repairing this manually, I learned that the hosts should be in maintenance mode during the preparation. It’s a little bit counterintuitive at first because the UI will show them as “unavailable” if they are in maintenance mode (which makes sense because they are technically unavailable to vCD), but VIBs can’t be installed to a host that isn’t in maintenance mode. I didn’t realize a VIB install was actually part of this preparation phase, so hadn’t caught this at first.
- Even in the absence of problems, I feel that vCD is a good opportunity to start to learn some of the deeper internals of all of these systems. Inevitably, you will need to “go there” for automation at some point and, without a doubt, when problem remediation gets complex enough it becomes invaluable. So knowing the landscape of the hosts and the vCD server at the shell level makes life a lot easier (in other words, SSH is your friend)
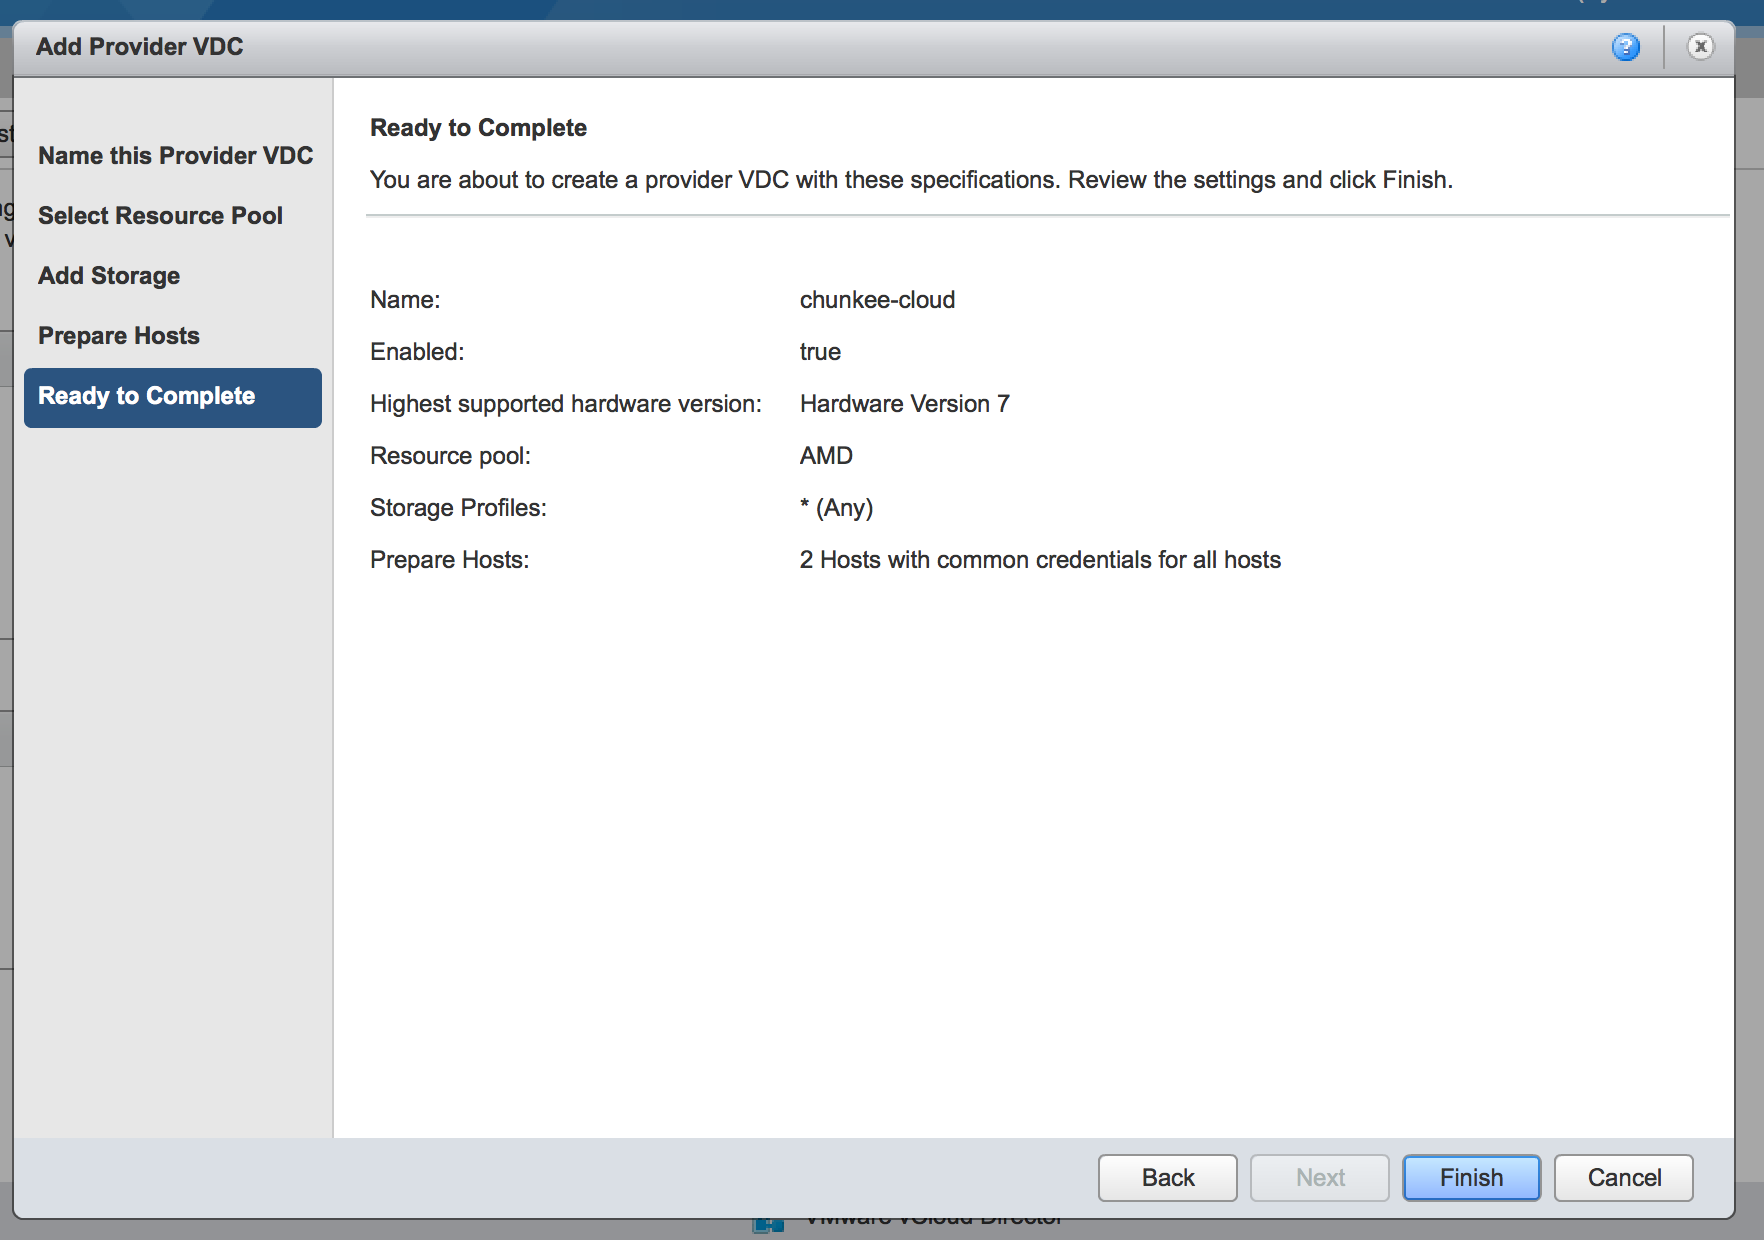
While these two screens look innocuous enough, and seemed to complete and pass through with no issue, what was actually going on behind the scenes was this:
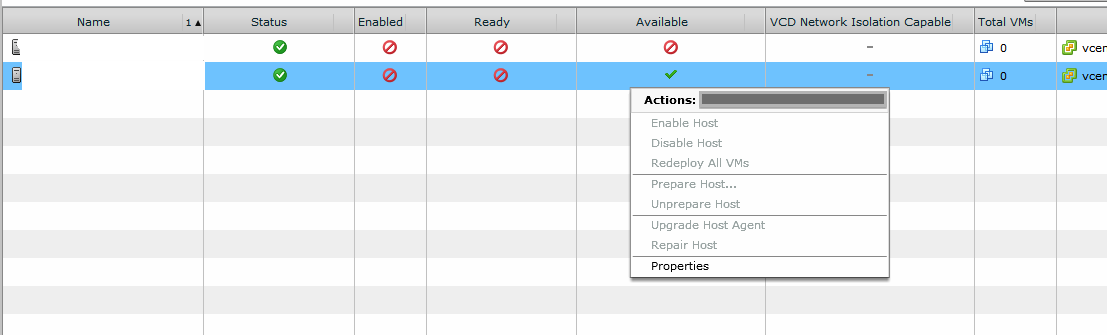
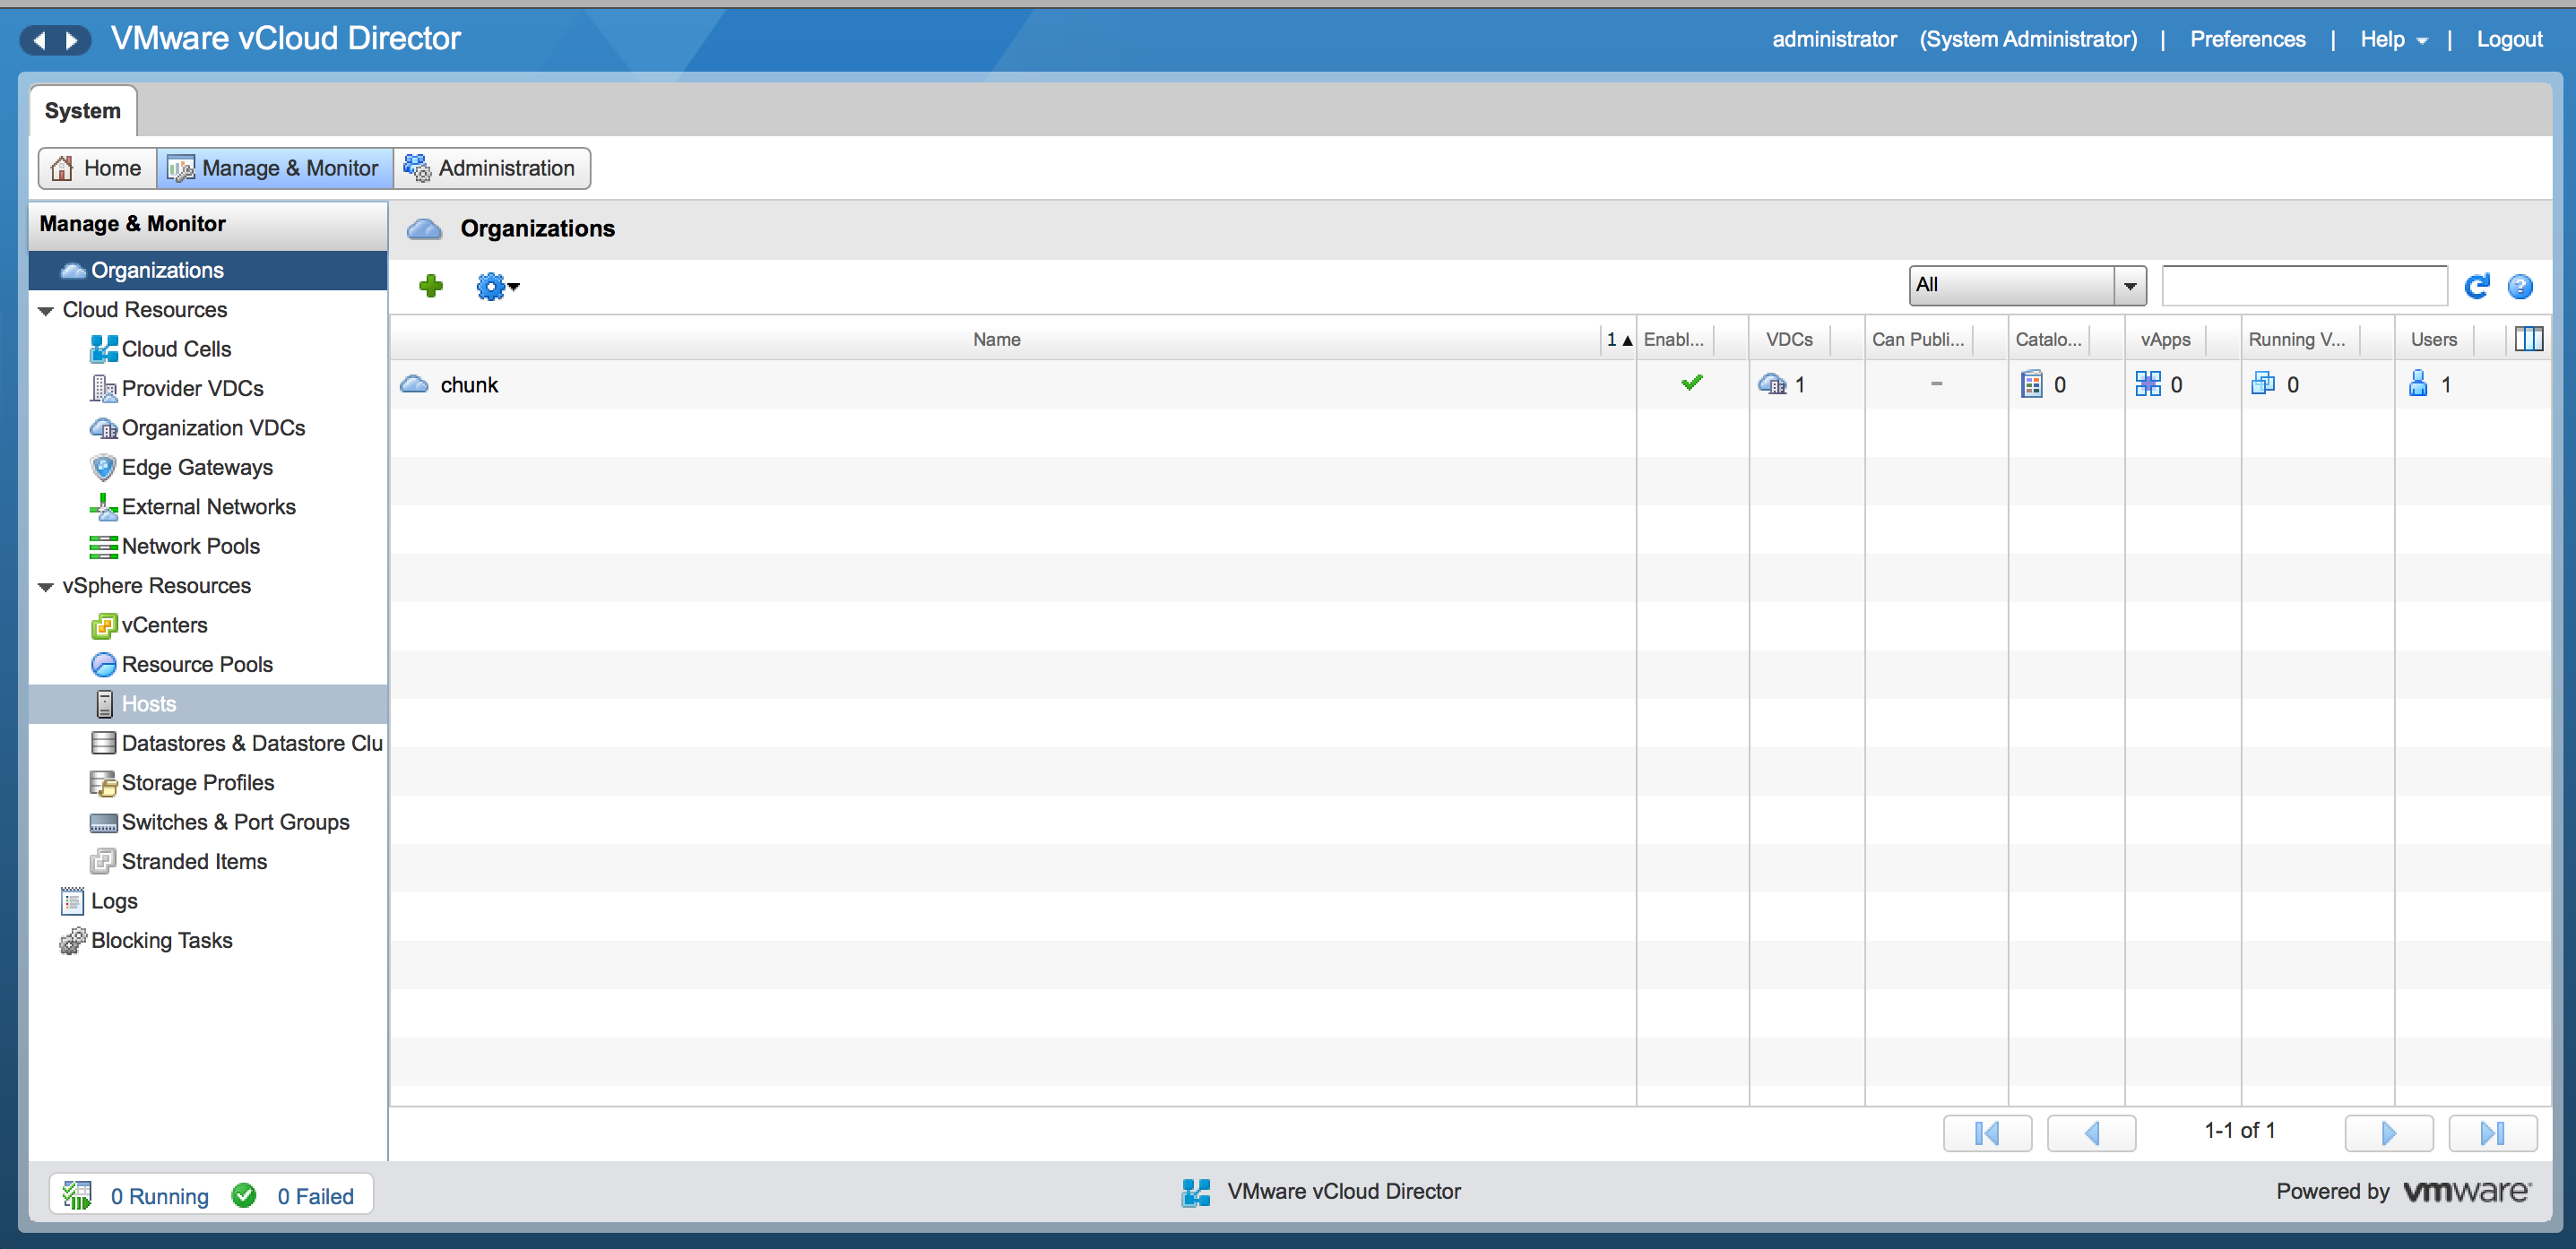
The actual setup of the Provider vDC, and the subsequent creation of the first Organizational vDC, can (and did) continue without error. It was only later, when attempting to actually deploy resources, that the above problem became apparent (in that there were no available resources to allocate!). Check host status by navigating back into the vCD web console and looking at the current service status under Manage & Monitor->Resource Pools->Hosts:
My first instinct was to attempt to prepare the hosts again through the admin UI by right-clicking the host entry, and choosing “Prepare Host”. The first time through failed. A second attempt caused the hang condition described earlier. At that point, it seemed nothing would change the status away from being stuck on “Installing”, and no matter how much time passed, it wouldn’t complete (as a failure or otherwise). It was clearly SSH time! First, the ESX host. If it isn’t already enabled, we need to enable SSH access to the host in question:
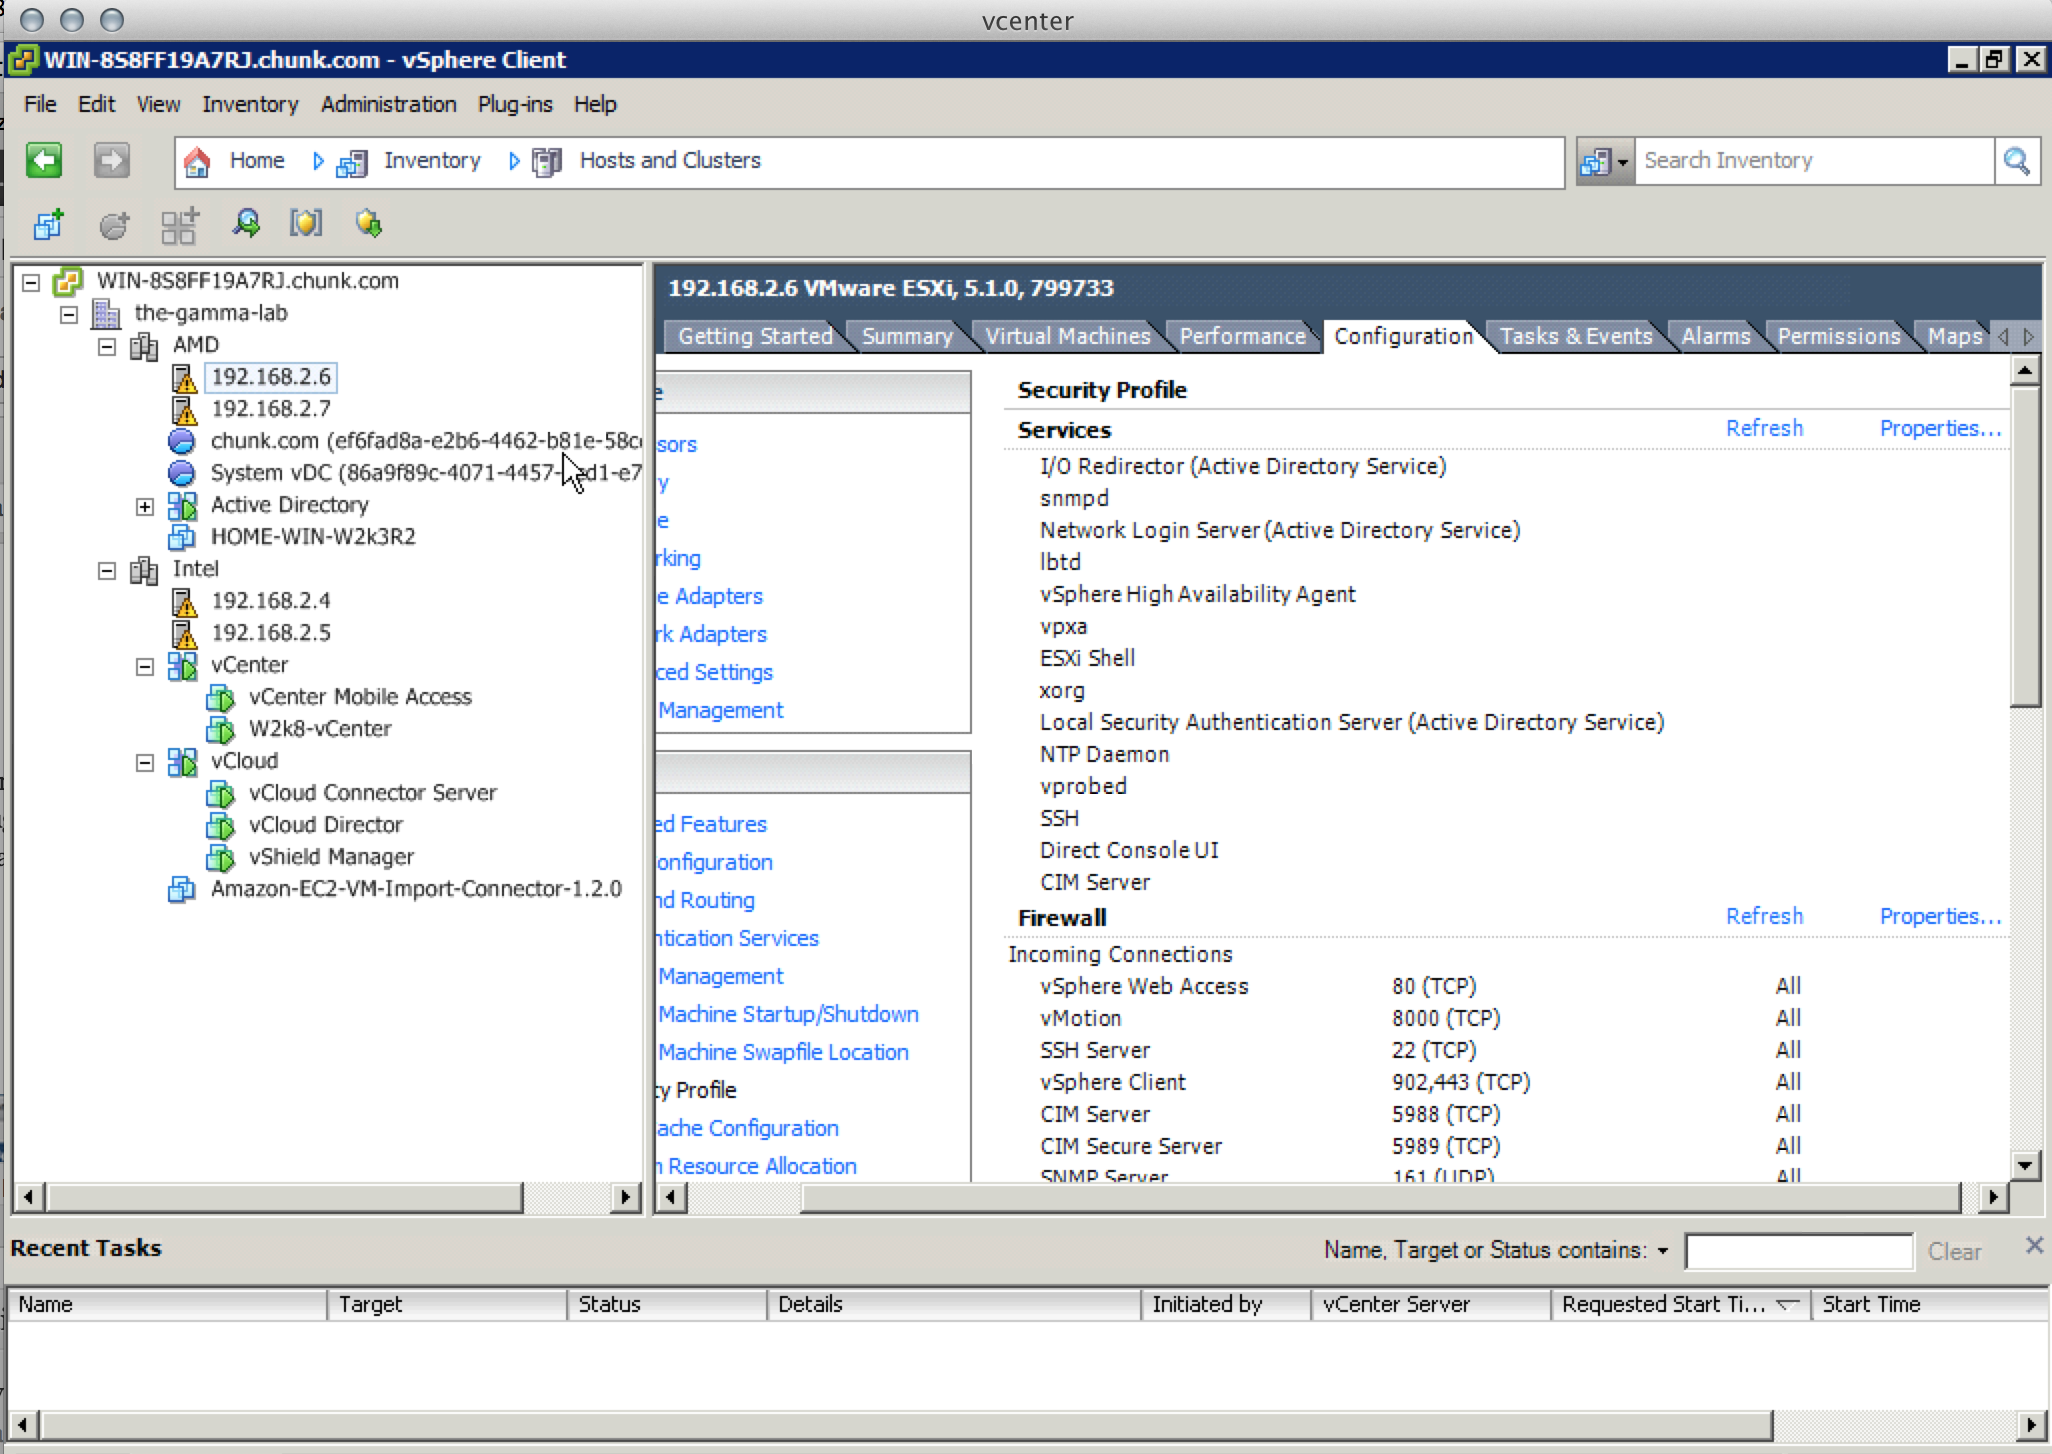
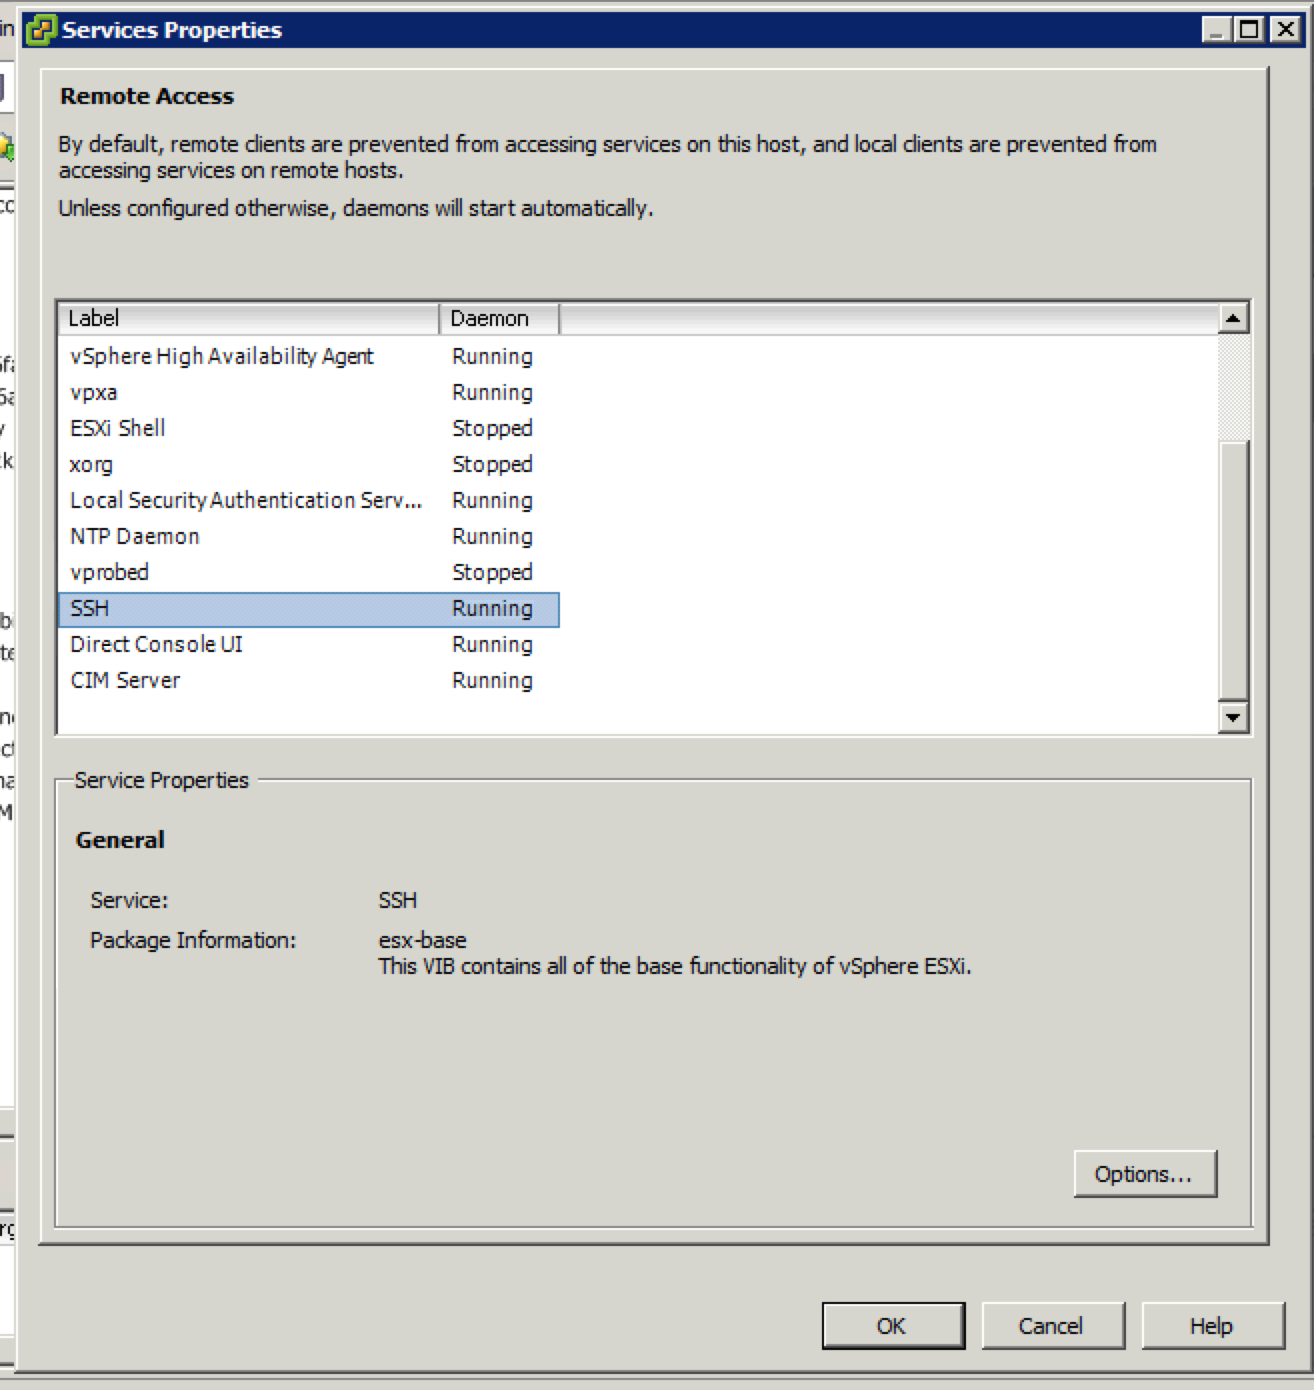
In the vSphere Client, select the host and click on its “Configuration” tab. The configuration group we want, from the left-hand pane links, is “Security Profile”. The Security Profile is broken into two groupings; Services and Firewall. In this case we want “Services”, so we click the “Properties” link in the upper pane. Lots of cool stuff in the Services Properties dialogue box. Scrolling down we see “SSH”. Enabling SSH access on the ESX host at this point is as easy as clicking the Options button, selecting “Enable”, and applying the change. We can now immediately SSH into our ESX host – (ssh root@IP-of-host) :
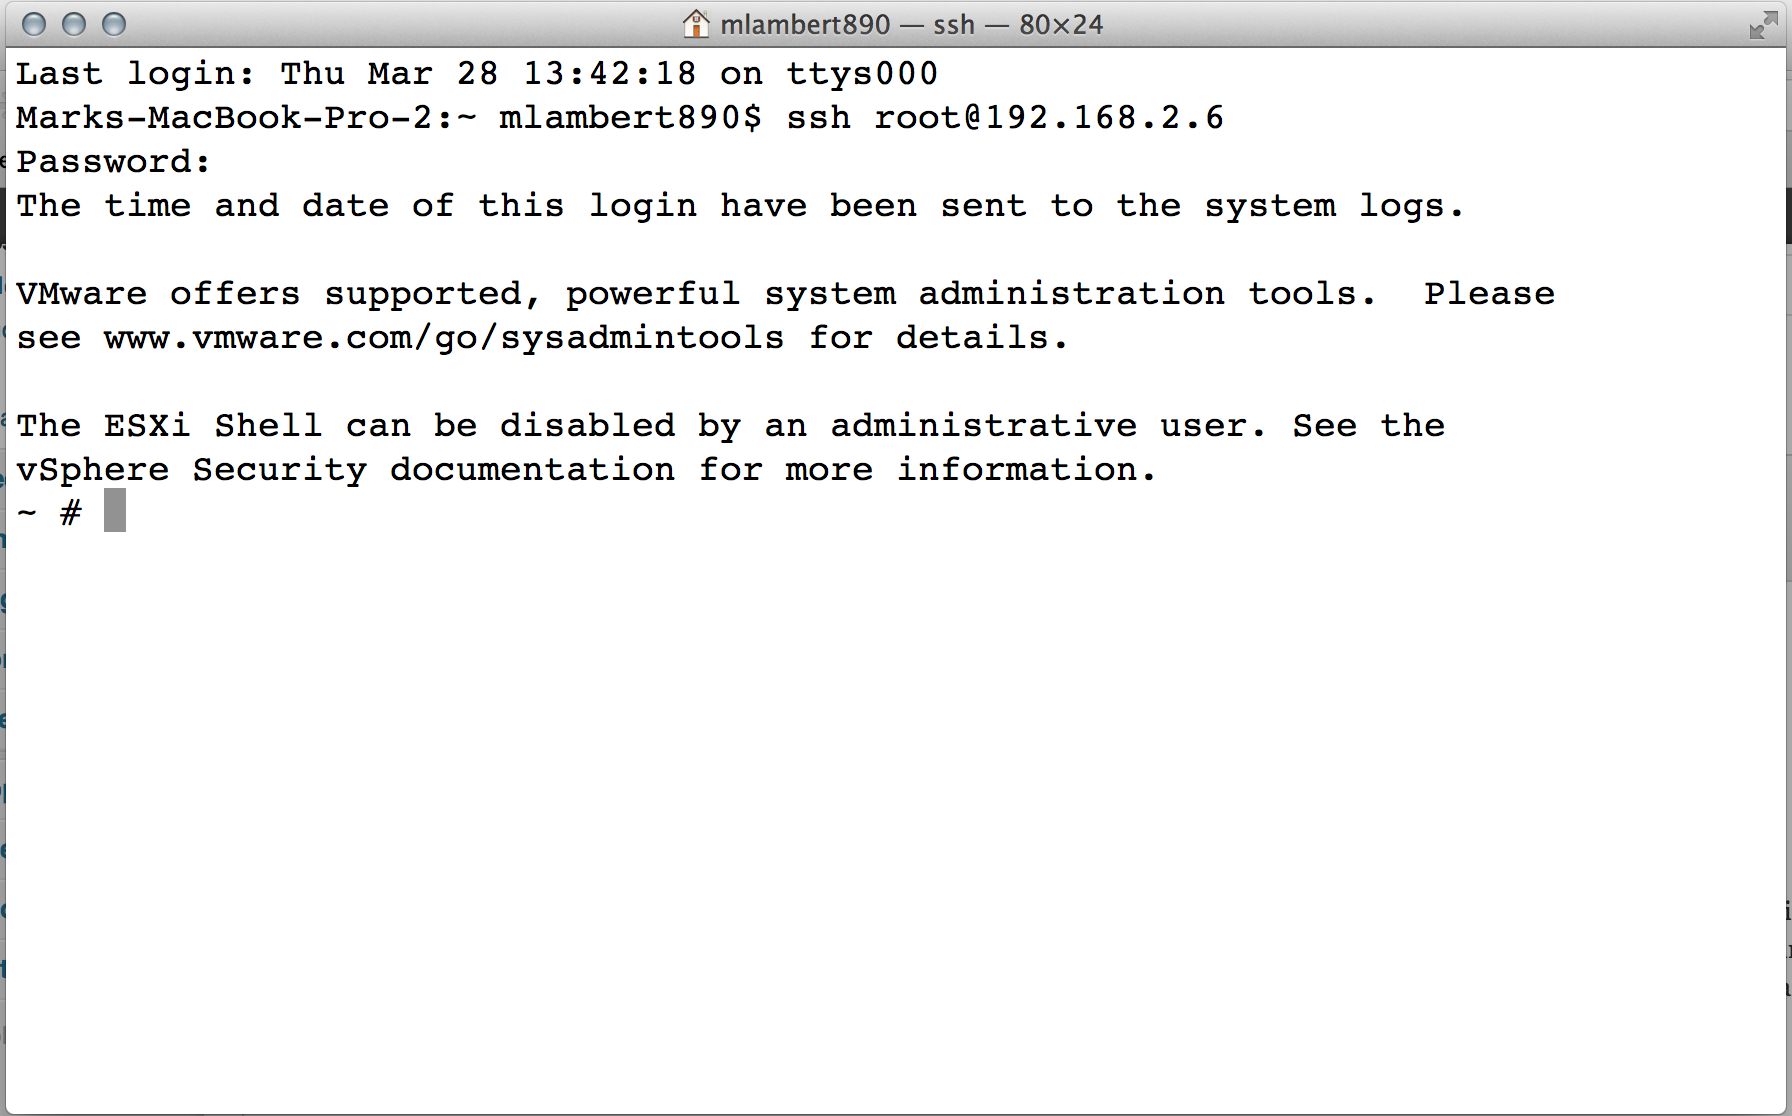
What we’re going to need to do is manually copy the agent from the vCD cell server over to the ESX host (a VIB in the case of 5.x), and then install it using ESXCLI. I found that a push was actually easier, so let’s SSH over to the vCD server before continuing. In the vCD installation, we configured two network interfaces along with two IP addresses. One IP address is the web console address we have been accessing for the configuration steps so far. The other IP address is the API address and this is the address we connect to via SSH – (ssh root@API_IP_of_vCD_server):

If the root password has not yet been changed it will be the default which is vmware. There are lots of interesting things to see here at the vCD server shell. First lets take a look at the vCD home file structure. Conveniently, an environment variable is set for us: $VCLOUD_HOME. We can cd to it and take a look:
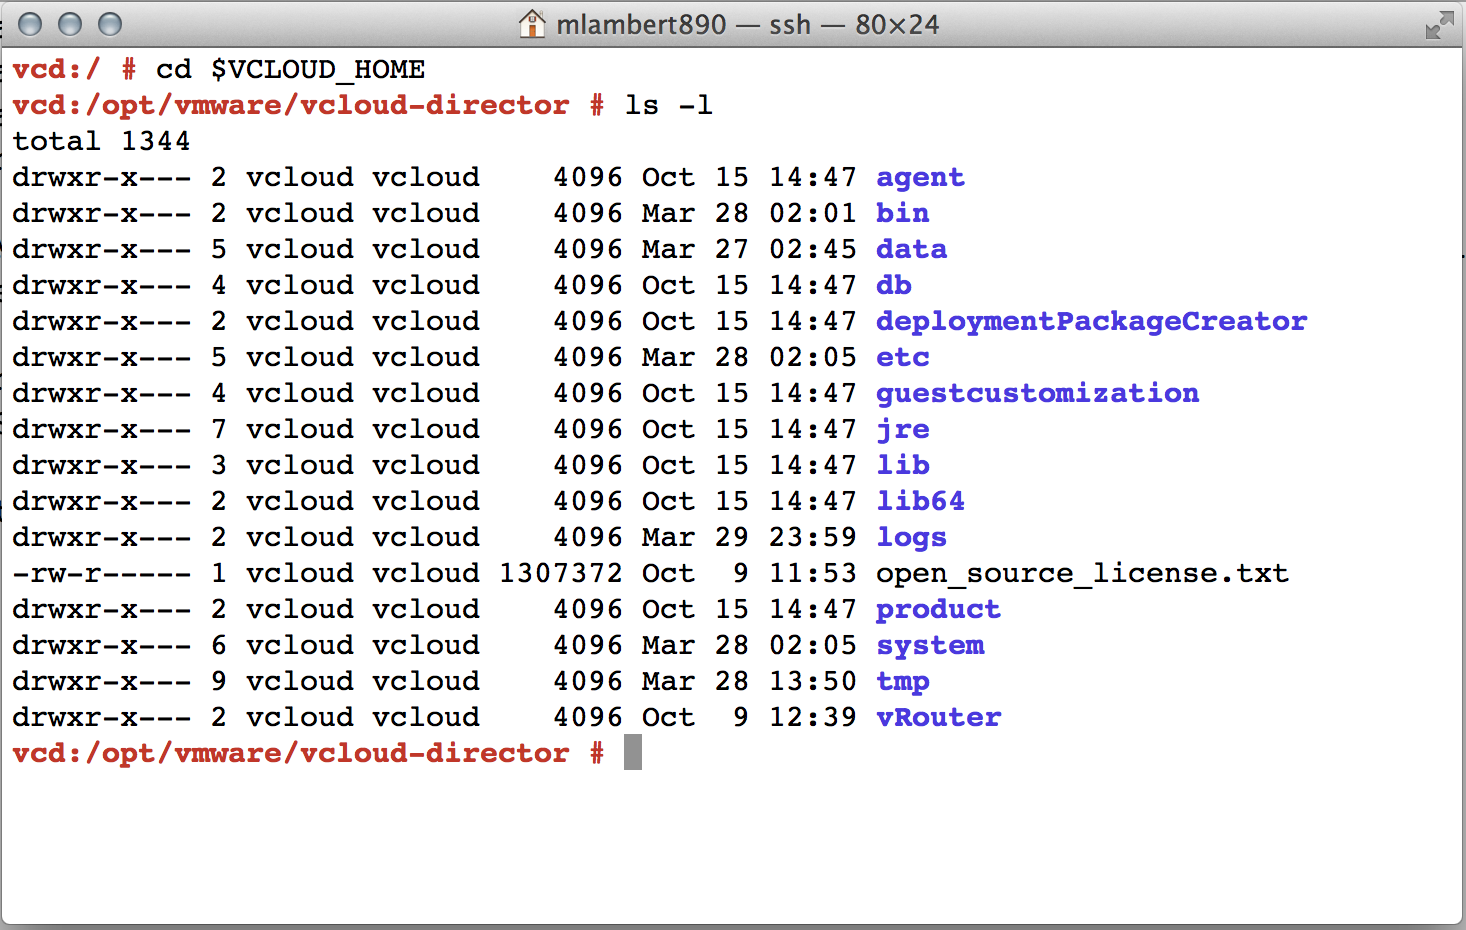
The host agents are conveniently stored in the agent directory, but before going there lets have a look at some other interesting items:
- agent: the vCD host agents are stored here
- bin: the vCD binaries are stored here including the important configure binary. Executing configure will re-trigger initial setup for the OVA. This can allow for all sorts of interesting things including modifying the database connection properties. Unfortunately, to complete the reconfigure having the original passwords on hand is required and this is something I haven’t been able to successfully uncover (the default embedded passwords for the certs, local DB, etc)
- data: this is the default path for certain vCD middleware data structures including the temporary storage directory for data inbound and outbound to/from vCD (./transfer) and the JMS application message broker (./activemq).
- db: this is where the administrative and operational scripts for SQL Server and Oracle are stored
- deploymentPackageCreator: this directory contains the shell scripts for creating deployment packages
- etc: as expected, the configuration files directory
- guestcustomization: this one is interesting. It contains the gold masters, and customization and deployment scripts, for Windows and UNIX
- jre: the Java Runtime Environment home
- lib, lib64: runtime library directories
- logs: self explanatory
- product: the home of three interesting utilities: the vmware-vcd-log-publisher, for publishing log files out of the system, the vmware-vcd-support-log-collector, for bundling logs for a submission to VMWare support, and the vmware-vcd-support-db-extract, for extracting data from the vCD database without having to go directly to the database management console
- system: the java system directory for the consoles (apache, spring, eclipse etc)
- tmp: self explanatory
- vRouter: the home of the vCDNI (vCloud Directory Network Interface) virtual router configuration
It is a great idea to get familiar with these directories and their contents. Particularly the config files and binaries. Most of it is out of scope, but one file in particular is worth highlighting. Under the ./etc directory, there is a file global.properties:
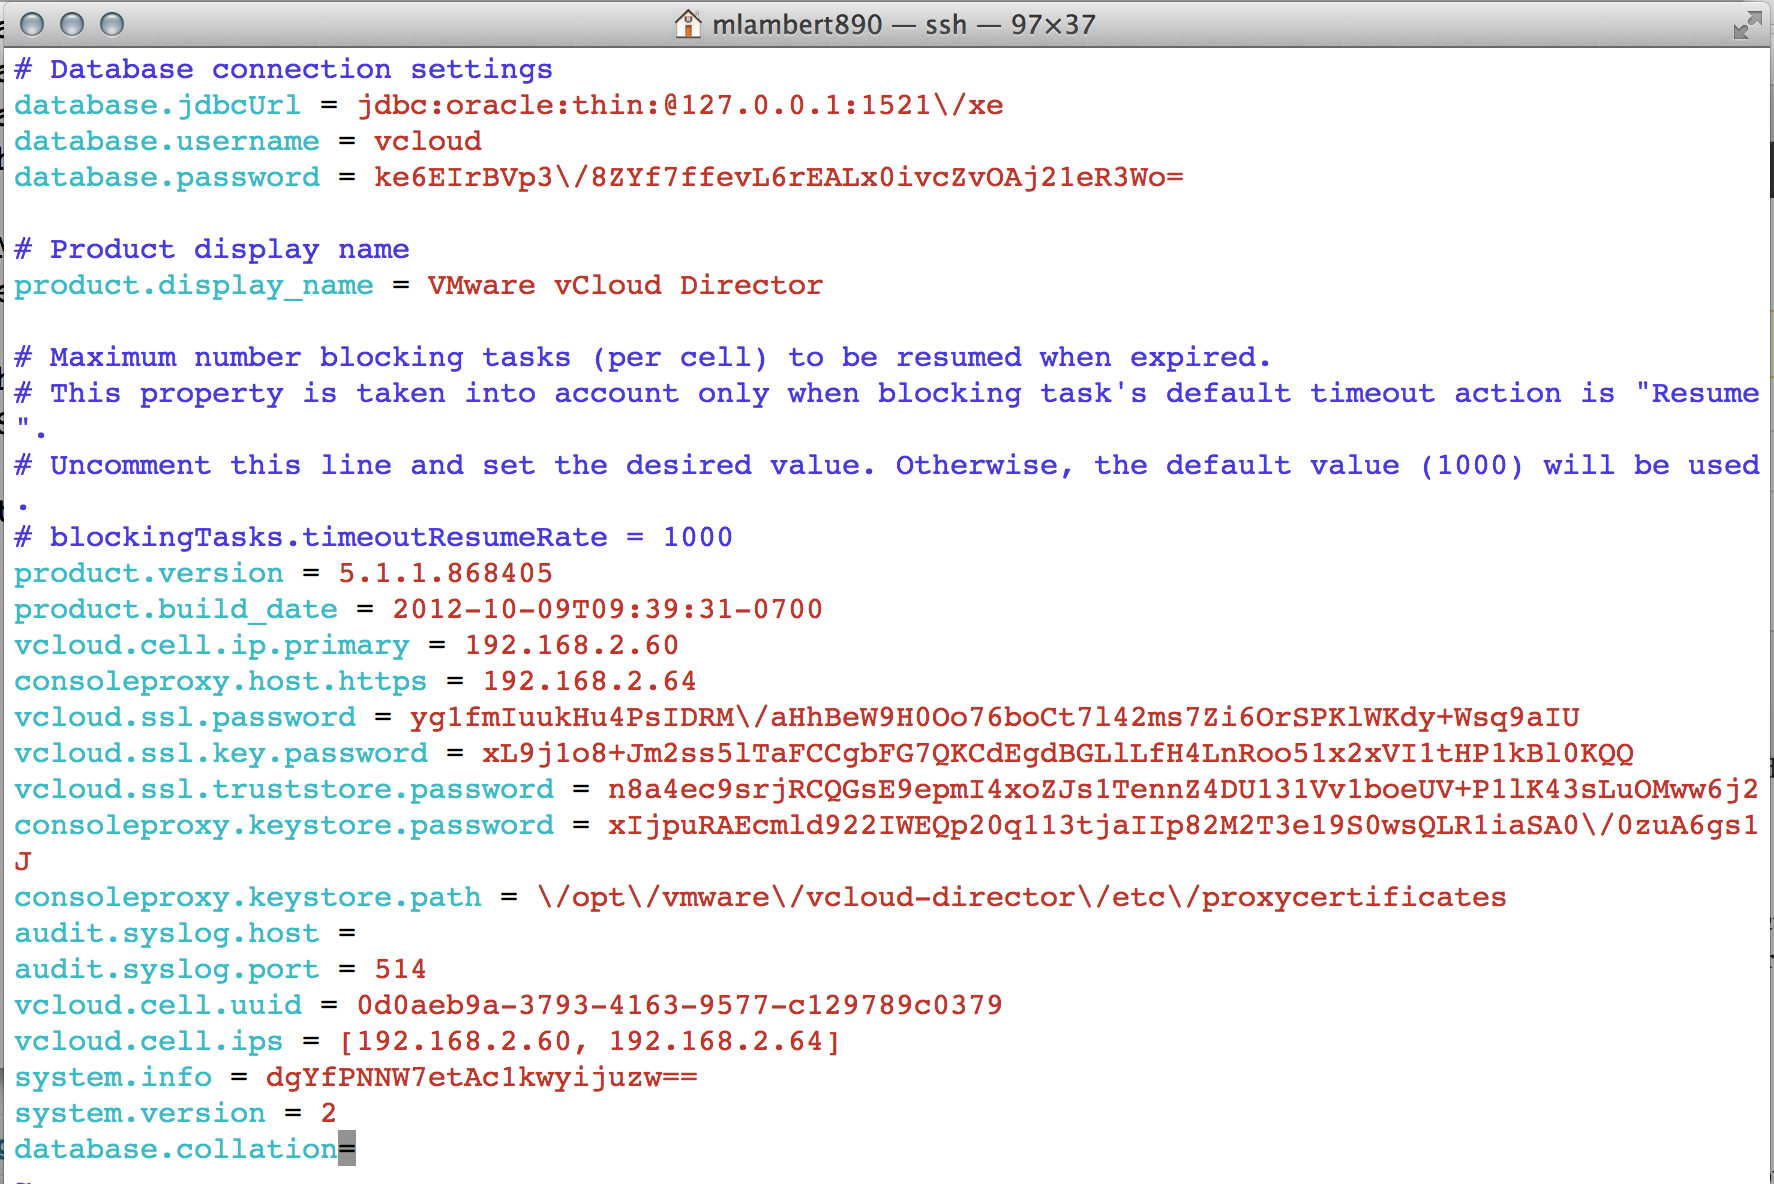
These are some of the core vCD config items including IP addresses, SSL passwords, and database connection configuration. I also learned that changing IP addresses for vCD is sort of a challenge with the OVA when using the internal database. It is pretty easy to change the network config up in the UI (which strangely just changes the interface configs), and then dive into this properties file and change it here as well so the portal knows how to find itself (which oddly doesn’t seem to flow through from a top level re-address event in the UI), but the database also needs internal changes. To do this you need to know have the database admin credentials. This is super easy if you are using a database you control, but I was never able to connect to the internal Oracle database at all. I attempted to use the “default database password” that is floating around on the web, but access was denied. I suspect that the password is autogenerated on initial config and cannot be extracted. The database can be reconfigured using the configure utility discussed above, but unfortunately running through that process requires the SSL passwords which I was also unable to ascertain. The lesson here is do not change the IP addresses of the OVA when using the local DB. I had initially installed with DHCP, so what I ended up doing is carving those out as a reservation so they will stay static.
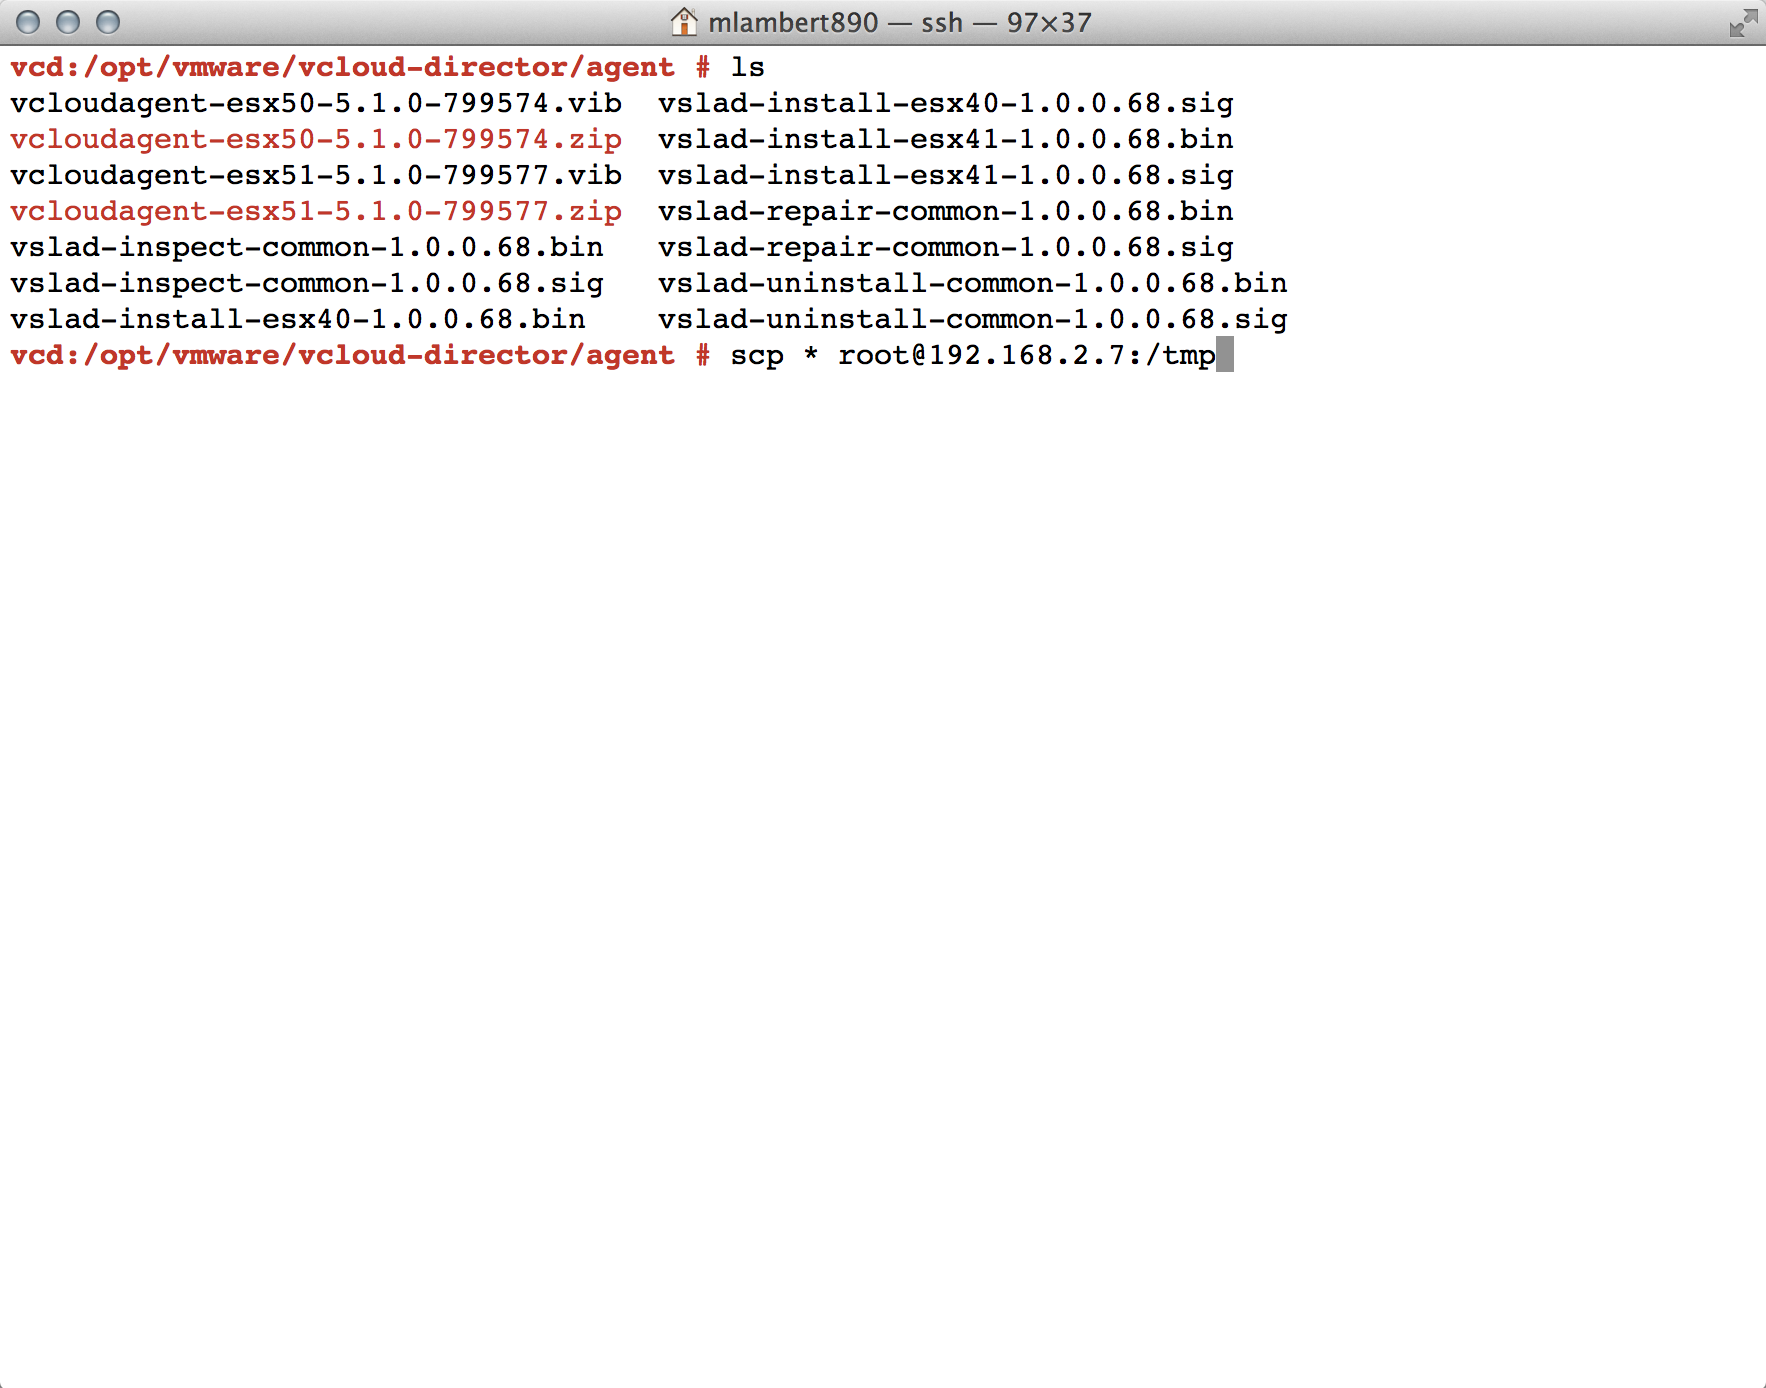
OK, thats enough “vCD internals” for now, we’re here on a mission! Back in the ./agent directory, we find the agent binaries that we want to copy over to our ESX hosts. The obvious scp gets the job done well here and, if pushing to a plethora of hosts, this is obviously a job for scripting. Only the version appropriate agent needs to be copied, but in my case I’m lazy so I did a wildcard copy. They can go anywhere on the host, but I put them in /tmp:
The scp operation will ask that the untrusted cert on the host be verified as OK, and will then execute very quickly. Back on the ESX server, we can now proceed with our VIB installation using ESXCLI:
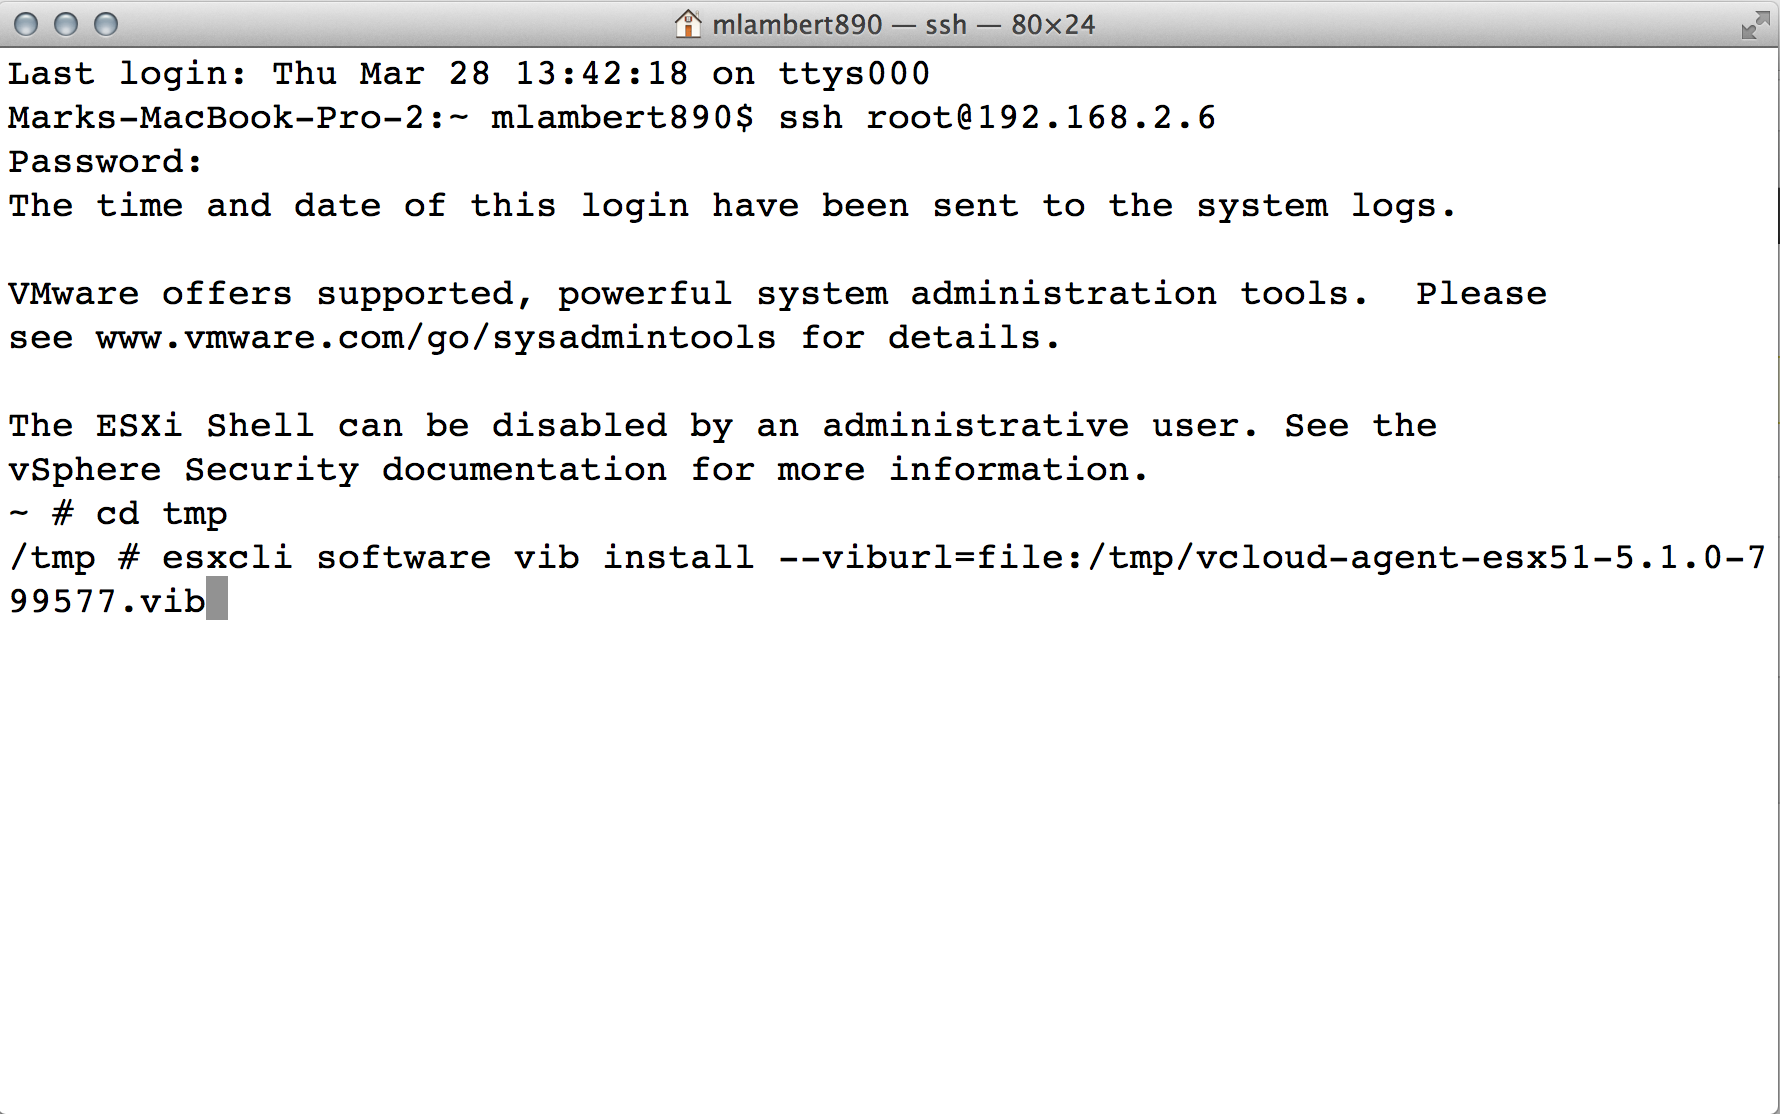
At this point the VIB will install and the agent will be in place. It should now be possible to return to the vCD web UI and forcibly restart the preparation phase. Again, if the host was initially placed into maintenance mode, I suspect this remediation would never be needed. But if, for whatever reason, the preparation phase hangs, or if there is ever a need to do an agent reinstall (because the UI cannot do this), then this process should work. When everything completes successfully, the host status should appear as follows:
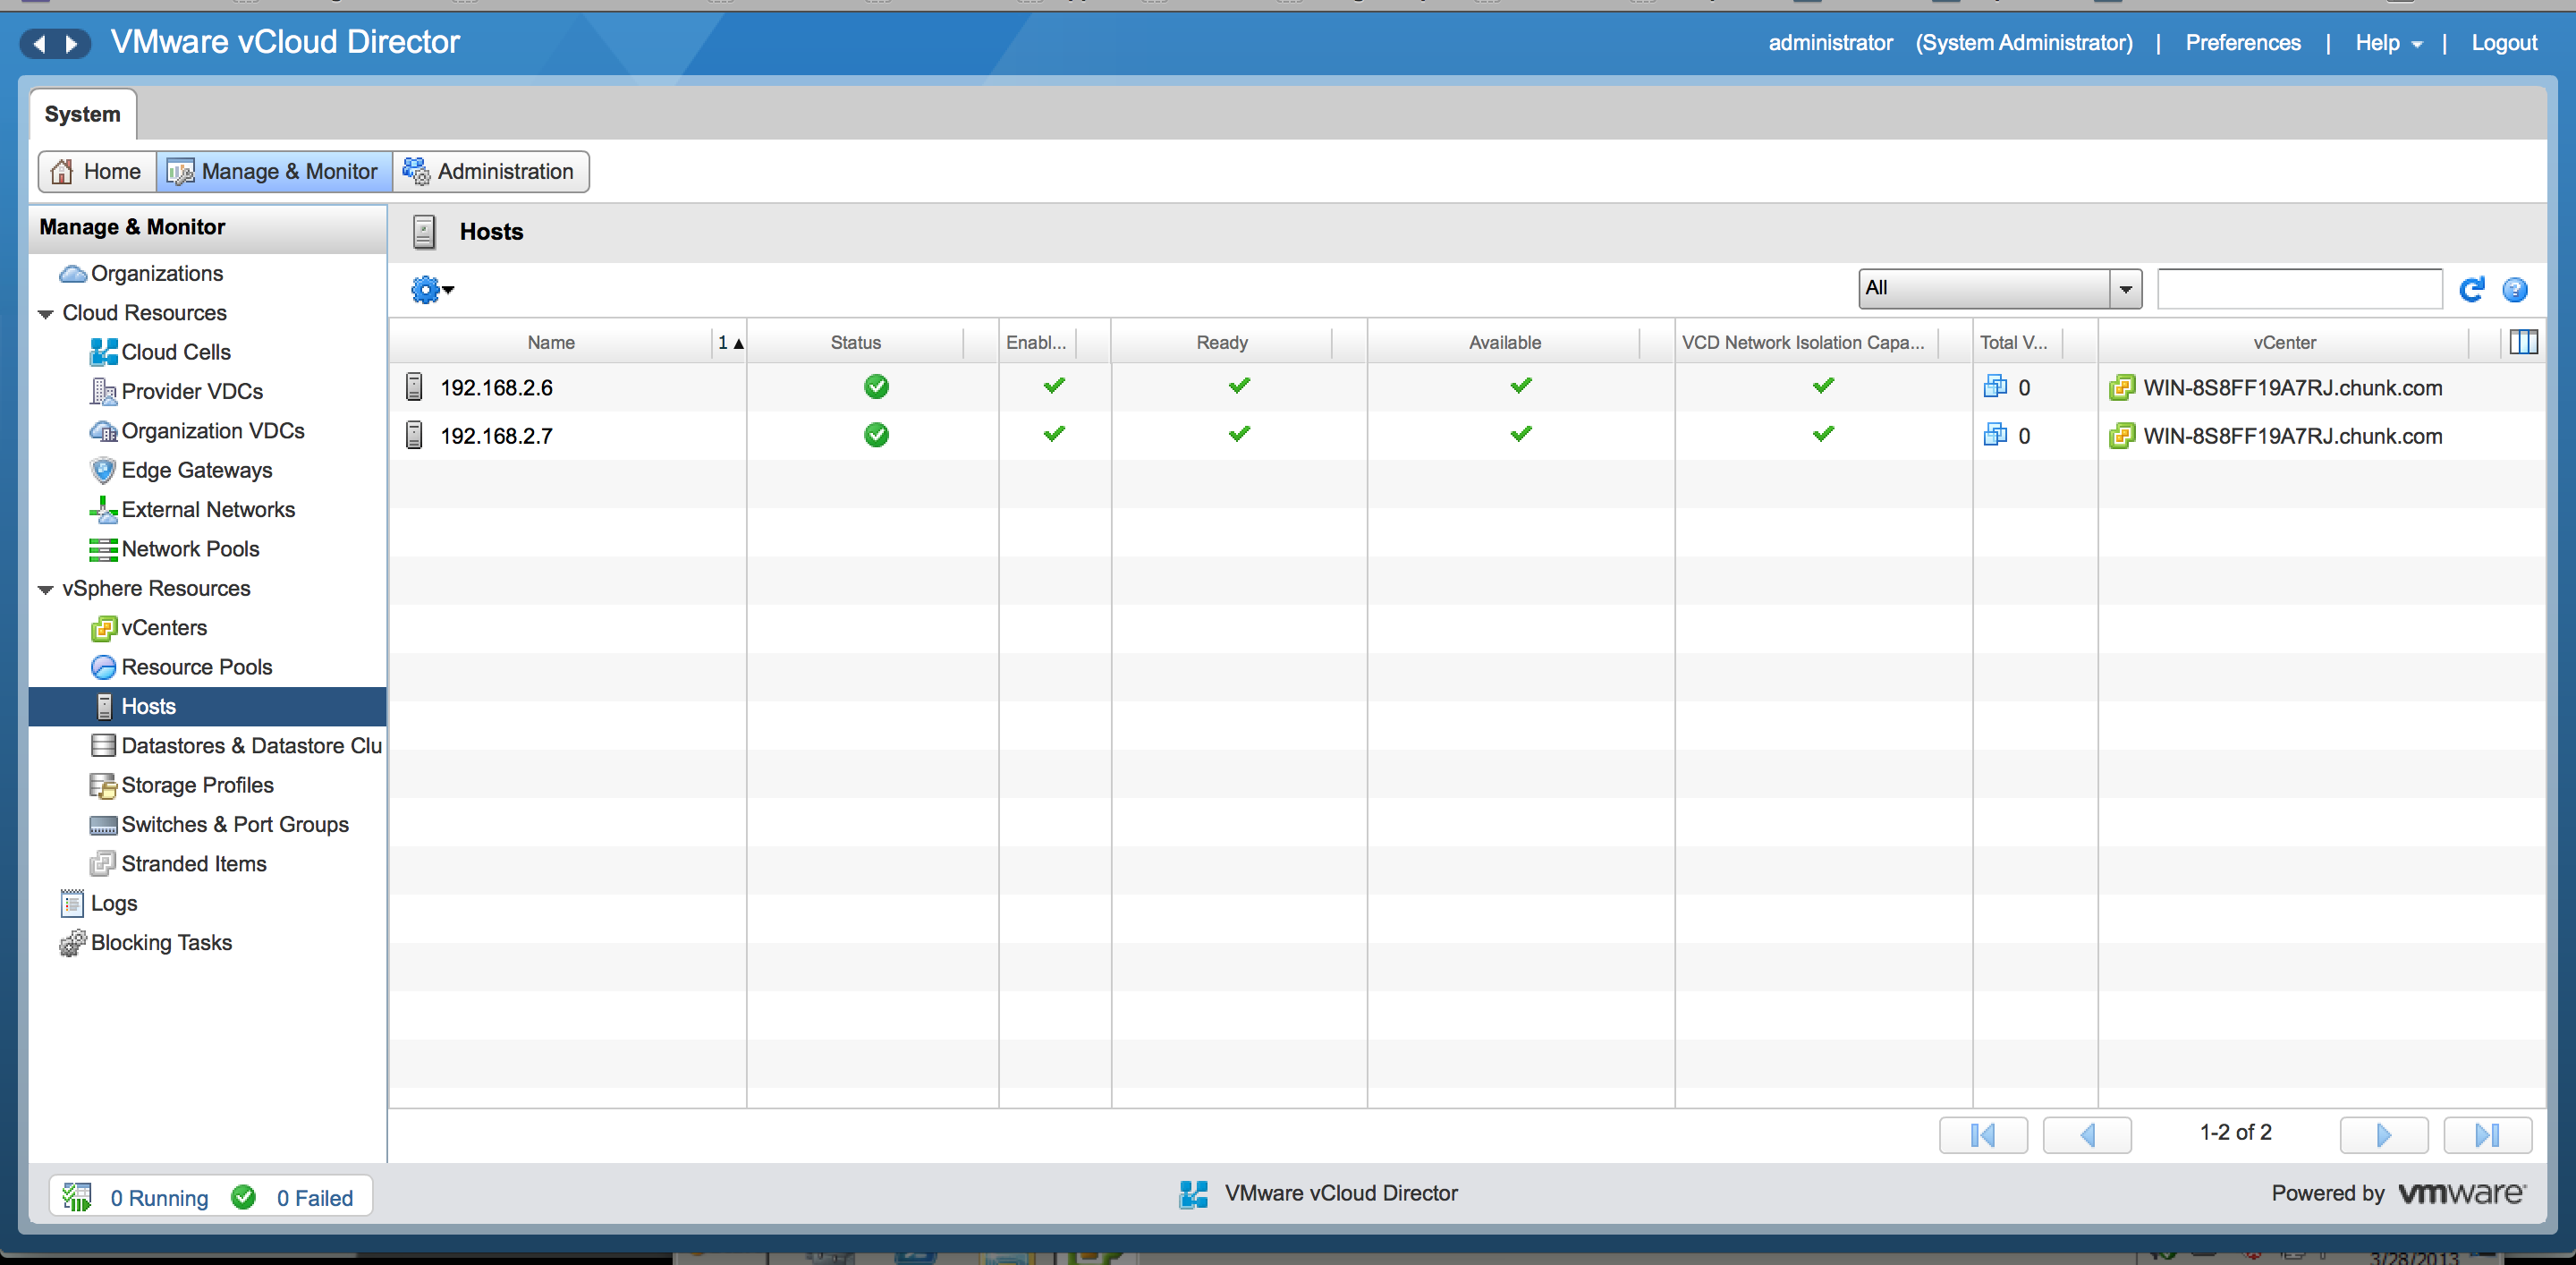
With our resources now online and available, we can complete the Provider vDC configuration and move forward with the creation of our first Organizational vDC. This entry has gotten long enough, though, so this is a good break point. We will continue next entry with the wrap up of our vCD setup. Thanks for reading!
