Two things I’ve always wanted to try in the ESX lab were DirectPath I/O and vSAN. For the former, I always liked the idea of having a GPU accelerated virtual desktop to use as a jump server and also to test just how good GPU acceleration can be in a virtual environment. vSAN is extremely compelling because I find the idea of highly scalable and efficient distributed file systems based on DAS to be a perfect fit for many cloud scenarios if you can architect an efficient enough capacity planning and resource allocation/consumption model to match. In the past I never had a test server platform with VT-D (or AMD-Vi), pre-requisites for VMware DirectPath directed I/O, so the GPU scenario was out. With vSAN it was more about finding the time and catalyst to implement. As it turns out, the T620 and the new lab effort solve both of these problems! Before laying down the ESXi install, I decided to do a few hardware tweaks in service of my two stretch goals. I had two passively cooled AMD PCI-E GPUs on hand (both R800 era… nothing fancy) and I also had a spare 80GB Intel SSD laying around (yes, I have SSDs “laying around” and should probably seek help). In the case of the SSD, this particular requirement of vSAN (SSDs required to act as a buffer for the virtual SAN) can be bypassed with some ESXCLI wizardry as explained by Duncan Epping, but since I had a spare I figured I might as well use it as long as the server had a spare SATA port. First step was to open her up (something I knew I had to do at some point anyhow just to see how clean the cable routing is!). First up is to find the ingress point. Absolutely fantastic design element here as there are no screws (thumb or otherwise) and the entry point is fully intuitive. A nicely molded and solid feeling lockable handle right on the side panel. I unlocked it, pushed down on the release trigger by gripping the handle, and pulled forward. The door opens smoothly and settles straight down to the horizontal on its tabs. It can be removed as well if need be:  Inside, things are looking clean and really great:
  Another cool thing is that the second the case was open, the intrusion detection tripped and the front panel LCD went amber and displayed the alert. Very neat:
  Of course the alert can be acknowledged in the iDRAC (which is accessible even with the server powered off – excellent stuff):
  Scoping out the interior, I noticed right away that the tool-less design approach applies to all components and that there appears to be two free x16 PCI-E slots (one top and one bottom) as well as plenty of disk shelf space above the array cage, a spare power connector on the SATA power cable going to the DVD drive, and a single free SATA connector available on the motherboard. So far so good! First step was to get access to the PCI-E slots by removing the card braces:
  The brackets are easily removed by following the directions provided by the arrow and pressing down on the tab while pulling forward. Once out, there is free access to the PCI-E slots. The slot clips, also tool-less, can be removed with a similar squeeze and pull motion:
  With the slots cleared, it was easy work installing the two GPUs in the roomy case (top and bottom shown with clips back in place):
 Next up was the SSD. I decided not to do anything fancy (especially since I wasn’t 100% sure this would work). The server is very secure and isn’t going anywhere and the disk shelves are free and clear and very conveniently placed. The SSD is small and light so I opted to just cable it up and sit it on the shelf. Here is a quick pic of the SSD in question before we get into the “installation”. 80GB Intel, a decent performing and very reliable (in terms of write degradation) drive back in the day:
  First up, a shot of the one free onboard SATA port (Shuttle SATA cable used for comedic effect):
  Next up, a shot of the drive bay area and free SATA power plug with the SSD “mounted”:
  And finally, a close up of the SSD nestled in the free bay:
  That’s it for the hardware tweaks. Time to close it up and get started on the ESXi 5.5 install! As always, this is a straightforward process. Download and burn VMware-VMvisor-Installer-5.5.0-1331820.x86_64 to a DVD, boot her up, and let ‘er whirl. Installer will autoload:
  Initial load:
  Installer file load:
  Installer welcome screen:
  EULA Acceptance:
 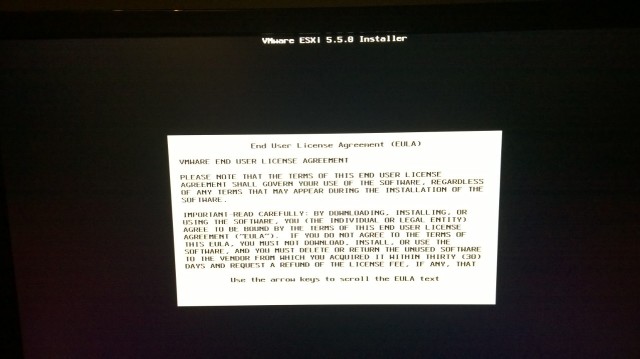 Select install disk (this is the physical host, so the PERC H710 is the target):
  Select a keyboard layout:
  Set a root password:
  Final system scan:
  “Last exit before toll”:
  Off to the races!
  Like magic (many) second later, installation is complete:
 First boot of shiny ESX 5.5 host:
  Splash screen and initializations are a good sign:
  As always, first step is to configure the management network (shown here post config):
  Interesting to have a look at all of the network adapters available in this loaded system. Select one to use for the initial management network:
  Provide some IP and DNS info or rely on DHCP:
  Commit the changes, restart the network and give it a test!
  Did everything work? Indeed it did, thanks for asking!
How about the SSD and the DirecPath GPUs? Let’s take a look. First DirecPath because the anticipation is killing me. From the vSphere client, DirectPath settings are found under the Advanced subsection of the Configuration tab when the focus is a host. The view will initial display an error if the server is incapable of DirectPath (no VT-D or AMD Vi), or a blank box with no errors or warnings if it can. From here, we click “Edit” in the upper right hand corner to mark devices for passthrough usage. The following (very interesting) dialogue box pops up:

Here we can see all of the PCI devices installed in the system and recognized by ESXi. In the list we can see the AMD GPUs and their sub-devices. We are also able to select them. So far so good! Click the checkboxes and you will get a notice that the sub-devices will also be selected. Acknowledge and click OK. We can see that the AMD GPUs have been added and will, in theory, be available for assignment pending a host reboot (yikes):

Following the (long) reboot cycle, return here and find that the GPUs are in fact available for assignment. Hallelujah! I am not going to assign them to a guest yet, but we will revisit this when I create the Windows 8 jump VM:

So far so good. The DirectPath seemed like the more complicated mission, so I am feeling a bit cocky as I move forward with the SSD configuration. Of course, as always in technology, that is exactly when Murphy’s Law chooses to strike. As it turns out, I had forgotten that the last time I used this SSD it was part of a GPT RAID 0 array. As a result, it has an extremely invalid partition table. ESXi can see it, but errors out attempting to use it. I decided to see how things were looking from the command line view. Of course as always, that means first enabling SSH. The first step is to set the focus to the host and head over to the Security Profile section of the Configuration:

Select the SSH service under Services and click Properties in the upper right corner. This will invoke the Services Properties dialogue where we can highlight the SSH service and select Options. :

In the following dialogue box we can start the service as well as configure its future startup behavior:

Next up its time to hit up PUTTY. Of course on first connect we will get the SSH certificate warning that we can just acknowledge and ignore:

At that point after a quick root login we are in. The first step is to find out how the system views the SSD device. The best way to do this is with the ESXCLI storage enumeration command esxcli storage core device list:

Wow, the SSD has a pretty odd device header! That’s ok though, this is why copy/paste was invented! Device in hand, and knowing that this disk has a GPT partition, I give partedUtil a try. Unfortunately partedUtil isn’t interested either as it reports that “ERROR: Partition cannot be outside of disk”. My luck this was the first disk in the span set and so is the one that has a “too big” partition table (the partition table for the span set). After rebooting into various “live CD” and “boot repair” tools I have onhand, and failing miserably for various reasons (inability to recognize the Dell onboard SATA, confusion over the system having 3 GPUs, inability to recognize the onboard GPU, etc) I finally had a brainstorm – the trusty ESX installation DVD! Sure enough, the ESXi 5.5 install was able to see the SSD and was perfectly happy nuking and repartitioning it. At that point I had an ESX 5.5 installation partition structure (9 partitions!) hogging up about 6GB of space. On an 80GB SSD that’s a lot of space, so I went back to the ESX command line to try partedUtil. This time things went much better!
partedUtil get /dev/disks/t10.ATA_____INTEL_SSDSA2M080G2GC____________________CVPO012504S9080JGN__
This command returned the partition info. A list of 9 partitions with starting/ending locations enumerated
partedUtil delete /dev/disks/t10.ATA_____INTEL_SSDSA2M080G2GC____________________CVPO012504S9080JGN__ N
With this command I was able to go ahead and delete the partitions iterating through 1-9. Once deleted, the vSphere client was able to easily add the new datastore. With the host as the focus again, under the Storage subsection of the Configuration tab, we can now Add a new datastore. We’re adding a local disk, so we select Disk/LUN:

Next up we select it and we can see the SSD here with its wacky device name:

Next we select a file system (I’m going with VMFS 5 to keep all datastores consistent and because I plan to do vSAN):

Current Disk Layout is where things errored out the first time through when the partition table was wonky. This time we sail right past both Disk Layout and Properties (naming it “SSD”) with no errors. For formatting, I choose to allocate the maximum space available:

With everything looking good, we can click Finish to create the new datastore:

And voila! One shiny new datastore online and ready for later experimentation!

Well that’s a wrap for yet another entry in the series! We now have a fully function ESXi 5.5 base host with a 9.2TB of primary RAID based DAS for VMs and a secondary 80GB SSD datastore that will be used to support vSAN. DirectPath is ready to go for the VDI guest. Next up is the nested ESX installation followed by the VDI install. Stay tuned and thanks for reading!
