
In the “Era of Cloud” I find myself doing more IPSEC configuration in a month than I had done in the prior 20 years of my IT career. Is this a good thing? Maybe not. But it’s very cool that full time private connectivity to a cloud network is just an IPSEC tunnel and cheap appliance away! It wasn’t long ago that this would have been science fiction, let’s not forget. In past entries I’ve documented both connecting a VPN to vCHS and to AWS, so with my latest Azure adventure in full swing it seemed high time to dig a tunnel out to Redmond. I have to say that I continue to be impressed with this bargain basement McAfee UTM SG720 I picked up. It has proven to be a capable companion on these adventures and gets by on less power, and takes up less room, than the pfSense based slimline PC it replaced (although oddly enough it’s louder).
Anyhow… These days building IPSEC tunnels is largely a GUI driven affair and, as documented in the last entry on performance, Microsoft has invested pretty heavily in the console UX. Before getting into the actual configuration, it’s worth spending just a moment talking through how Azure views networks in general and the VPN connection in particular. There are a few terms to get familiar with:
- DNS Servers – these can be registered up front, or as part of the VPN creation workflow. What is being specified during this registration process are DNS servers that you control. They can be on-prem, or not, but the main this is that you’re registering your servers (not deploying the services)
- Local Network – the dialogue boxes are confusing during the VPN creation workflow for local networks, but more straight forward when adding them from the main Network Services menu. As expected, Local Networks refer to on-prem IP space. The Local Network definition is also where you specify your VPN endpoint IP
- Virtual Network – the Virtual Network definition refers to private IP space within the Azure cloud. You can set one or more top-level CIDR blocks and then carve subnets out of them. One of these subnets is designated as a “gateway subnet” which means it is the subnet which contains the virtual gateway out of your private IP space. Any objects (VMs, etc) with an IP matching one of these address ranges can be routed through the VPN tunnel.
With these basic definitions out of the way, let’s start configuring! As alluded to above, the pre-requisite objects can be created as part of the VPN workflow, or prior to kicking it off. To get things started on the VPN front, I prefer to setup the pre-reqs ahead of time. The first step is to dive into the Azure Management Console and click “New” from the action bar. Next, from the “New Service” dialogue, select “Network Services”. We’re going to register our DNS first. This is super straightforward and is just a hostname/IP pair:

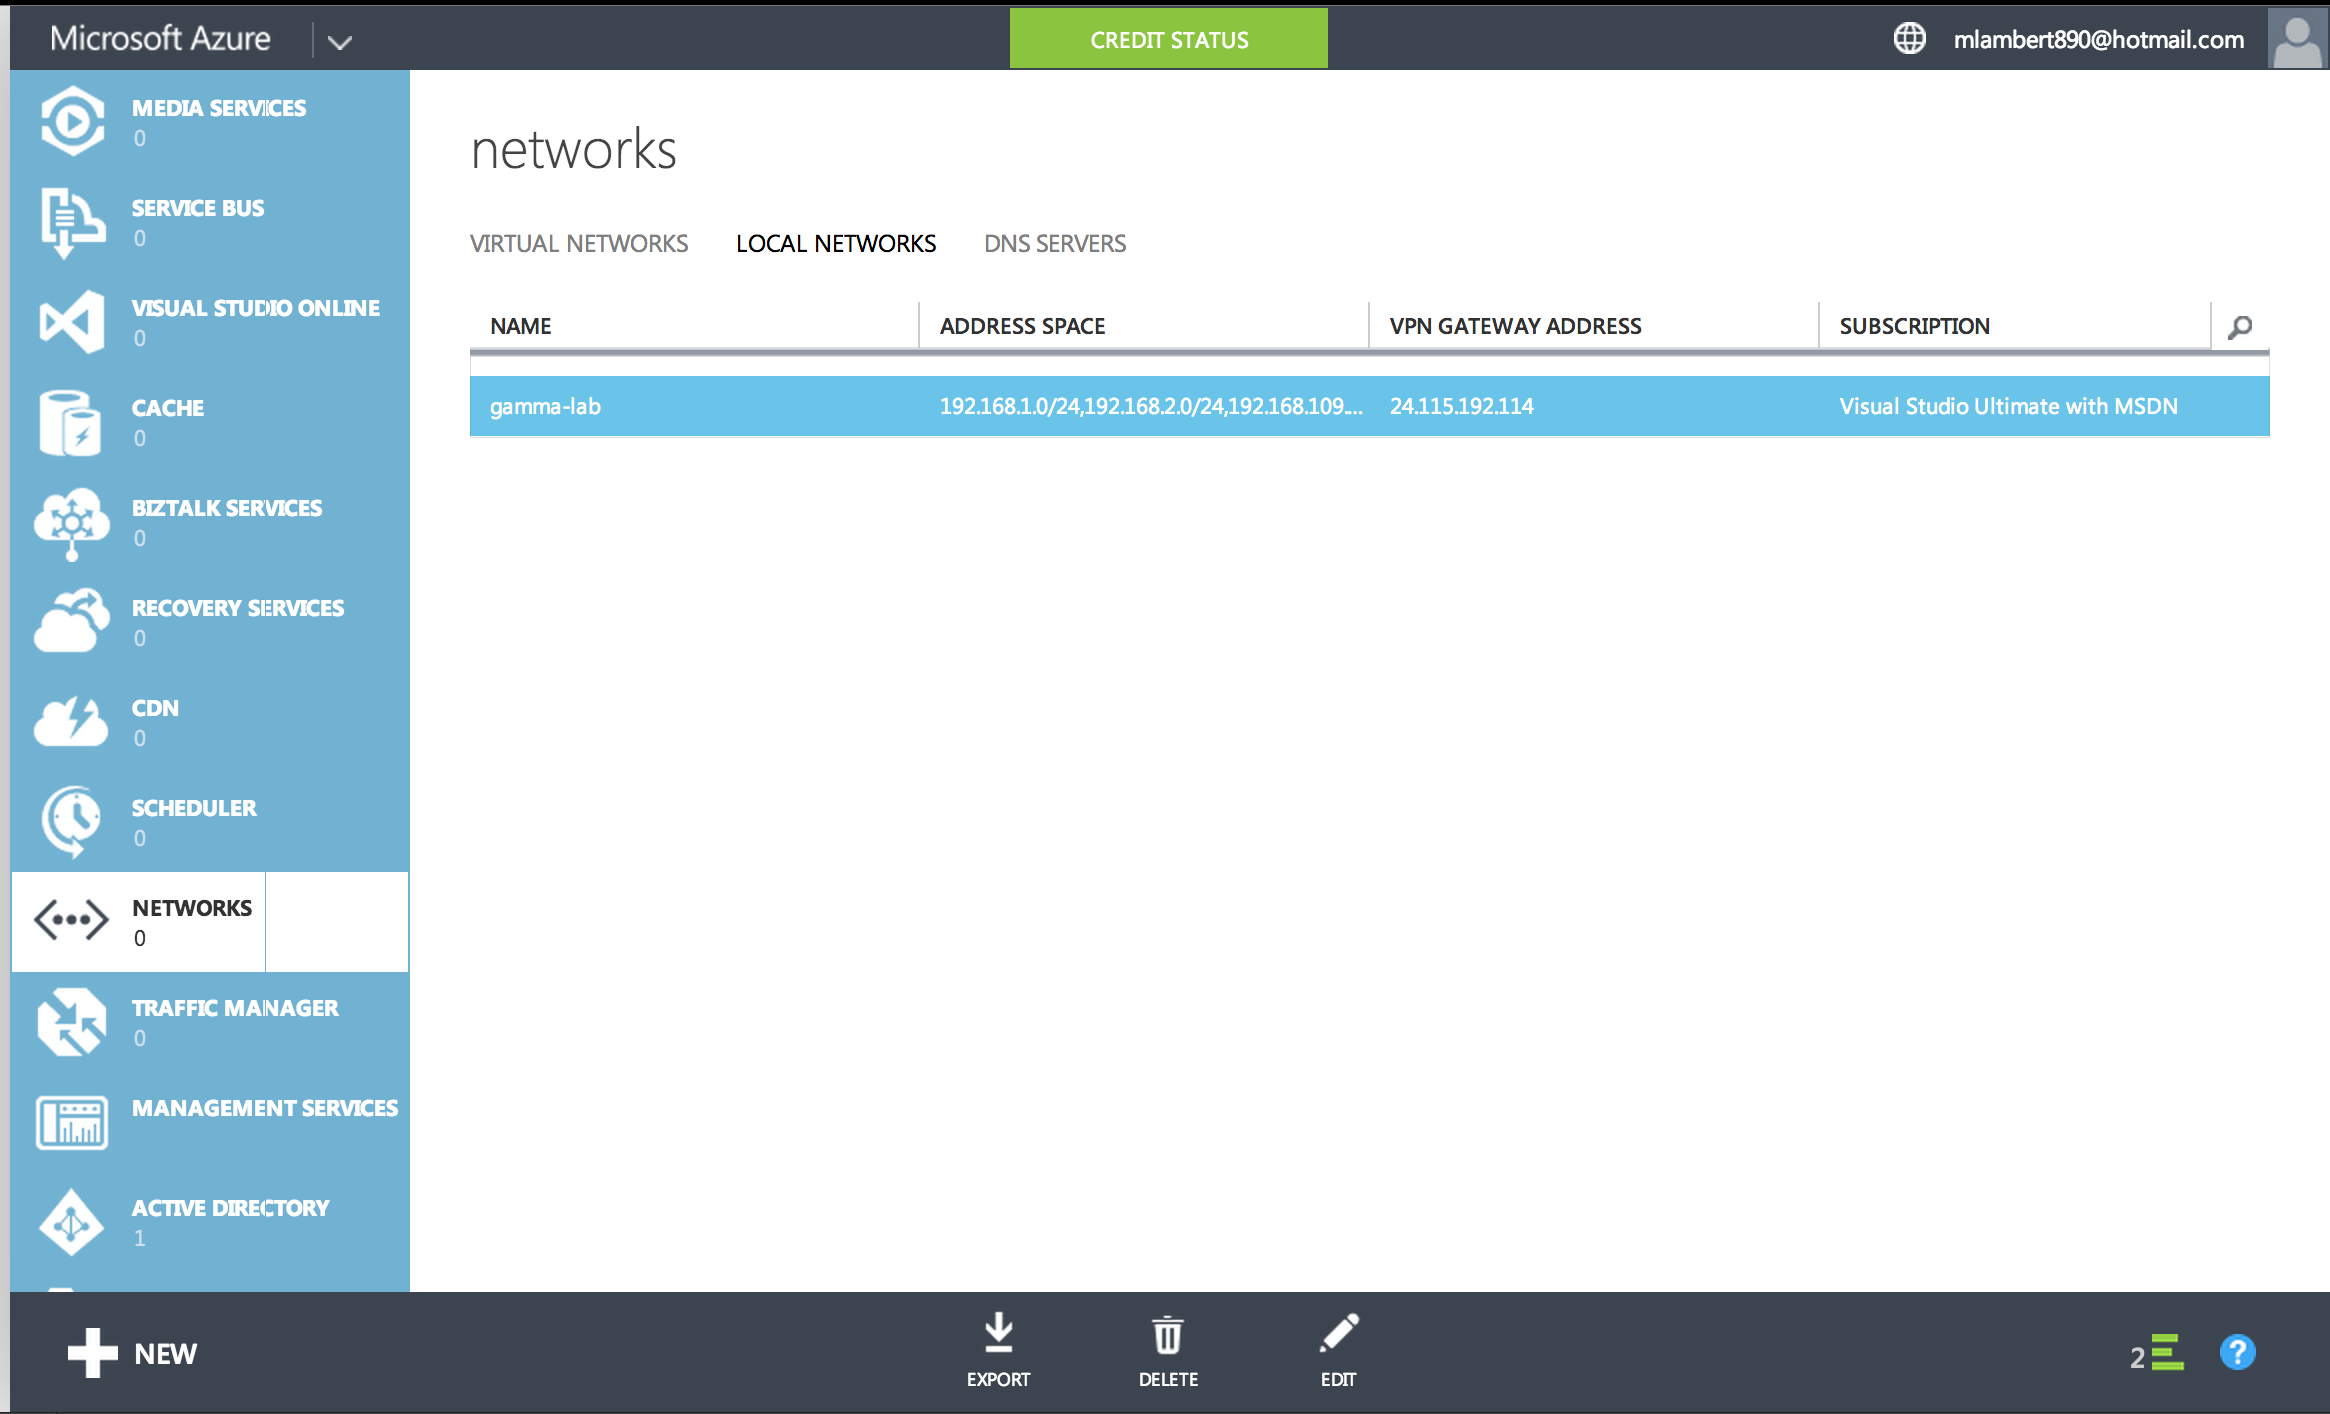
Next up, let’s define our Local Networks. First we choose a name to apply to this configuration, and then provide the IP address of the VPN endpoint which will connect Azure to the local IP space we’ll be specifying. Obviously the VPN IP must be public:

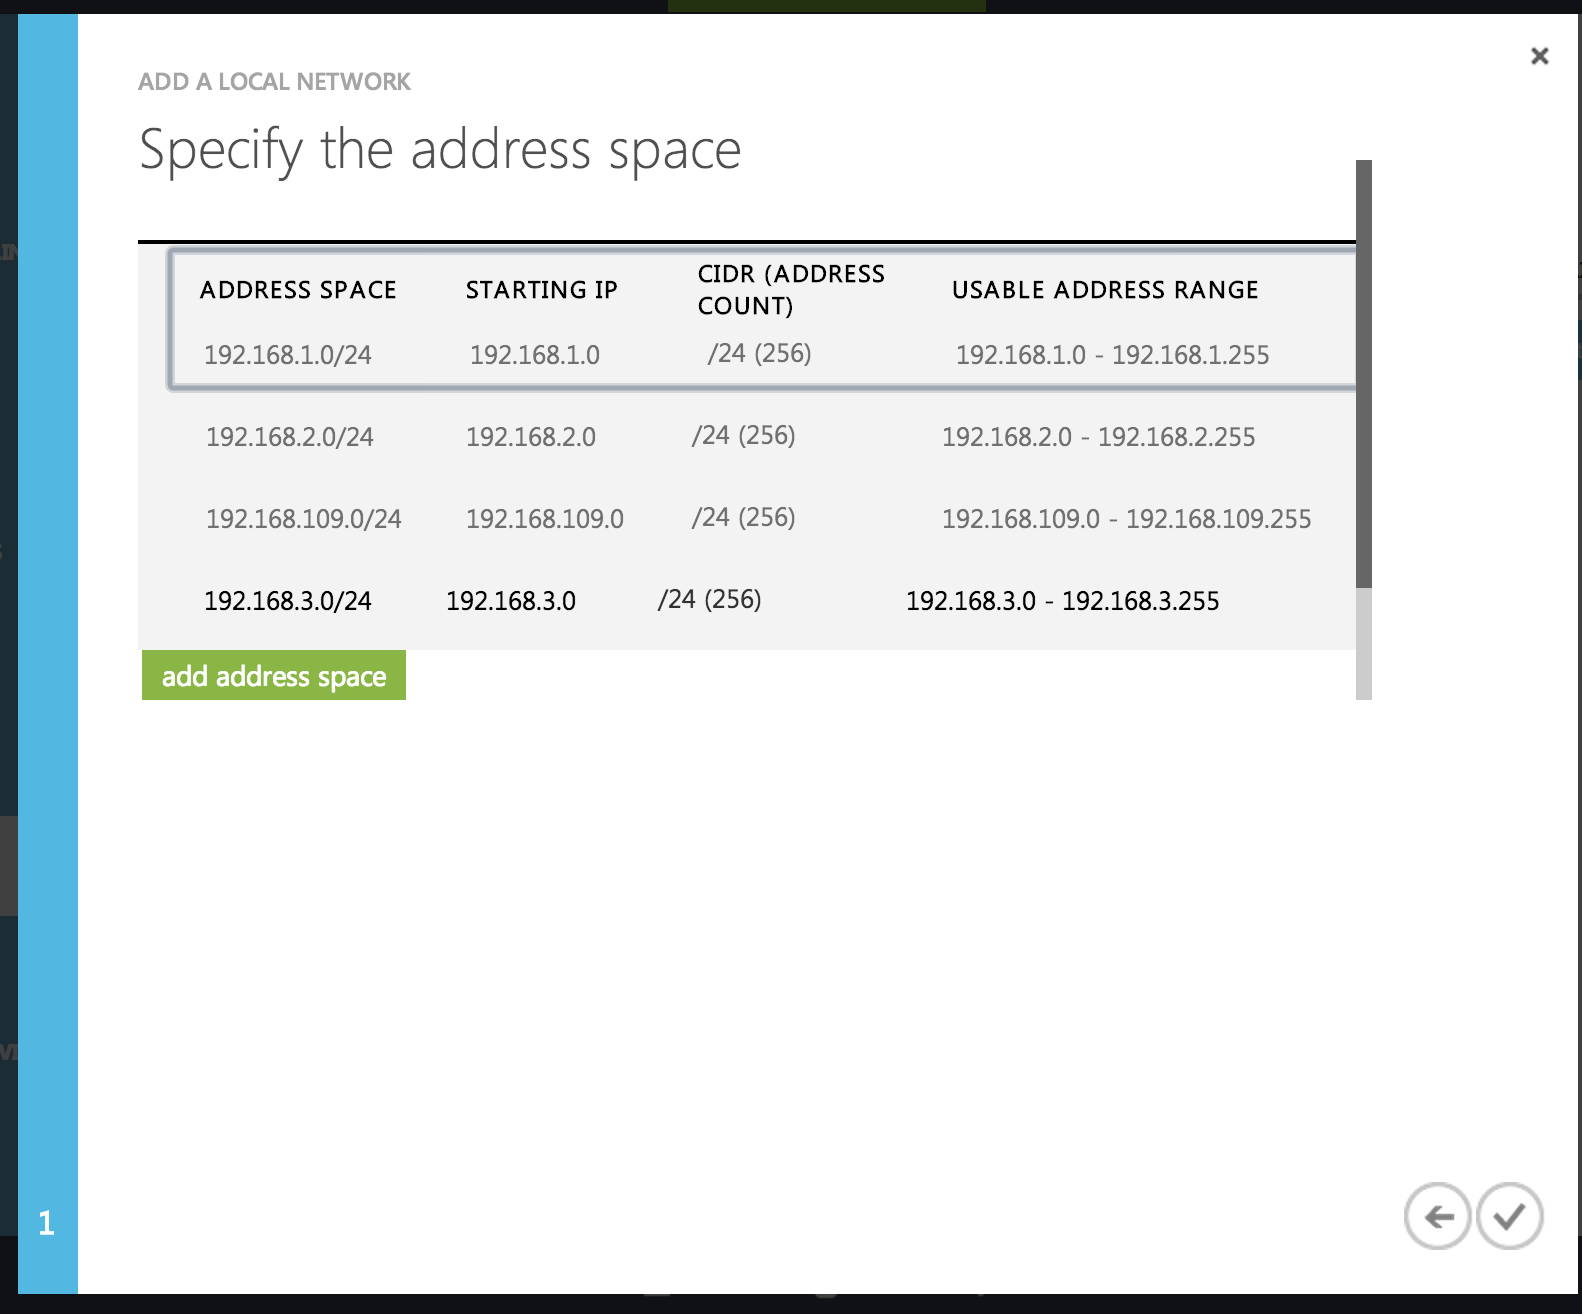
With our Local Network base configuration defined, the next step is to add our IP ranges. Again, a very easy task of specifying IP subnets and subnet masks for all of the networks that we expect to traverse the IPSEC tunnel:
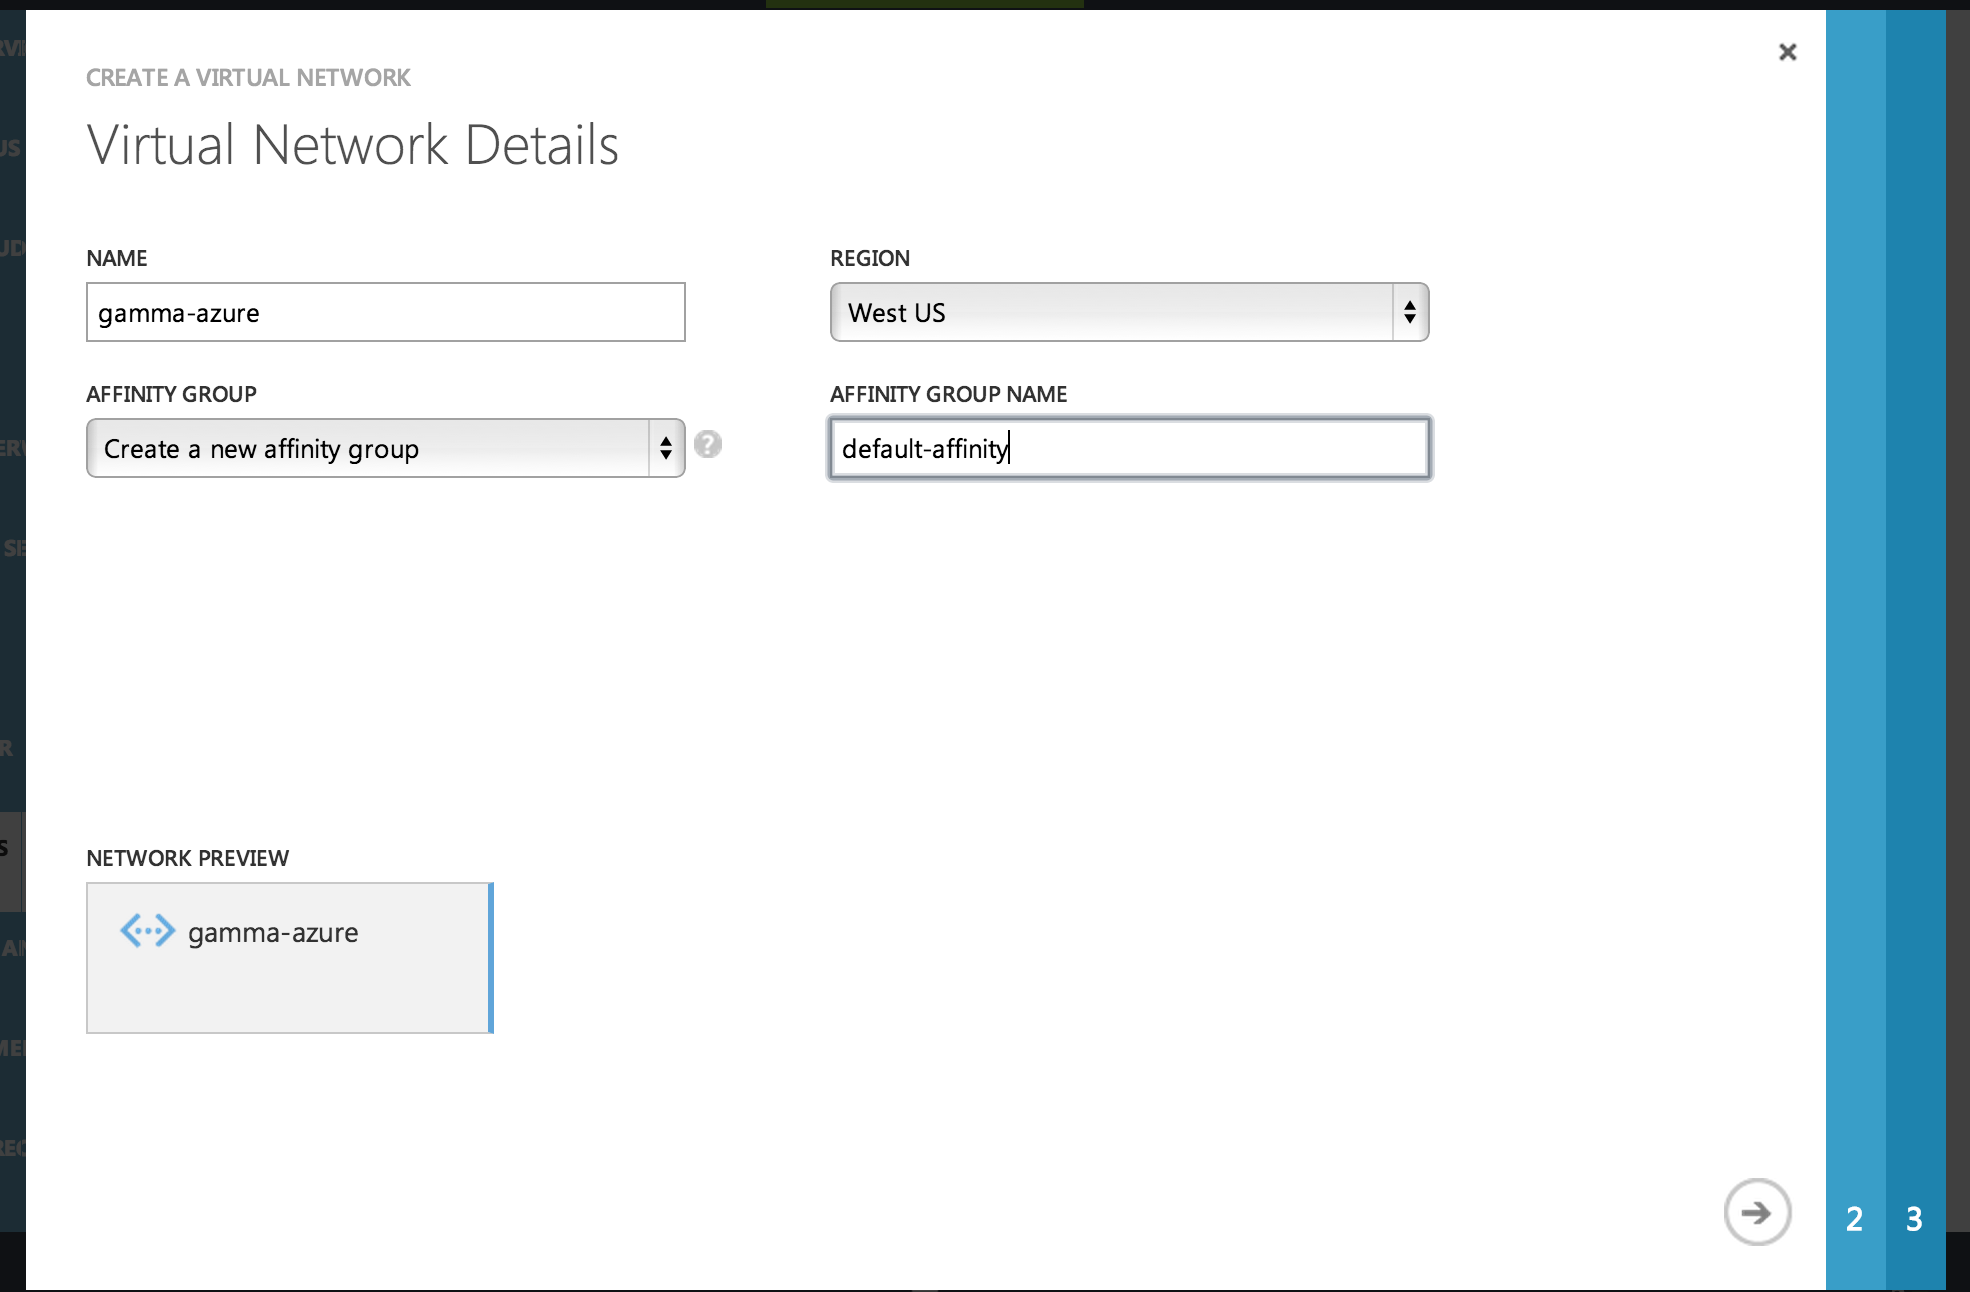
With those two steps complete, our on-prem environment is essentially configured from the Azure point of view. Next up is to configure the Azure side of the equation. First we define the Virtual Network space. Once again we give it a name, but this time we are also specifying a region (this is critical as it will determine where our tunnel lands geographically from an Azure point of presence perspective. We also assign an affinity group, or create a new one:
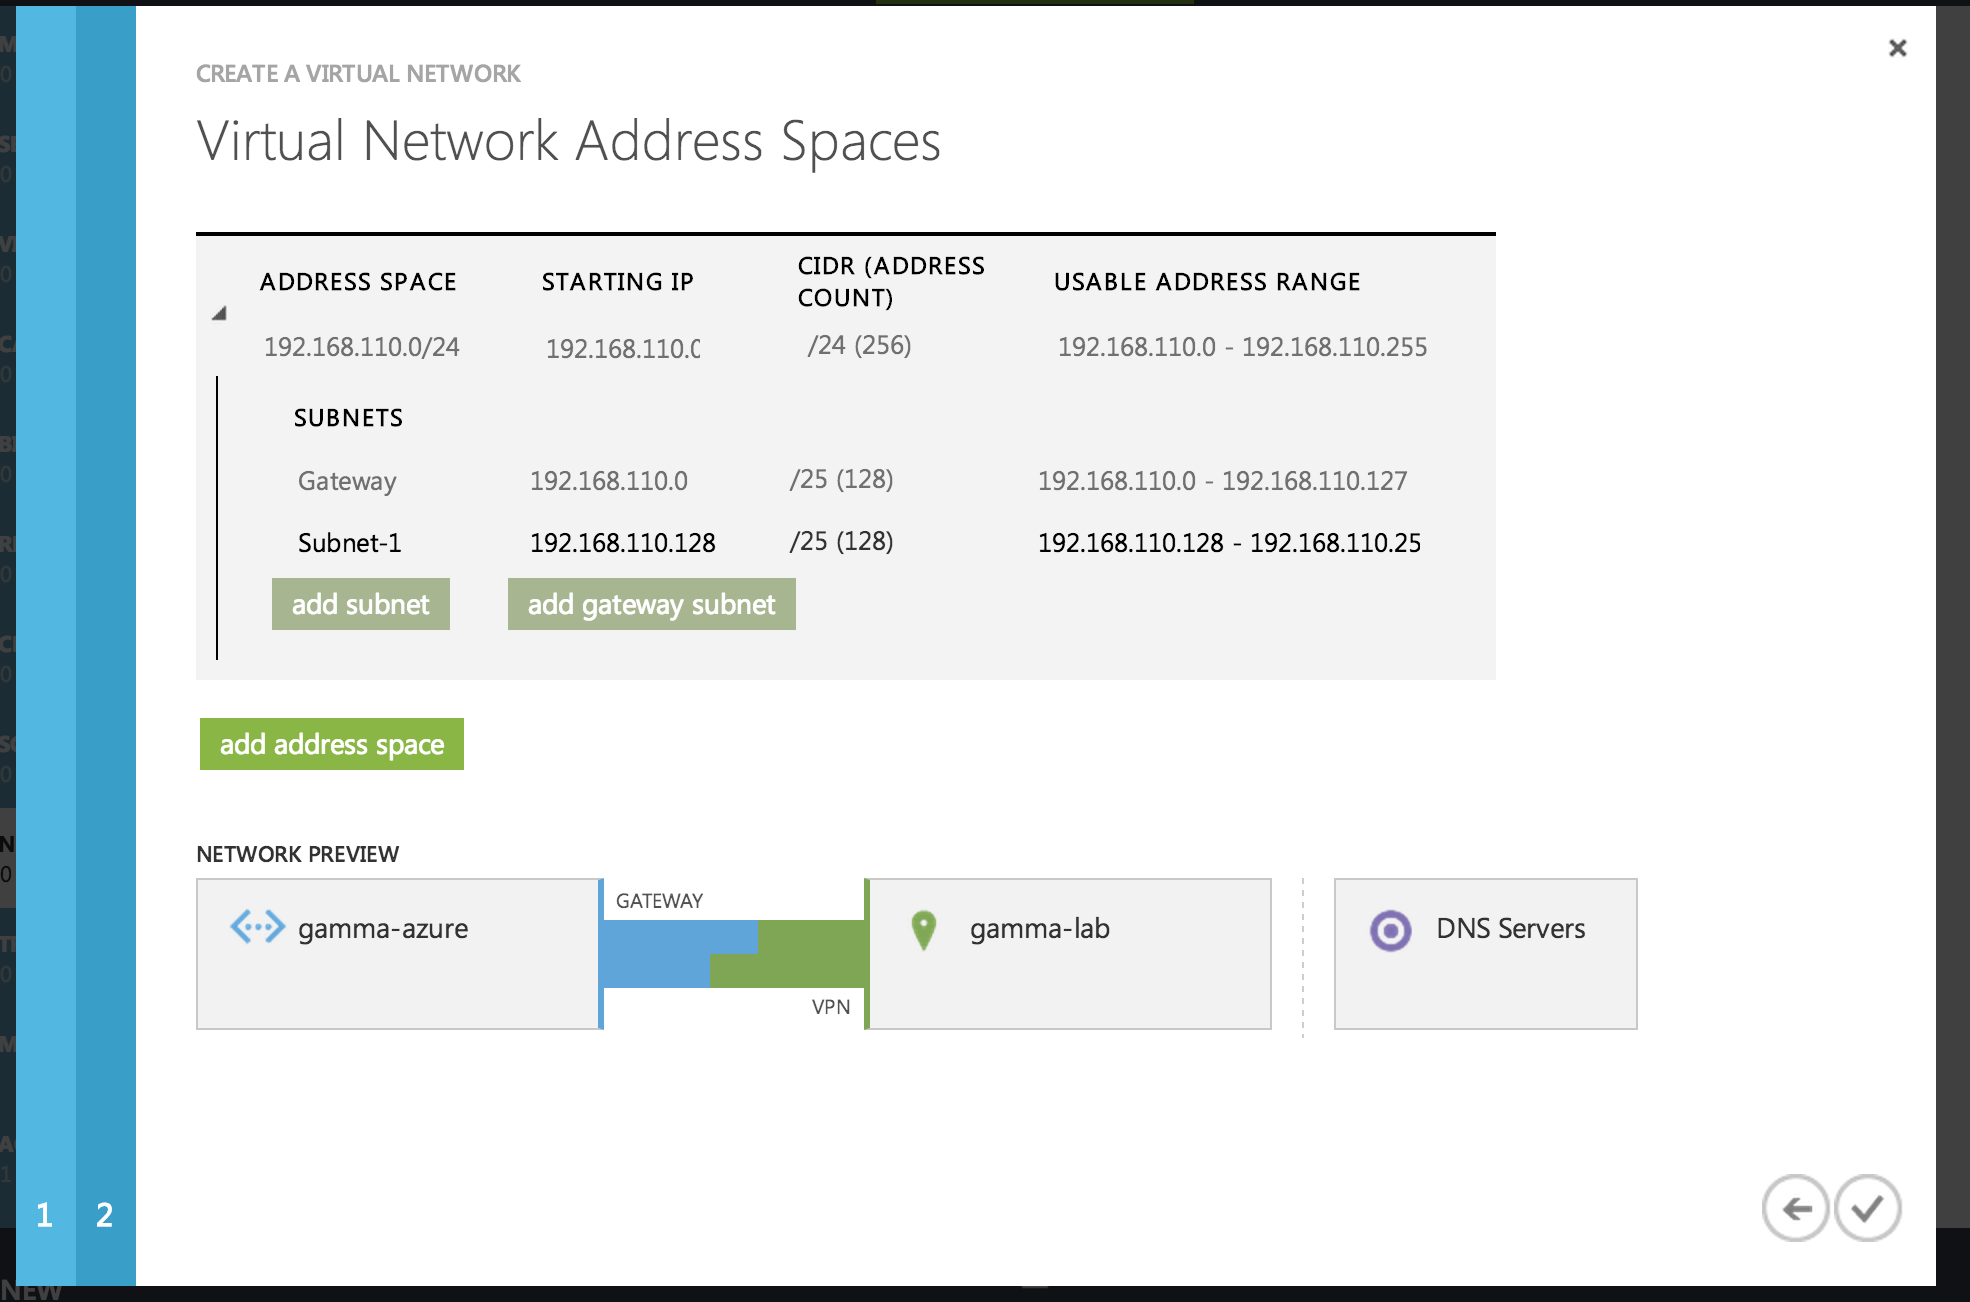
With the Virtual Network base configuration defined, we now add some address space. The workflow is very similar to the Local Network definition. First we set a top level CIDR block (IP subnet address and mask) and then from the CIDR we deploy one or more subnets. We need at least one subnet as at least one must be defined as the “Gateway Subnet” as we discussed above. So for example, if we wanted a single class C to be the sum total private IP space we have available in this Azure definition, we would set a class C CIDR block, and then allocate the entire CIDR block to a single subnet (/24) and add it as a “Gateway Subnet”. This would give us 252 addresses to use that have a path out through the tunnel:

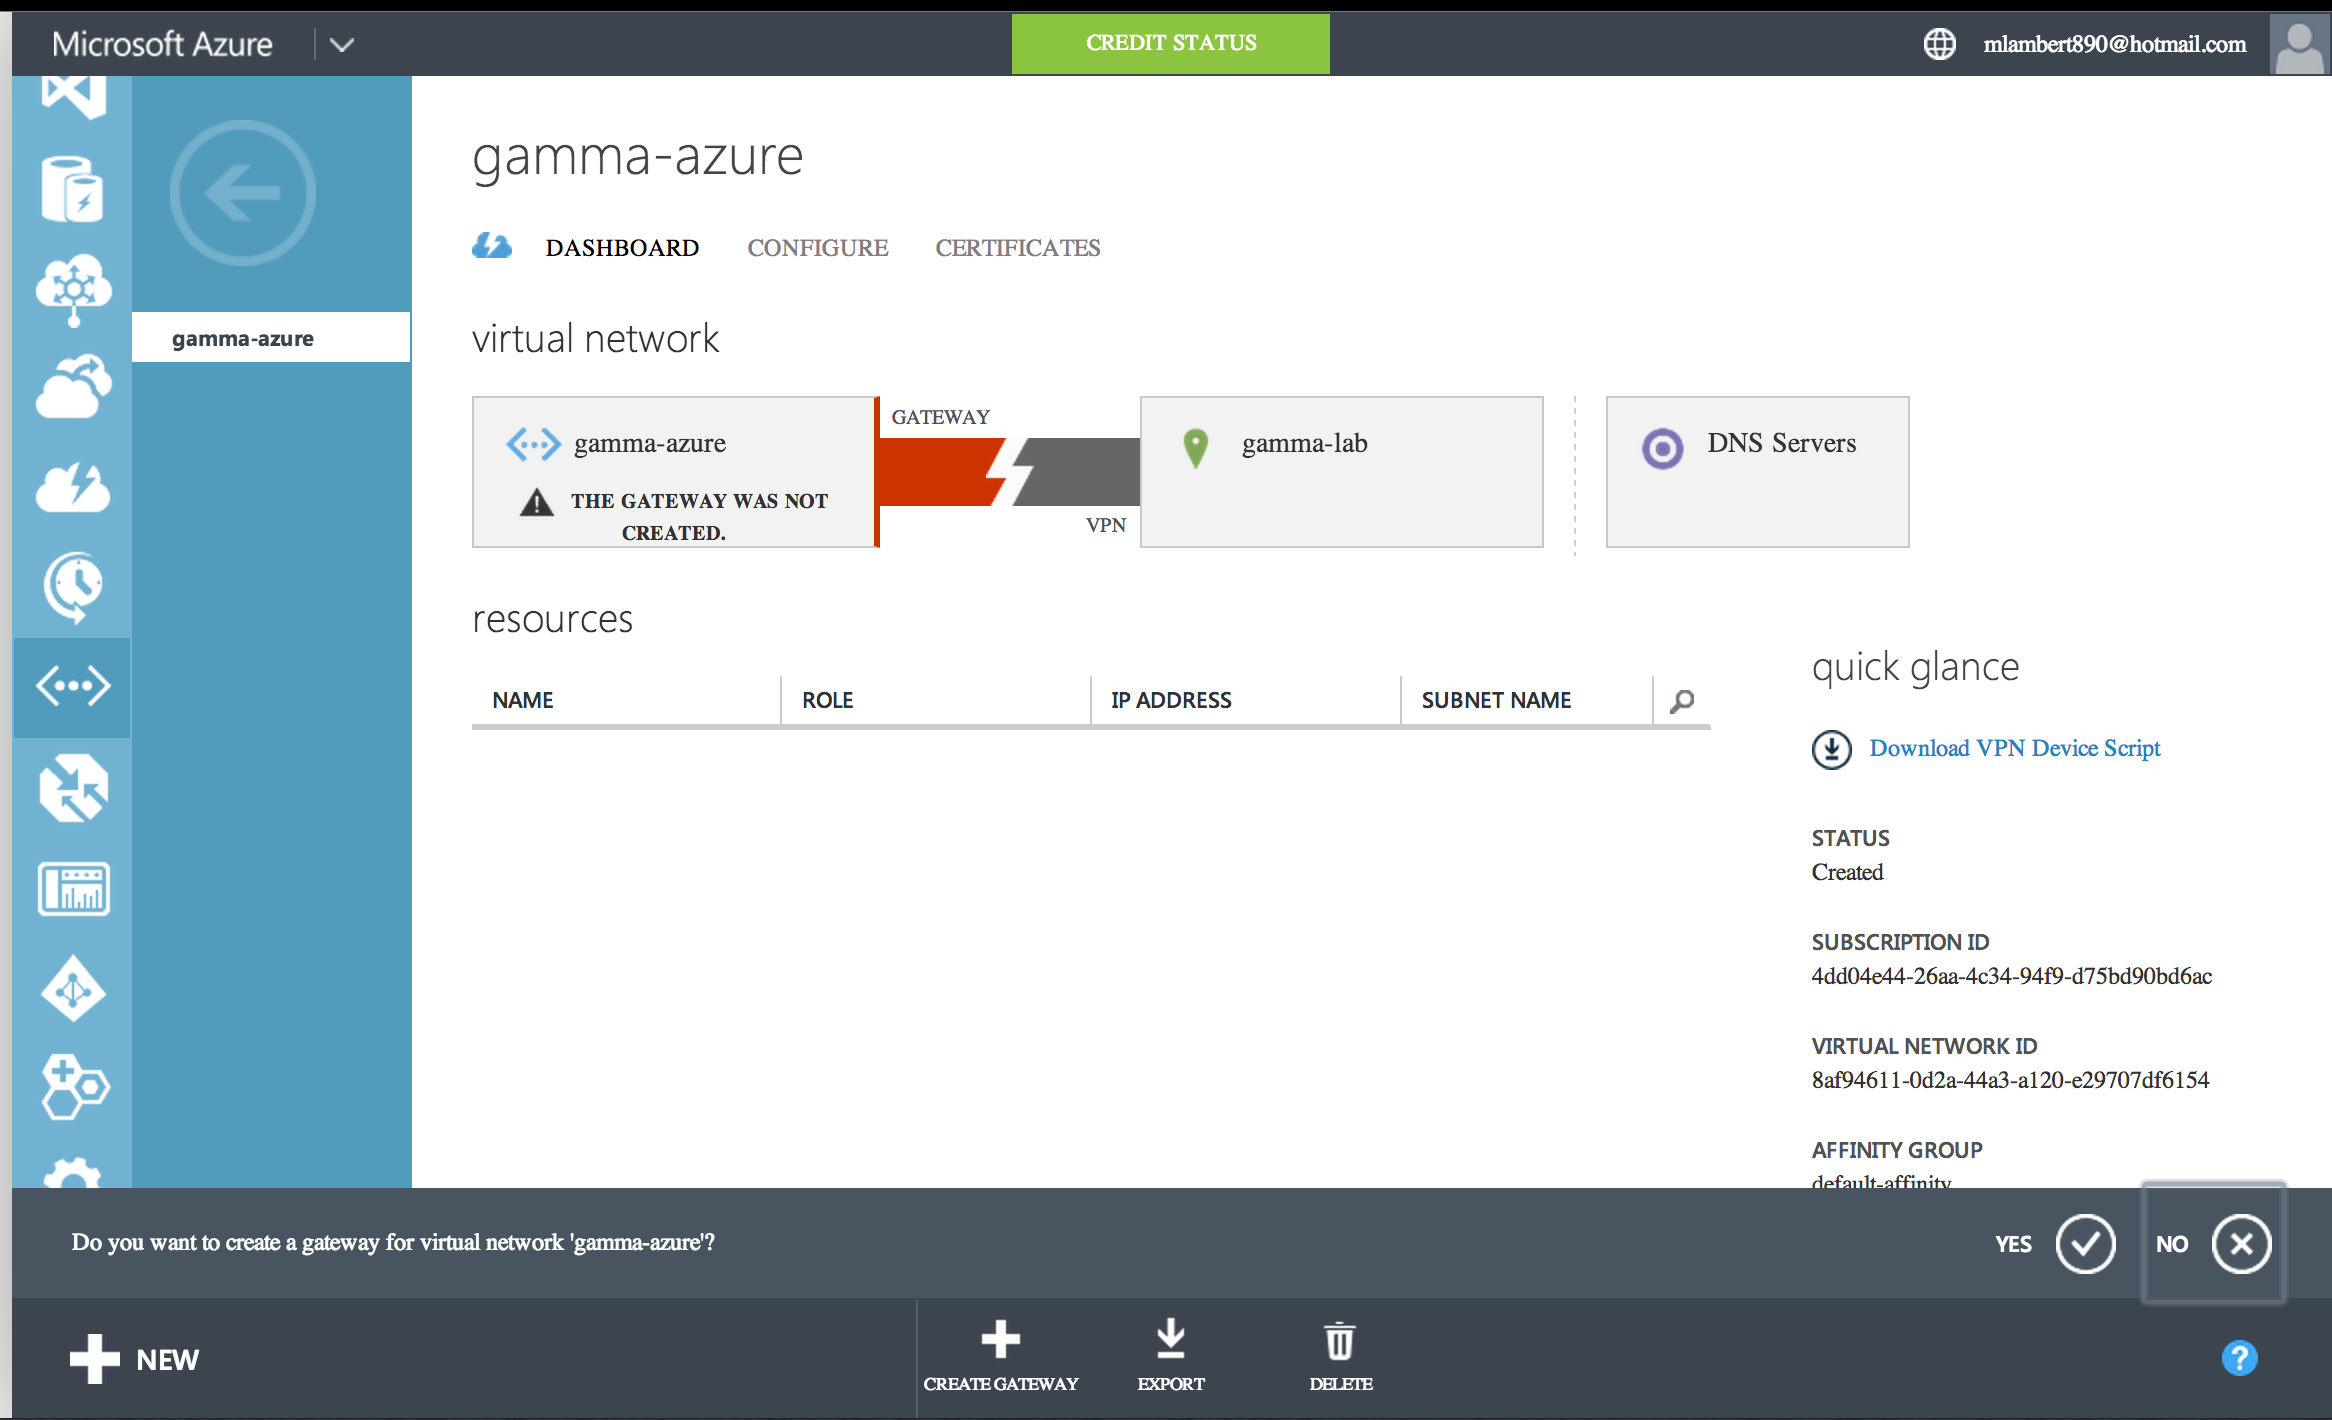
At this point, all of the pre-requisites are done and we are ready to configure a Gateway and establish the VPN. From the Network Services dashboard, we can now click “Create Gateway” from the action bar:
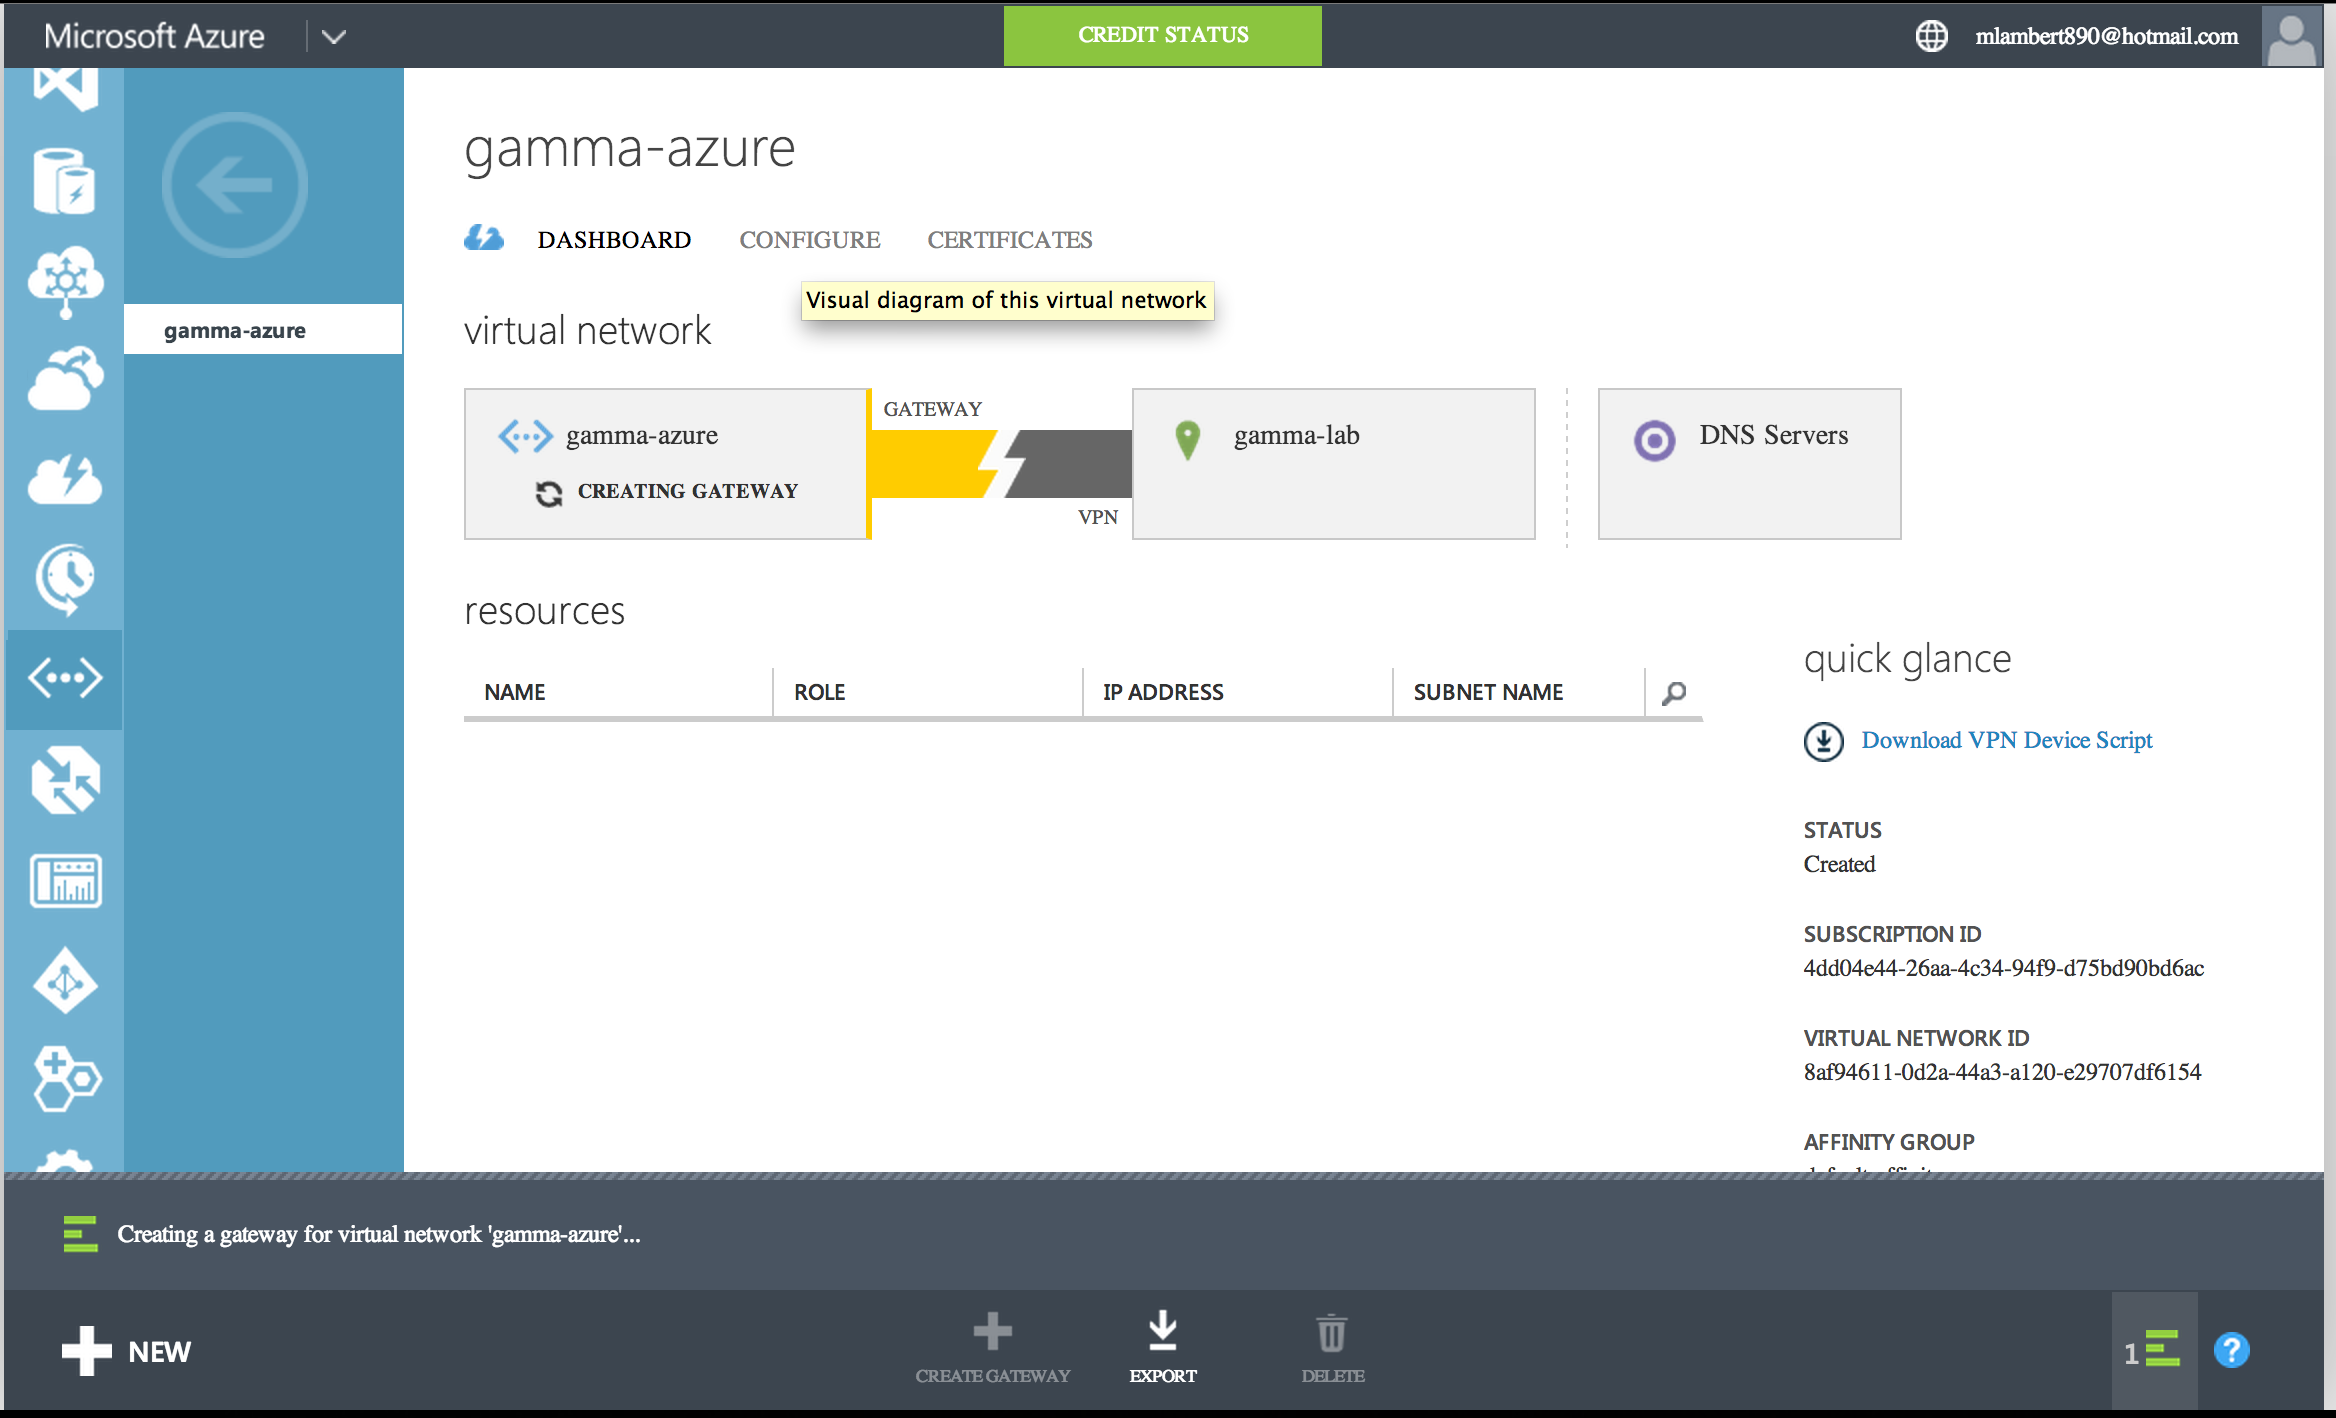
As with all Azure operations, there are verbose status updates and a nice visual representation. Note the gateway side of the pipe is yellow:
The process of creating a gateway took about 4 minutes or so and when completed the gateway visual flipped to blue:
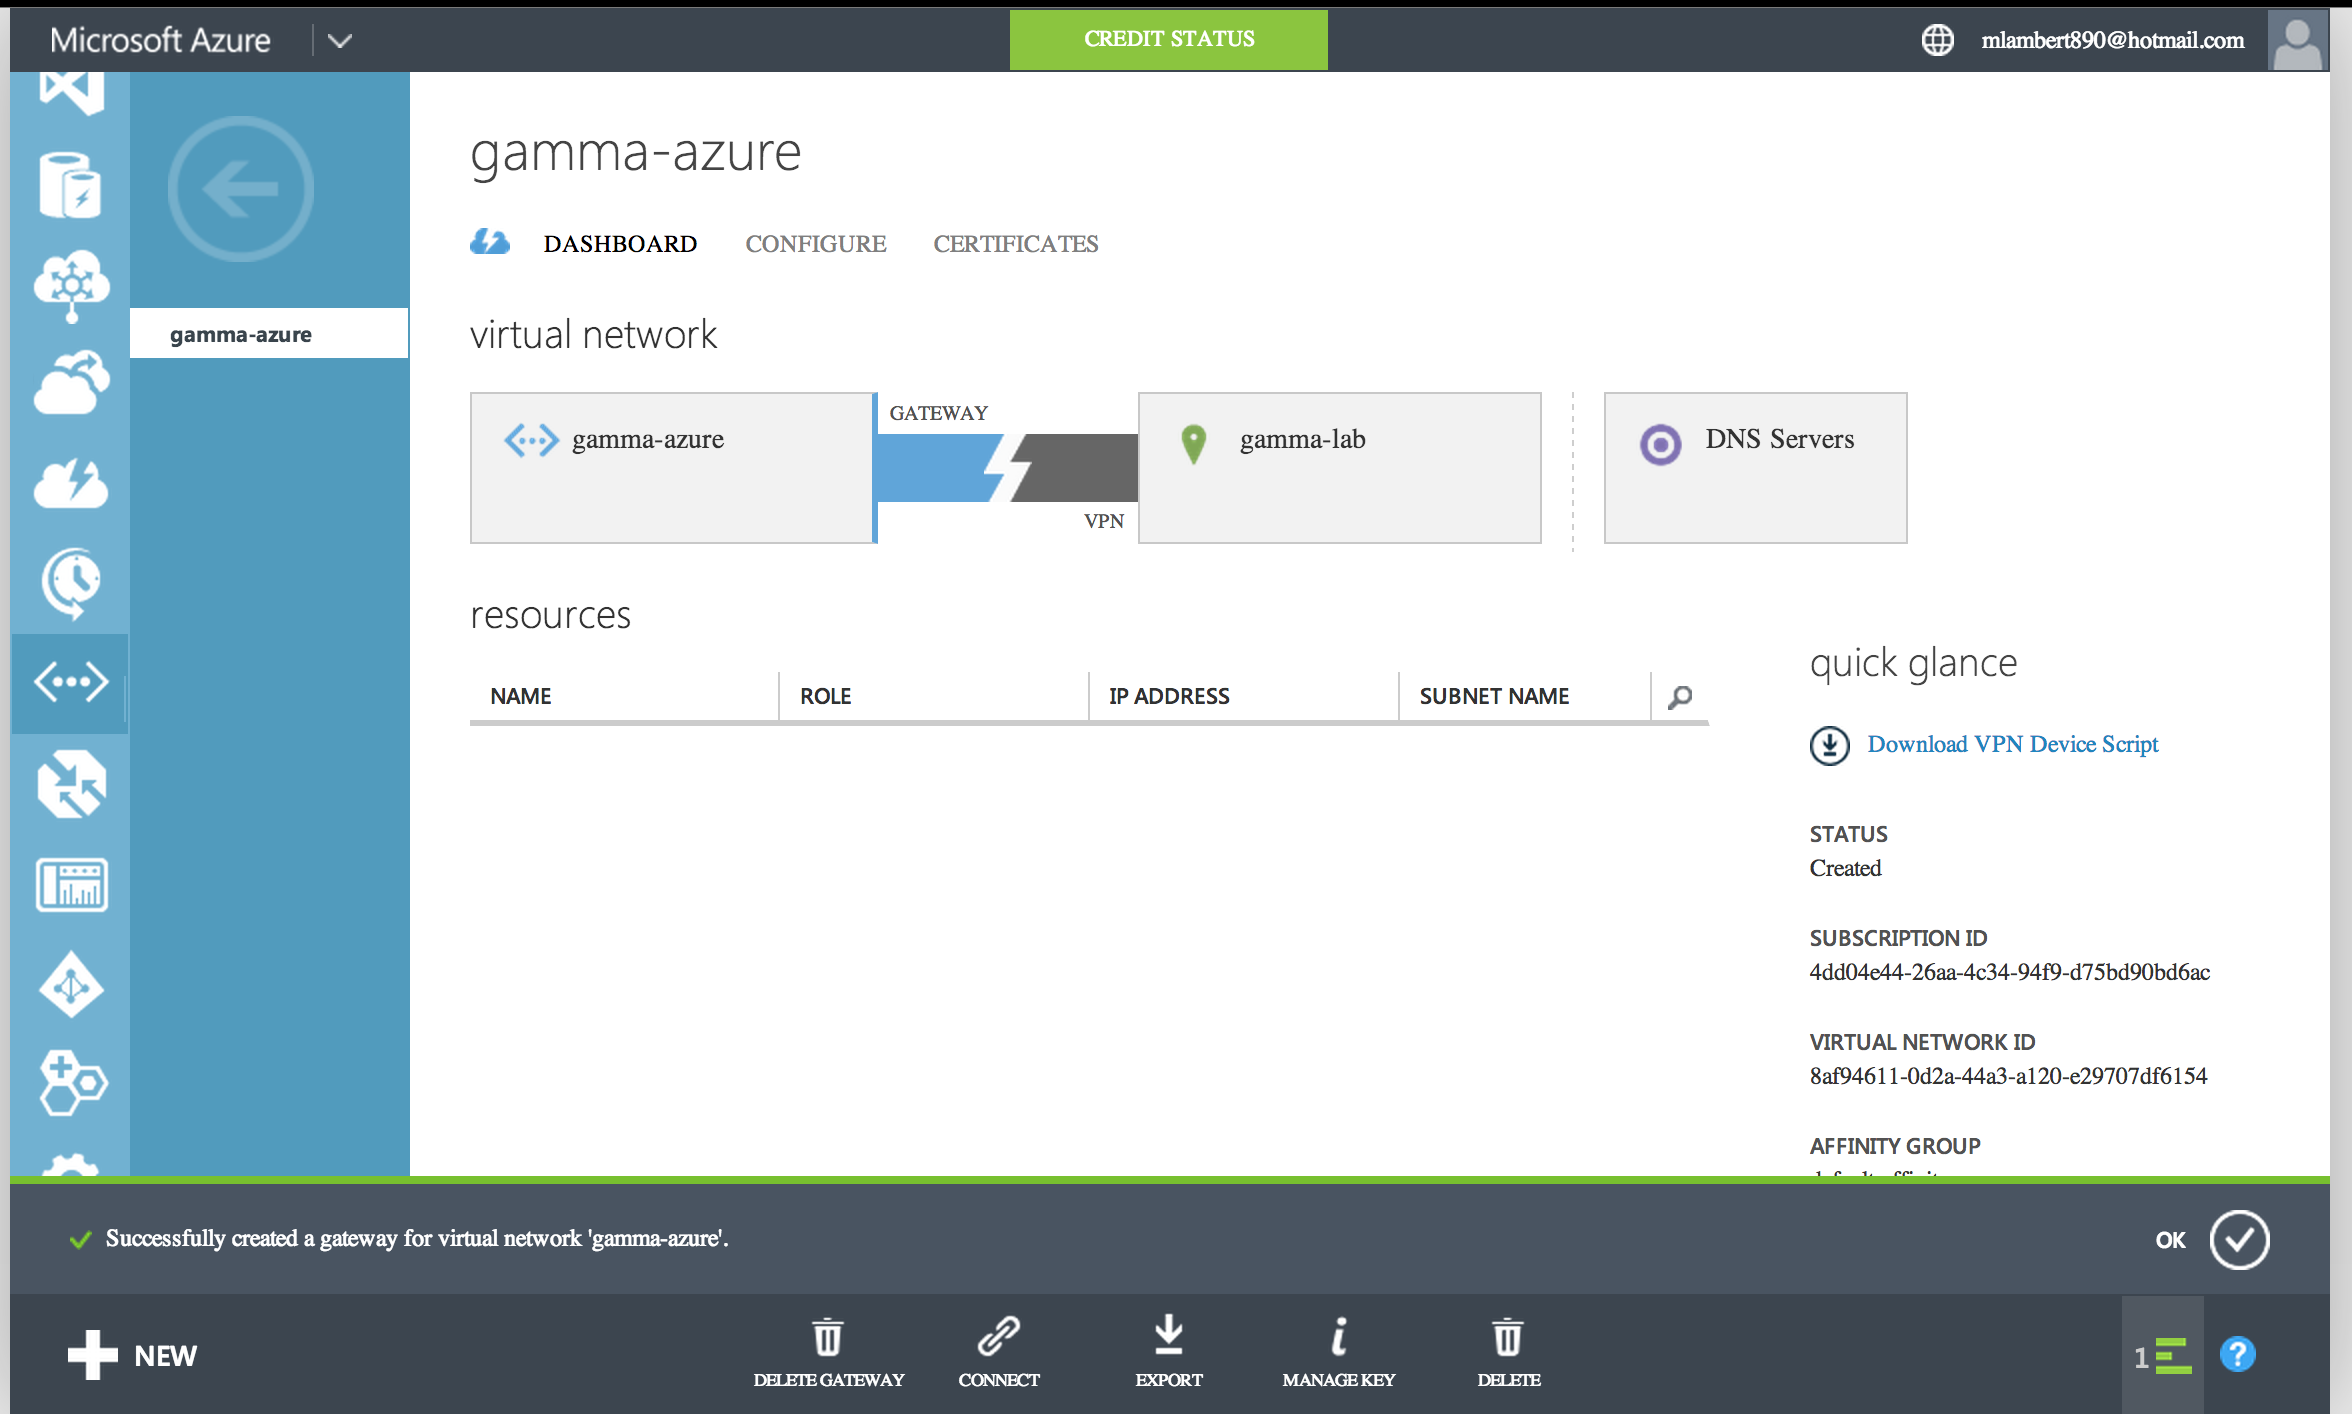
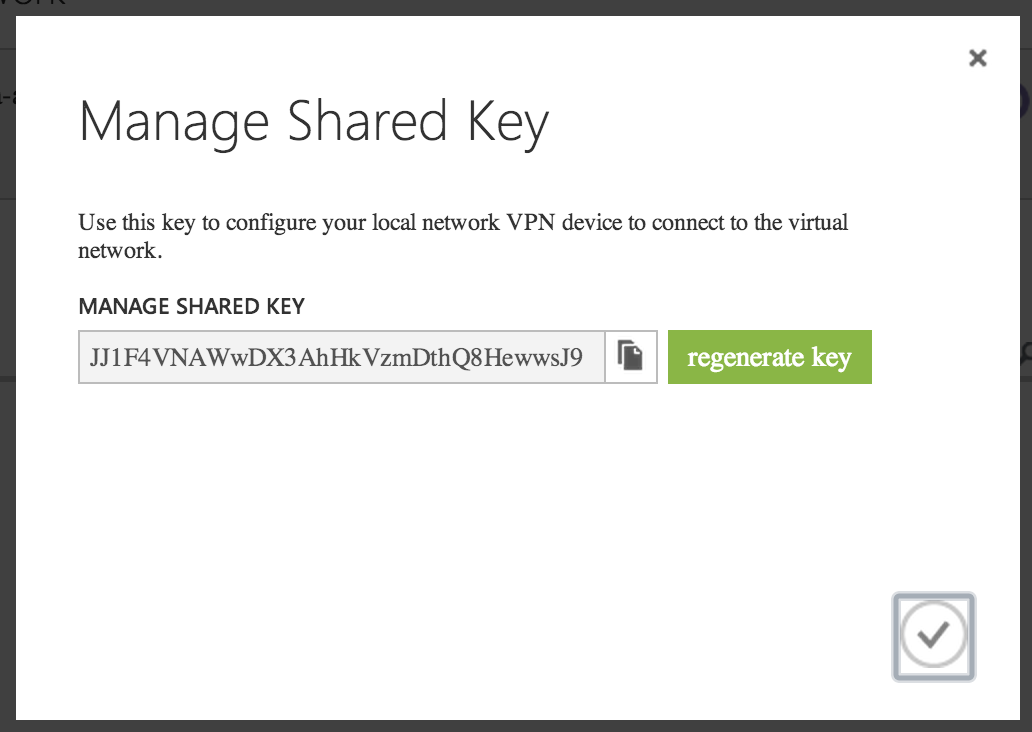
The gateway creation is pretty silent, but some interesting new options appear on the action bar once it is finished. Most notably “Manage Key” and “Download Configuration”. Manage Key allows us to view our IPSEC PSK and copy it to the clipboard as well as generate a new one (which I did immediately after taking this screen cap!):
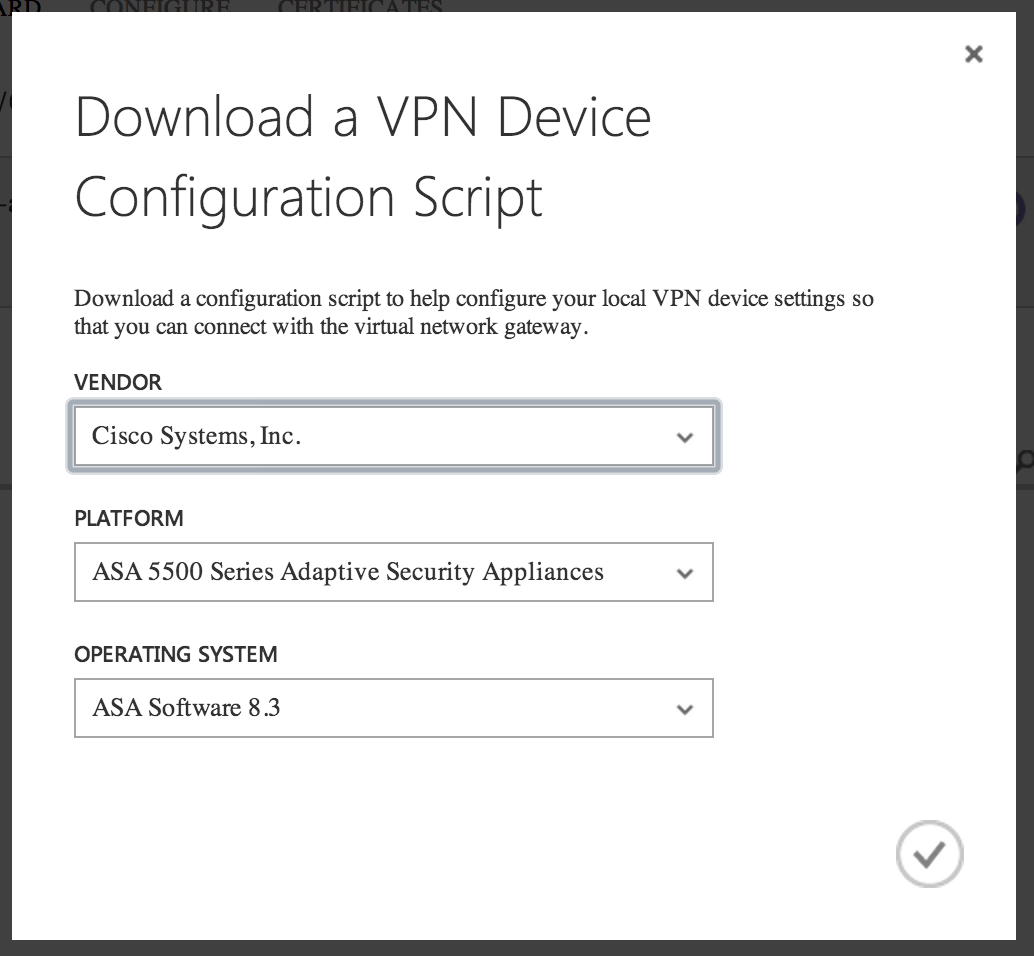
As with the AWS Customer Gateway Creation process, we are able to download a script in order to configure our on-premise equipment. Multiple families of devices from Cisco and Juniper are supported as is Microsoft RRAS. Unlike with AWS, there is no “generic configuration” option, but honestly any of these scripts is just structured text and human readable. If you are configuring a pfSense, Microtik, Astaro or other open source router, any of these scripts will provide the required info. Of course it would be nice to pull that info directly from the GUI or have the GUI offer a quick tutorial. Microsoft has this approach down pretty solidly in some of the less complex tasks, so it would be nice to see it here where it is more needed:
As an example, here are the contents of the Cisco ASR1000 configuration script:
! Microsoft Corporation
! Windows Azure Virtual Network
! This configuration template applies to Cisco ASR 1000 Series Aggregation Services Routers running IOS XE 15.1.
! It configures an IPSec VPN tunnel connecting your on-premise VPN device with the Azure gateway.
! ---------------------------------------------------------------------------------------------------------------------
! ACL rules
!
! Proper ACL rules are needed for permitting cross-premise network traffic.
! You should also allow inbound UDP/ESP traffic for the interface which will be used for the IPSec tunnel.
access-list 101 permit ip 192.168.1.0 0.0.0.255 192.168.110.0 0.0.0.255
access-list 101 permit ip 192.168.2.0 0.0.0.255 192.168.110.0 0.0.0.255
access-list 101 permit ip 192.168.109.0 0.0.0.255 192.168.110.0 0.0.0.255
access-list 101 permit ip 192.168.3.0 0.0.0.255 192.168.110.0 0.0.0.255
! ---------------------------------------------------------------------------------------------------------------------
! Internet Key Exchange (IKE) configuration
!
! This section specifies the authentication, encryption, hashing, Diffie-Hellman, and lifetime parameters for the Phase
! 1 negotiation and the main mode security association. We have picked an arbitrary policy # "10" as an example. If
! that happens to conflict with an existing policy, you may choose to use a different policy #.
crypto isakmp policy 10
 authentication pre-share
 encryption aes 256
 hash sha
 group 2
 lifetime 28800
 exit
crypto isakmp key zjhzbi0ak8EBCq4xZrFHzdVhEb7Sdllh address 24.99.5.140
! ---------------------------------------------------------------------------------------------------------------------
! IPSec configuration
!
! This section specifies encryption, authentication, tunnel mode properties for the Phase 2 negotiation
crypto ipsec transform-set azure-ipsec-proposal-set esp-aes 256 esp-sha-hmac
 mode tunnel
 exit
! ---------------------------------------------------------------------------------------------------------------------
! Crypto map configuration
!
! This section defines a crypto map that binds the cross-premise network traffic to the
! IPSec transform set and remote peer. We have picked an arbitrary ID # "10" as an example. If
! that happens to conflict with an existing crypto map, you may choose to use a different ID #.
crypto map azure-crypto-map 10 ipsec-isakmp
 set peer 24.99.5.140
 set security-association lifetime seconds 3600
 set security-association lifetime kilobytes 102400000
 set transform-set azure-ipsec-proposal-set
 match address 101
 exit
! ---------------------------------------------------------------------------------------------------------------------
! External interface configuration
!
! This section binds to the external interface of the router so that the cross-premise network traffic matching the
! traffic selector defined in the crypto map will be properly encrypted and transmitted via the IPSec VPN tunnel. It
! also adjusts the TCPMSS value properly to avoid fragmentation
interface <NameOfYourOutsideInterface>
 no crypto map
 crypto map azure-crypto-map
 ip tcp adjust-mss 1350
 exit
