
The IPSEC highway into Complaints HQ keeps expanding! We are now up to two lanes. With the generous MSDN Azure credit allowance, I decided it was time to keep a permanent IPSEC tunnel online. In my experience it has been a very enlightening experience, from a testing and customer advisory perspective, attempting to keep a “cloud lab” up and running 24×7 connected the way a customer would be connected.
There has been lots written on Azure IPSEC VPN and it really is straightforward, but I did run into some “gotchas” and so thought it would be useful to create a quick entry focusing on just those. First, just for review, it is worth noting that my VPN appliance is the (now defunct) MacAfee UTM SG720 (the old SnapGear line). From an IPSEC configuration perspective, pretty much any Linux based appliance falls into the “generic” category. Most IPSEC configuration “lessons learned” are broadly applicable.
When it comes to any cloud service, the primary hurdle is understanding tooling and terminology. Microsoft has done a good job on the new Azure console and it is very intuitive. The walkthroughs I found for getting started were great and most of the terminology is fairly intuitive. In a nutshell, this is the basic idea:
- Virtual Networks – these are your networks in the cloud service; the core of the “bring your own private IP space” capability that most cloud platforms provide. Azure, however, adds a specific construct that is important for the VPN configuration…
- Gateway Networks – this is a subnet carved out of the top level private IP space defined as your “virtual network” space. The purpose of this subnet is vital. This is the landing zone for the IPSEC tunnel. In very simply terms: this is the subnet that Phase 2 associations most focus on. This part is super important. When you configure the IPSEC device on your side, the peer network must match the Gateway Network definition. Take a look at my situation below:
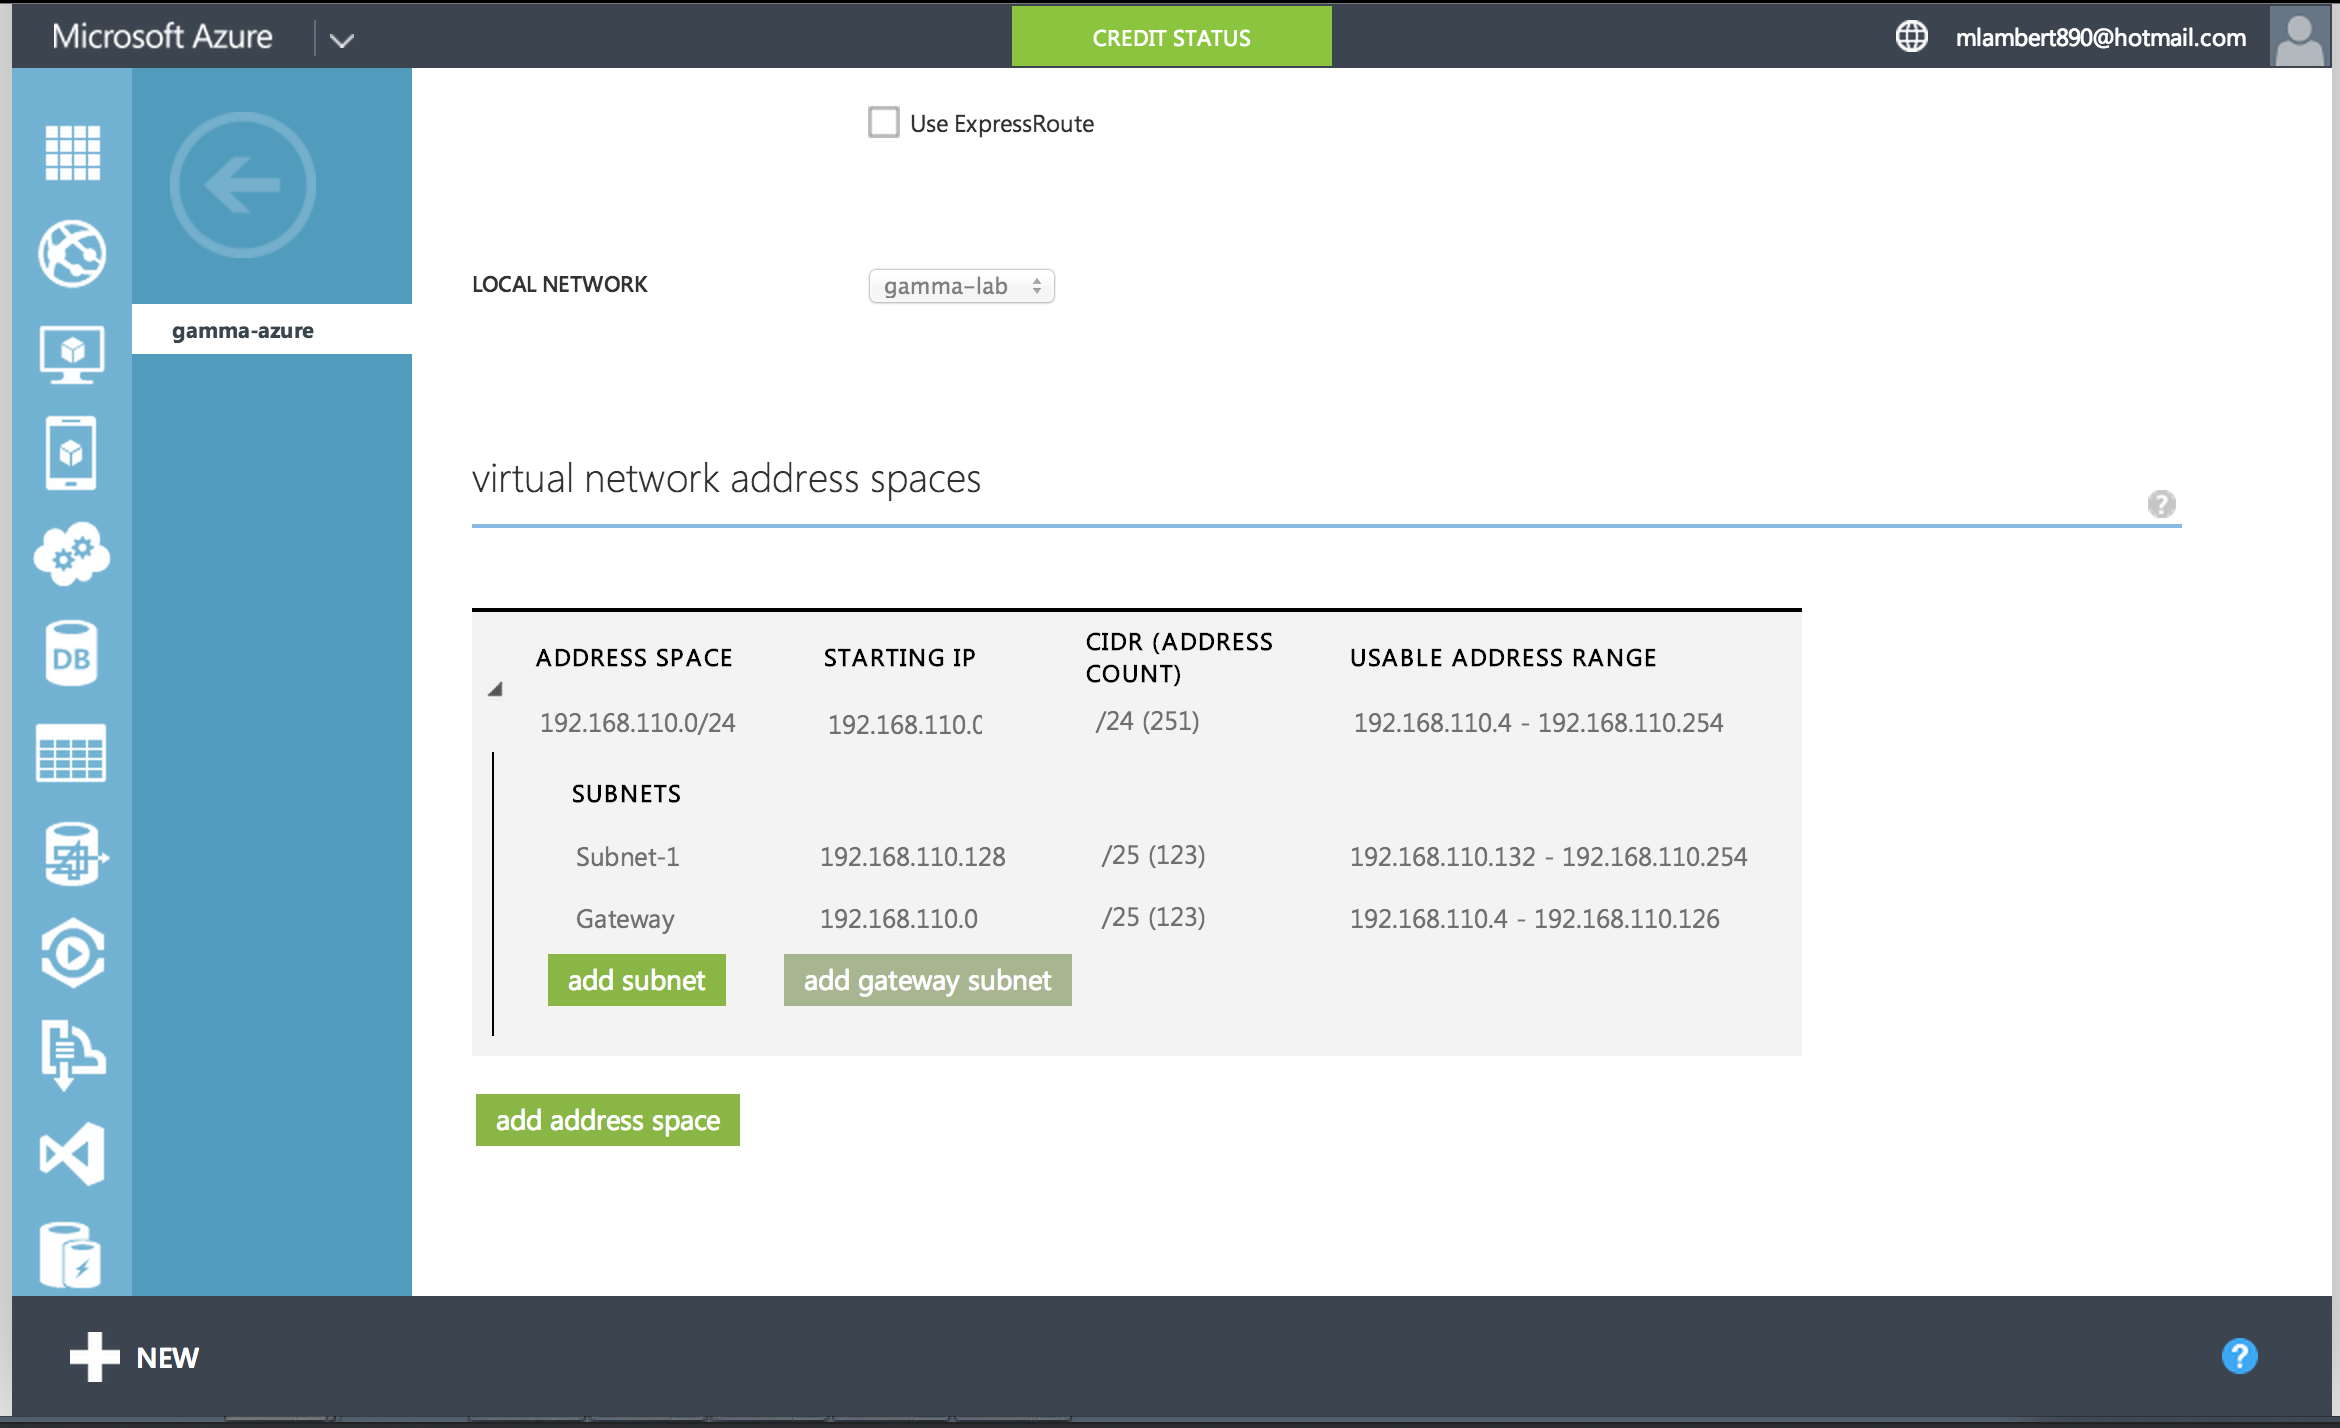
In the example above, the Phase 2 association should be configured with 192.168.110.0/25 as the remote peer.
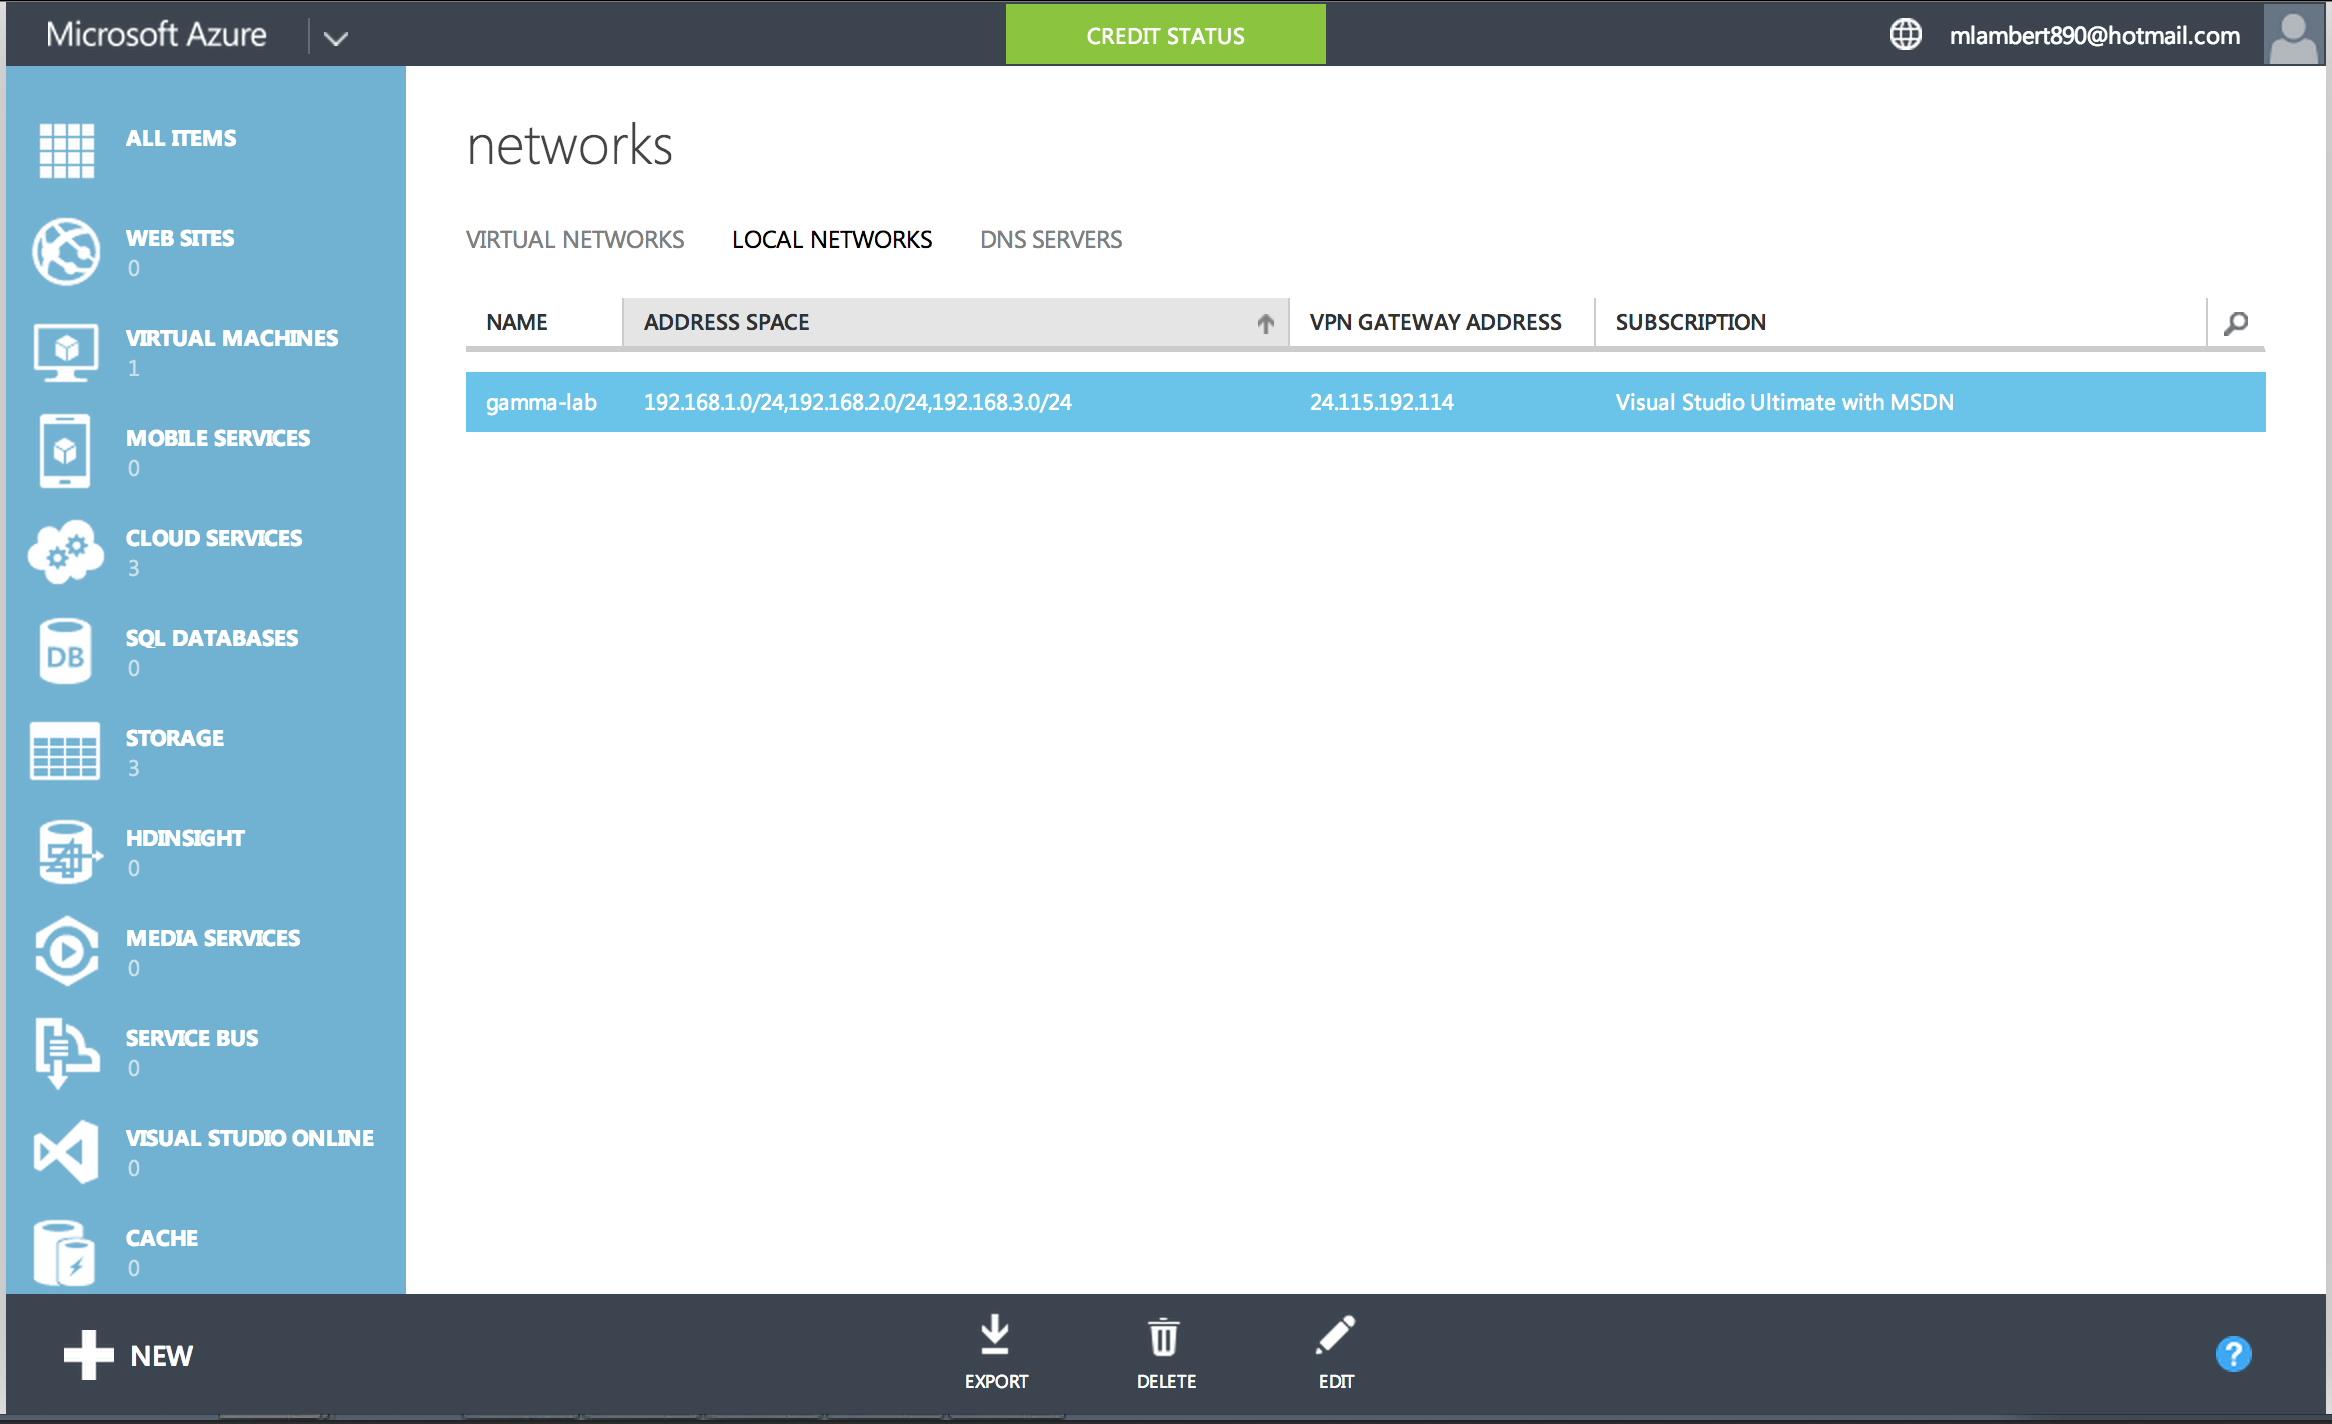
- Local Networks – these are the on-premise networks that will be exposed to the Azure side of the IPSEC tunnel through Phase 2 peering. As always with IPSEC, both sides must match. As you can see in my example, I am peering multiple /24 subnets on prem to a single /25 subnet in Azure:
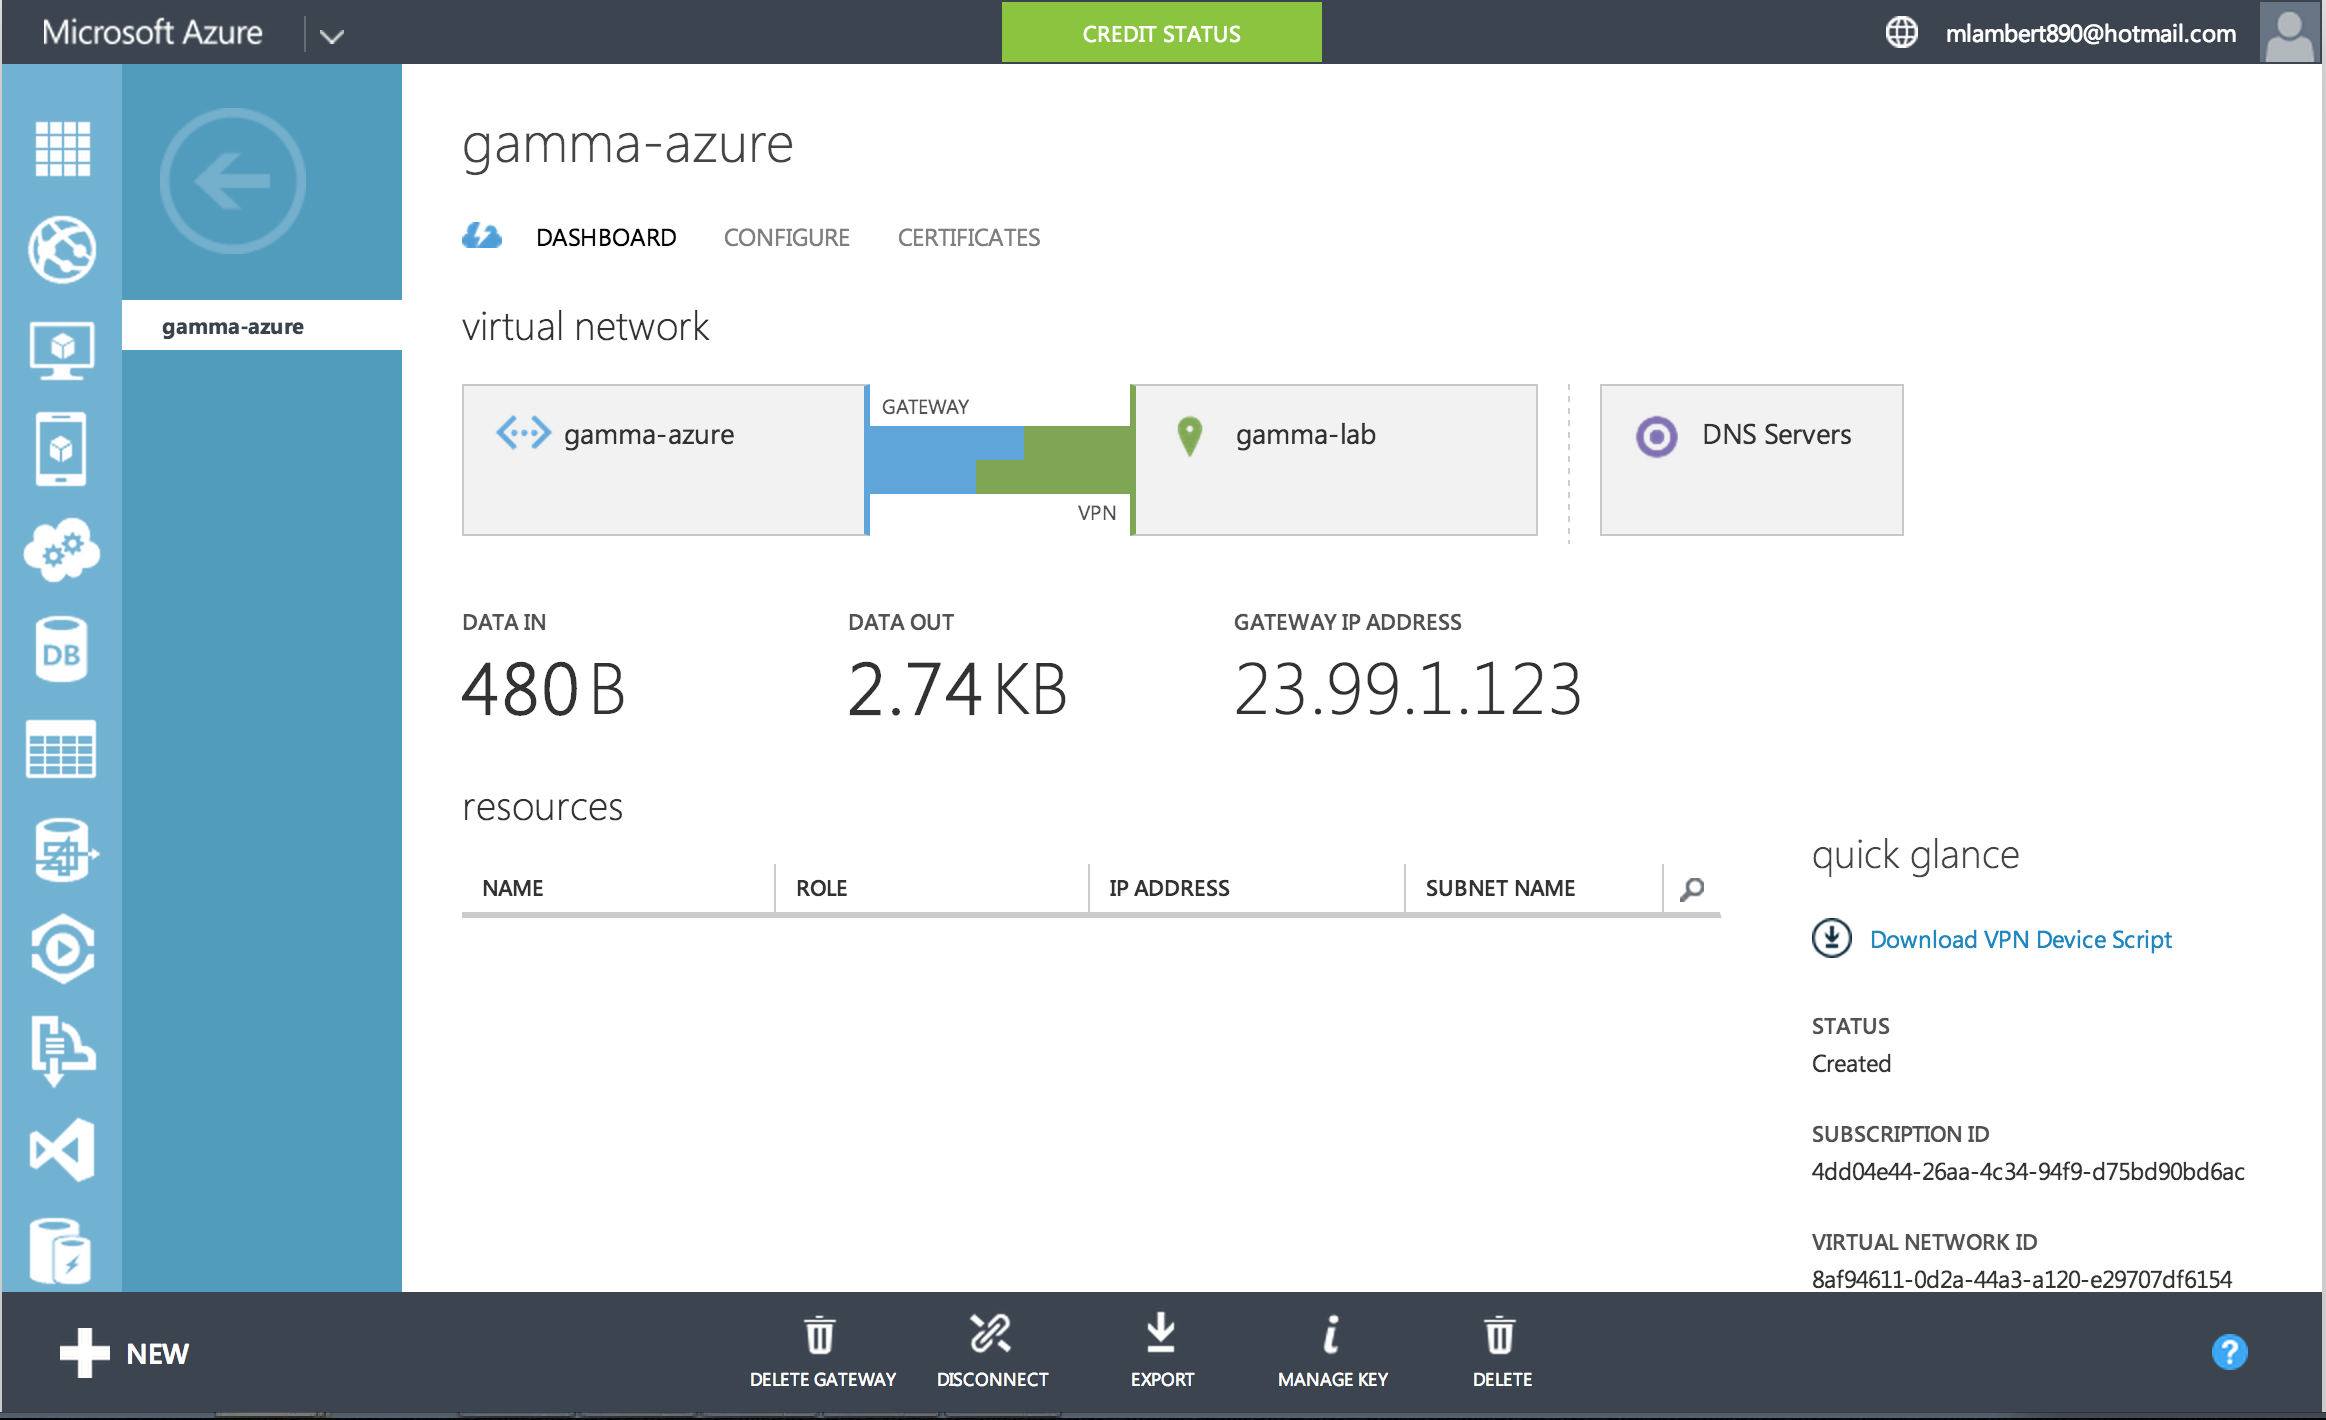
The last bit of advice I have is important. Turn off Perfect Forward Secrecy (PFS). The way PFS works, if it is disabled on your VPN appliance, and the remote side requests it, it will enable it. If it is enabled on your side, and the remote side does not support it, the Phase 2 agreement will fail. Azure does not use PFS, so it should be disabled. If all goes well, this is what success looks like:
Happy tunneling!
